Posts Tagged ‘Transform a T-shirt’

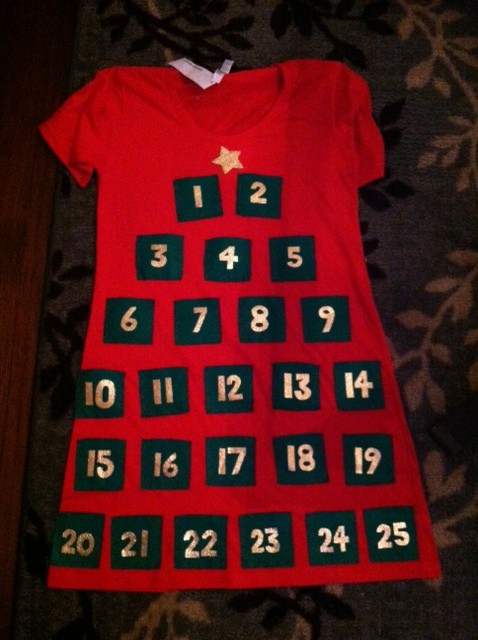
How To: Advent Calendar T-shirt!

This project comes courtesy of my very talented and party-hopping younger sister, Ariana, who attended a very special holiday gathering this month in the Bay Area at which attendees don’t just wow with sparkly seasonal cocktail dresses — they costume it up. And not just sexy Santas and holiday carolers, but as, say, a dreidel, Nutcracker ballerinas, or the entire cast of Charlie Brown’s Christmas!

The event is called the Elf Party. It was originally started as a party among friends and has since grown into a huge fundraiser for children in need — not to mention a very popular event. Tickets sold out in just 30 minutes this year!

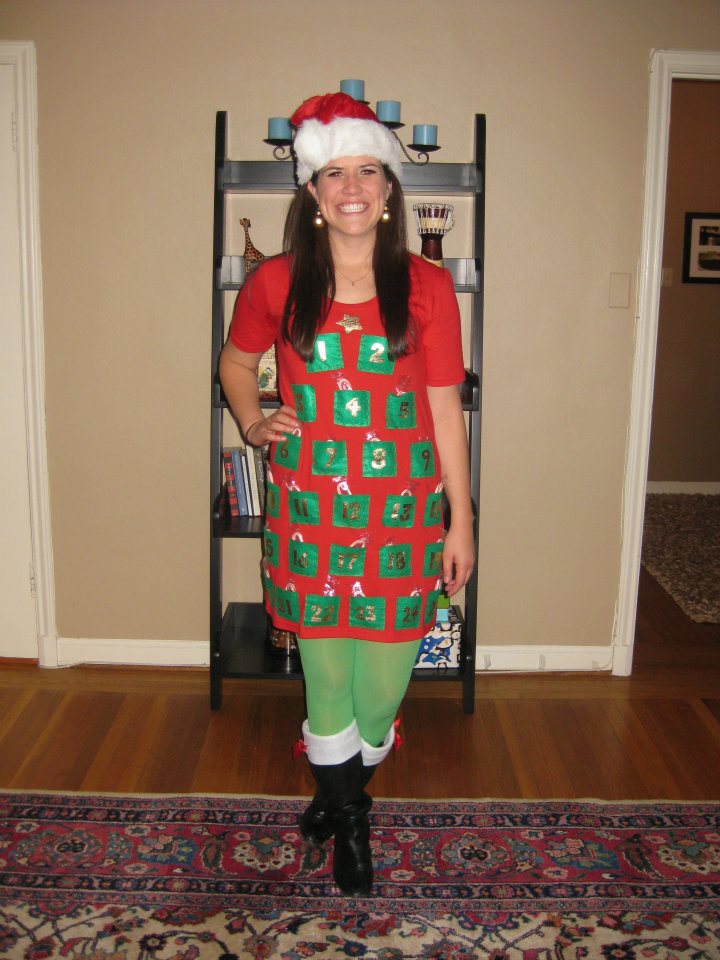
Needless to say, Ariana needed to dress to impress, and when we were having a crafty consult, I suggested that she be an advent calendar–a wearable variation on the “Final Countdown” pocketed calendar (project #35) from Generation T: Beyond Fashion — complete with pockets full of treats! And so she set to work…

Materials:

-Plain tunic dress or long T-shirt (in red or green for Christmas or blue or white for Hanukkah; sample is from American Apparel)
-2 to 3 sheets of craft felt (in red or dark green for Christmas or blue or white for Hanukkah)
-Fabric scissors
-Pen
Tulip Fashion Glitter Shimmer Transfer Sheets
-All-purpose scissors
-Pressing cloth
-Iron
-Straight pins
-Treats (individually wrapped mini candy canes and other hard candies work well–depending on how long you’ll be wearing the outfit, keep in mind that body heat can melt Hanukkah gelt or other chocolates!)

Make it:

1. Measure and cut about twenty-five 3″ by 3″ squares of felt (depending on the number of pockets you’d like).

2. Trace or draw the numbers 1 through 24 (or 25), on the glitter transfer sheets. Note: Trace numbers 1 through 12 for the twelve days of Christmas, or 1 through 8 for the eight nights of Hanukkah, and so on. (Optional: If you’re going Christmas-themed, trace and cut a star to place at the top of the arrangement.)

3. Cut out the numbers and/or shapes.

4. Following the instructions on the packaging, peel the clear layer off the top of the glitter numbers and arrange them glitter side up on each felt square. Then press the numbers on the squares with a pressing cloth and a warm iron.
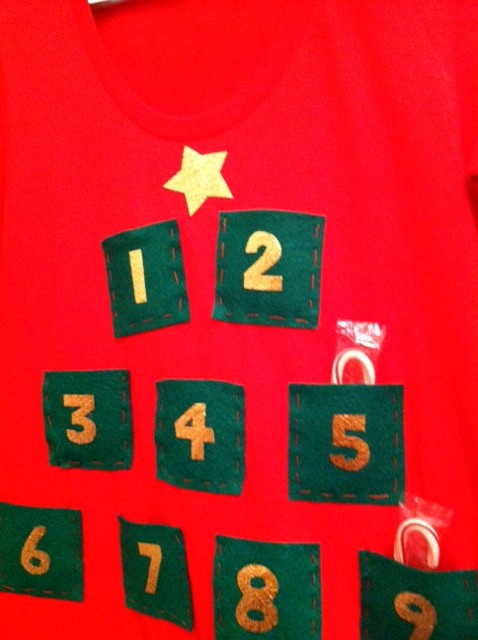
5. Lay the tunic flat and arrange and pin the squares onto the front. Thread the needle with contrasting or matching thread and use a running stitch or backstitch to sew around the two sides and the bottom of each square to complete each pocket.

6. Remove the pins, try on the tunic, and fill up those pockets with treats!

[ 1 Comment | Posted on December 6th, 2011 ]

From Our Readers: Carol Schneider Designs!
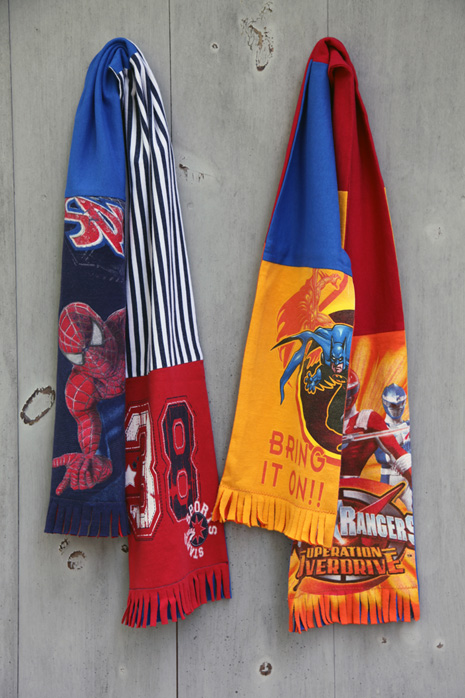
Recently, I had the opportunity to sit down with Carol Schneider, lecture series publicist by day and fashion designer by nights and weekends (y’all know how much I love a crafty superhero alter ego!). She started making scarves from vintage kimono fabrics, but eventually (as we all do, right?) found her way to discarded T-shirts. Here are some scrap-fabulous highlights from her website.

For those of you in the NYC area, I found out that Carol and some of her designer colleagues (Annie Walwyn-Jones, Teresa Montalvo, and Danielle Mailerare) are hosting an open house this Tuesday and Wednesday, December 6 and 7, 3:00 to 9:00 pm to share and sell their designs!
I got a preview of some of Carol’s more recent T-shirt scarves that will be on sale this holiday season for kids and adults, and gosh they’re pretty cute and clever. I love the New York-themed one (that Coney Island tee is a great thrifty find!) and there’s a pink one that incorporates a pocketed T-shirt into the quilted mix.

I just love all the colors she uses–isn’t it inspiring? (I’m always looking to keep the color quotient high when winter grays settle in!). If you’re feeling crafty, I encourage you to turn to project #77 “Scarf It Up” in Generation T: 108 Ways to Transform a T-shirt (page 194) to make your own scarves from your T-shirt stash. Or check out this video from the Generation T/Threadbanger archives for some more basic scarf designs.

And if you’d rather buy than DIY, support a small business and check out that open house I mentioned above (Tuesday and Wednesday, December 6 and 7, 2011, from 3:00 to 9:00 pm) at the home of Carol Schneider Designs in NYC!

27 East 22 Street, 7th floor, NYC
(between Broadway & Park)
212-505-6615


[ Comments Off on From Our Readers: Carol Schneider Designs! | Posted on December 3rd, 2011 ]

10 Quick & Easy T-shirt Halloween Costumes!

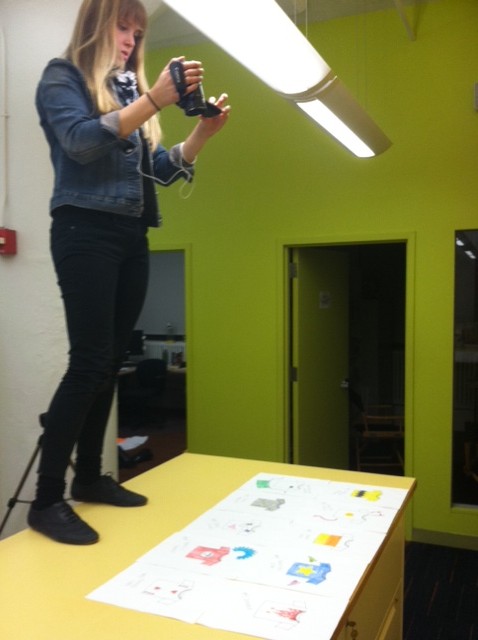
Just in time for you last-minute Halloween revelers! Make a beeline for your T-shirt stash and pull together one of these costumes in mere minutes…. Last week, my friend Elan asked me to help her out with a student project for her journalism class (see Elan in action, right, who was willing to climb on top of tables to get the right shot!). Here’s a little video tutorial we came up with to show you 10 super quick-and-easy ideas for a T-shirt-based Halloween costume. Forgive the low sound, since we were working without a mic, but we hope you enjoy!

Top-10 Last Second Halloween Costumes from Elan Bird on Vimeo.

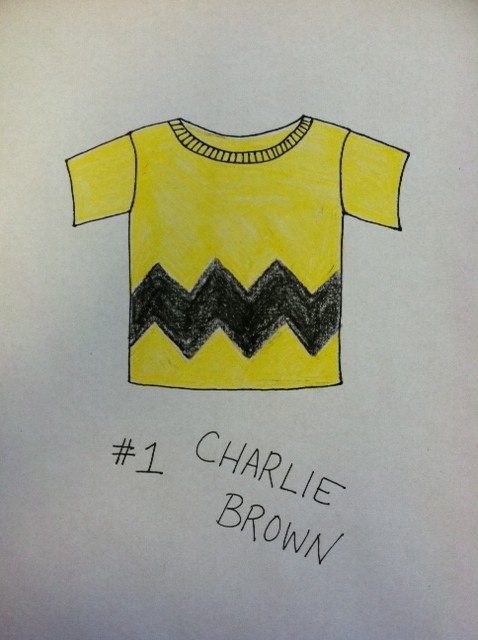
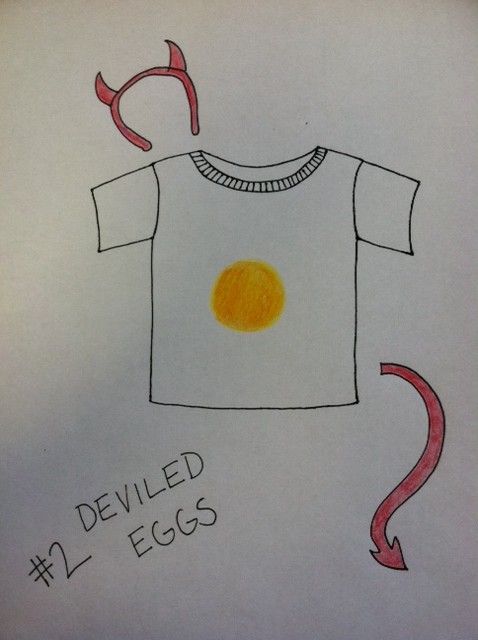
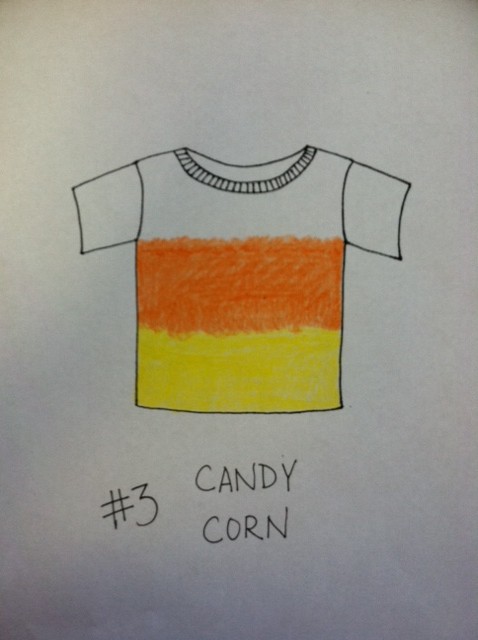
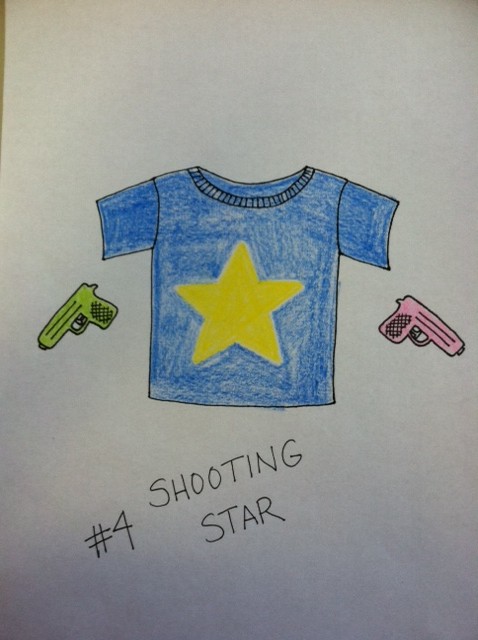
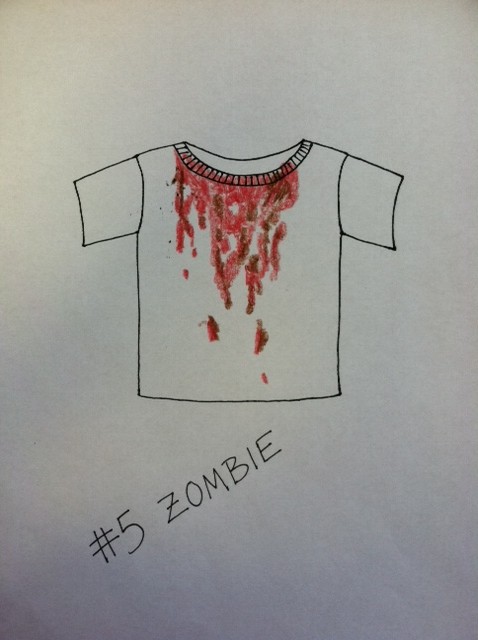
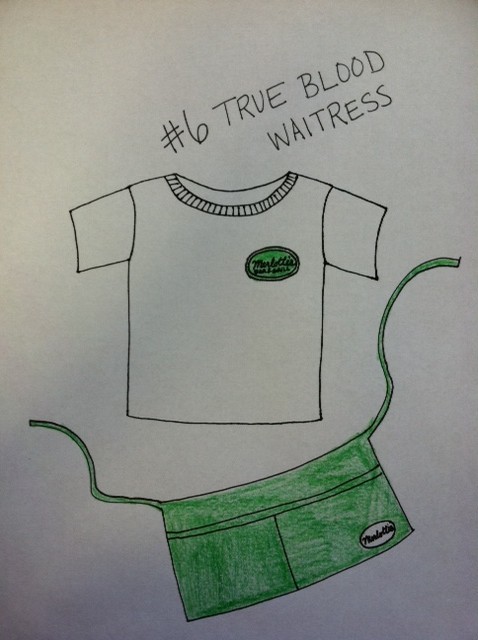
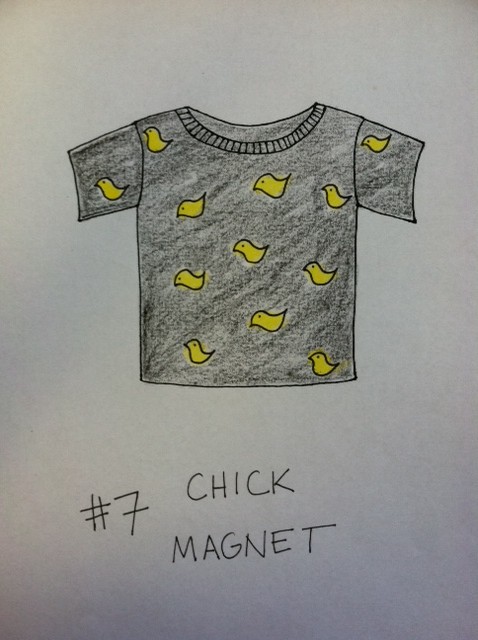
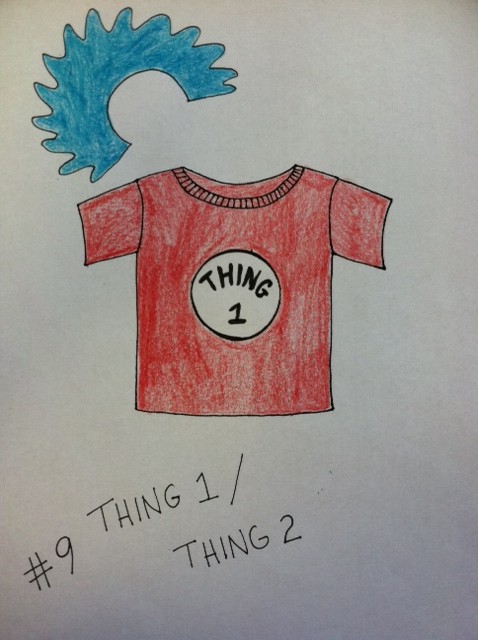
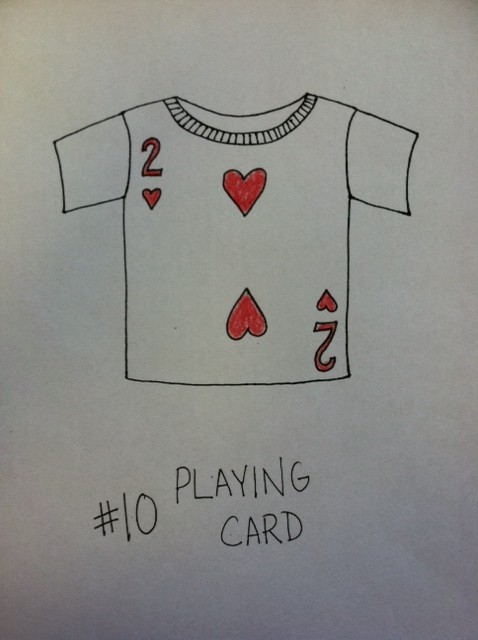
And in case you missed the visuals, below are the 10 quick-and-easy T-shirt-based Halloween Costumes (all illustrations courtesy of Megan/Generation T):

1. Charlie Brown (a good man, indeed, from our pal Charles M. Schulz–add a black pair of shorts and a baseball cap for good measure)

2. Deviled Egg (love me some wordplay! just grab those devil horns and tail I know you have packed away somewhere)

3. Candy Corn (inspired by my friend Alexa (aka The Swell Designer)’s adorable tie-dyed onesie!)

4. Shooting Star (more nerding out with words, adapted from an idea in The Halloween Handbook PS: those are squirt guns, folks!)

5. Zombie (classic: blood, brains…nuff said; and here’s the perfect soundtrack to listen to while you craft)

6. True Blood Waitress (don’t forget to add some fang marks on the neck!)

7. Chick Magnet (ha. get it?… also adapted adapted from an idea in The Halloween Handbook)

8. Static Cling (you don’t even need paint for this one!)

9. Thing 1 and Thing 2 (These Dr. Suess characters are perfect for pairs costumes!)

10. Playing Card (Ace of Spades or Queen of Hearts–or recruit enough for a full 52-card deck! Then shuffle.)

And if you have a T-shirt left over, don’t forget to make check out the tutorial for a trick-or-treat tote!

[ 6 Comments | Posted on October 28th, 2011 ]

Sew It All TV on PBS!

Hey Coloradans! Did any of you happen to catch Megan and Generation T on Sew It All with host Ellen March Saturday morning (August 6, 2011)  on your local Rocky Mountain PBS station? This was an especially poignant airing of the show since we filmed the episodes in Golden, Colorado almost a year ago!

Check with your local station to see if if they’re airing the show (and if not, request it here!).

[ Comments Off on Sew It All TV on PBS! | Posted on August 8th, 2011 ]

From Our Readers: Onyx!

tia haltertopA blast from the past, but still in time for summer 2011! Shortly after Onyx’s dad came to one of my summer 2009 book tour events for Generation T: Beyond Fashion in Portland (sadly, Onyx was out of town!), Onyx made the Pinup Girl halter top at home. Her aunt came over for a visit, and she generously gifted it to her. Instead of using a punk pin for the “pinup” part (the gathers at the front), she used a safety pin and sewed on a barrette–a very cute and creative variation!

Other viable variations include a couple of stitches to keep the gather in place, a button or two (or three!), or a big sparkly bead or brooch. Sum-sum-summertime!

[ 1 Comment | Posted on August 2nd, 2011 ]

I Love to Create: Superhero Arm Warmers!

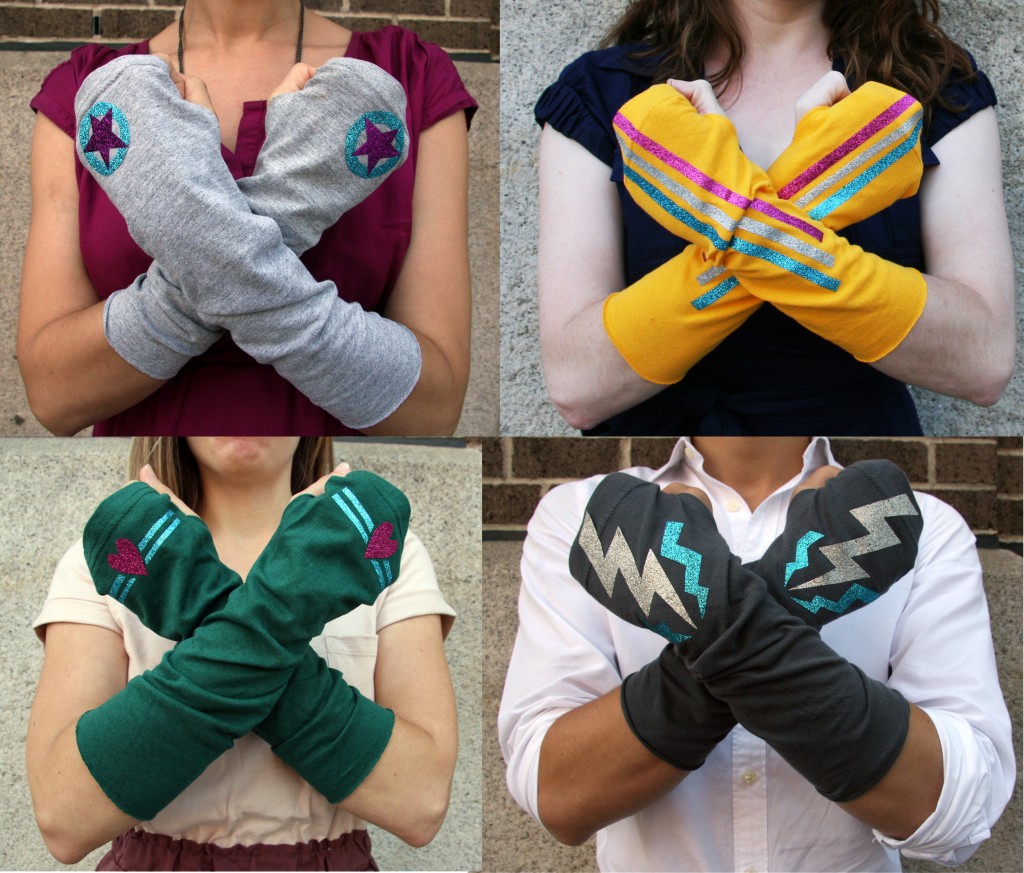
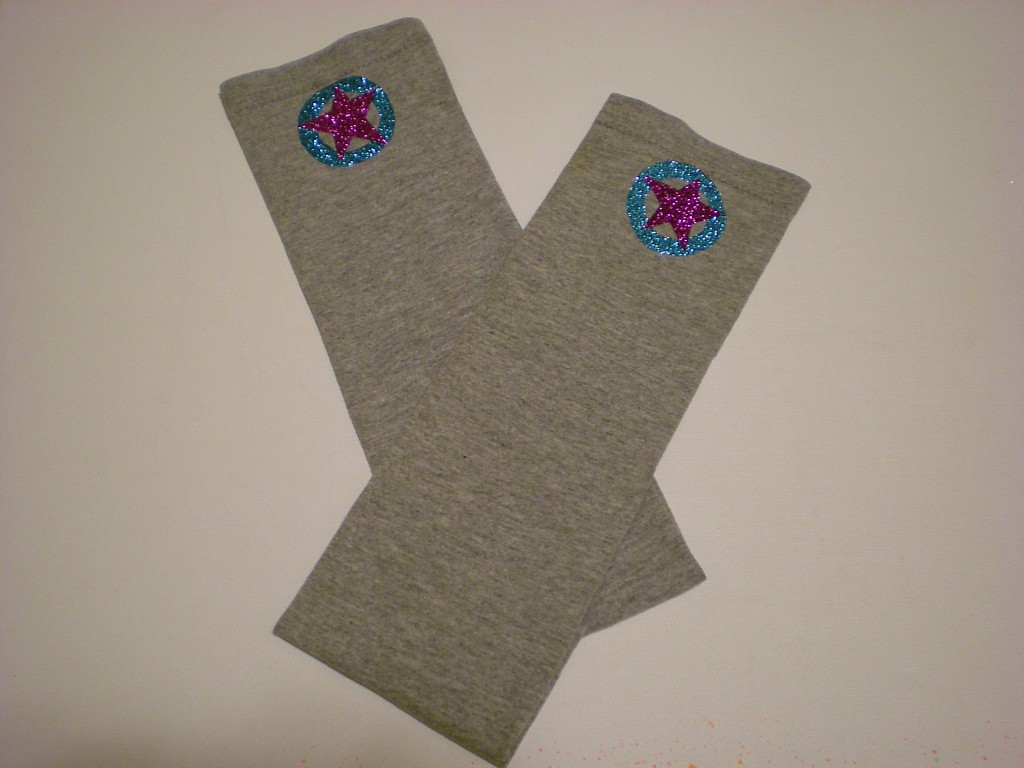
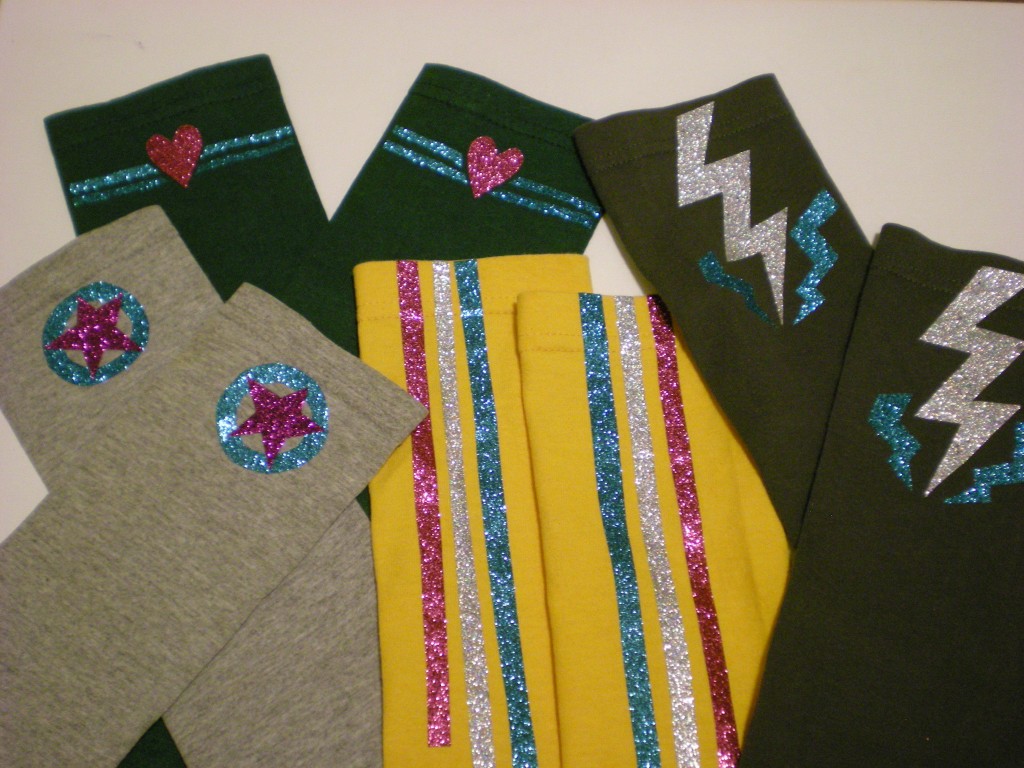
This T-shirt transformation project is my favorite of the accessories in my first book. They’re the Go-go Gauntlets (project #73) from Generation T: 108 Ways to Transform a T-shirt. They’re super easy to stitch up in an afternoon, and even easier to embellish with iron-on glitter sheets–which seriously increase the superhero factor.

These arm warmers are especially good for:
1) Completing late night deadlines (reports, papers, presentations, tax filing, etc.).
2) Healing goose-bumped flesh in the over-air-conditioned spaces of warm-weather climates.
3) Protecting long-armed folks from that pesky draft caused by the gap between the glove and sleeve in cold weather climates.
4) Shielding the knuckles of bicyclists from biting winds when they ride really fast.
5) Executing superhero power stances.

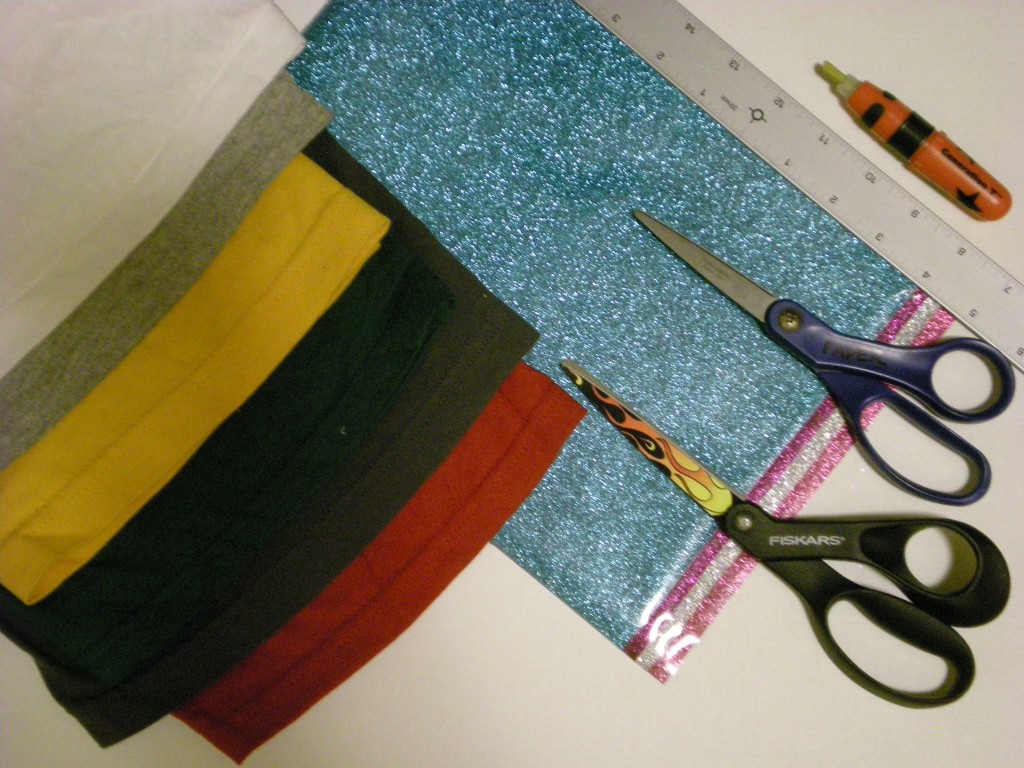
Materials:
-1 or more old T-shirts (with the bottom hem intact)
-Fabric marking tool
-Ruler
-All-purpose scissors
-Fabric scissors
-Needle and thread (or sewing machine)
Tulip Fashion Glitter Shimmer Transfer Sheets
-Pressing cloth
-Iron

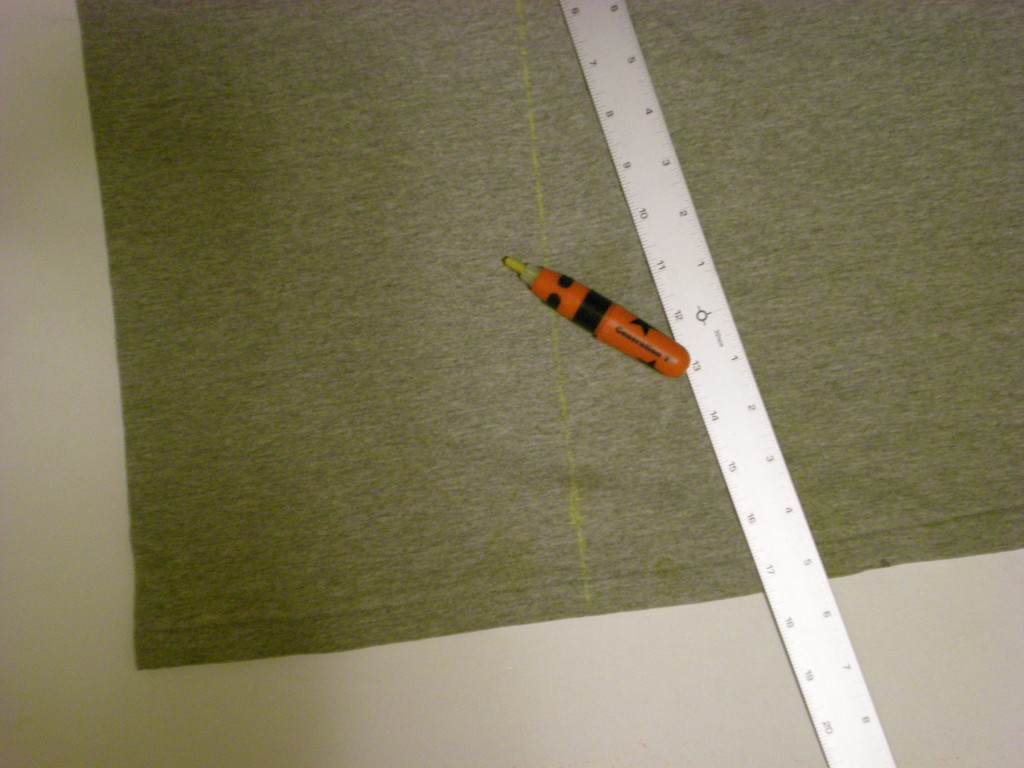
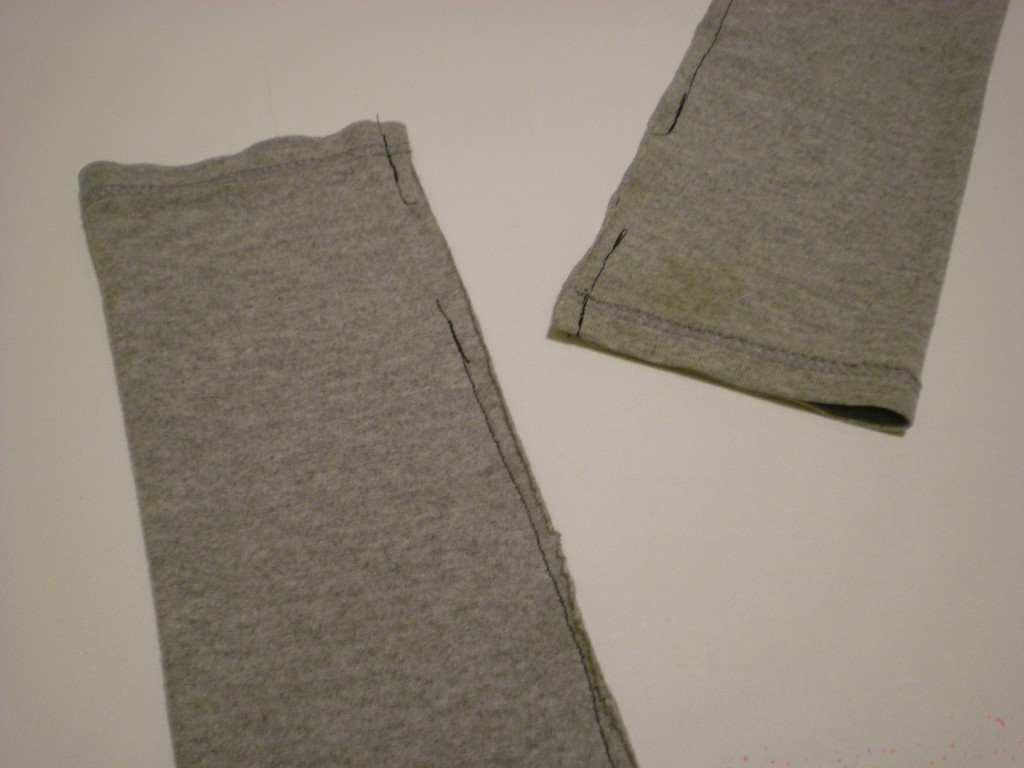
1. Measure the distance around the middle of your forearm (x). Mark a rectangle x” wide and between 11″ and 14″ tall that lines up along one of the side folds of the T-shirt and extends up from the bottom hem.

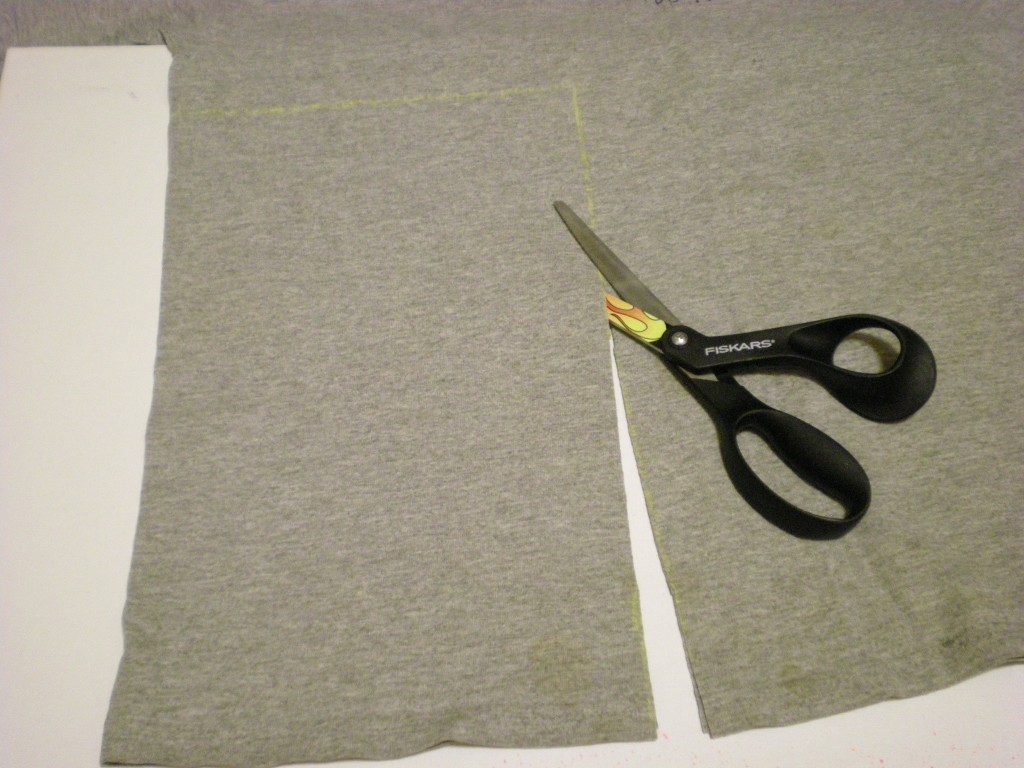
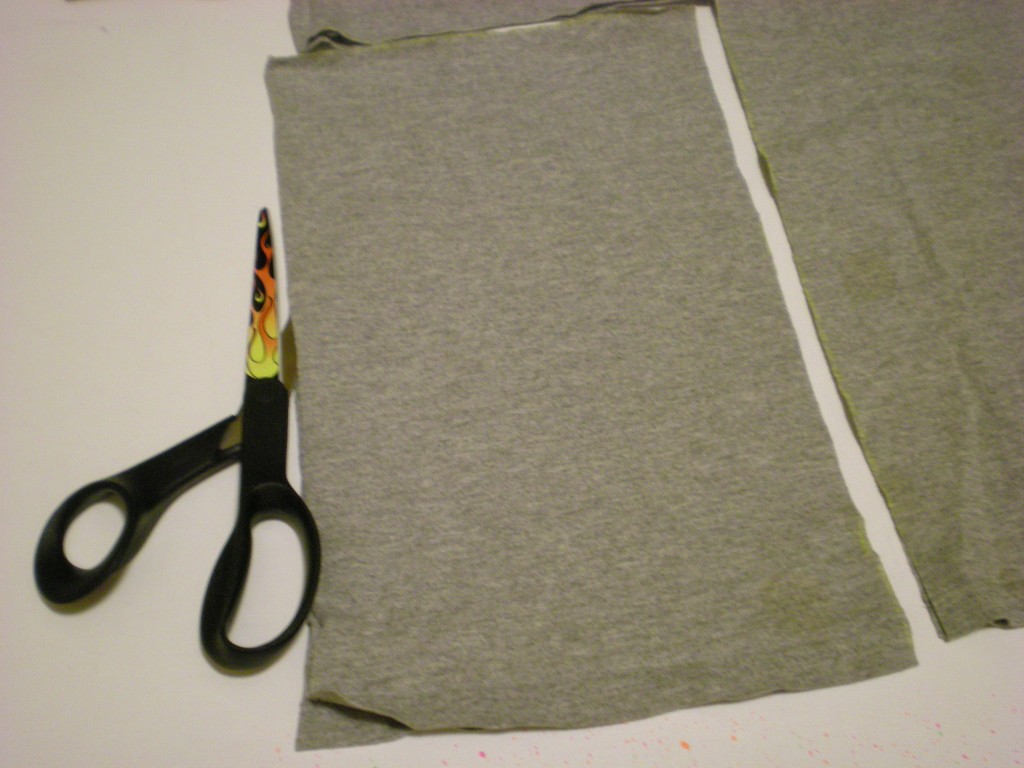
2. Use the fabric scissors to cut out the rectangle through both layers.

3. Cut open the side, along the fold of the shirt.

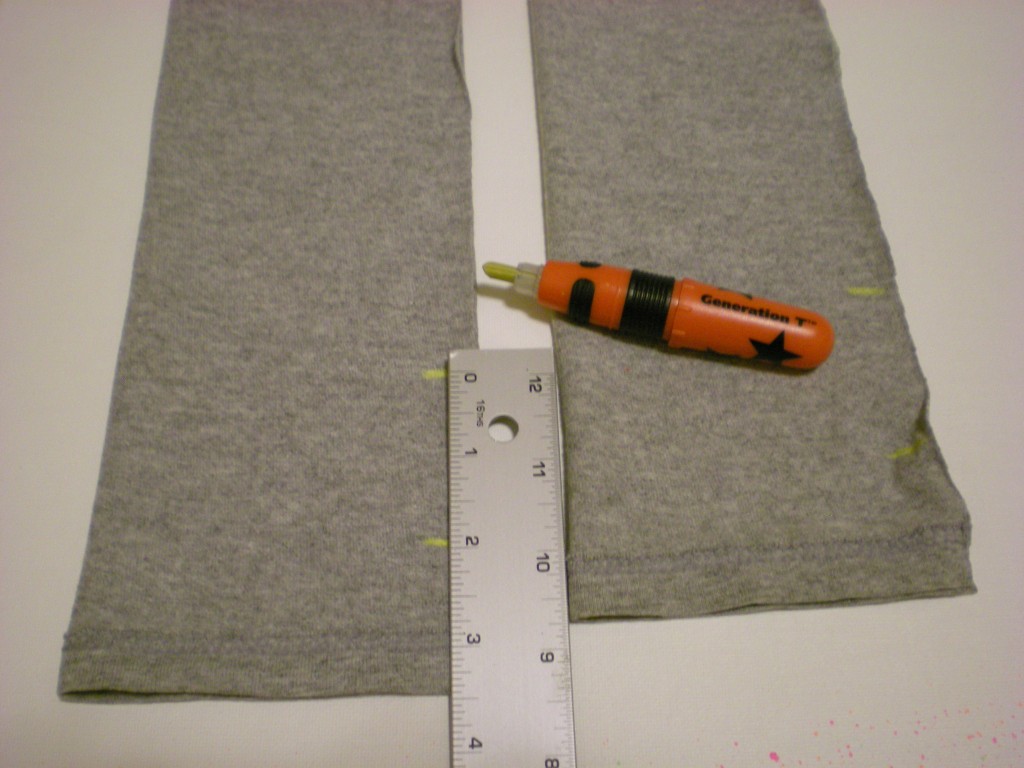
4. Fold each rectangle, right sides in, and make two marks along each of the open edges that measure 1 1/2″ and 3 1/2″ from the hem.

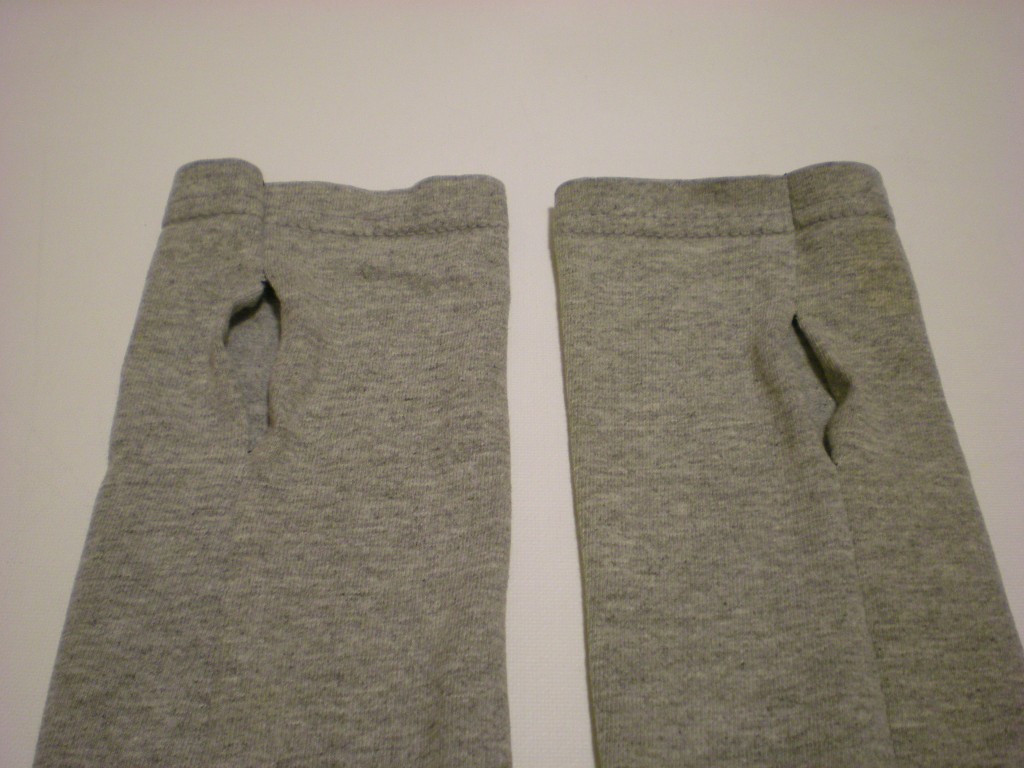
5. Stitch along the open edge, about 1/4″ from edge, leaving an opening (for the thumbs!) between the two marks.

6. Turn the arm warmers right side out and orient the thumb holes about one-third from the edge.

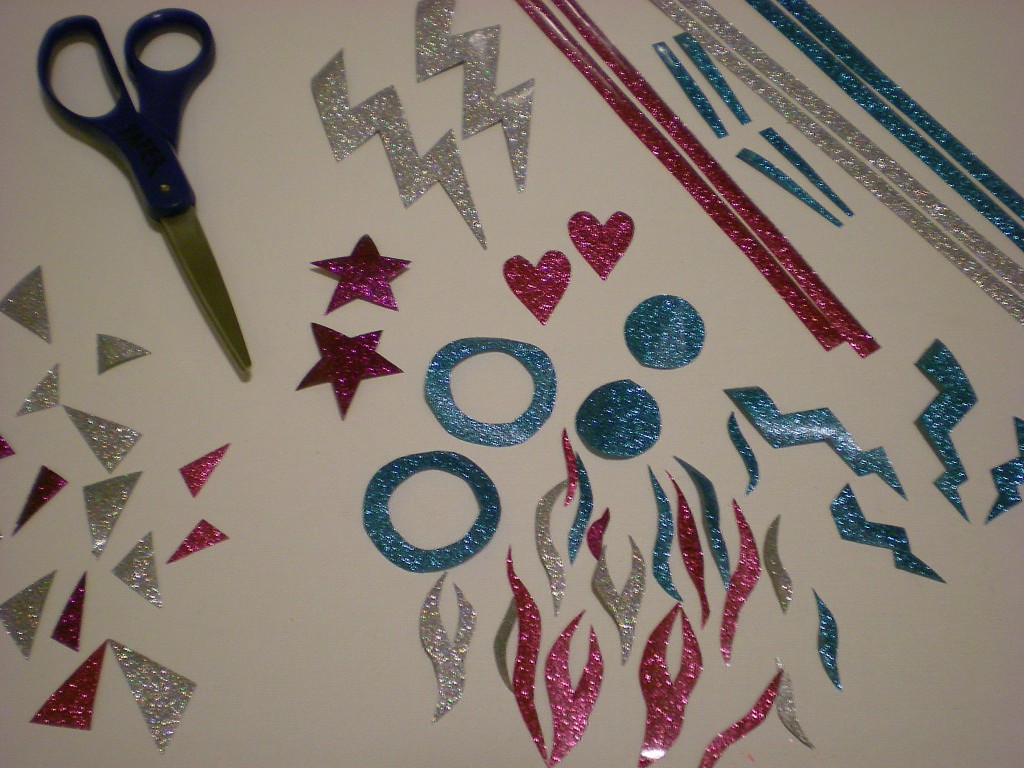
7. Use all-purpose scissors to cut out fun shapes from the iron-on glitter sheets (in pairs, if you want your arm warmers to match).

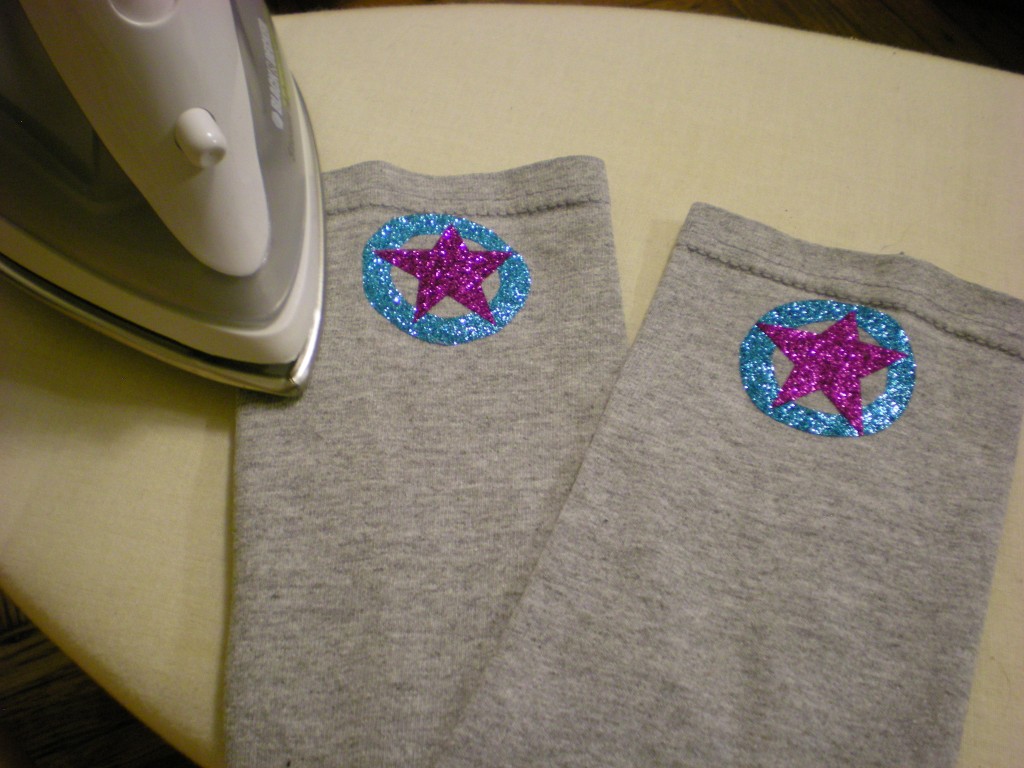
8. Keeping the arm warmers oriented as they were in Step 6, flip them over and arrange the glitter shapes near the hem. Peel away the shiny surface layer from the shapes, lay a pressing cloth over the arm warmers (being careful not to disturb the placement of the shapes), and press firmly with the iron for about 40 seconds. Repeat if necessary to set the glitter transfer.

9. Turn off and unplug the iron. Try on your new pair of superhero arm warmers!

10. Use all the shapes you cut out in Step 7 to make more!

Optional: Use remaining T-shirt scraps to make a matching superhero mask or headband!


[ Comments Off on I Love to Create: Superhero Arm Warmers! | Posted on July 26th, 2011 ]

Chicago, IL @ Pumping Station: One

It is officially summer (read: T-shirt season!), so nothing could make us happier than to hear about all the summertime T-shirt snipping events in the pipeline all over the country. Here’s one that’s happening in Chicago this Sunday June 26, 2011 from noon to 5 pm–it’s Pumping Station: One’s “Summer T-shirt Hackathon”! Participants are invited to bring old T-shirts (or new ones–as long as they’re not getting used in their current form, they’re fair game!) and learn how to transform them into a stuffed animal, a throw pillow, or a new piece for the wardrobe. No need to fear sewing, since there are plenty of no-sew projects to tackle, too. The event is being hosted at Pumping Station: One, a nonprofit hacker space populated by a community of folks dedicated to exploring the intersection of technology, art, science, and culture, and in cooperation with Learnapalooza.

Though not an official Generation T-sponsored event, we get so giddy when folks start throwing public parties to cut up their T-shirts that we wanted to share it with the larger T-shirt community — and hey, it appears that copies of Generation T: Beyond Fashion will be on hand for reference. Let us know if you go!

Summer T-shirt Hackathon
Pumping Station: One
3354 N. Elston
*
Chicago, IL 60618

*Enter the Big Black Door on the south side of the street. If that door is locked, ring the doorbell. Once inside, walk into the lobby area, turn right and head for the hallway. PS:One is located at the first red door on the right, look for the PS:One sticker!

[ 1 Comment ]

Raleigh, NC @ Maker Faire NC

You know how much we love Maker Faires, so though Megan Nicolay is only able to be there in spirit for this one, Generation T will be there in the flesh…err, paper pulp…err, the crafty minds and nimble fingers of crafty readers Janet Kennedy and Kelly Farrow. This Saturday (June 18, 2011) Janet and Kelly and their team of intrepid recyclers will be using inspiration from Megan’s books, Generation T and Generation T: Beyond Fashion as they demonstrate how to take an ordinary T-shirt and re-purpose it into a T-shirt (or tank top, or pillow, or…) with style and flair! They’ll bring a box of tossed out T-shirts so that visitors may do their own “re-make & take” on the spot for $5. Proceeds of the creativity sale will benefit nonprofit organizations supported by 5 Bucks is Change. Most projects will be no-sew, but Kelly’s bringing her machine, so some light sewing will take place–brace yourselves!

If you’re in the area, please stop by the Tee Party to say hello to to Janet and Kelly and do some tee-cycling!–and pick up a free Generation T project card while you’re at it.

Maker Faire NC 2011
NC State Fairgrounds
Gov. Kerr Scott building
1025 Blue Ridge Blvd.
Raleigh, NC 27607

The event happens this Saturday June 18, 2011 from 10 am to 5 pm. Entry: Adults $4, Kids $2, Under 6 Free!

[ Comments Off on Raleigh, NC @ Maker Faire NC ]

From Our Readers: Juno!

A tale of three sisters… Juno, Rosy, and Jasmine are three magnificent and creative sisters who I’ve known since my youthful days in New Hampshire. They recently played pivotal roles in a very special DIY project for Rosy, who got married last month in Paris. Here is a brief time line of the crafty wonderland, executed over an incredible number of modern social media platforms!

December 30, 2010 from Jasmine, via Twitter, via Skype: Megan, I just Skyped with Rosy and she showed me the T-shirts her friend Kit printed on that Juno will turn into a wedding dress for her.

My interest was piqued as I immediately tweeted back for more information! Eventually, I connected with Juno after she heard that I’d be in town to teach T-shirt workshops, when I can potentially catch a glimpse of the work in progress…

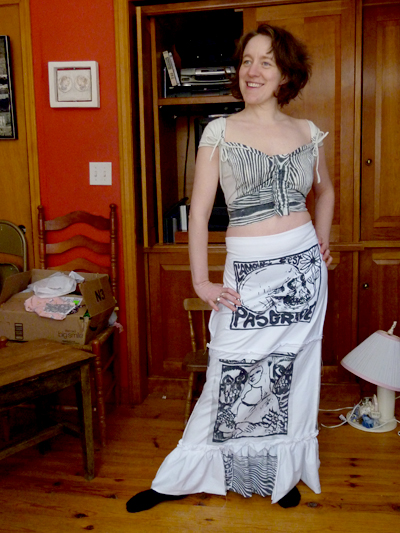
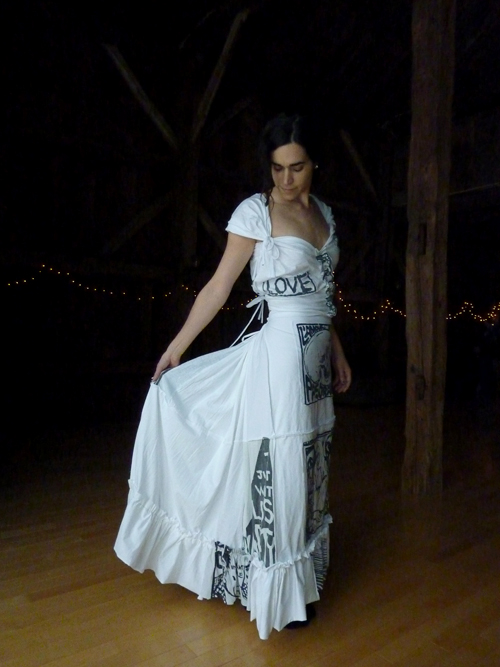
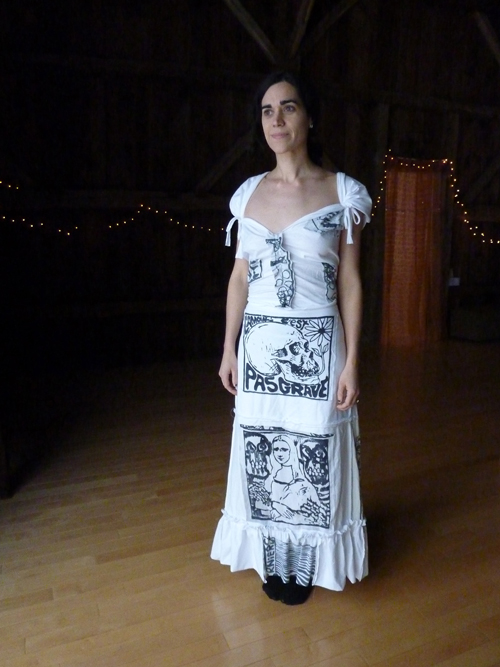
March 7, 2011 from Juno, via Facebook: How long will you be up here for this weekend? I’ve made Rosy a crazy art wedding dress with block prints by a friend of hers from your pattern—would love to cross paths with you and take a picture of you in it if the timing worked.

And Juno finished the gown (Tying the Knot, project #108 in Generation T; 108 Ways to Transform a T-shirt), and the timing worked, and I tried on the dress at the yoga barn before our yoga class, and we took some pictures! Then, we fast forward to after the wedding…

May 12, 2011 from Juno, via email: Sorry it’s taken me so long to get the wedding dress post up. The dress was fabulous—Rosy loved it and felt it was entirely her. The whole process made me excited to sew more and learn to make some easy clothes.

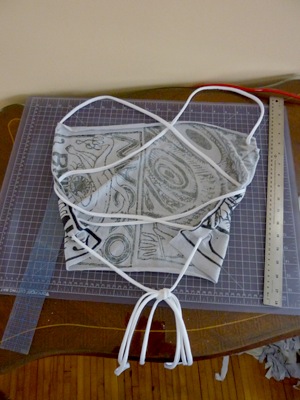
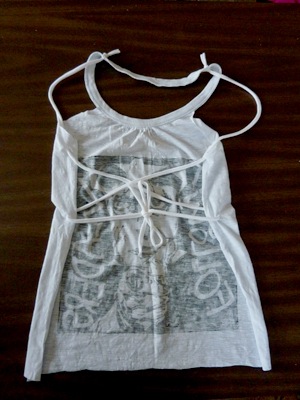
Oh, happy day! Now let’s take  look at that process. Here are some of Juno’s alternate versions for the bodice: the All Strung Out tank top, project #88 plus a combination of All Strung Out and the Shoulder Chic tank top, project #15. For more pictures of the whole process of acquiring the hand-printed shirts, cutting and sewing up the skirt, and the whole grand affair, visit Juno’s blog, Try This at Home

Here are some pictures of Jasmine trying on the dress and the different dress tops! The top she’s wearing below right is the top that is paired with the wedding skirt in the book, but in a different print than the one I tried on — Juno really had all her bases covered!

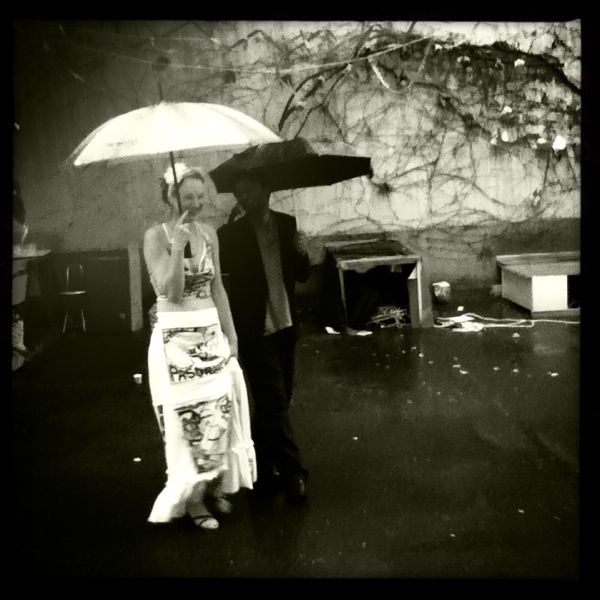
And here, at last, are some totally dreamy photos of the beautiful bride, Rosy! She chose, in the end, to wear the All Strung Out tank top as the top of her gown. Doesn’t she look stunning?

Congratulations to all involved in the beautiful project! (And thanks to Juno, for letting me play a minor role in it all!)

All photos courtesy of Juno Lamb at Try This at Home.

[ 3 Comments | Posted on May 13th, 2011 ]

I Love to Create: Spray 4 Ways!

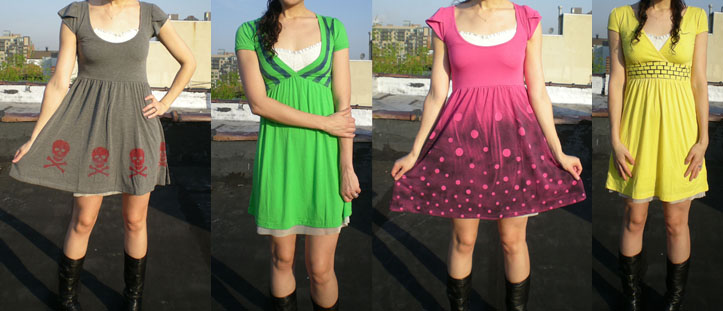
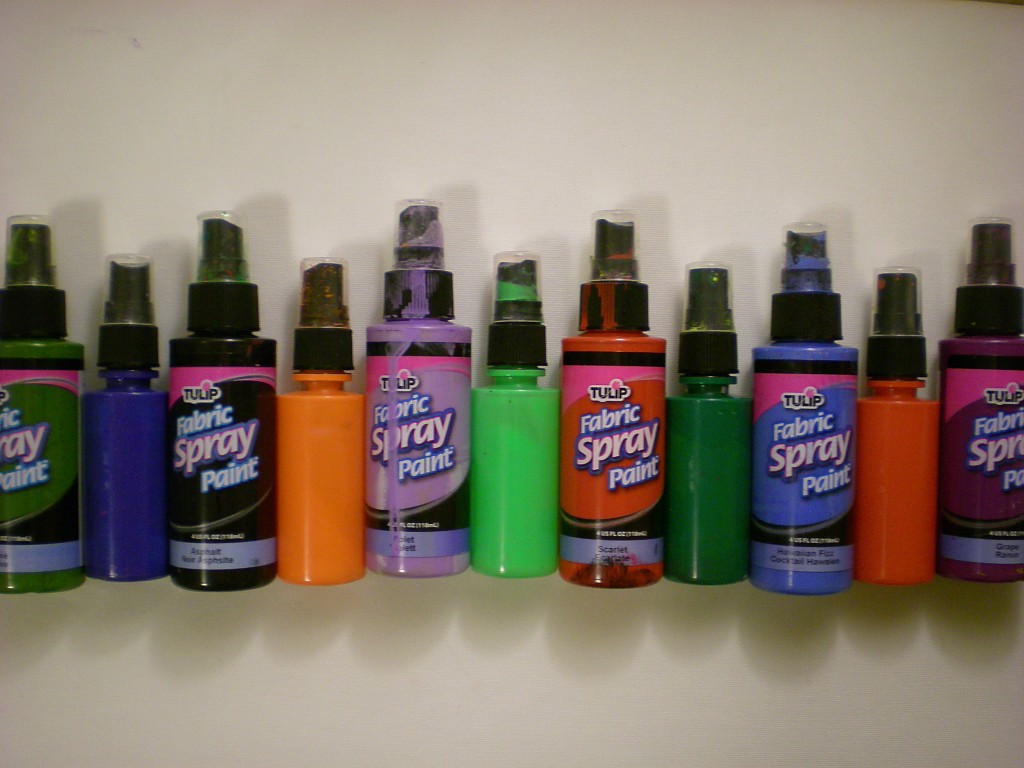
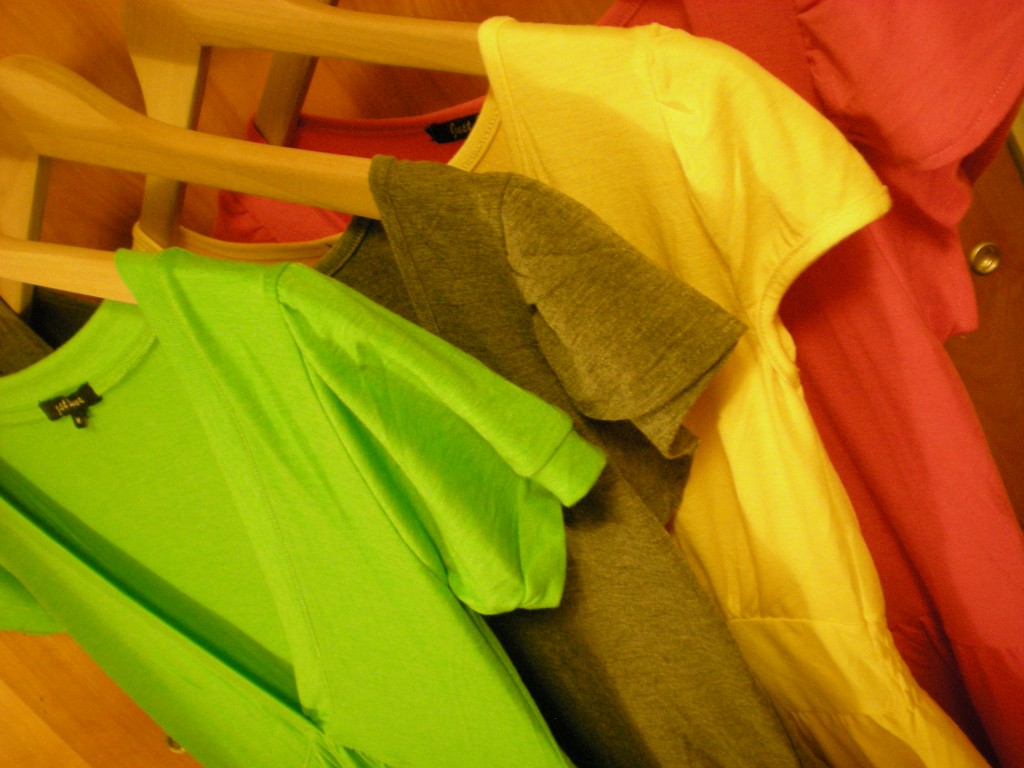
As some of you know, I’ve been just a little bit obsessed with my spray paints lately. And it’s because they’re the perfect quickie spiff-up and surface embellish for T-shirts, pillows, dresses–or any other fabric item you want to spray! Since it’s spring, though, I grabbed up some plain cotton dresses to spray. Here are four different ways to pair those fabric spray paints with templates made from materials around the house including masking tape, stationery stickers, and freezer paper. Pull your spray paints from your holsters!

Once your paints are assembled, select your surfaces (in all different colors–though light colors will take the paint best).

Then introduce any number of “secret weapons from around the house” (items that can be used as templates or stencils to mask parts of the fabric, e.g. freezer paper, permanent marker, a craft knife; map dot stickers; rectangle sticker labels; masking tape) in each of the individual projects below!

1. Yellow Brick Road

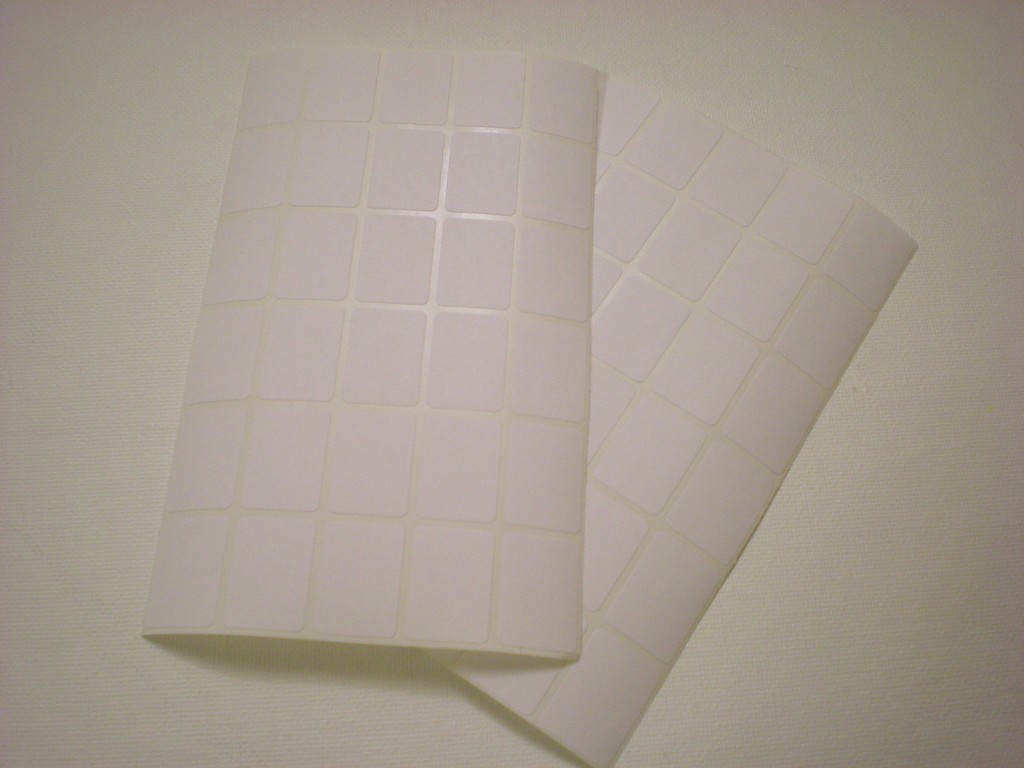
Secret weapon from around the house: Rectangle sticker labels

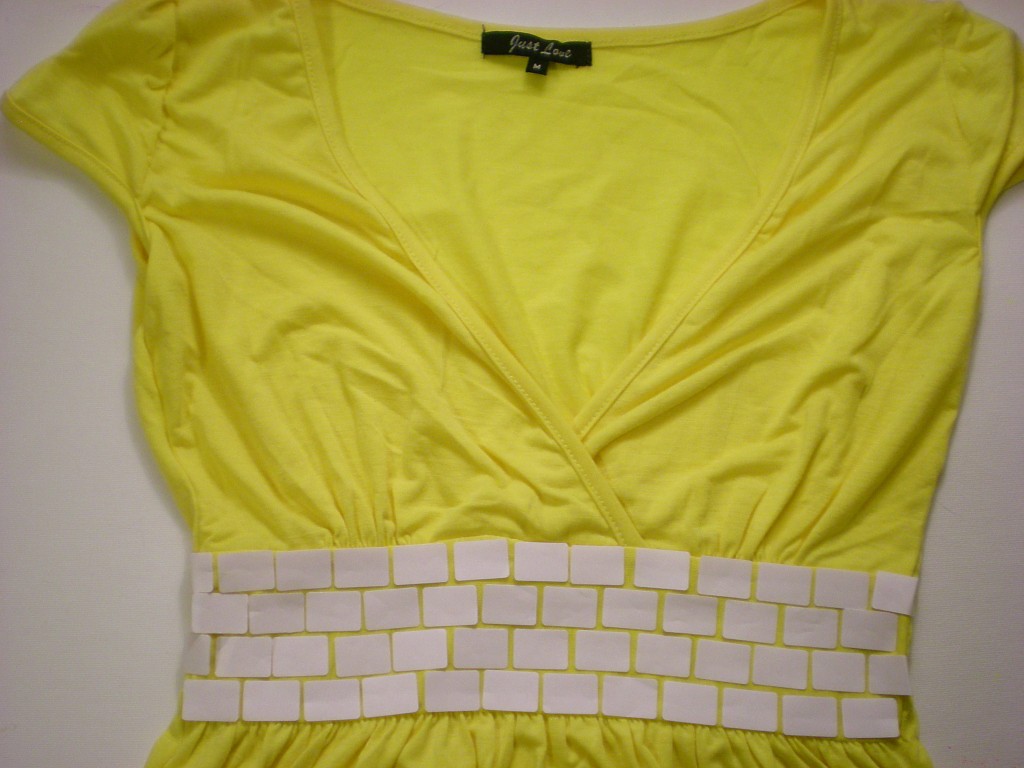
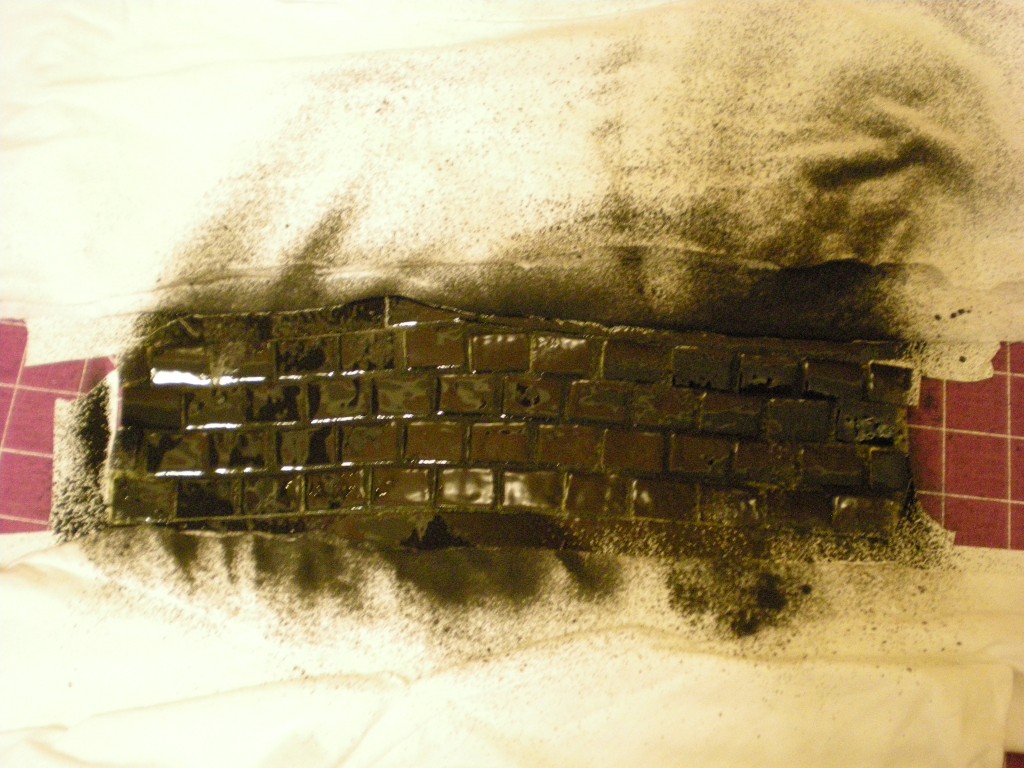
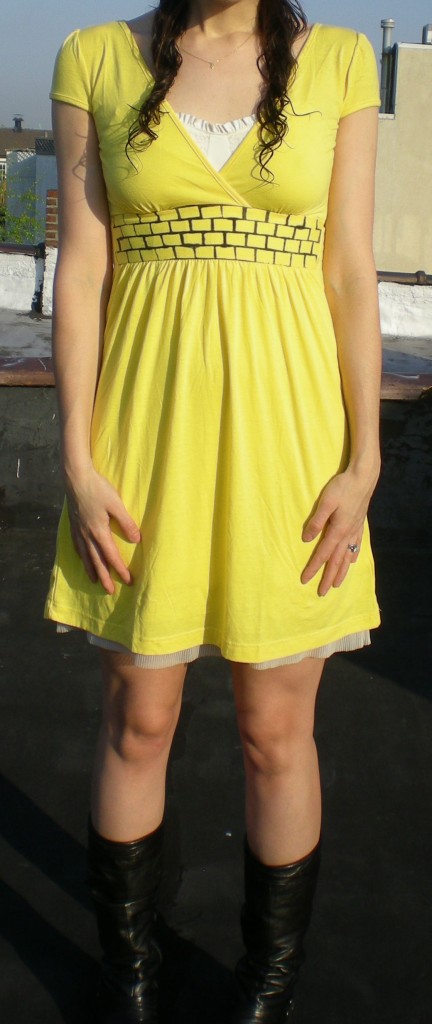
Originally, my plan was to stick on these labels in a checkerboard pattern to give the dress the feel of a racing flag. But the stickers so easily lent themselves to being bricks, that I immediately thought of the yellow brick road in the Land of Oz.

I chose to follow the yellow brick road along the waistband, but you could lay your bricks around the hem of the dress, up and over the shoulder, or a circle them all over the dress. I laid one row of bricks and then stuck down a second row, offsetting the first brick in the second row so that the rest of the stickers in that row would be slightly staggered to create the brick pattern.

Mask the rest of the garment before spraying (I used T-shirt scraps and paper from my recycling bin) so that you can contain the paint to only the area you want to color. I used black spray paint to make the yellow bricks really pop!

Let the paint dry completely before you peel off the brick stickers and try it on!

2. Skull & Bones

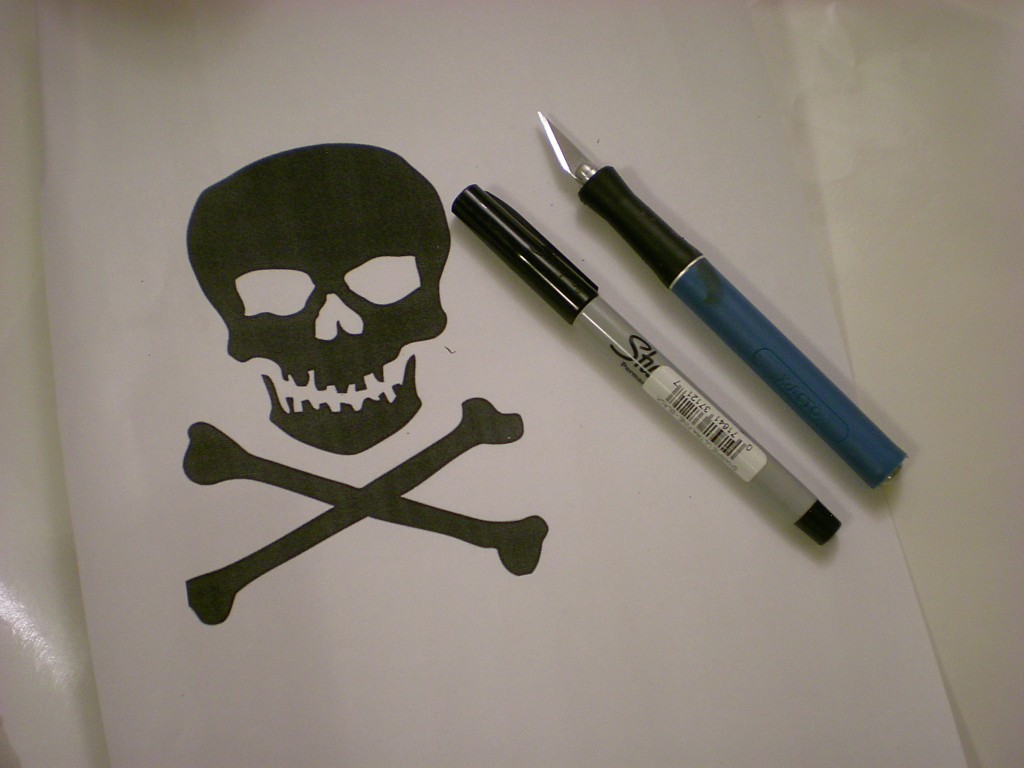
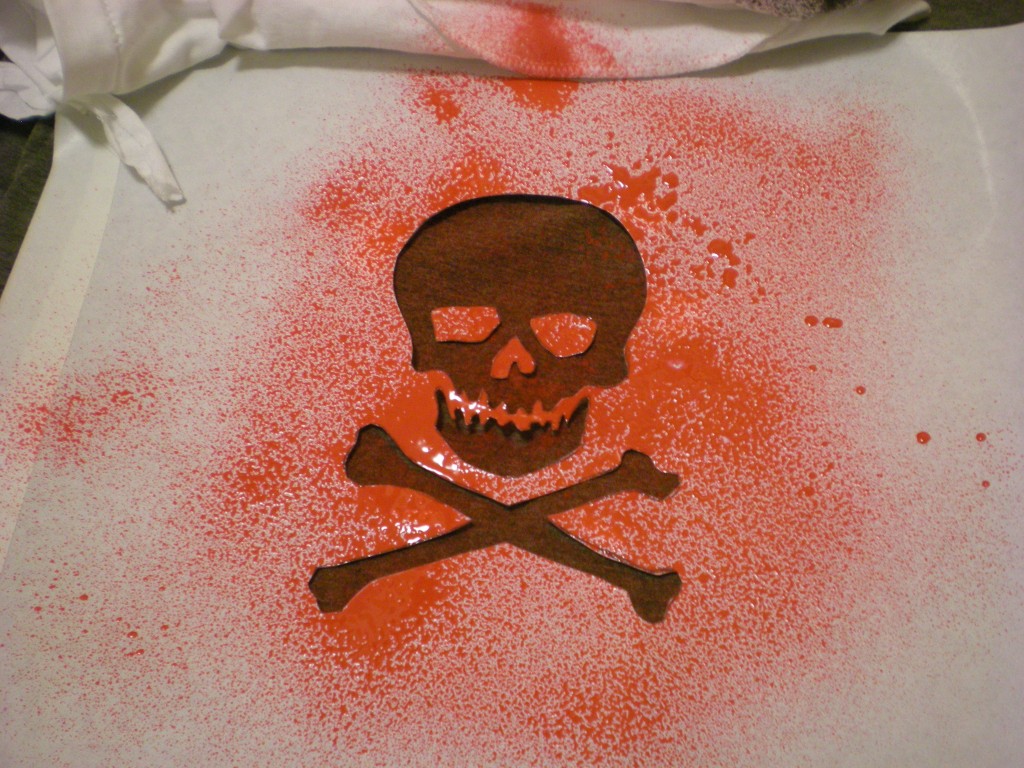
Secret weapons from around the house: Freezer paper, high-contrast image printout, marker, craft knife, and cutting mat

I chose the classic skull and crossbones as my image to download and print for creating the stencil, but any image is fair game!

Trace the design onto a sheet of freezer paper.

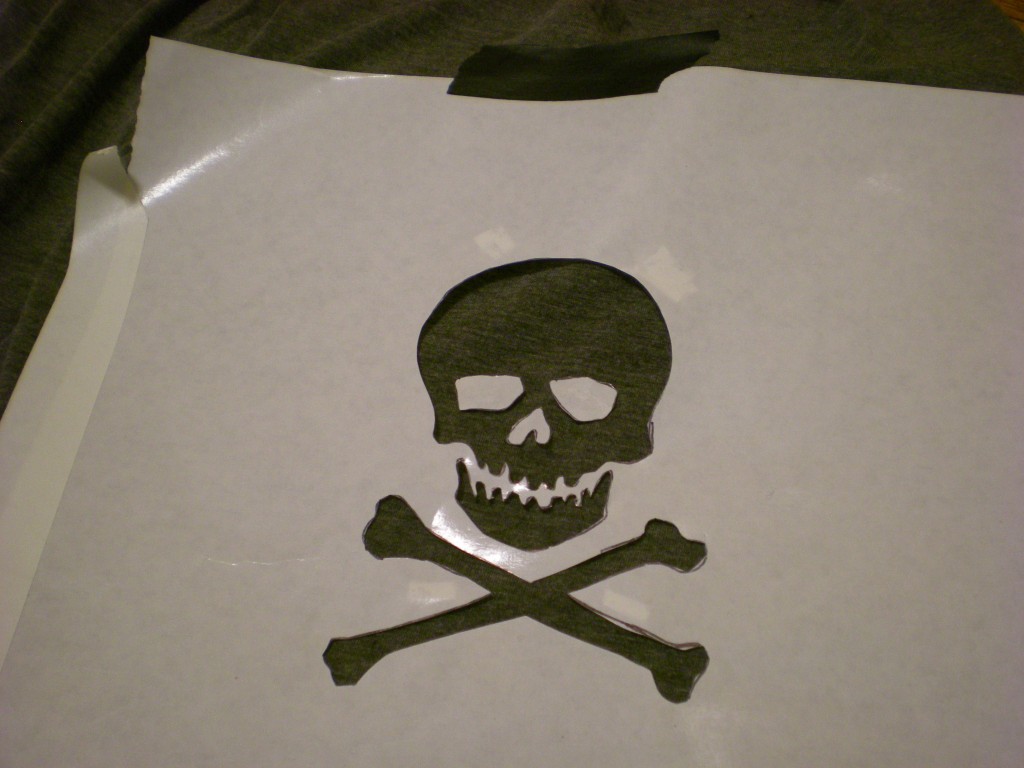
Then use the craft knife to carefully cut out the shapes.

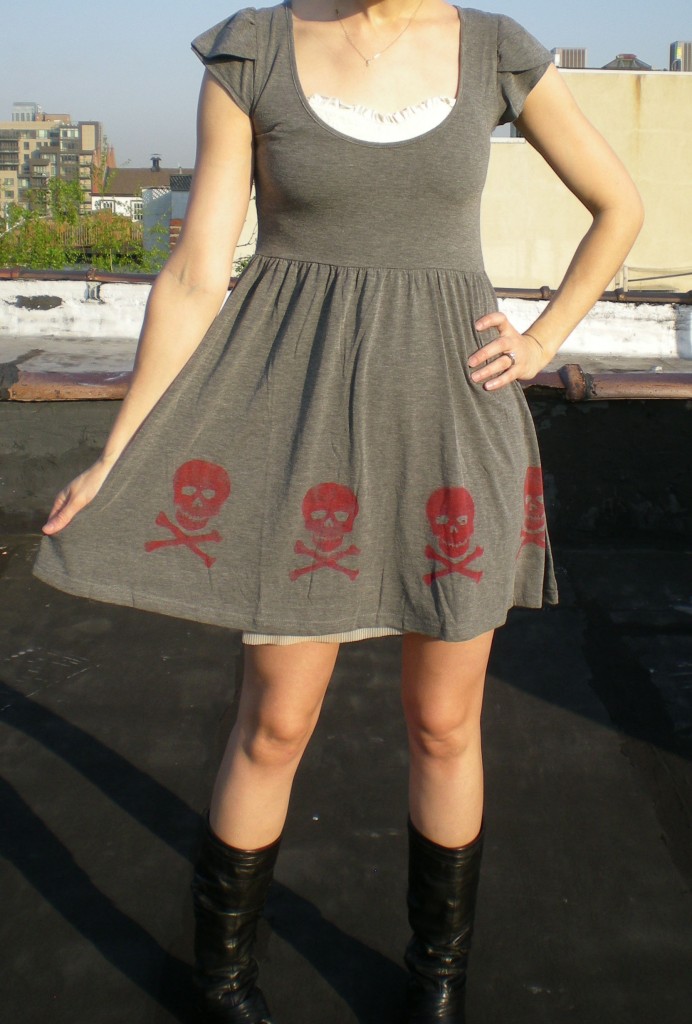
Tape the stencil onto the fabric surface (I placed it along the hem). Don’t forget to place any loose pieces (in this case, the eye sockets and nose cavity!). I sprayed red spray paint on the charcoal gray surface and reused the stencil to create a pattern around the bottom of the skirt.

Let each image dry slightly before moving the stencil to another part of the fabric.

Then let the image dry completely before spraying it onto the back of the garment. Let all the paint dry completely before you try it on!

3. Bubble, Bubble, Toil, and Trouble

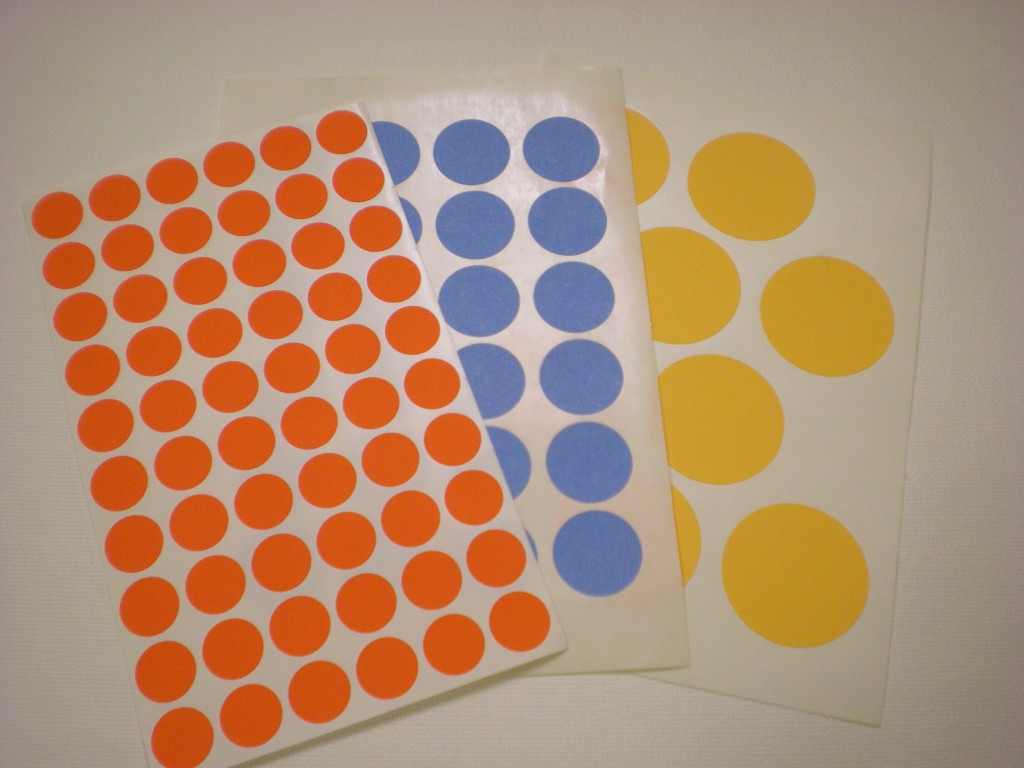
Secret weapon from around the house: Map or garage sale dot stickers in different sizes.

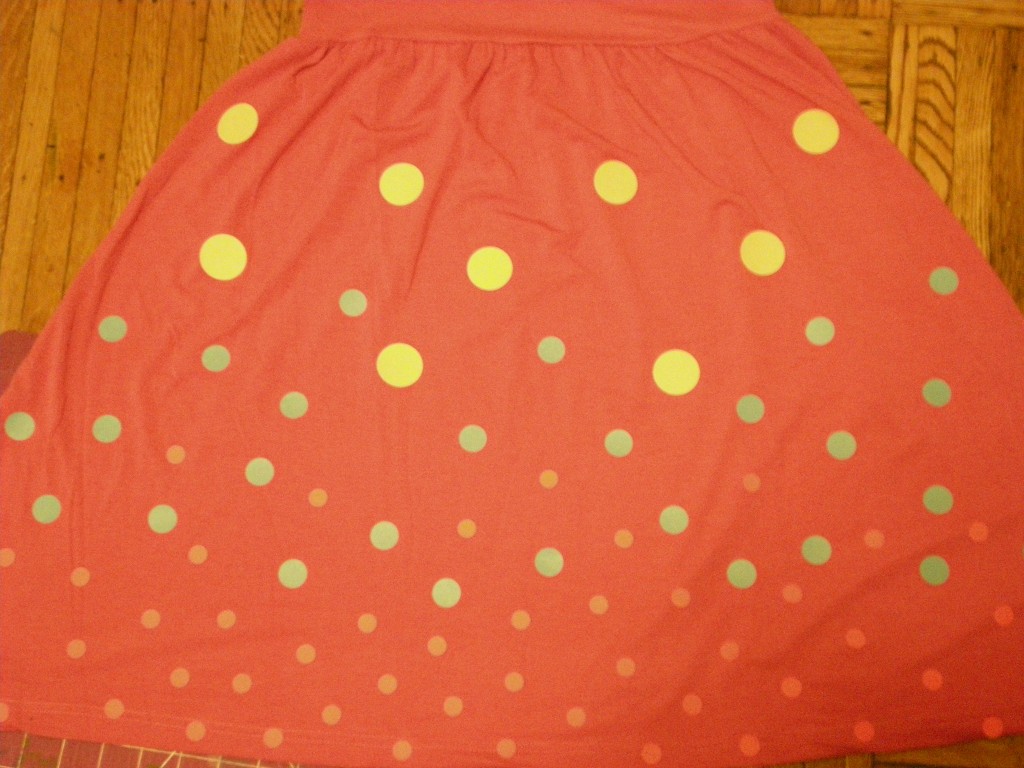
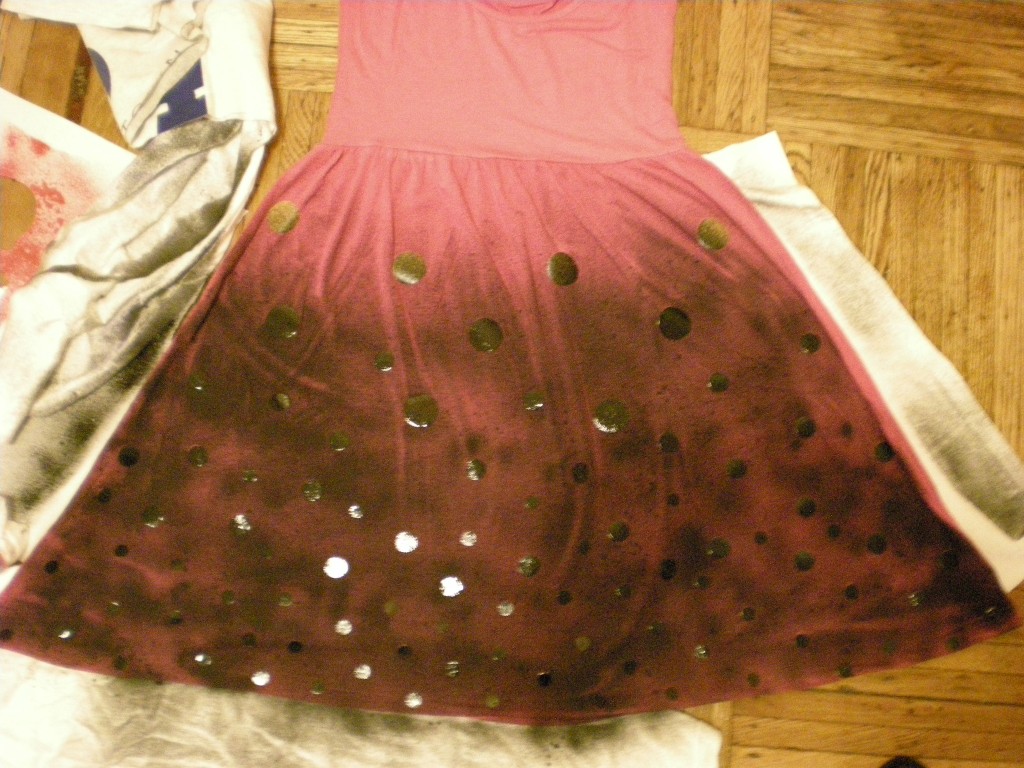
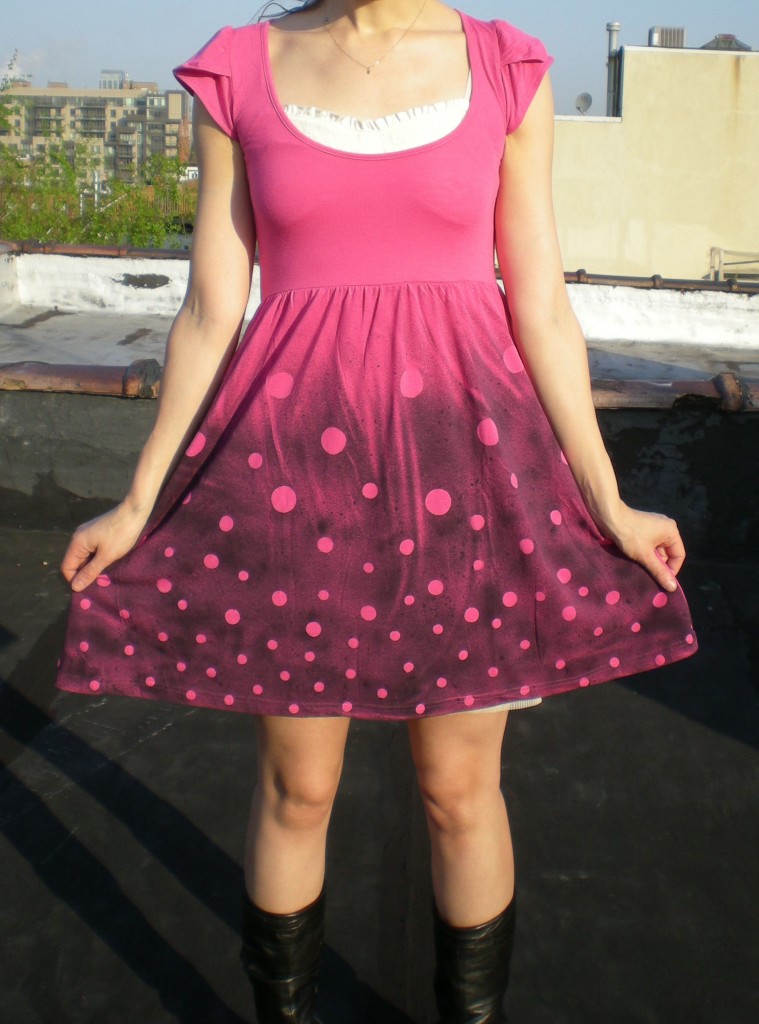
These stickers have so much potential. Beyond mixing up the sizes, you can arrange them into patterns, overlap them, use the surrounding sticker bits to create reverse dots, and so on. I used three sizes (3/4″, 1 1/4″, and 1 3/4″).

To create the appearance of bubbles rising up to the surface, I started with closely spaced small dots at the hem, then transitioned to more widely spaced medium dots, with the large dots finishing below the bodice.

Mask all the parts of the garment you don’t want to color. I used black spray paint, fading out at the top, to make the pink really shine through! I also allowed the naturally occurring wrinkles caused by the gathered skirt to form “cracks” in the paint.

Let the paint dry completely before you put it on. Now that you’ve made your bubbles, go out and make some trouble!

4. Yipes Stripes!

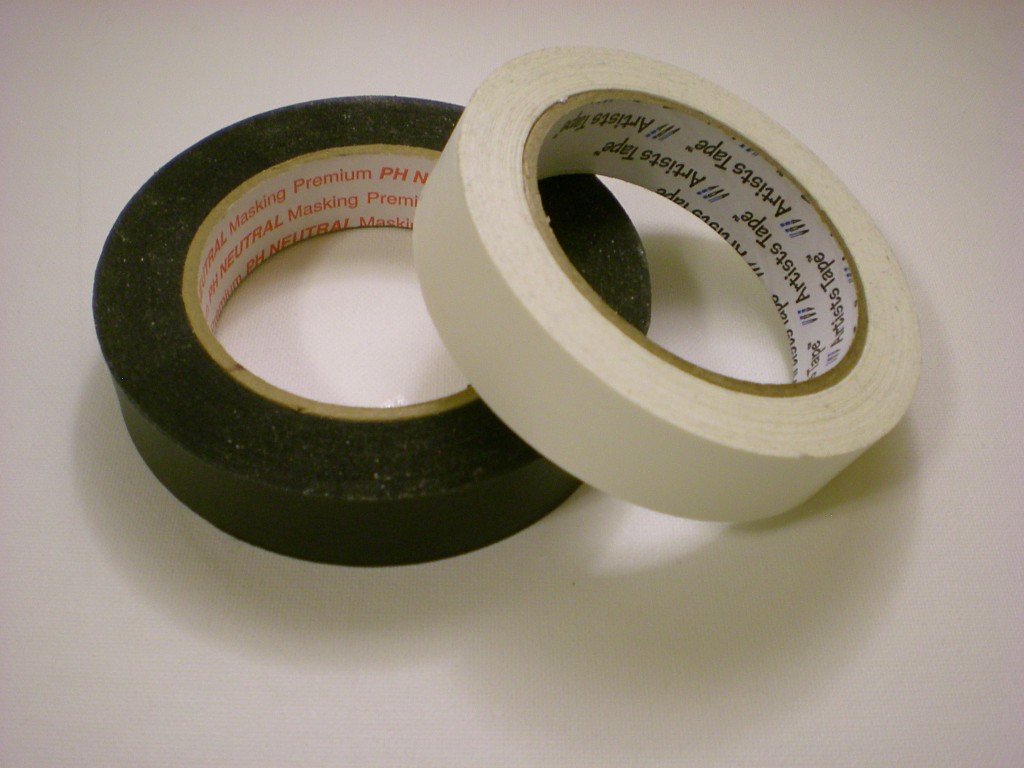
Secret weapon from around the house: Masking or Artists tape

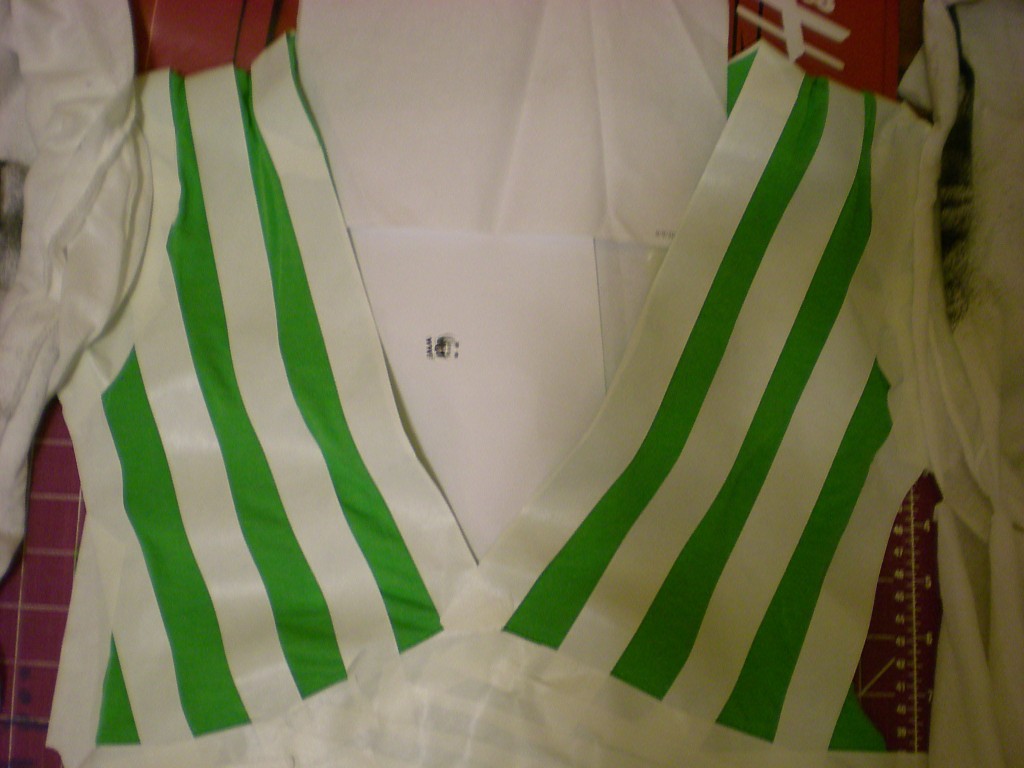
Stripes are just the beginning–you can create plaid, checkered, or gingham patterns with a roll of masking tape. Keep in mind that the width of the tape (and how closely you align them) determines the width of your stripes!

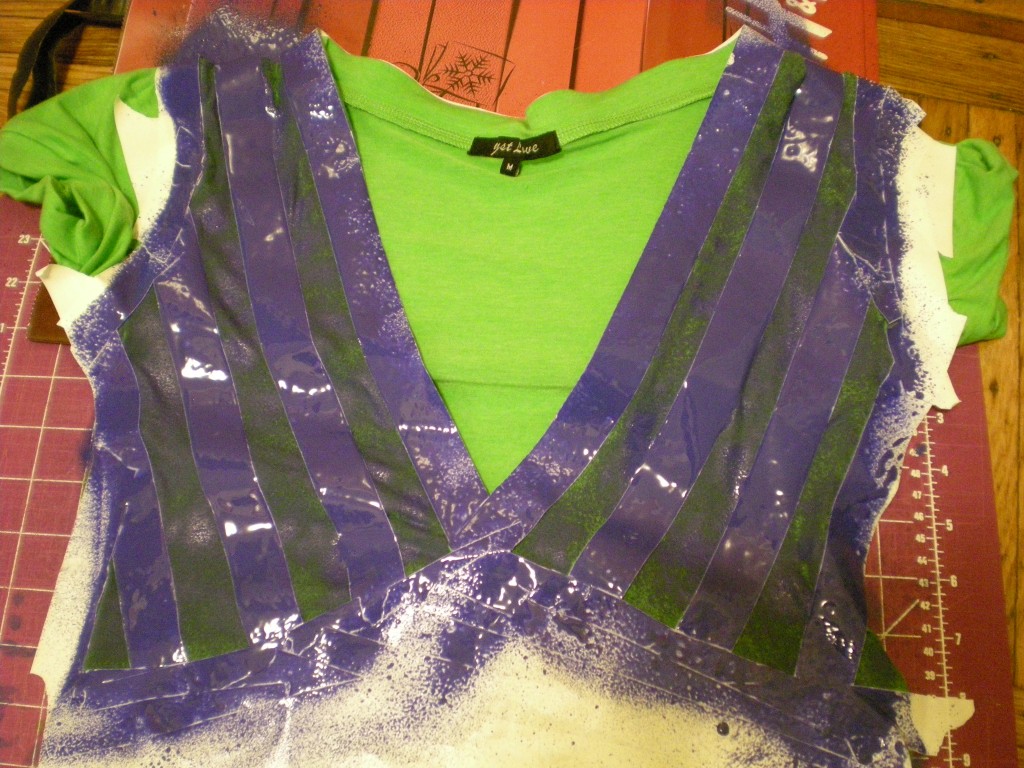
I followed the V-neck cut of the dress to create gently slanting diagonal stripes. Be careful to line up the tape strips carefully in order to keep your design symmetrical and even.

As always, mask the fabric you don’t want to paint! I chose blue spray paint to pair with my bright green frock–a springtime inspiration, for sure!

Let the paint dry before peeling off the tape to reveal your sassy stripes!

One, two, three, four — don’t stop now, let’s spray some more! How many more ways can you spray?


[ 20 Comments | Posted on April 26th, 2011 ]