Posts Tagged ‘T-shirt surgery’

Raleigh, NC @ Maker Faire NC

You know how much we love Maker Faires, so though Megan Nicolay is only able to be there in spirit for this one, Generation T will be there in the flesh…err, paper pulp…err, the crafty minds and nimble fingers of crafty readers Janet Kennedy and Kelly Farrow. This Saturday (June 18, 2011) Janet and Kelly and their team of intrepid recyclers will be using inspiration from Megan’s books, Generation T and Generation T: Beyond Fashion as they demonstrate how to take an ordinary T-shirt and re-purpose it into a T-shirt (or tank top, or pillow, or…) with style and flair! They’ll bring a box of tossed out T-shirts so that visitors may do their own “re-make & take” on the spot for $5. Proceeds of the creativity sale will benefit nonprofit organizations supported by 5 Bucks is Change. Most projects will be no-sew, but Kelly’s bringing her machine, so some light sewing will take place–brace yourselves!

If you’re in the area, please stop by the Tee Party to say hello to to Janet and Kelly and do some tee-cycling!–and pick up a free Generation T project card while you’re at it.

Maker Faire NC 2011
NC State Fairgrounds
Gov. Kerr Scott building
1025 Blue Ridge Blvd.
Raleigh, NC 27607

The event happens this Saturday June 18, 2011 from 10 am to 5 pm. Entry: Adults $4, Kids $2, Under 6 Free!

[ Comments Off on Raleigh, NC @ Maker Faire NC ]

From Our Readers: Juno!

A tale of three sisters… Juno, Rosy, and Jasmine are three magnificent and creative sisters who I’ve known since my youthful days in New Hampshire. They recently played pivotal roles in a very special DIY project for Rosy, who got married last month in Paris. Here is a brief time line of the crafty wonderland, executed over an incredible number of modern social media platforms!

December 30, 2010 from Jasmine, via Twitter, via Skype: Megan, I just Skyped with Rosy and she showed me the T-shirts her friend Kit printed on that Juno will turn into a wedding dress for her.

My interest was piqued as I immediately tweeted back for more information! Eventually, I connected with Juno after she heard that I’d be in town to teach T-shirt workshops, when I can potentially catch a glimpse of the work in progress…

March 7, 2011 from Juno, via Facebook: How long will you be up here for this weekend? I’ve made Rosy a crazy art wedding dress with block prints by a friend of hers from your pattern—would love to cross paths with you and take a picture of you in it if the timing worked.

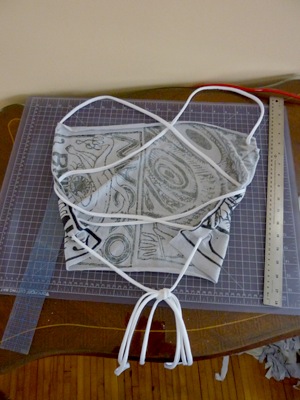
And Juno finished the gown (Tying the Knot, project #108 in Generation T; 108 Ways to Transform a T-shirt), and the timing worked, and I tried on the dress at the yoga barn before our yoga class, and we took some pictures! Then, we fast forward to after the wedding…
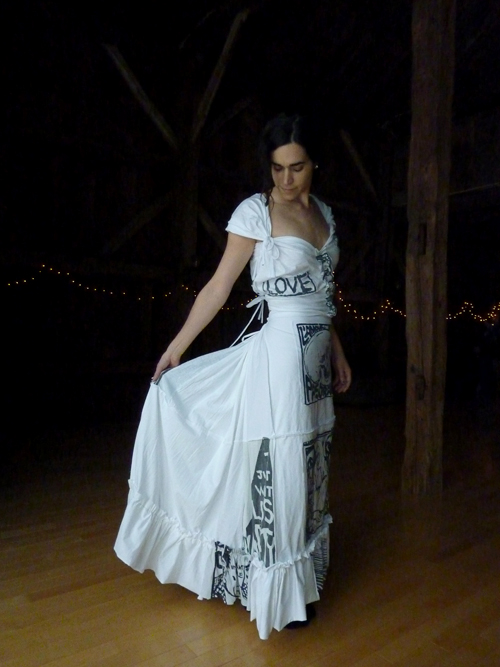
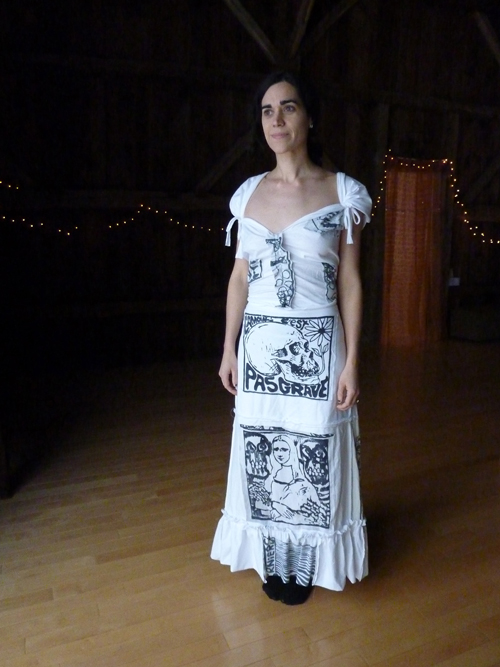
May 12, 2011 from Juno, via email: Sorry it’s taken me so long to get the wedding dress post up. The dress was fabulous—Rosy loved it and felt it was entirely her. The whole process made me excited to sew more and learn to make some easy clothes.

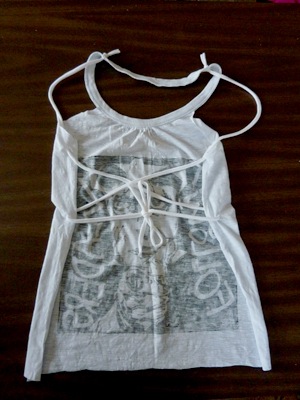
Oh, happy day! Now let’s take  look at that process. Here are some of Juno’s alternate versions for the bodice: the All Strung Out tank top, project #88 plus a combination of All Strung Out and the Shoulder Chic tank top, project #15. For more pictures of the whole process of acquiring the hand-printed shirts, cutting and sewing up the skirt, and the whole grand affair, visit Juno’s blog, Try This at Home

Here are some pictures of Jasmine trying on the dress and the different dress tops! The top she’s wearing below right is the top that is paired with the wedding skirt in the book, but in a different print than the one I tried on — Juno really had all her bases covered!

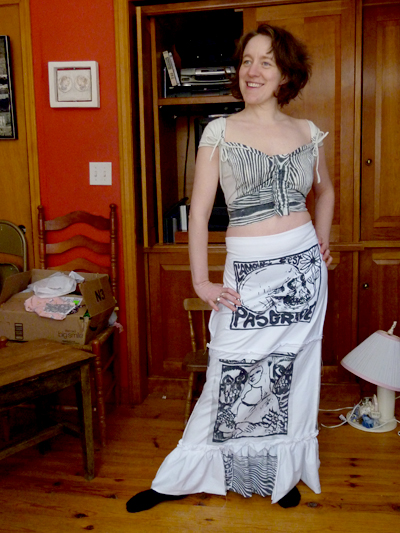
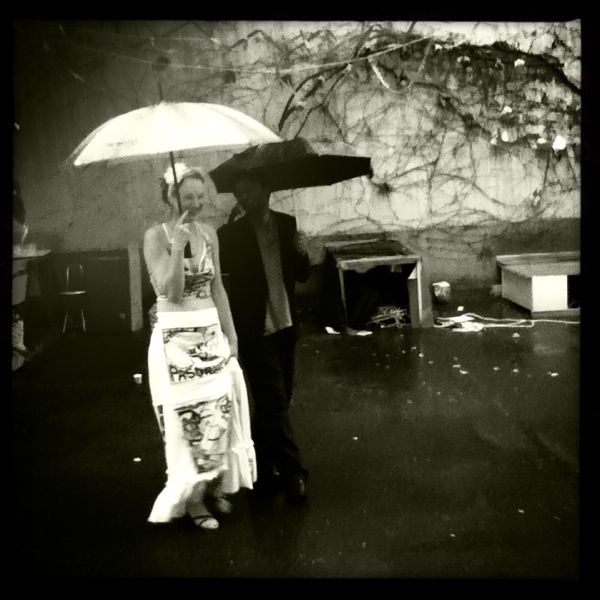
And here, at last, are some totally dreamy photos of the beautiful bride, Rosy! She chose, in the end, to wear the All Strung Out tank top as the top of her gown. Doesn’t she look stunning?

Congratulations to all involved in the beautiful project! (And thanks to Juno, for letting me play a minor role in it all!)

All photos courtesy of Juno Lamb at Try This at Home.
[ 3 Comments | Posted on May 13th, 2011 ]

Letter to a Young T-shirt

In which I introduce you to a piece of T-shirt literature quite different from the T-shirt literature you generally consume around these here parts. It’s a smart and whimsical ode to the life cycle of a that essential staple of a young woman’s wardrobe: the black T-shirt, in all its gritty, sweaty, scissor-snipped truth, by my friend–and one of my favorite writers–Ms. Emily Meg Weinstein. Here is an excerpt (for which I took the freedom of combining three of my favorite lines from the essay):

“You might be a little groggy from the surgery I performed on you last night, as soon as I brought you home from the merch table…. I don’t want you to feel any pressure, but you are the cornerstone of my entire wardrobe. When I can only bring one t-shirt, you will be the t-shirt…. But you, new black t-shirt, are at the center of everything, and we, new black t-shirt, have only just begun.” –Emily Meg Weinstein, from To My New T-shirt

"Chloe Libre" black T-shirt (aka The Predecessor to the New Black T-shirt, third from left), flanked by Chloe Libre gray, blue, and red.

What’s the story behind your newest wardrobe essential? Thrift store wonder, merch table masterpiece, vacation souvenir, or refashioned rescue from the dresser drawer?

Please share in the comments. In the meantime, here’s to T-shirt love stories and rock & roll!

[ Comments Off on Letter to a Young T-shirt | Posted on March 24th, 2011 ]

How to: T-shirt Hooded Scarf

Hat plus scarf? Yes, please! Pack just one item and save space for other necessary springtime accessories. In honor of the first full day of spring (the official start to the new season) and our bidding goodnight to winter, I present “Hoodnight Moon,” project #27 from Generation T: Beyond Fashion. This hooded scarf will bring out the kid in you. Pretend that you’re a mysterious spy in a foreign land… Wrap yourself up and hide from that not-yet-summery-breeze… Wear it to walk your dog, keep a low-profile at school, or take a late-night trip to the deli to buy a pint of ice cream and the next morning’s paper.

Make it:

Excerpted from Generation T: Beyond Fashion (Workman, 2009).

[ 5 Comments | Posted on March 21st, 2011 ]

I Love to Create: A Shoe Travel Bag!

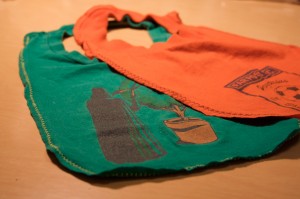
Living in New York, my shoes get especially dirty (it’s a special kind of filth). On the occasion that I’m traveling away from New York (which I am very soon!) and packing for that trip, I like to protect the clothes in my suitcase from all of the grime that collects on my shoes. (The streets may be paved in gold, but that’s definitely not what’s sticking to the soles of my shoes.) Here’s a simple project that makes use of an old T-shirt, requires very little sewing (you use the T-shirt hem as the drawstring casing!), and keeps the rest of your wardrobe fresh and clean. And, because the bag is made from an old T-shirt, it’s easy enough to toss in the laundry when you get home and unpack.

Materials:

-T-shirt (M or larger)

-Ruler

-Scissors

-Sewing machine (with a ballpoint needle and thread), or Needle and thread

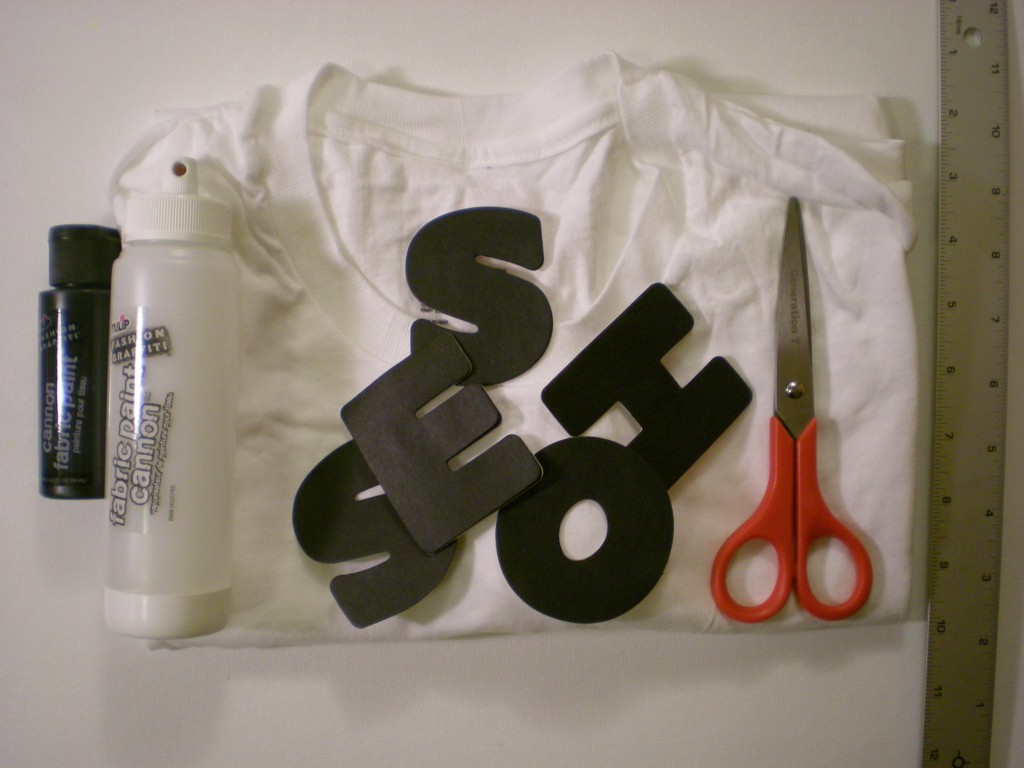
-Alphabet stickers (or make your own; I used letter-shaped sticky notes)

Fabric paint and paint cannon (black)

-Safety pin

Make it:

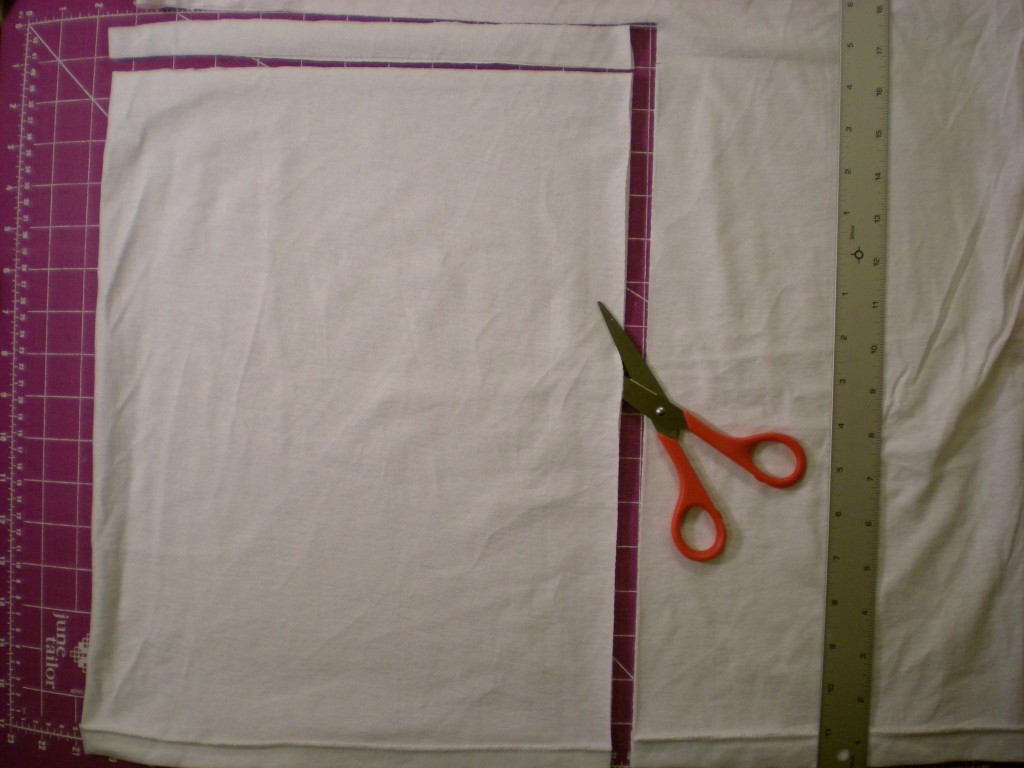
1. Turn the T-shirt inside out and lay it flat. Measure and cut a 12″ x 16″ rectangle extending in from one side and up from the bottom hem. Cut a 1″ strip from the top of the rectangle, through both layers. Set aside the strip.

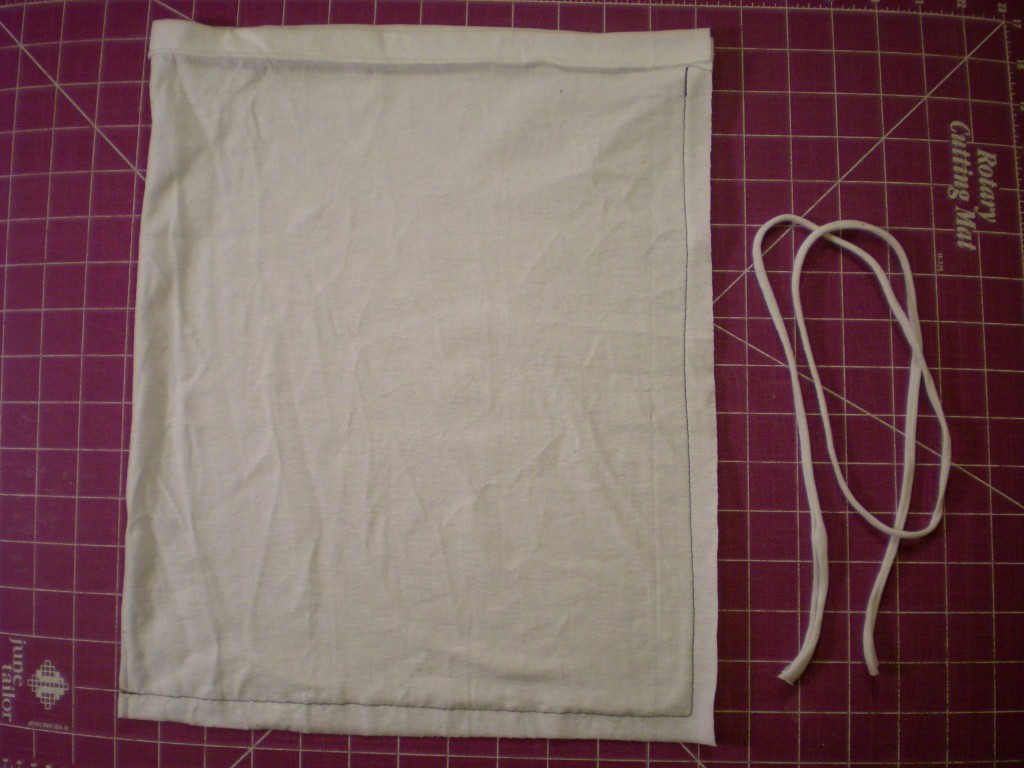
2. Sew a straight stitch along the two cut edges of the rectangle, leaving a 1/2″ seam allowance, and stopping at the hem (this becomes the drawstring casing. (I used contrasting thread for visibility, but matching your thread to the fabric color is recommended.)

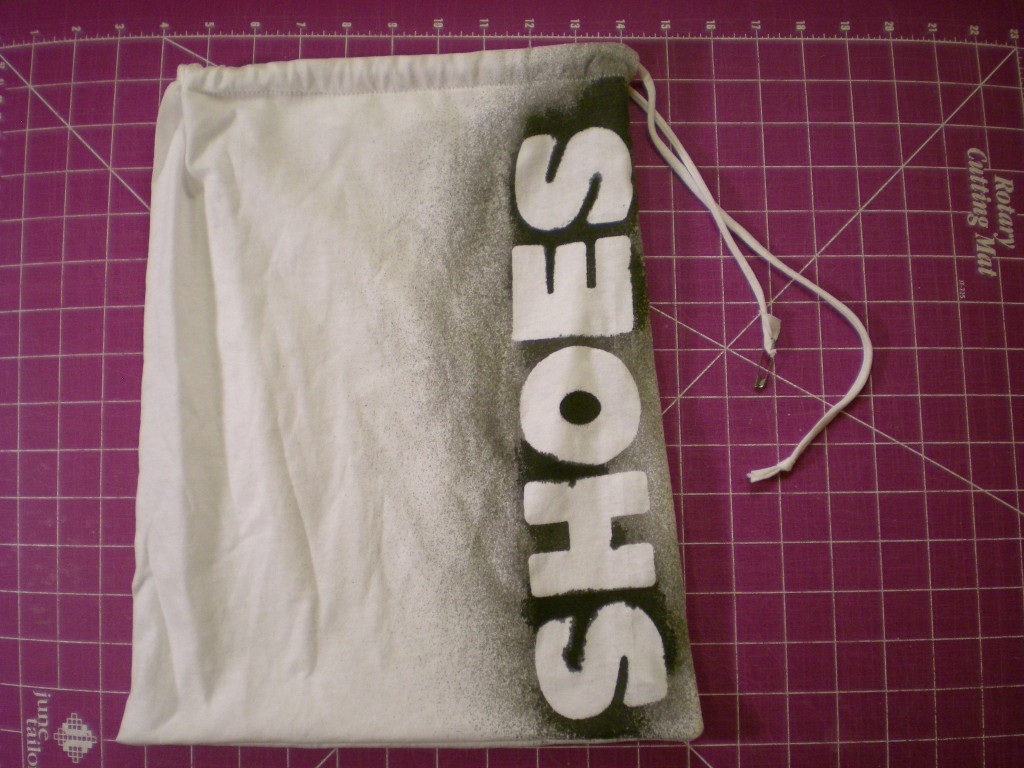
3. Turn the bag right side out and lay it flat, oriented with the hem (the opening of the bag) at the top. Stretch out the fabric strip to make a drawstring cord and set it aside again. Arrange the letters across the side of the bag. (Note: Use stickers to achieve a “clean” edge along the letters…I like the rough edges that a little paint seepage creates, so I let the edges of my letters curl up a bit.)

5. With the fabric paint, spray lightly over the letters and let dry completely. (Paint will seep around the sides of the letters that are not sealed flat, creating a rough-edged look to the lettering.)

6. Carefully peel off the letters to reveal the reverse silhouettes. Attach a safety pin to one end of the cord and draw it through the entire drawstring casing. Remove the safety pin and tie the ends together in a knot.

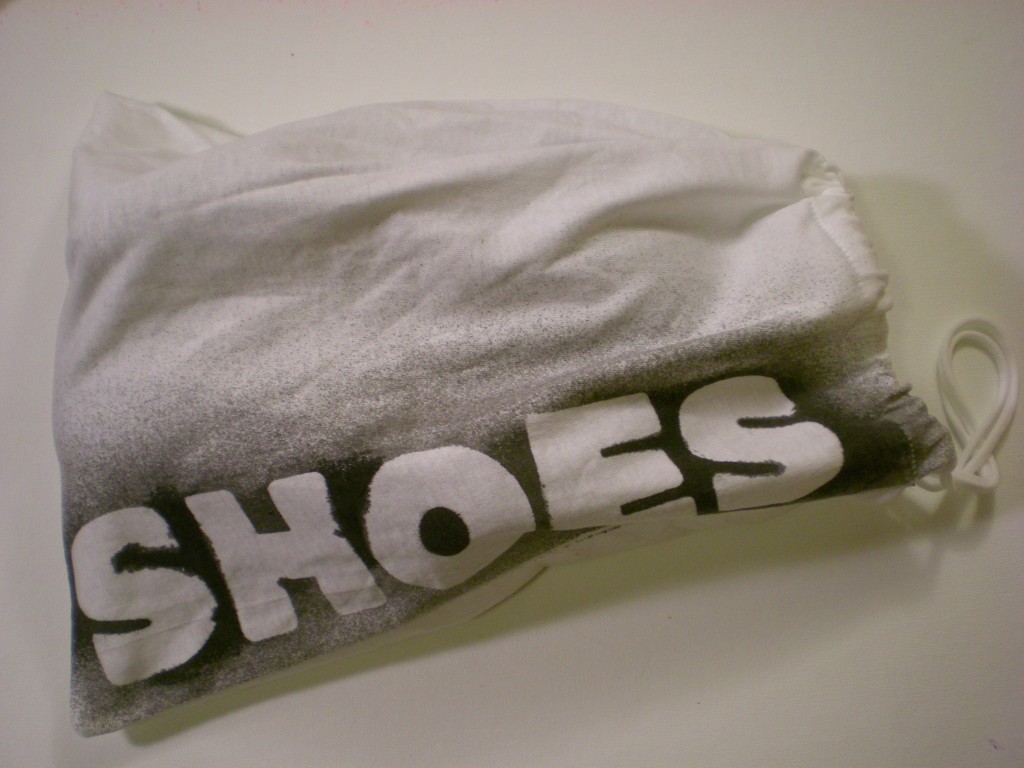
7. Now spin the globe, land your finger, and buy a ticket! If your shoes are made for walking, this T-shirt shoe bag is made for packing. Bon voyage!

Variations:

-Differentiate your various shoe stashes by making multiple bags–do away with the generic “shoes” label and instead indicate heels, flats, sneakers, and so on.

-Scrap the shoes altogether and use the bag to pack pajamas for a slumber party!

P.S. Happy National Craft Month! How will you celebrate?

[ 3 Comments | Posted on March 1st, 2011 ]

Plymouth, NH @ Holderness Artward Bound

Because there’s nothing quite like March in New England, I’m heading north with Generation T to spend quality time with some creative teenagers at Holderness School as part of an artist-in-residency program called Artward Bound (like Outward Bound, but with art!). I’ll be sharing the time and space with eight other artists, who are all working around the central theme: Re-make it New. According to the mission and description of the 2011 program, we will “explore and celebrate…invention and resourcefulness. Re-source, re-use, re-make, re-balance, re-mix, reflect are the keywords that allow us to effectively tap the past, within the present, in order to construct a creative and sustainable future. Artists and performers of every kind are confronted with the daily challenge of making something new out of what is before them. It is said, ‘Necessity is the mother of invention.’ Never has that been more true, than in the eco-era of today. Invention is the ability to bring dissimilar ideas, tools, experience, and materials together in ways that surprise, instruct and lead.” That sure sounds all right to me!

Though the daytime class sessions are private, the evening performances are open to the community (including two eco-fashion shows premiering my students’ T-shirt refashion work) , and I’ll be posting more information about them as it becomes available. In the meantime, we’ll be sure to post plenty of pictures to share our progress throughout the two weeks that we get creative together!

Materials for the Generation T fashion workshops have been generously provided by the following sponsors:

[ 2 Comments ]

From Our Readers: Izzy!

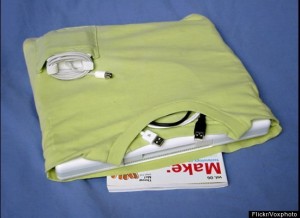
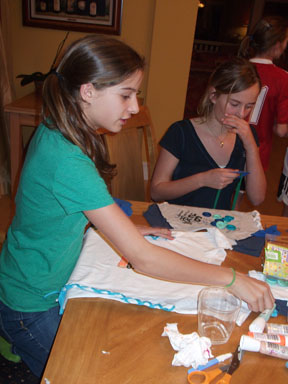
Izzy from New York made the T-shirt laptop cozy included in the 8 Ways to Transform a T-shirt roundup we featured back in December, and get this…she made it without even looking at the instructions! Very cool. It’s pretty impressive to be able to look at a finished project and figure it out in reverse — and have it come out looking as awesome as Izzy’s project does! Not to mention, she reports that she had tons of fun making the laptop cozy, too–which is of course, pretty darn sweet.
[ Comments Off on From Our Readers: Izzy! | Posted on February 7th, 2011 ]

From Our Readers: Jessie!

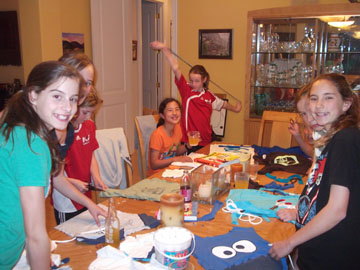
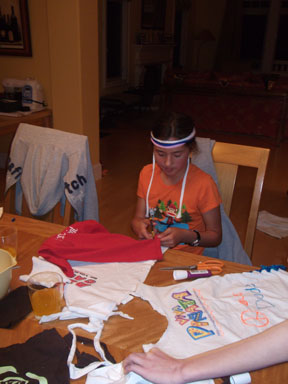
While I was wandering the halls at CHA in Southern California (more details to come!), there was a surprise Tee Party brewing up north in the Bay Area. It was Jessie’s 12th birthday, and she and six of her pals were quick to dig into a pile of her brother’s old tees (excellent source, by the way), scissors, fabric paints, and copies of Generation T and Generation T: Beyond Fashion (of course) and styled a whole new wardrobe.

They each made a version of Outer Lace (project #16 from Generation T). And, they even choreographed dance moves to stretch out the T-shirt hems into cords!
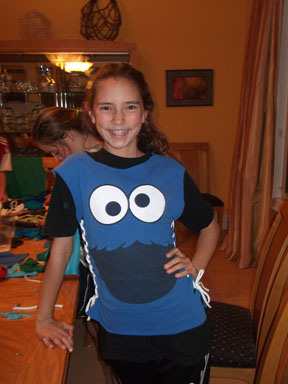
Fashionably, they used their scrap pieces as headbands, bracelets, and other accessories.

They swapped T-shirt cords so they could each have contrasting color laces down the sides.

And when the birthday girl has an ear-to-ear grin to rival Cookie Monster’s, you know it’s a success!
Want to throw your own Tee Party? Here’s how.

[ 3 Comments | Posted on February 3rd, 2011 ]

From Our Readers: Lauren!

Lauren was lovely enough to attend one of my book tour events in the Seattle area in summer 2009. Last spring she hit up Chapter 4: Kid Rock, in Generation T: Beyond Fashion, for all her baby showering needs that season. Here are the pretty sweet gifts that she stitched up:

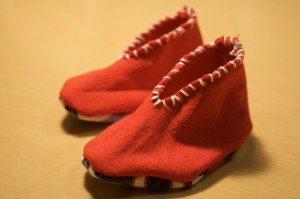
Playing Footsie baby booties (project #48).

Baby Back Bib (project #53).

Baby Back Bib (project #53) with appliqué.

Too Cool for Drool burp cloths (project # 50) with colorful zigzag stitching.


[ 3 Comments | Posted on January 18th, 2011 ]

8 Ways to Transform a T-shirt (via HuffPo)

Add another 8 T-shirt projects to the hundreds of Generation T projects you’ve already got in your arsenal! This slide show collection includes projects from DollarStoreCrafts, Makezine, SuperNaturale, and more–courtesy of Care2’s Becky Striepe. Make’s T-shirt laptop cozy is shown here–plus a pillow, a quilt, a skirt, a necklace, a grocery tote, an appliqué, and…a pair of T-shirt undies!

And, 8 must be the hot little number because here are another “8 Ways to Recycle that Old T-shirt” posted by Valley News Live (list by Raquel Fagan; provided by Earth911).

[ 5 Comments | Posted on December 29th, 2010 ]