Posts Tagged ‘T-shirt refashion’

From Our Readers: Lindsey

Last month, I was alerted to a DIYer named Lindsey over at Hello Hydrangea blog, who seeks out inspiration in books and across the web to make her own designs! Here, inspired by Generation T, she discovered a new T-shirt recon that she has dubbed “Dinosaur” because it reminds her of the spikes on a triceratops.

I love it because it reminds me of a dissection or x-ray vision, with a strong, colorful spine running down the back! Either way you slash it, it’s amazingly quick and easy to make — check out Lindsey’s tutorial on Hello Hydrangea here if you’d like to try your hand at it, too.

[ Comments Off on From Our Readers: Lindsey | Posted on December 19th, 2011 ]

In a Class of 3000! Celebration and Giveaway

It’s been less than a year since we celebrated the Generation T Facebook community growing to a whopping 2000 members (and slightly more than a year since we hit 1000 strong), and as of a Monday morning a couple of weeks ago in September, now we have some more nice round numbers to cheer for.

In honor of the milestone, and in thanks for your support of this growing community, I’m giving away one book per thousand Facebook fans (for the math-challenged that’s a total of three books from the Generation T library!). To enter, just share your favorite T-shirt refashion project in the comments either here on the blog or on the Generation T Facebook page before 12:00 noon (that’s EST) on Saturday October 15. Just one entry per person, please! I’ll randomly select the three winners and announce them over the weekend. (Winners will get to choose which book they receive as a prize!)

And please, keep spreading the T-shirt love by sending your DIY-minded friends to the Facebook page — there are many more milestone celebrations to be had!

xo,
Megan/Generation T

[ 13 Comments | Posted on October 14th, 2011 ]

From Our Readers: Aimée!

This photo was enthusiastically submitted by Pearl and the Beard band member Jocelyn while on tour — she spotted Aimée’s sassy red tank top (and Aimée herself!) at a Washington D.C. show and simply had to snap a photo to send to us. (Editor’s Note: Good thinking, Jocelyn! We like your style.) The shirt looks to be a bit of a hybrid of #20 (“It’s My Party and I’ll Tie if I Want To”) from Generation T and #104 (“Knot So Fast”) from Generation T: Beyond Fashion with some gathered sleeve-straps thrown in for good measure.

Cheers to Aimée for her DIY savvy and impressive musical tastes (after the show, Aimée and her brother Paul interviewed the band for his blog, The Reverb Signal) and cheers to Jocelyn for her keen eye for T-shirt refashioning! Oh, and if you haven’t checked out Pearl and the Beard’s Will Smith Medley, please do so immediately. I really can’t stress how important this is.

[ 1 Comment | Posted on August 18th, 2011 ]

From Our Readers: Onyx!

tia haltertopA blast from the past, but still in time for summer 2011! Shortly after Onyx’s dad came to one of my summer 2009 book tour events for Generation T: Beyond Fashion in Portland (sadly, Onyx was out of town!), Onyx made the Pinup Girl halter top at home. Her aunt came over for a visit, and she generously gifted it to her. Instead of using a punk pin for the “pinup” part (the gathers at the front), she used a safety pin and sewed on a barrette–a very cute and creative variation!

Other viable variations include a couple of stitches to keep the gather in place, a button or two (or three!), or a big sparkly bead or brooch. Sum-sum-summertime!

[ 1 Comment | Posted on August 2nd, 2011 ]

From Our Readers: Flossie!

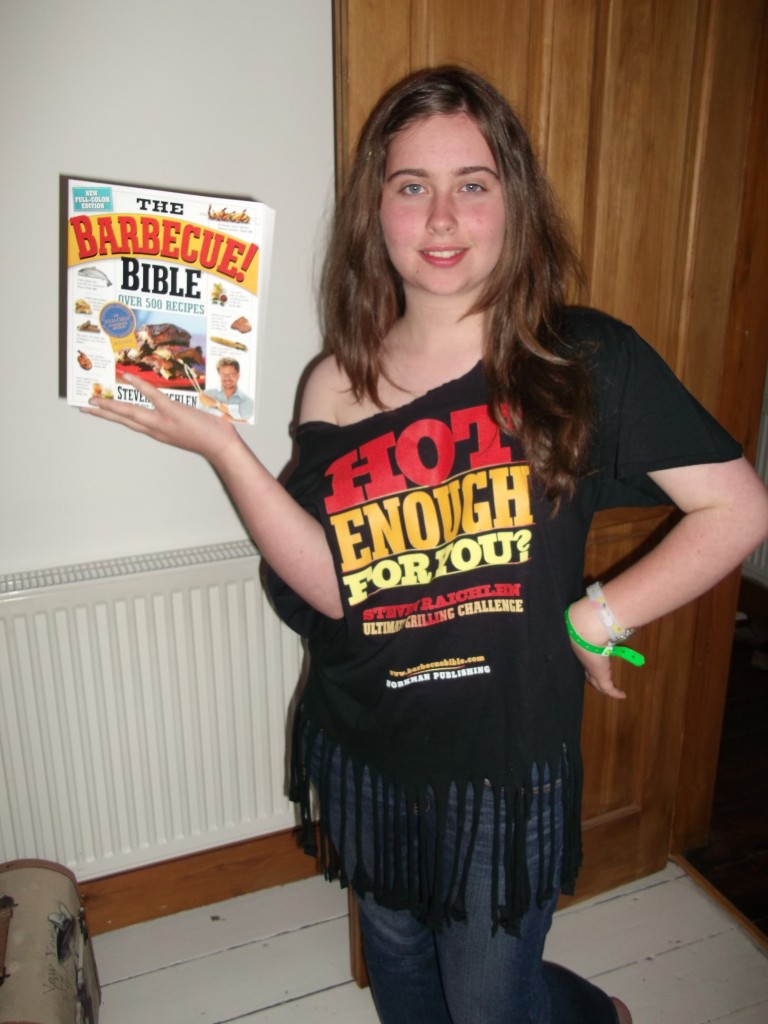
Last weekend, 14-year-old Flossie was recruited by her dad to help him sell barbecue books at Grillstock, a big BBQ festival in the U.K. Needless to say, the oversize T-shirt Flossie was offered to help promote books written by grilling guru (and fellow Workman author) Steven Raichlen wasn’t exactly her slice of pie.  She wisely refused the tee in its original state and slowly inched toward her scissors (and, of course, her copy of Generation T: 108 Ways to Transform a T-shirt). She came up with this no-sew classic hybrid design that combines project #1 “Scoop, There It Is” with project #4 “Fringe Benefits,” then topped it off by turning the tee around so the back logo (“Hot Enough For You?”) became the front. Totally hot, indeed!

[ Comments Off on From Our Readers: Flossie! | Posted on July 7th, 2011 ]

Raleigh, NC @ Maker Faire NC

You know how much we love Maker Faires, so though Megan Nicolay is only able to be there in spirit for this one, Generation T will be there in the flesh…err, paper pulp…err, the crafty minds and nimble fingers of crafty readers Janet Kennedy and Kelly Farrow. This Saturday (June 18, 2011) Janet and Kelly and their team of intrepid recyclers will be using inspiration from Megan’s books, Generation T and Generation T: Beyond Fashion as they demonstrate how to take an ordinary T-shirt and re-purpose it into a T-shirt (or tank top, or pillow, or…) with style and flair! They’ll bring a box of tossed out T-shirts so that visitors may do their own “re-make & take” on the spot for $5. Proceeds of the creativity sale will benefit nonprofit organizations supported by 5 Bucks is Change. Most projects will be no-sew, but Kelly’s bringing her machine, so some light sewing will take place–brace yourselves!

If you’re in the area, please stop by the Tee Party to say hello to to Janet and Kelly and do some tee-cycling!–and pick up a free Generation T project card while you’re at it.

Maker Faire NC 2011
NC State Fairgrounds
Gov. Kerr Scott building
1025 Blue Ridge Blvd.
Raleigh, NC 27607

The event happens this Saturday June 18, 2011 from 10 am to 5 pm. Entry: Adults $4, Kids $2, Under 6 Free!

[ Comments Off on Raleigh, NC @ Maker Faire NC ]

From Our Readers: Juno!

A tale of three sisters… Juno, Rosy, and Jasmine are three magnificent and creative sisters who I’ve known since my youthful days in New Hampshire. They recently played pivotal roles in a very special DIY project for Rosy, who got married last month in Paris. Here is a brief time line of the crafty wonderland, executed over an incredible number of modern social media platforms!

December 30, 2010 from Jasmine, via Twitter, via Skype: Megan, I just Skyped with Rosy and she showed me the T-shirts her friend Kit printed on that Juno will turn into a wedding dress for her.

My interest was piqued as I immediately tweeted back for more information! Eventually, I connected with Juno after she heard that I’d be in town to teach T-shirt workshops, when I can potentially catch a glimpse of the work in progress…

March 7, 2011 from Juno, via Facebook: How long will you be up here for this weekend? I’ve made Rosy a crazy art wedding dress with block prints by a friend of hers from your pattern—would love to cross paths with you and take a picture of you in it if the timing worked.

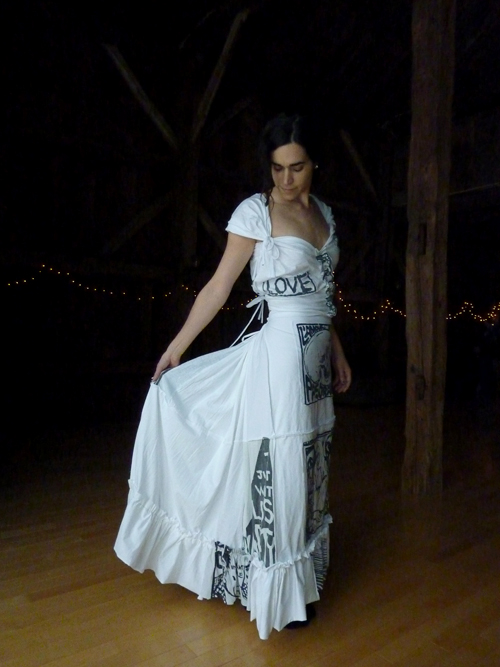
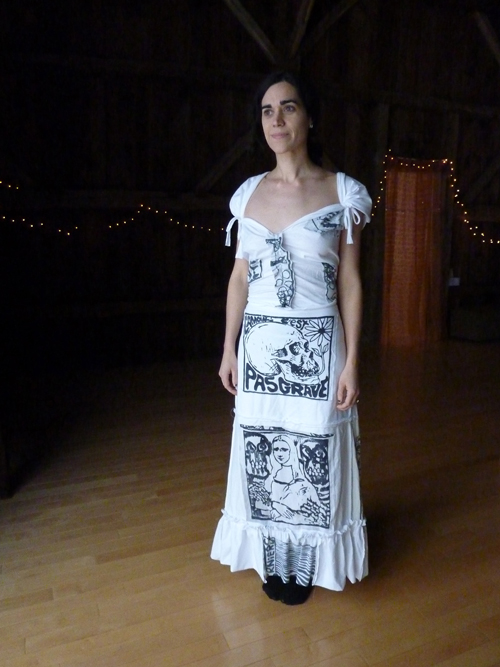
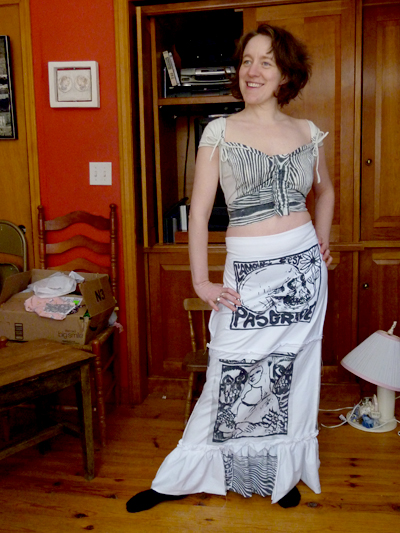
And Juno finished the gown (Tying the Knot, project #108 in Generation T; 108 Ways to Transform a T-shirt), and the timing worked, and I tried on the dress at the yoga barn before our yoga class, and we took some pictures! Then, we fast forward to after the wedding…

May 12, 2011 from Juno, via email: Sorry it’s taken me so long to get the wedding dress post up. The dress was fabulous—Rosy loved it and felt it was entirely her. The whole process made me excited to sew more and learn to make some easy clothes.

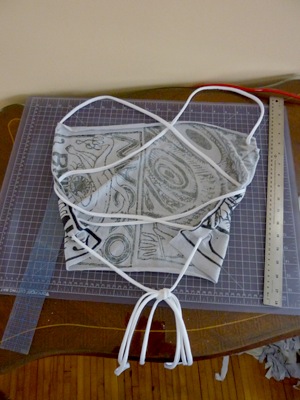
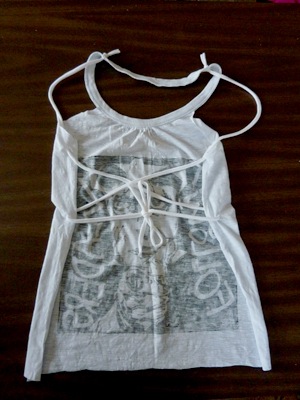
Oh, happy day! Now let’s take  look at that process. Here are some of Juno’s alternate versions for the bodice: the All Strung Out tank top, project #88 plus a combination of All Strung Out and the Shoulder Chic tank top, project #15. For more pictures of the whole process of acquiring the hand-printed shirts, cutting and sewing up the skirt, and the whole grand affair, visit Juno’s blog, Try This at Home

Here are some pictures of Jasmine trying on the dress and the different dress tops! The top she’s wearing below right is the top that is paired with the wedding skirt in the book, but in a different print than the one I tried on — Juno really had all her bases covered!

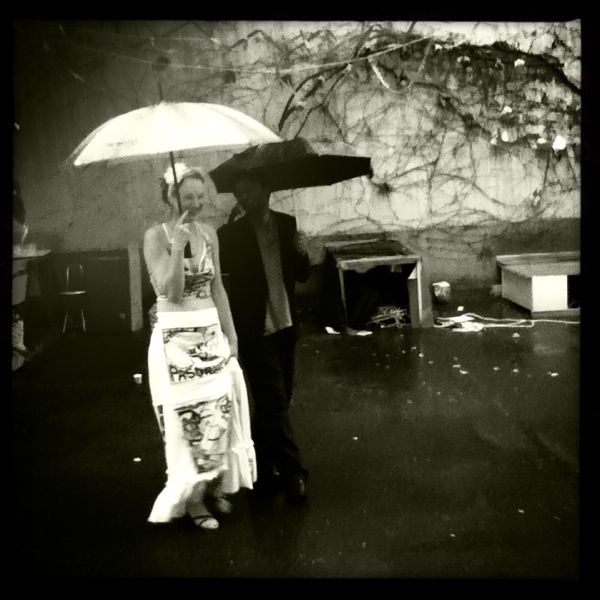
And here, at last, are some totally dreamy photos of the beautiful bride, Rosy! She chose, in the end, to wear the All Strung Out tank top as the top of her gown. Doesn’t she look stunning?

Congratulations to all involved in the beautiful project! (And thanks to Juno, for letting me play a minor role in it all!)

All photos courtesy of Juno Lamb at Try This at Home.

[ 3 Comments | Posted on May 13th, 2011 ]

Generation T: The Next Generation

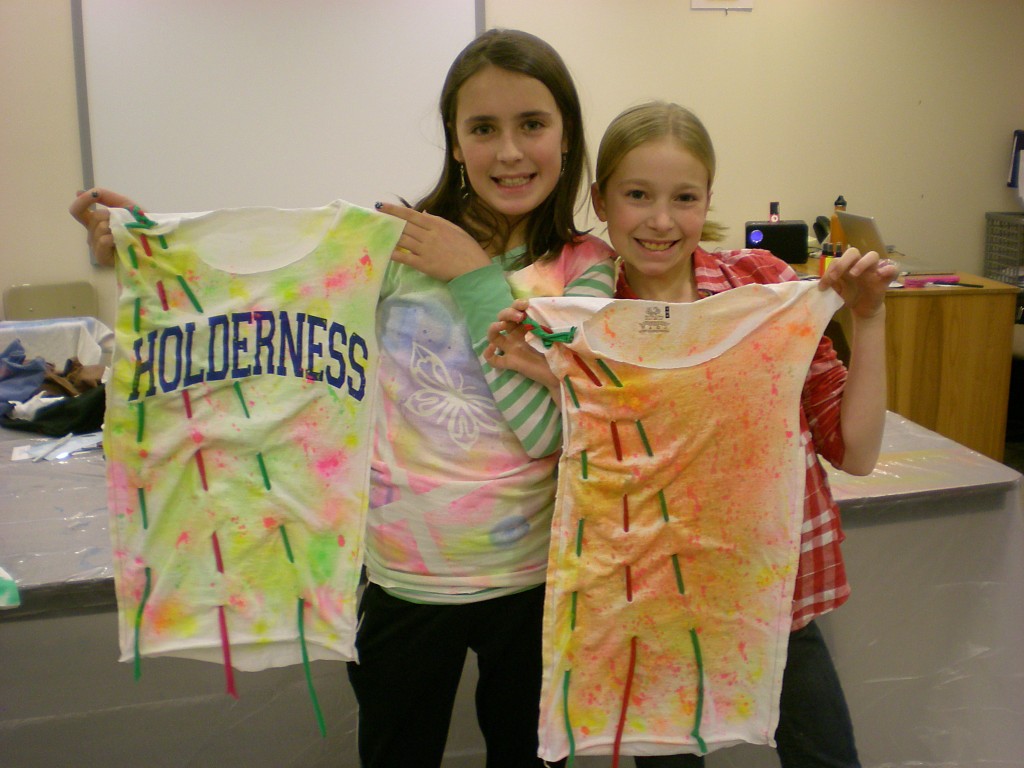
With Mother’s Day yesterday, and Father’s Day just around the corner, today’s post is inspired by those who inspire the next generation of DIYers. Here are some photos from my recent workshops at Holderness School–with my late afternoon crew. Even though Holderness is a high school, the school serves a much wider community in the faculty families that live on and near campus. After the Artward Bound Workshops were done for the afternoon, my late afternoon kids started to arrive (after they got out of middle, elementary, or preschool!).

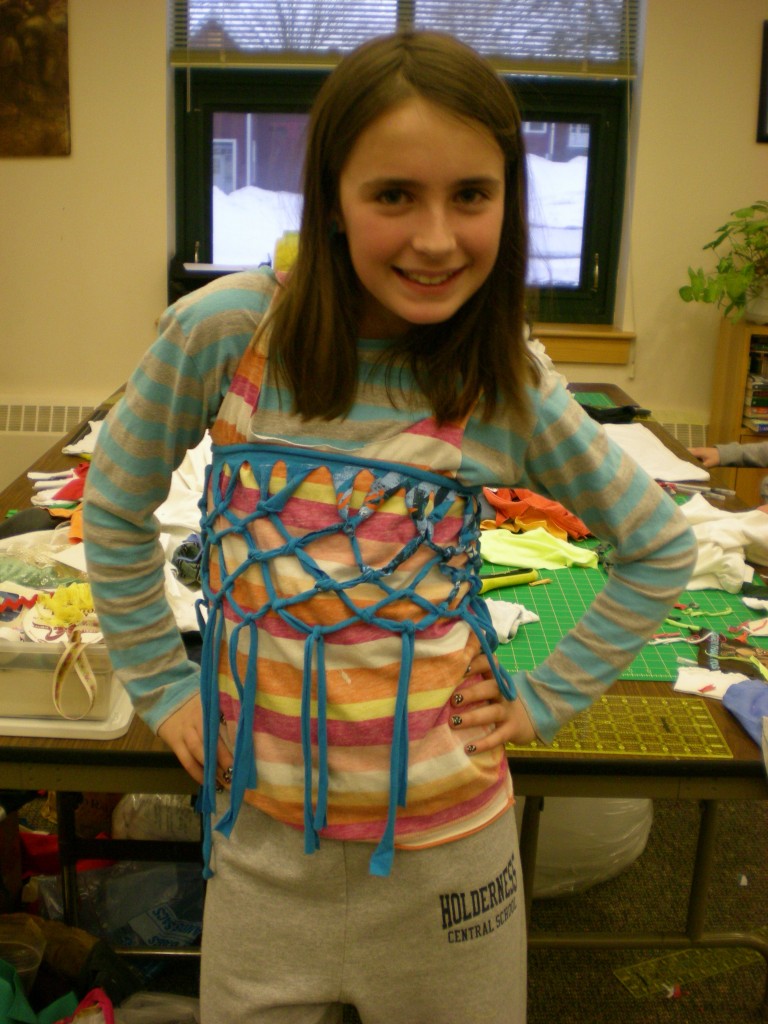
With dad’s encouragement, superstar DIYer Ella showed up almost every afternoon. This particular project is Knotty by Nature, project #44 from Generation T. And, rather than the traditional tube top underneath, she opted to snip a tank top from a colorful striped shirt she found in the donations. She also notes, “You can wear the knotted top around your waist over jeans or leggings!”

Mama Nikki decked out Molly and Mason in their superhero capes and boas (Mighty My Tee, project #55 and Tic Tac Boa, project #115, both from Generation T: Beyond Fashion) which they wore in the student fashion show (and, I’m told, all around the house!). Note: Molly’s skirt is also a T-shirt refashion — an outgrown dress whose top was cut off to make way for a T-shirt waistband!

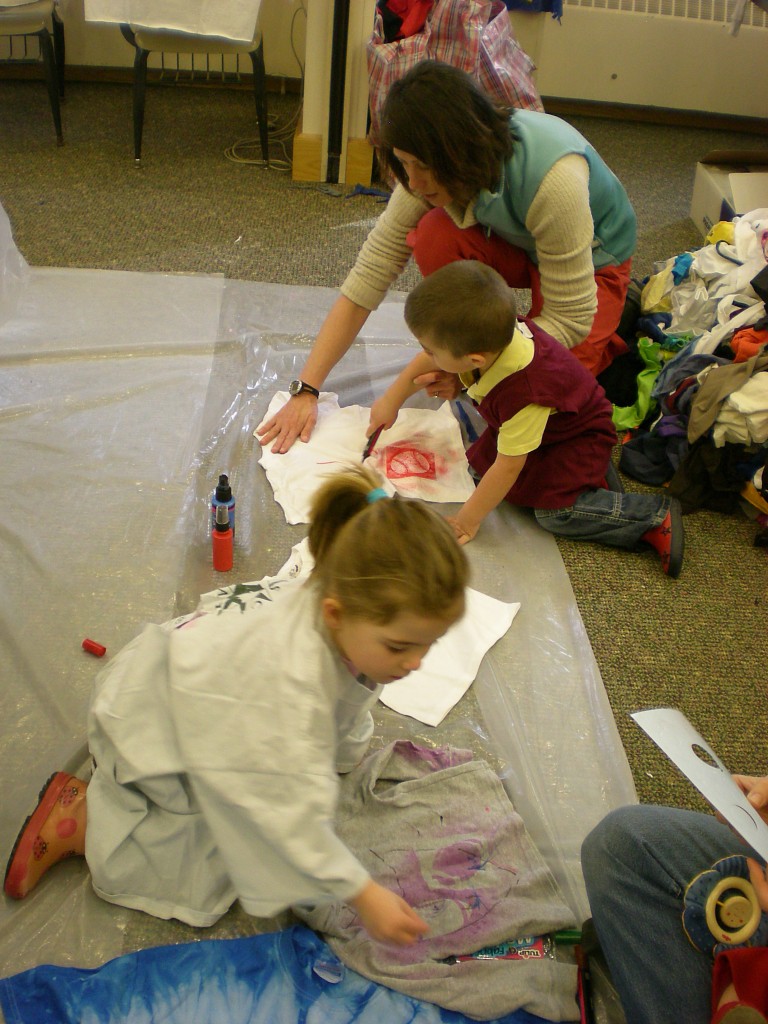
Claire and Michael (who are a little young yet to be handling the sharp scissors) donned T-shirt smocks and, with mom’s help, used fabric markers and fabric spray paints to personalize T-shirts that welcomed their dad back from his 10-day camping trip.

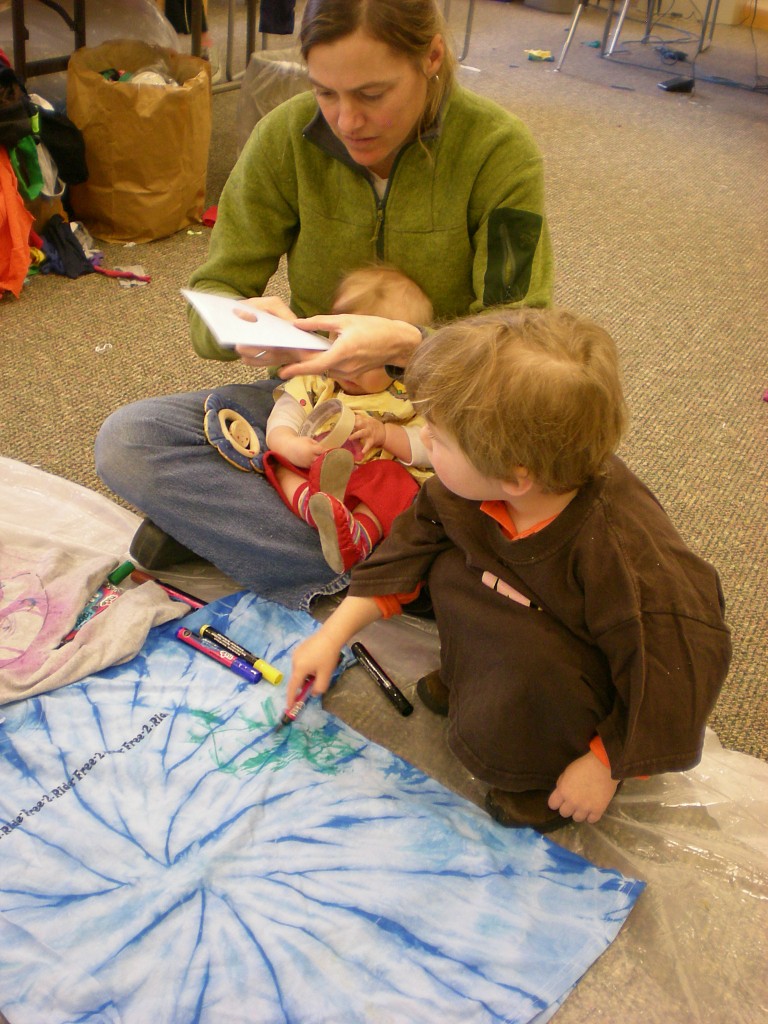
Mama Lindley helped Lindon apply stencils for fabric painting while baby Stella looked on and murmured noises of encouragement.

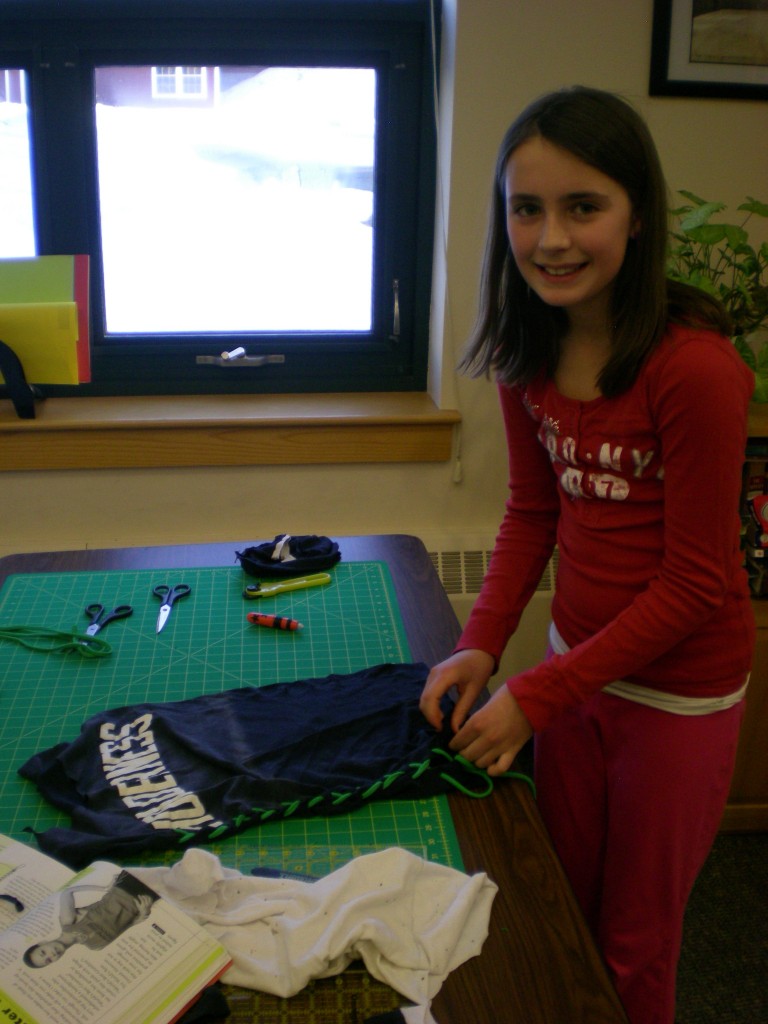
Ella was back for more, following the instructions to make Outer Lace, project #16 in Generation T.

The next day, she brought her pal Chase so they could make matching spray painted tank tops (Sew Easy, project #26, in Generation T).

And Phoebe and Ella appeared together in the fashion show with in their Outer Lace tank tops (and, note the Knotty by Nature top worn as a sassy skirt!).

So here’s to all the parents out there who inspire and encourage kids to pick up scissors or markers or pencils — or any other creative instrument — and DIY. My own parents are two of the craftiest, handiest, creative people I know, and I wouldn’t be here writing this post today if it weren’t for them!

[ Comments Off on Generation T: The Next Generation | Posted on May 9th, 2011 ]

I Love to Create: Spray 4 Ways!

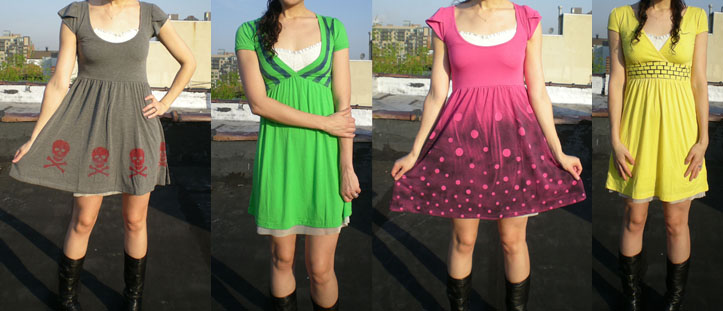
As some of you know, I’ve been just a little bit obsessed with my spray paints lately. And it’s because they’re the perfect quickie spiff-up and surface embellish for T-shirts, pillows, dresses–or any other fabric item you want to spray! Since it’s spring, though, I grabbed up some plain cotton dresses to spray. Here are four different ways to pair those fabric spray paints with templates made from materials around the house including masking tape, stationery stickers, and freezer paper. Pull your spray paints from your holsters!
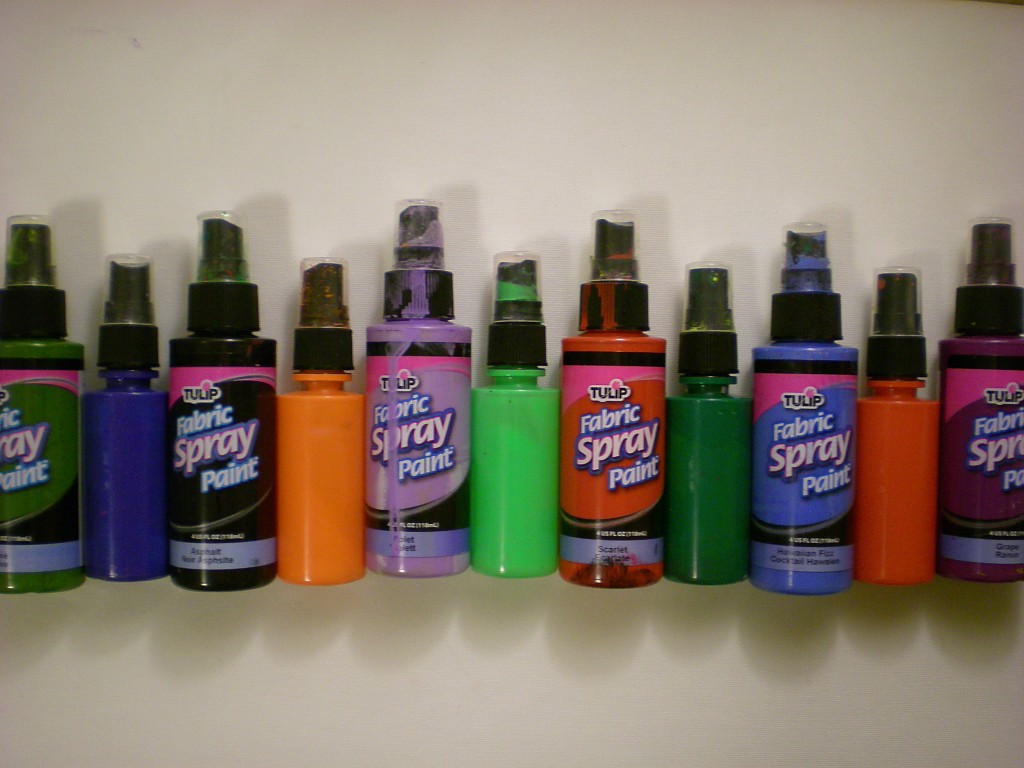
Once your paints are assembled, select your surfaces (in all different colors–though light colors will take the paint best).
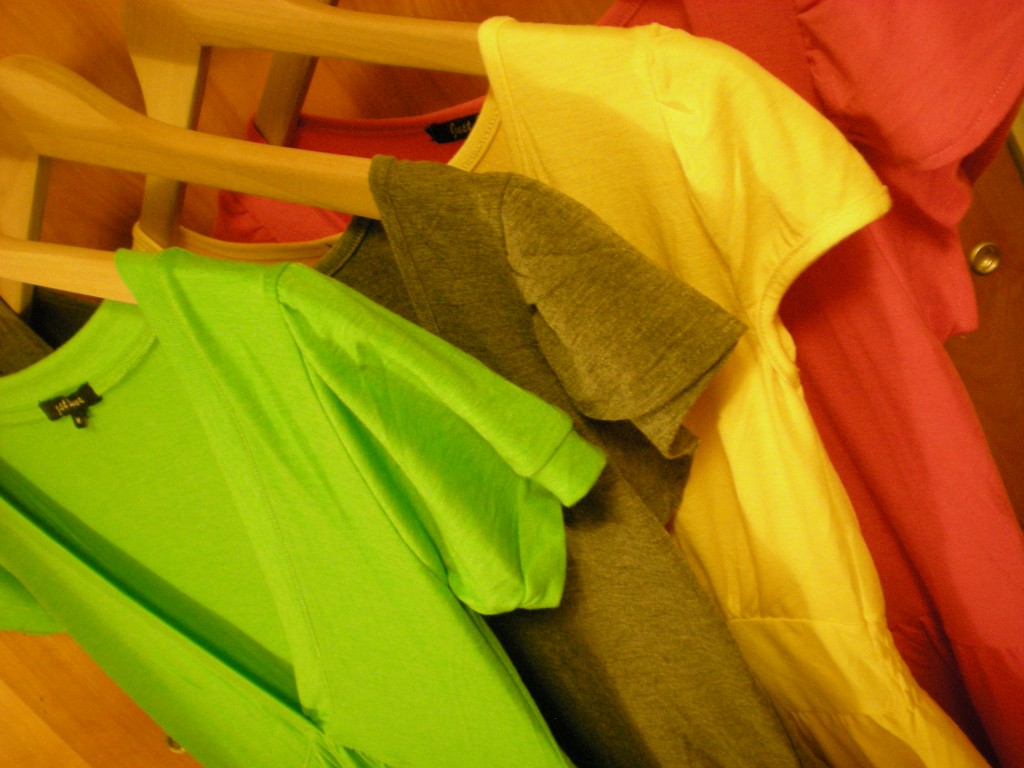
Then introduce any number of “secret weapons from around the house” (items that can be used as templates or stencils to mask parts of the fabric, e.g. freezer paper, permanent marker, a craft knife; map dot stickers; rectangle sticker labels; masking tape) in each of the individual projects below!

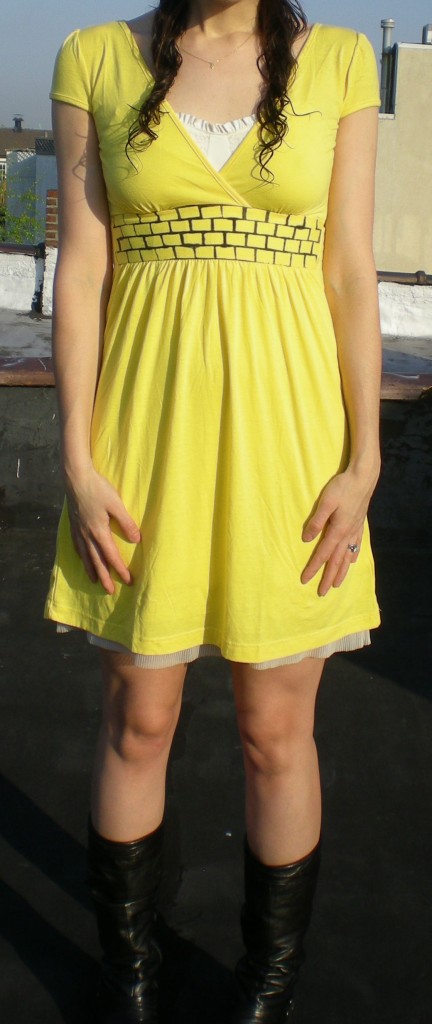
1. Yellow Brick Road

Secret weapon from around the house: Rectangle sticker labels

Originally, my plan was to stick on these labels in a checkerboard pattern to give the dress the feel of a racing flag. But the stickers so easily lent themselves to being bricks, that I immediately thought of the yellow brick road in the Land of Oz.
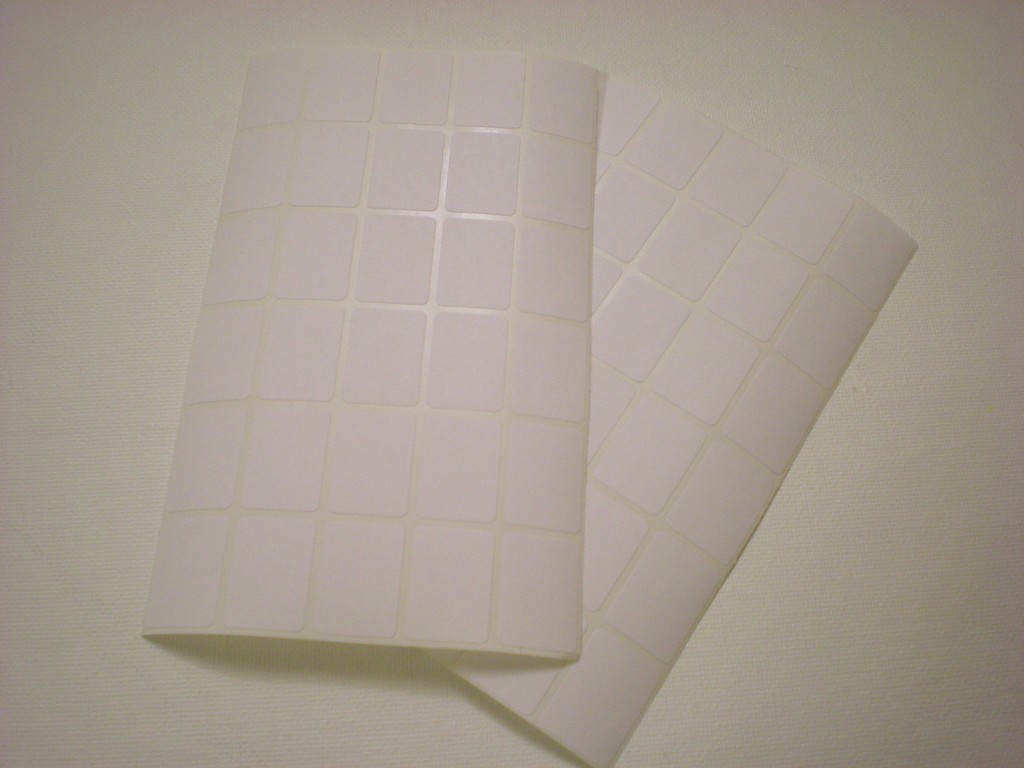
I chose to follow the yellow brick road along the waistband, but you could lay your bricks around the hem of the dress, up and over the shoulder, or a circle them all over the dress. I laid one row of bricks and then stuck down a second row, offsetting the first brick in the second row so that the rest of the stickers in that row would be slightly staggered to create the brick pattern.
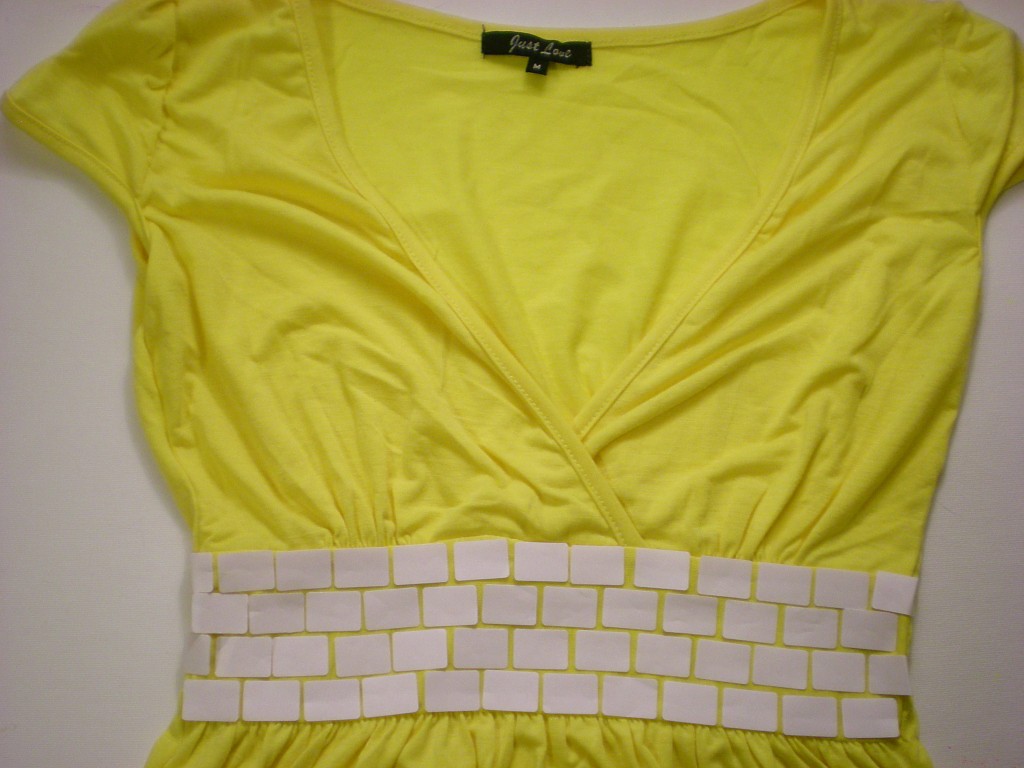
Mask the rest of the garment before spraying (I used T-shirt scraps and paper from my recycling bin) so that you can contain the paint to only the area you want to color. I used black spray paint to make the yellow bricks really pop!
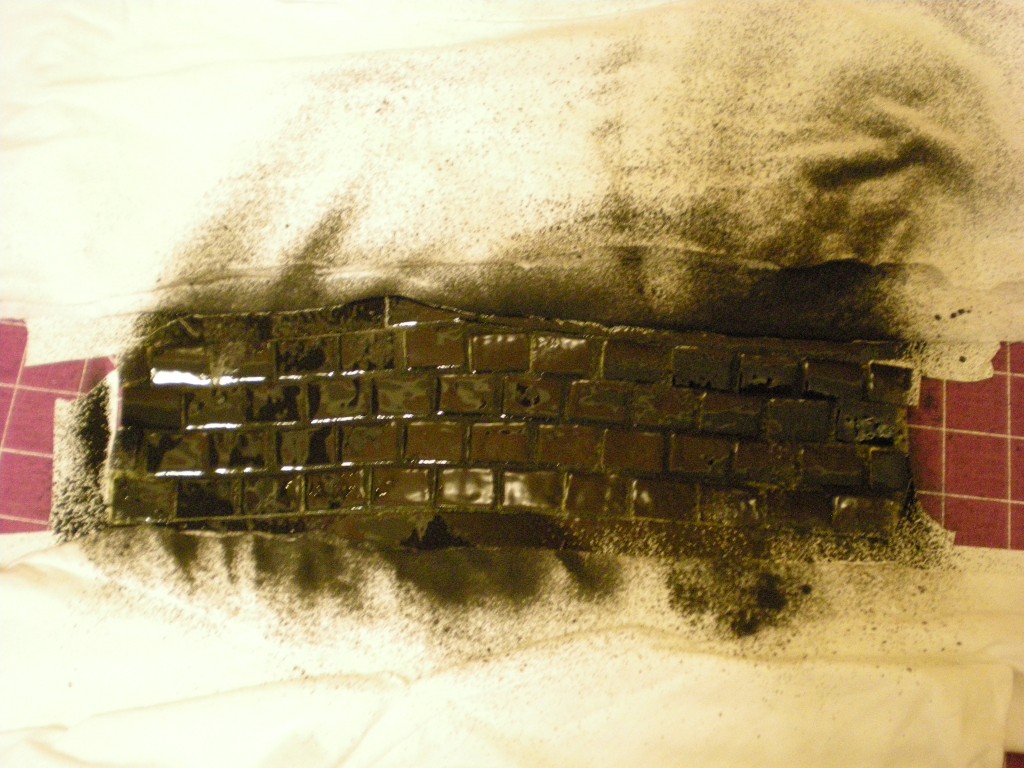
Let the paint dry completely before you peel off the brick stickers and try it on!
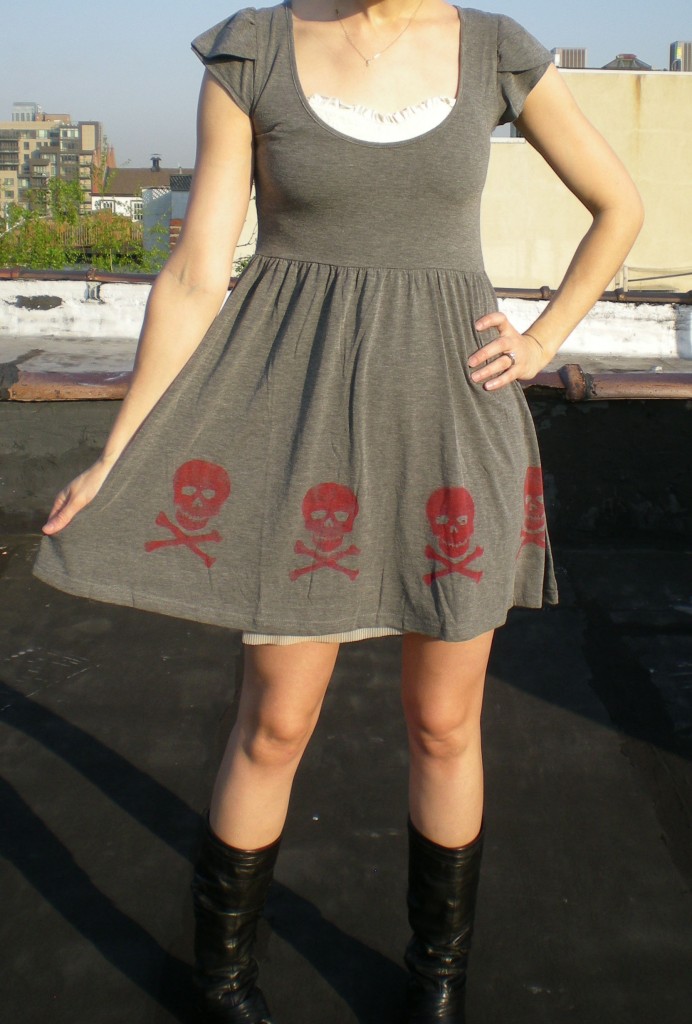
2. Skull & Bones

Secret weapons from around the house: Freezer paper, high-contrast image printout, marker, craft knife, and cutting mat

I chose the classic skull and crossbones as my image to download and print for creating the stencil, but any image is fair game!
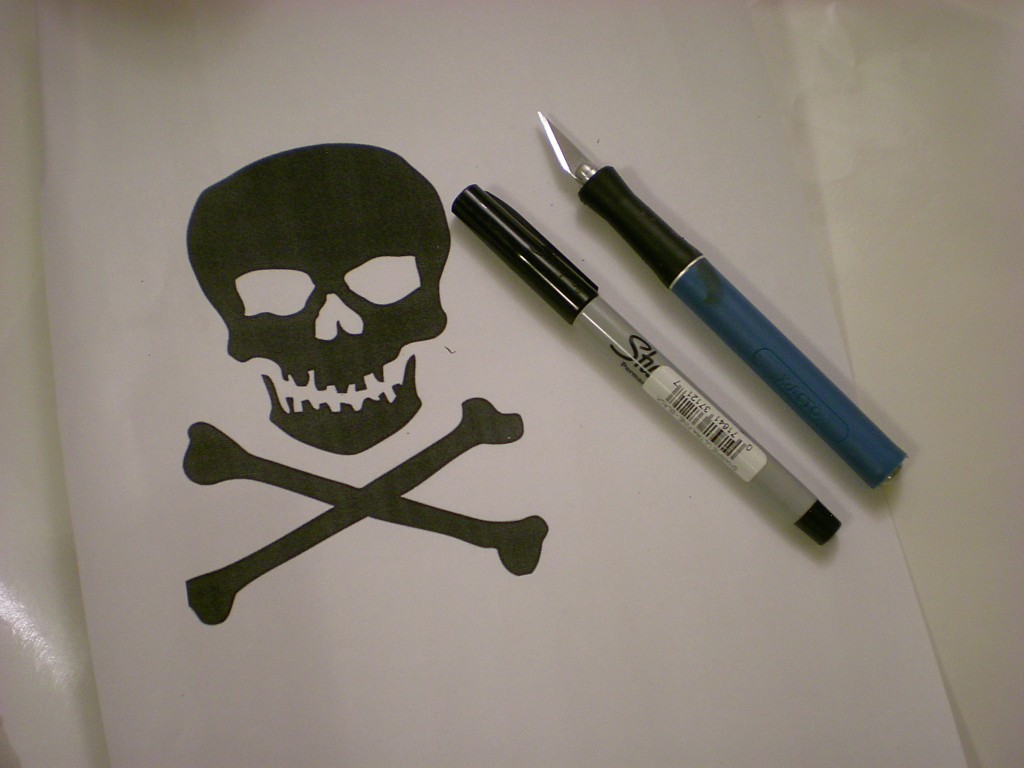
Trace the design onto a sheet of freezer paper.

Then use the craft knife to carefully cut out the shapes.

Tape the stencil onto the fabric surface (I placed it along the hem). Don’t forget to place any loose pieces (in this case, the eye sockets and nose cavity!). I sprayed red spray paint on the charcoal gray surface and reused the stencil to create a pattern around the bottom of the skirt.
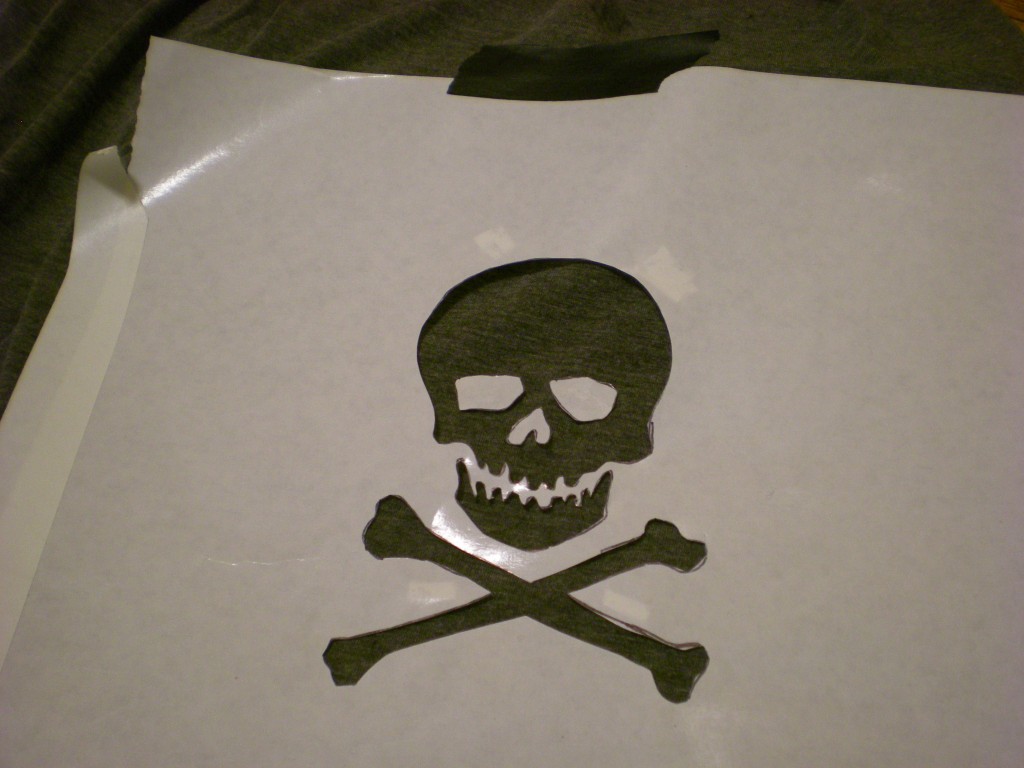
Let each image dry slightly before moving the stencil to another part of the fabric.
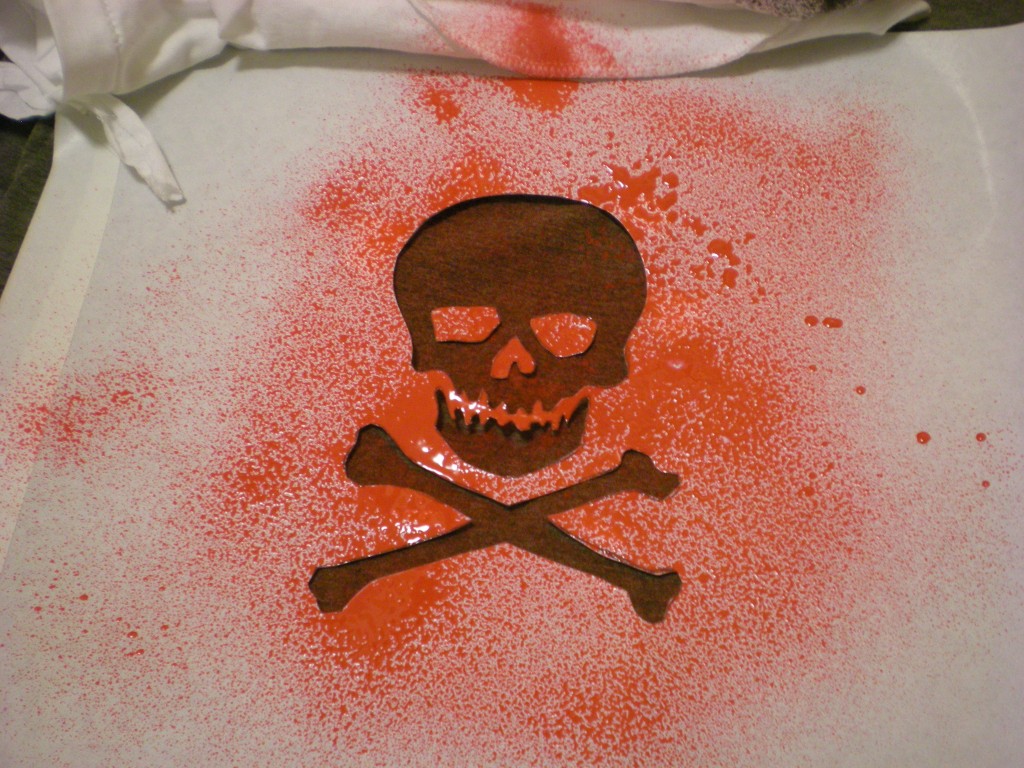
Then let the image dry completely before spraying it onto the back of the garment. Let all the paint dry completely before you try it on!
3. Bubble, Bubble, Toil, and Trouble

Secret weapon from around the house: Map or garage sale dot stickers in different sizes.

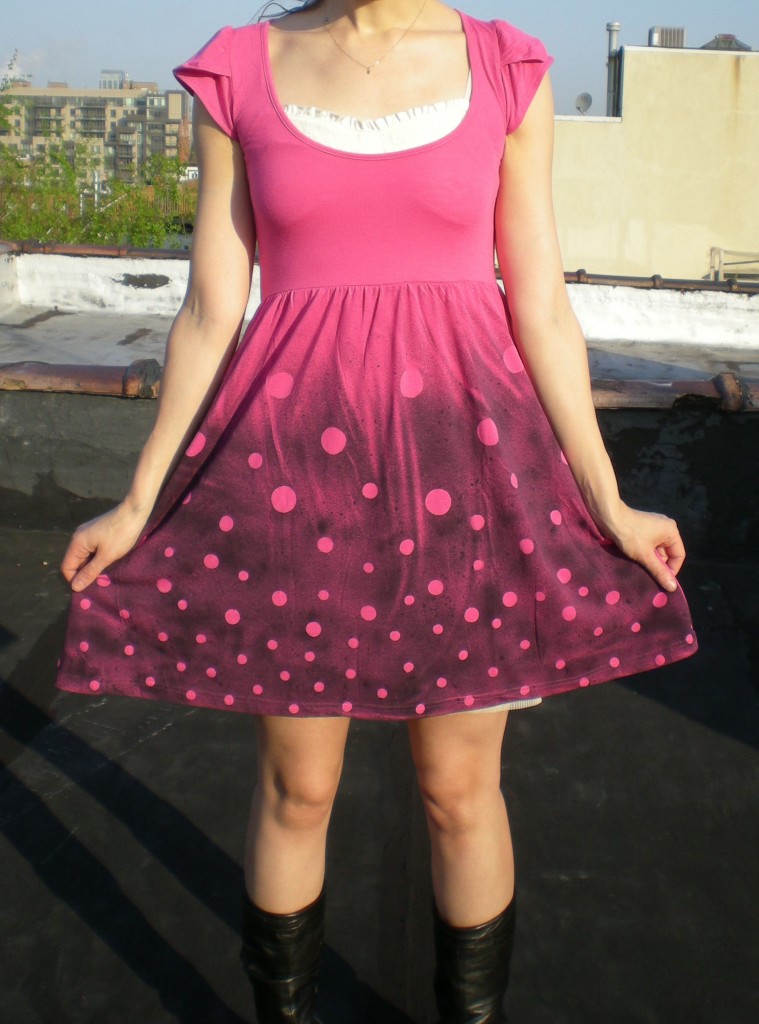
These stickers have so much potential. Beyond mixing up the sizes, you can arrange them into patterns, overlap them, use the surrounding sticker bits to create reverse dots, and so on. I used three sizes (3/4″, 1 1/4″, and 1 3/4″).
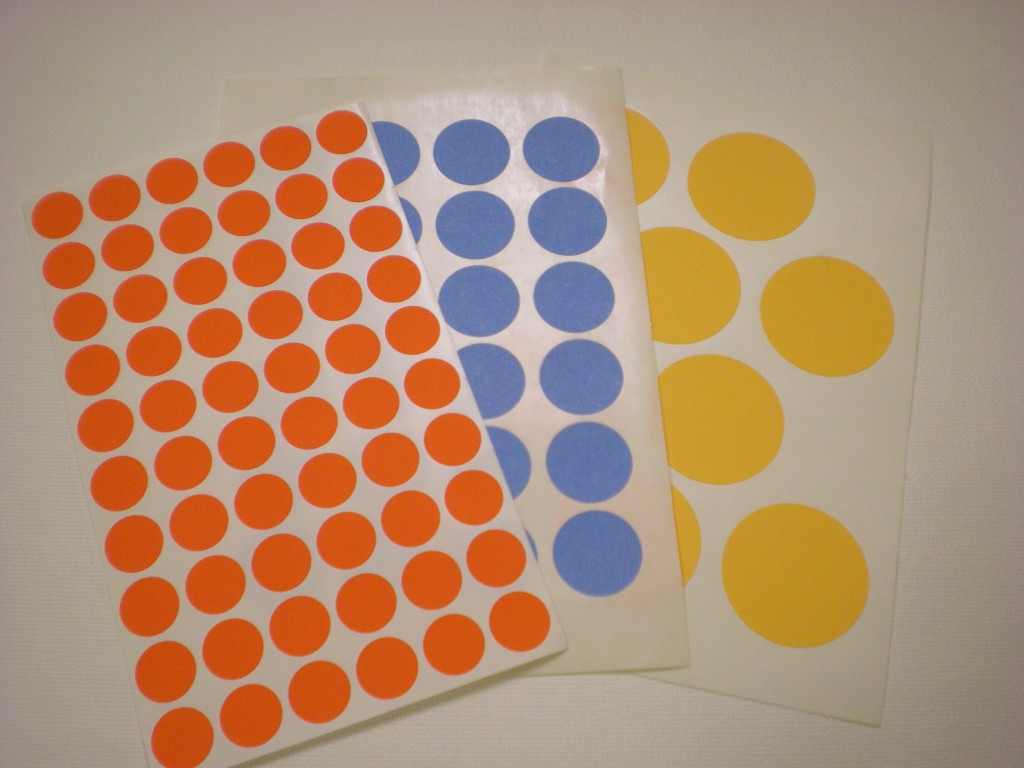
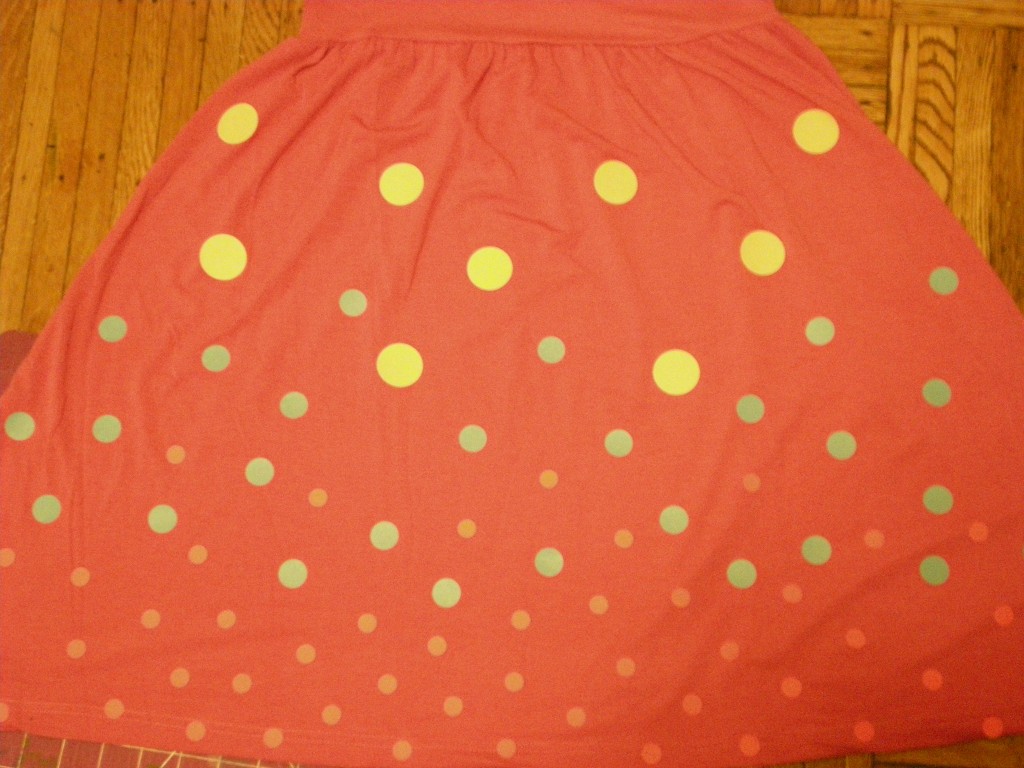
To create the appearance of bubbles rising up to the surface, I started with closely spaced small dots at the hem, then transitioned to more widely spaced medium dots, with the large dots finishing below the bodice.
Mask all the parts of the garment you don’t want to color. I used black spray paint, fading out at the top, to make the pink really shine through! I also allowed the naturally occurring wrinkles caused by the gathered skirt to form “cracks” in the paint.
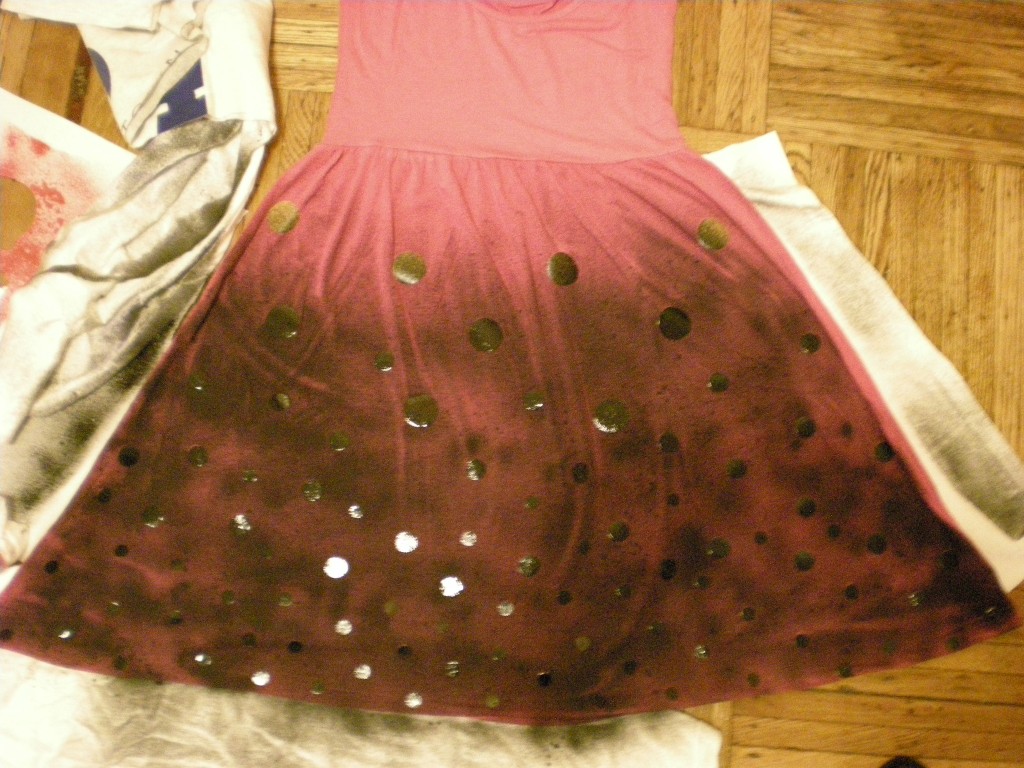
Let the paint dry completely before you put it on. Now that you’ve made your bubbles, go out and make some trouble!
4. Yipes Stripes!

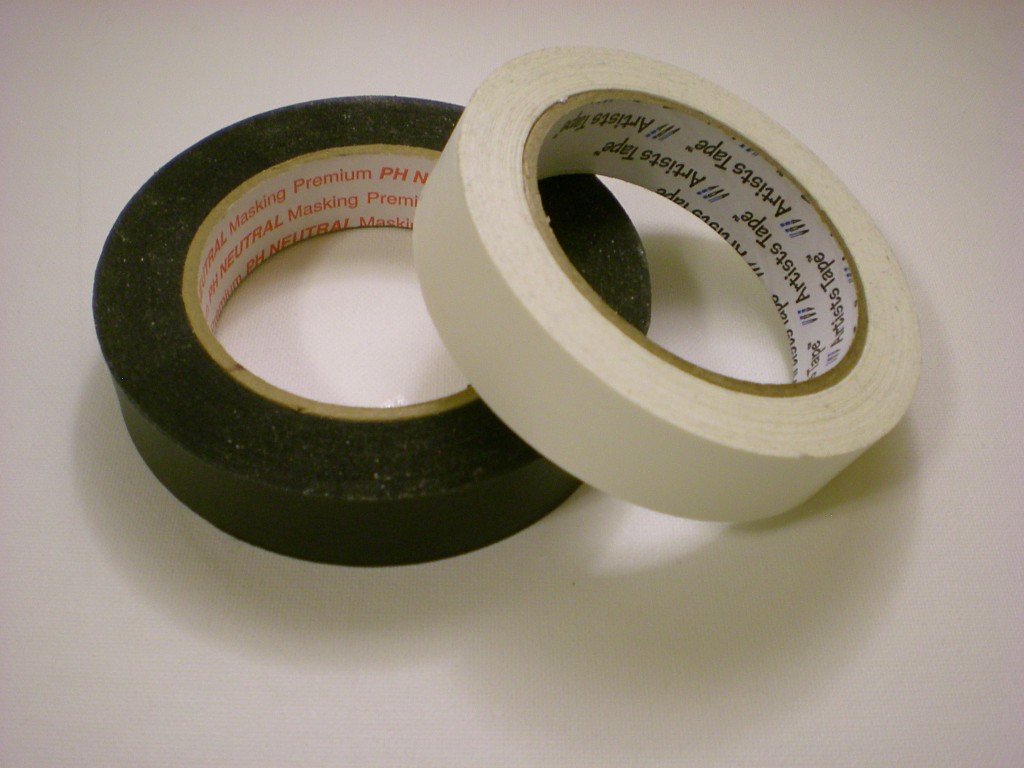
Secret weapon from around the house: Masking or Artists tape

Stripes are just the beginning–you can create plaid, checkered, or gingham patterns with a roll of masking tape. Keep in mind that the width of the tape (and how closely you align them) determines the width of your stripes!
I followed the V-neck cut of the dress to create gently slanting diagonal stripes. Be careful to line up the tape strips carefully in order to keep your design symmetrical and even.
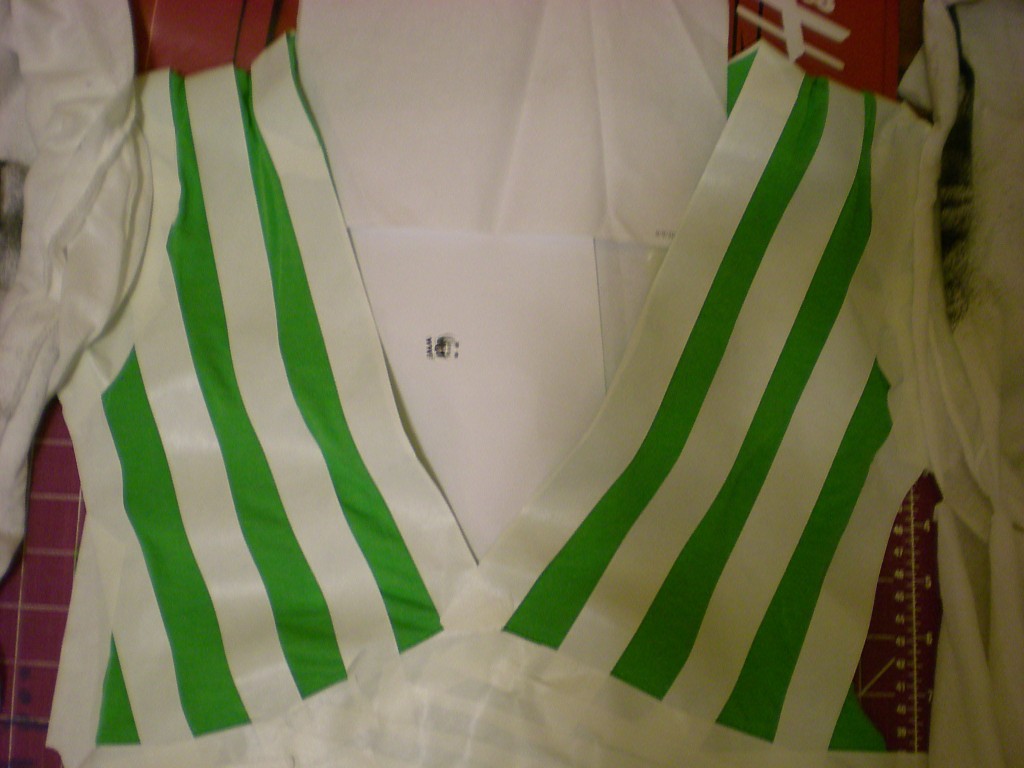
As always, mask the fabric you don’t want to paint! I chose blue spray paint to pair with my bright green frock–a springtime inspiration, for sure!
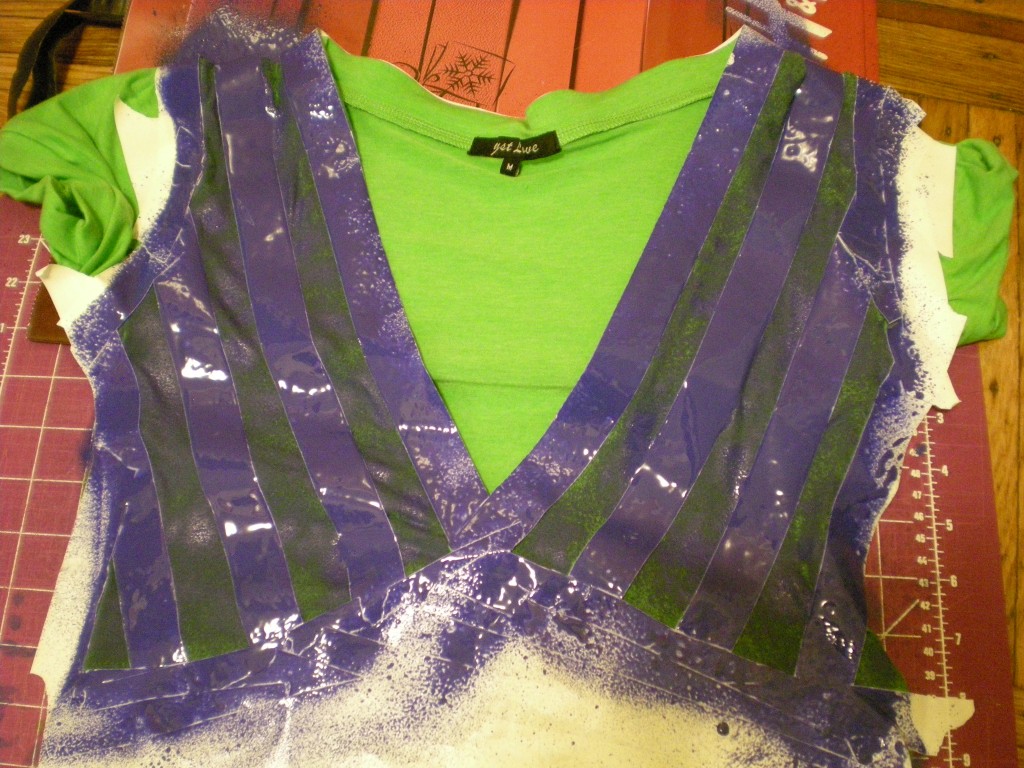
Let the paint dry before peeling off the tape to reveal your sassy stripes!

One, two, three, four — don’t stop now, let’s spray some more! How many more ways can you spray?


[ 20 Comments | Posted on April 26th, 2011 ]

How to: T-shirt Hooded Scarf

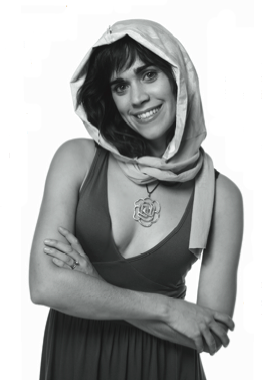
Hat plus scarf? Yes, please! Pack just one item and save space for other necessary springtime accessories. In honor of the first full day of spring (the official start to the new season) and our bidding goodnight to winter, I present “Hoodnight Moon,” project #27 from Generation T: Beyond Fashion. This hooded scarf will bring out the kid in you. Pretend that you’re a mysterious spy in a foreign land… Wrap yourself up and hide from that not-yet-summery-breeze… Wear it to walk your dog, keep a low-profile at school, or take a late-night trip to the deli to buy a pint of ice cream and the next morning’s paper.

Make it:

Excerpted from Generation T: Beyond Fashion (Workman, 2009).

[ 5 Comments | Posted on March 21st, 2011 ]