Posts Tagged ‘T-shirt refashion’

No-Sew T-shirt Superhero Cape

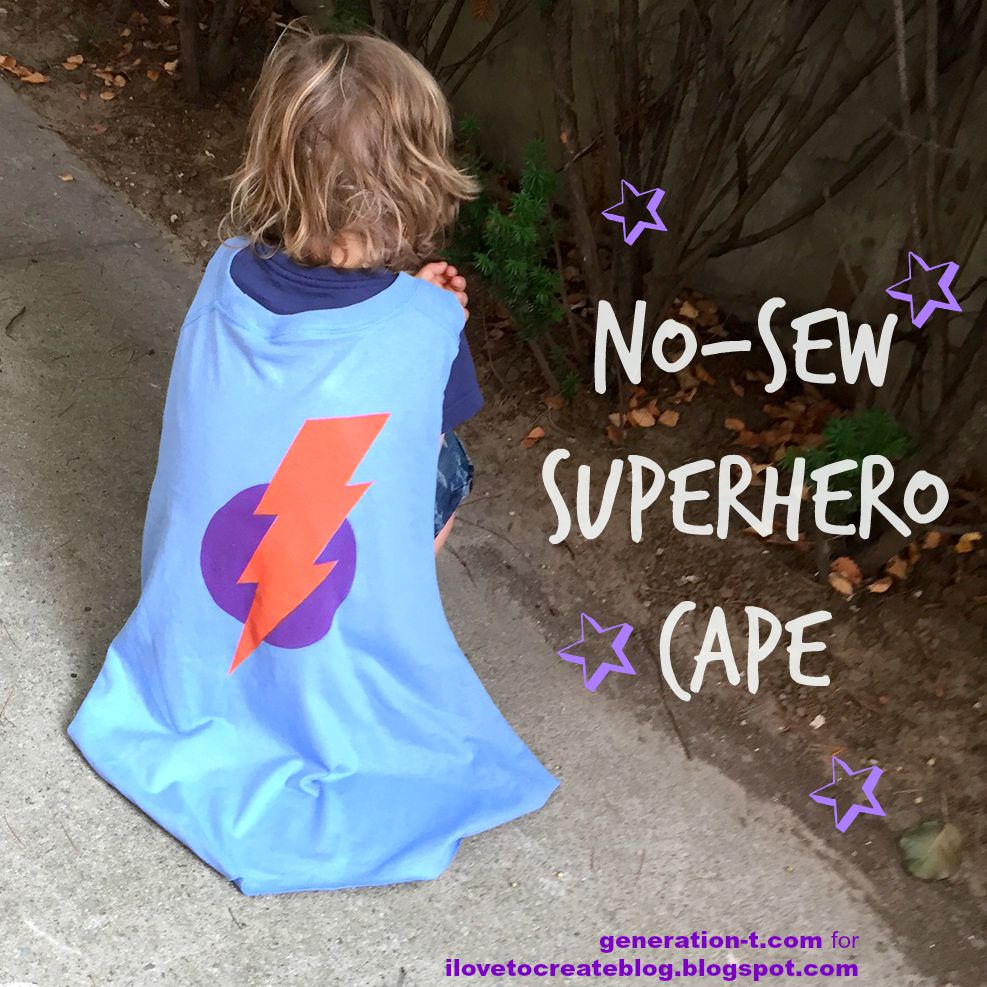
Here’s a classic I recently adapted from my second book, Generation T: Beyond Fashion, because, hey,  it’s superhero season (okay, okay, when is it not??). A plain T-shirt is the key ingredient to this phonebooth-like transformation. Whether you’re a superhero at rest, or in action (leaping tall buildings in a single bound, racing faster than a locomotive, and generally exercising capabilities well beyond those of mortal men and women — you know, the usual), this cape has got you covered. Well, partially covered. It’s got your back, at least. (HA!)

superhero finish2 generation-t.com

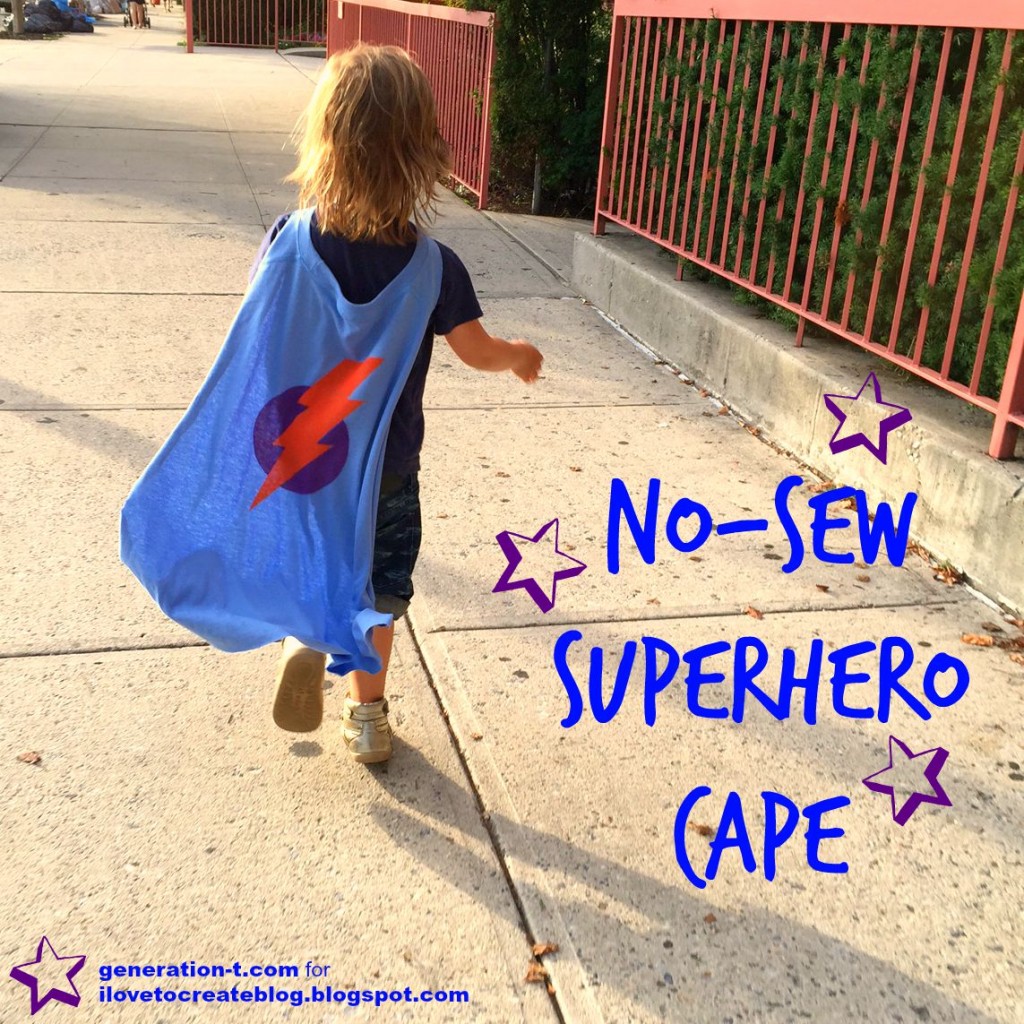
The superhero in my household requested an orange lightning bolt on his cape, so once I created the basic shape, I made a couple of stencils I could layer to get the two-color effect. The length can be customized, so rest assured that adults and children of any size can be made super!

PS: Let me know how you like seeing my illustrations in the tutorial. A throwback to the books….

megan-nicolay-blog-footer

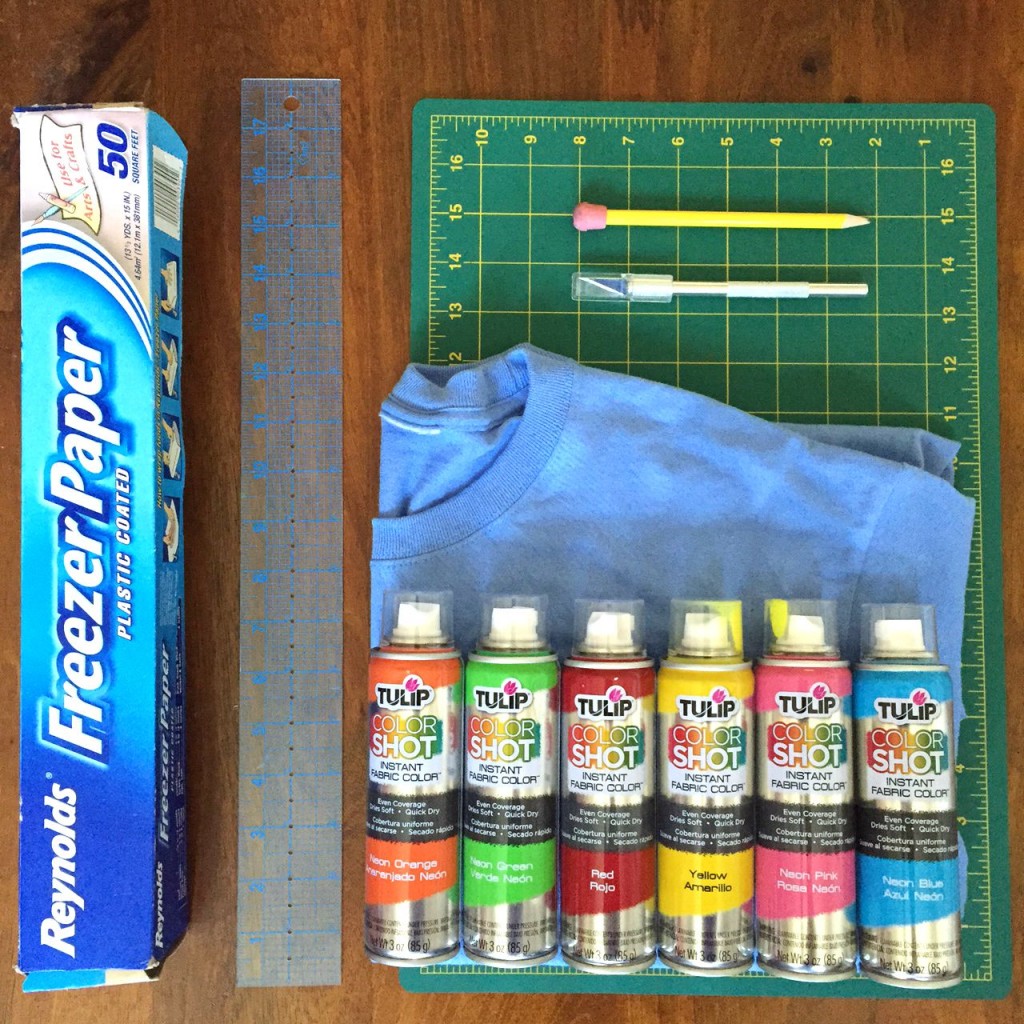
What you need:
-T-shirt
-Pencil or pen
-Ruler

-Fabric scissors
-Freezer paper (for stencils)
-Craft knife and cutting mat
-Warm iron
Tulip ColorShot Instant Fabric Color (fabric spray paint)

superhero materials generation-t.com

PART 1: The cape.
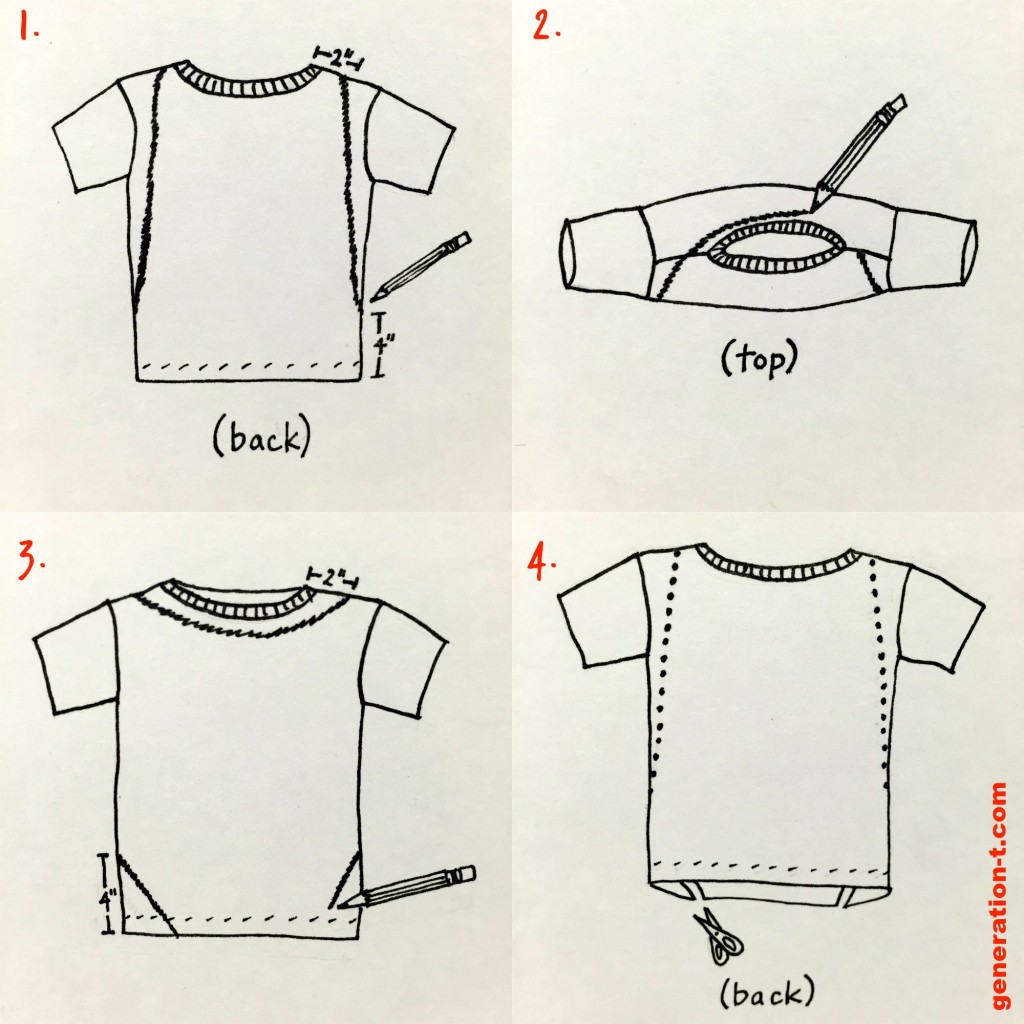
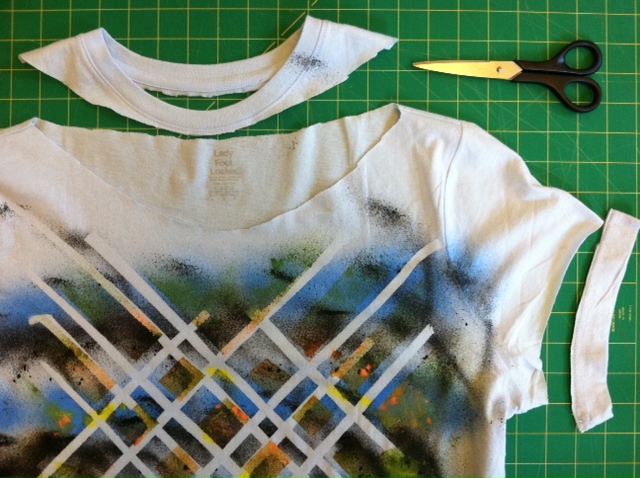
1. Lay the T-shirt flat, back side up. Use the pencil and ruler to mark a diagonal line from about 4″ up from the T-shirt hem along the left side of the shirt to a point 2″ left of the neckband. Mark a second diagonal line from about 4″ up from the T-shirt hem along the right side of the shirt to a point 2″ right of the neckband.

2. Continue the diagonal lines over each shoulder at the top until they intersect just below the front of the neckband.

3. Continue the diagonal lines around to the front of the shirt at the bottom until they reach the hem.

4. Cut along the pencil markings, through just one layer, and around the neckband in the front.

Superhero StepsA-D generation-t.com

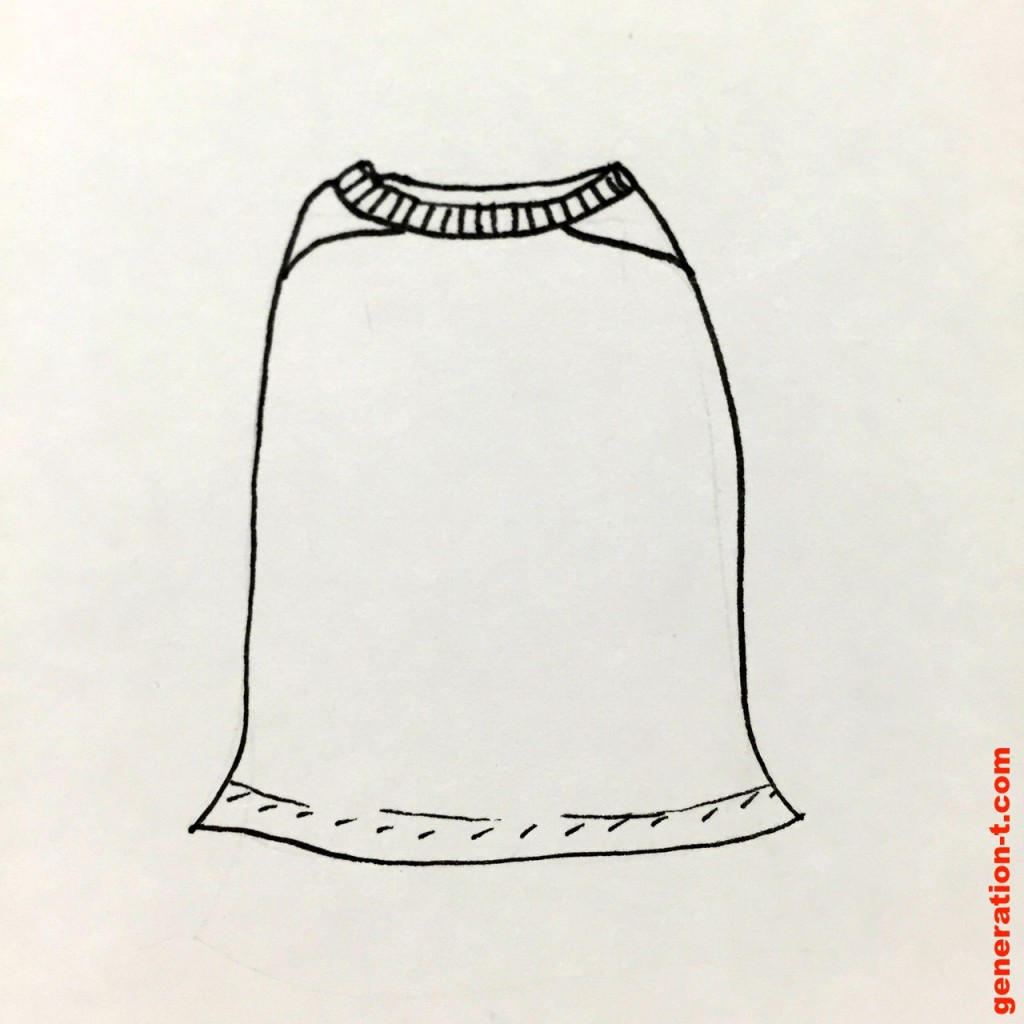
Slip the neckband over your superhero’s head. The hem at the bottom adds a nice weight, but check that it isn’t too long so that it’s in danger of getting snagged or stepped on, and trim it if necessary.
Superhero StepE generation-t.com

PART 2: The design.
1. Head on over to the iLoveToCreate blog for the stenciling tutorial!

PART 3: The execution. 
1. Test out your cape’s powers!
superhero finish generation-t.com

[ Comments Off on No-Sew T-shirt Superhero Cape | Posted on August 26th, 2015 ]

From Our Readers: Brenda!

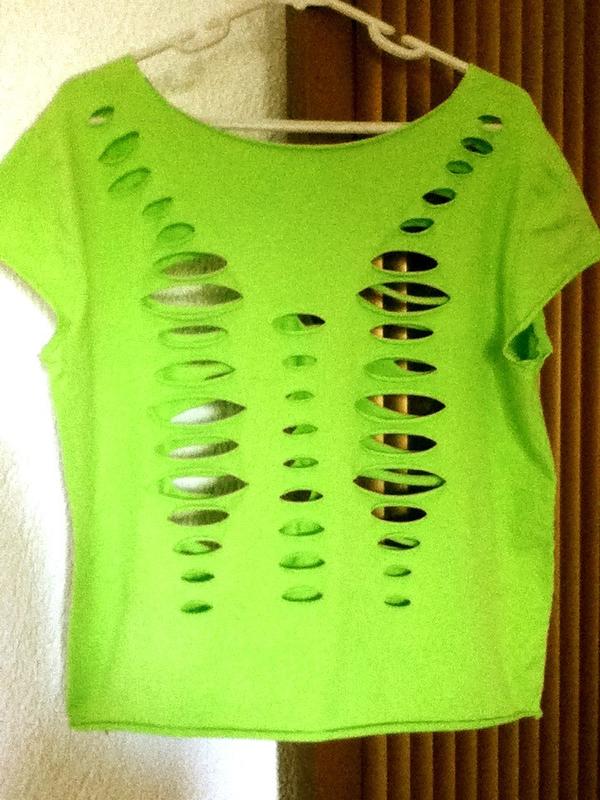
Happy Earth Day, friends! Today’s “from our readers” feature introduces Brenda, a Canadian expat living it up in Mexico and slashing up old T-shirts whenever she can. She asked me a question over Twitter awhile ago, and I was just too slow in answering (I do so understand when the scissors start getting a little twitchy, and one needs to forge on!), so Brenda, resourceful lady that she is, found a design on the Internets to help fulfill her vision (if anyone knows the source, let me know so I can properly link it! UPDATE: Properly linked to the source shirt!). See the result of Brenda’s T-shirt snipping (white T-shirt, left).

And this one (green T-shirt, right), inspired by the butterfly variation on the slashed “Brokenhearted Tee” (project #2 in Generation T: 108 Ways to Transform a T-shirt):

Happy Earth Day to all! What sweet T-shirt hacks are on your creative calendar? What are you making next?

[ Comments Off on From Our Readers: Brenda! | Posted on April 22nd, 2013 ]

From Our Readers: Lincoln High School!

In December, I heard from a teacher at the Lincoln High School Green Academy, a 3 year program for kids interested in potential careers or majors in the green economy.  Her students took old PE uniforms (brilliant!) and made hats and bags (projects #72 Mohawk Mo’ Rock! and #42 Plastic Surgery from Generation T: Beyond Fashion) to give as gifts to the Principal, Assistant Principals, and other members of the school staff who helped them.

Be still my heart: Rescuing shirts that would otherwise have been trash-bound and upcycling them into giftable items!

[ Comments Off on From Our Readers: Lincoln High School! | Posted on March 1st, 2013 ]

Queens, NY @ Maker Faire/NY Hall of Science

See me at Maker Faire!Hey New York — this just in: Megan will be demonstrating some T-shirt transformation techniques at the Maker Square Stage at Maker Faire NYC in just one week!

Reduce, Reuse, ReFASHION! Learn 3 quick-fire, no-sew ways to transform that boring, boxy T-shirt that’s been languishing in the back of your closet into your next go-to style staple. Scissors will be provided, so bring a T-shirt and follow along!

Maker Faire takes place at the New York Hall of Science in Queens — details below.

Maker Faire NY 2012 (@makerfaire)
New York Hall of Science (@nysci)
47-01 111th Street
Queens, NY 11368

Click here for directions. Hope to see you there!

[ 1 Comment ]

From Our Readers: Maria & Franz!

Earlier this summer, I got an email from my brother and sister-in-law with the subject line “T-shirt Guru, Help!” Maria and Franz are two musicians on an adventure along the Trans-Siberian Railway. Like any good musicians, they travel with merch, and like any good merch-peddlers, they run out of stuff fast. So they were down to two XXL T-shirts and quickly discovered that their fans were tending to come in smaller sizes. Maria writes…

“Franz and I have two XXL T-shirts left of one design and people much smaller than XXL keep expressing interest, but then balk at the size. We have a long train ride coming up, so I started thinking about trying to convert the shirts into cute, cut-up T-shirts. My sewing abilities and supplies are limited, but we’ve got decent scissors, safety pins, and a travel sewing kit. Can you recommend an easy-ish pattern that we could sell to a punky Russian girl?”

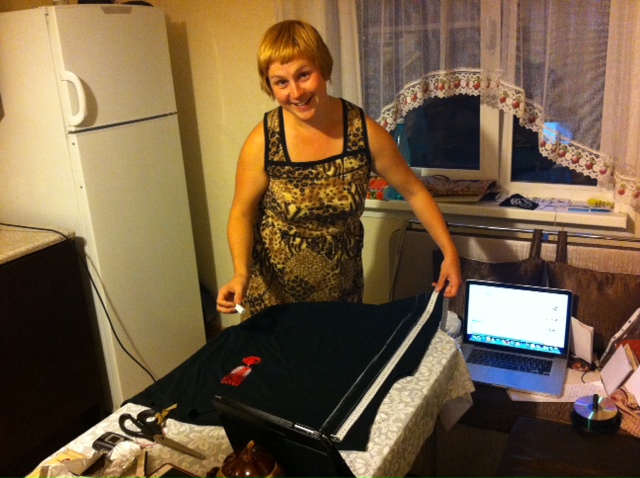
How could I ignore such a request? A few cross-continent consultation emails later, Maria and Franz had set up shop: They’d been crashing with some cute punk gals in the outer boroughs of St. Petersburg, and set up a workspace on their kitchen table. Armed with a pair of scissors, and that travel sewing kit, they set to work transforming their merch. Measuring and marking…

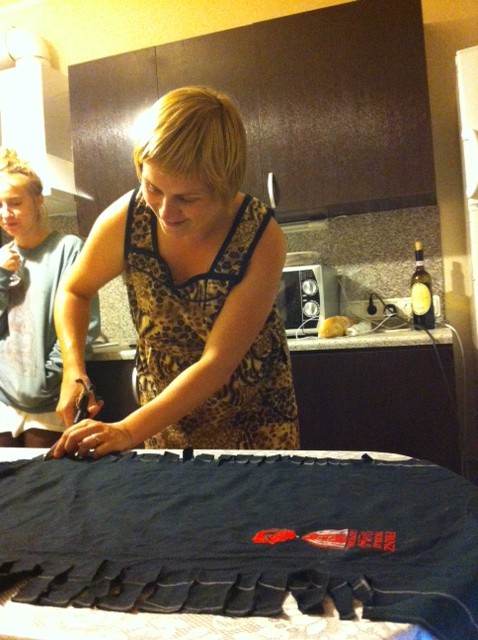
Cutting…

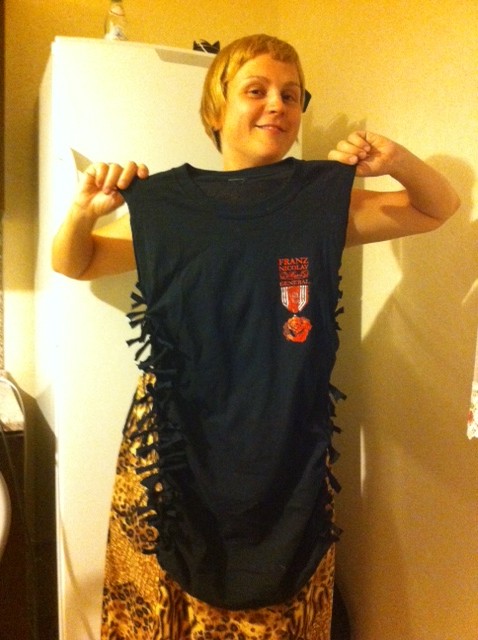
And knotting. Ta-da! It’s the “Knot So Fast” (project #104) tank top from Generation T: Beyond Fashion.

Sveta, one of the aforementioned cute punk girls who was looking on, was suspicious of all the scissor activity, but once she tried on the completed result, she asked if she could keep it, so, it seemed to be working. Nothing like converting a skeptic!

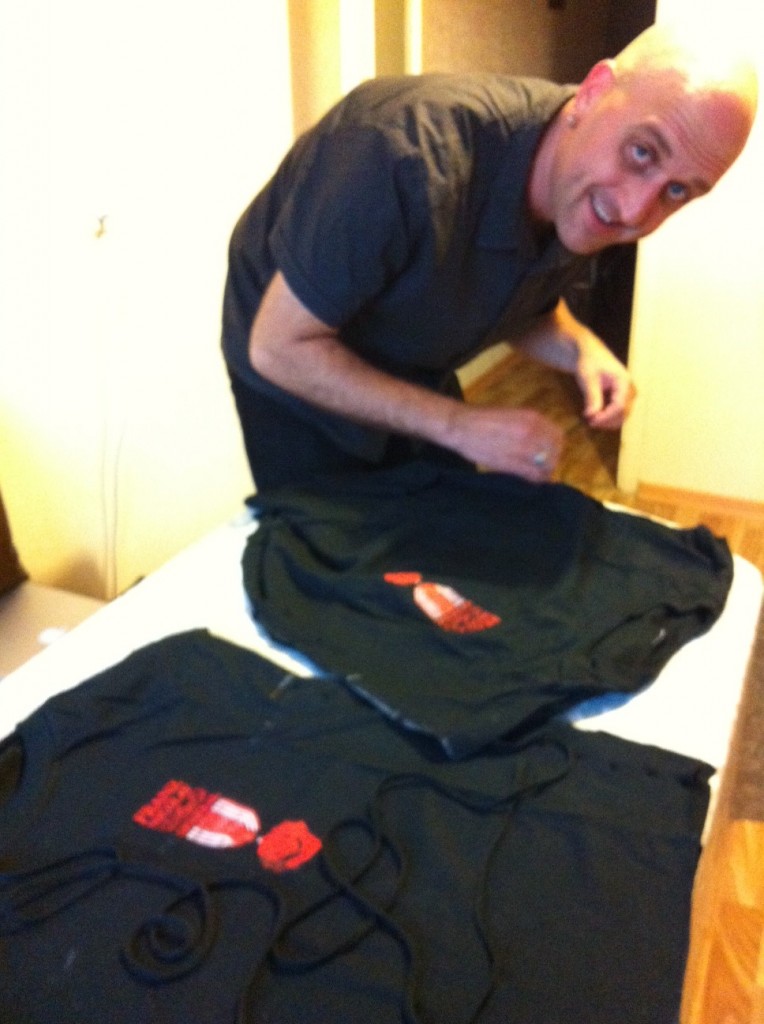
Then it was time to tackle “Outer Lace” (project #16) from Generation T.

And then they set off in search of one of the Russian editions of the two books, should any additional emerchencies arise.

UPDATE from the road: “We just sold the last of our Generation T-styled Franz Nicolay shirts to the fashionable women of Orenburg Russia. Thanks for the designs!”

[ Comments Off on From Our Readers: Maria & Franz! | Posted on September 14th, 2012 ]

A Spot of Tee: Skully T-shirt!

It’s Monday, and we’re back with our A Spot of Tee feature! Despite it having been June when I spotted this this skully tee (Halloween = 4 months away!), I actually spotted  it twice over a period of three days. Once in Prospect Park, Brooklyn at a BBQ (paired with some amazing platform sneakers — oh, how I wish I had the camera for those), and once here:

Where: F train Platform, West 4th Street Station, NYC
When:
June 2012
What:
Skully Tee
Key accessories: Denim shorts, fringed leather, (optional: platform sneaks!)
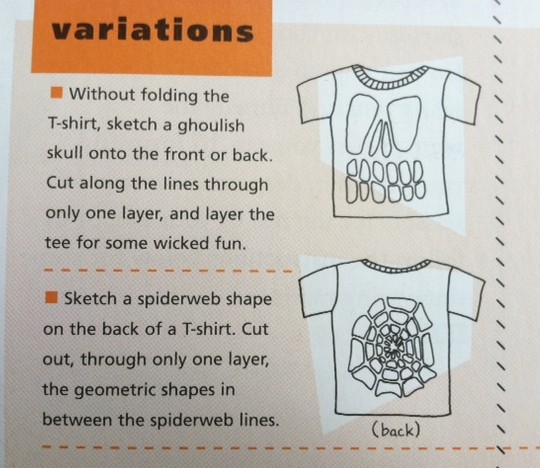
How do I get the look?: See the image below from page 35 in Generation T: Beyond Fashion (with a bonus spiderweb tee!), or click here for a tutorial via Hurley.

What, oh, what will we spot next…?

[ Comments Off on A Spot of Tee: Skully T-shirt! | Posted on August 13th, 2012 ]

A Spot of Tee: Born in the USA

Welcome to the newest feature here on the Generation T blog, known hereafter as A Spot of Tee, where we hit the sidewalk (the layperson’s catwalk!) and engage in the spotting of T-shirt refashions (or DIY-inspired looks). I thought it apropos to start the A Spot of Tee series today for two reasons: 1. Much of the world is focused on London, England (2014 Summer Olympic Games) where a spot of tea tee is quite common. Second, our first tee was spotted on Independence Day weekend, which is enough to start us chanting, “U-S-A, U-S-A!” from the virtual stands of the Olympic pool, roadways, gymnasium, track, and field. Today’s tee is a fairly simple one, spotted on our way to a 4th of July barbecue!

Where: Underhill Avenue, Prospect Heights, Brooklyn
When:
July 2012
What:
A slashed, casual V-neck tee
Key accessories:
denim shorts, hamburger (not pictured)
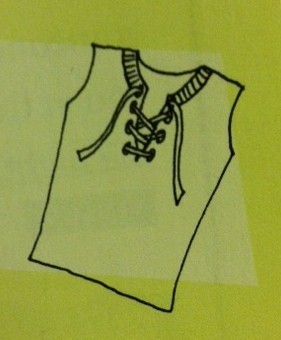
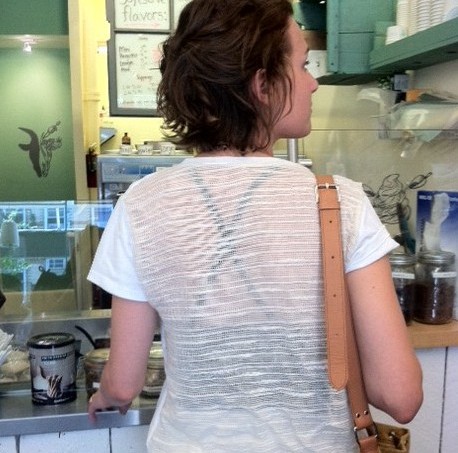
How do I get the look?: To keep the sleeves only temporarily cropped, this All-American gal simply rolled and tucked them. Without cutting the neckband completely off, she turned her crew neck into a V-neck, like this variation from Generation T: Beyond Fashion (step 3 from project 92, the “Fender Bender racerback tank top), cutting an additional 3″ to 4″ deeper than the neckband in the front and adding a slit down the center, to enhance the plunge another 3” or so (below left). Or, you could make a version of this with lacing — see variations for project #16 in Generation T (below, right):

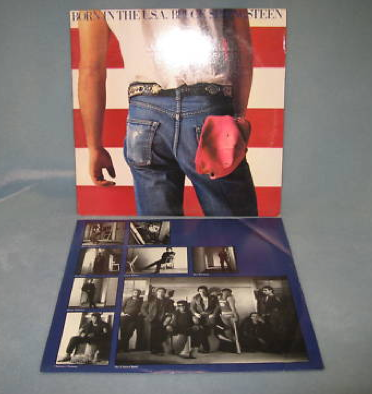
The denim plus American flag is so very Bruce Springsteen, don’t you think?

Though we often consume our “tee” over the weekend (Sunday afternoon would be rather proper, now wouldn’t it?), we’ll post on Mondays to give the week a nice jump start.  Here’s to celebrating our casual weekend wear!

[ 3 Comments | Posted on August 6th, 2012 ]

I Love to Create: Easy Breezy Heat Wave Tee

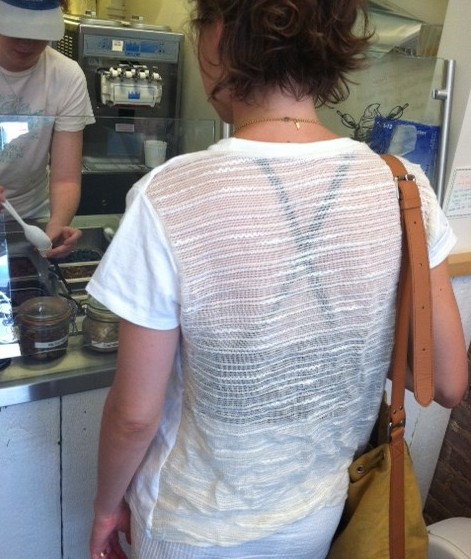
This design falls into the category of fashion as necessity: When temperatures push 90 and 100 degrees, there’s little else you want to wear besides a T-shirt. But even a tee can seem stifling when you add humidity to the mix. Here’s a T-shirt hack that’s meant to keep the air circulating–it features a cut-out back and a looser fit. (Of course, a trip to the local ice cream haunt doesn’t hurt the cooling plan either!)

I encourage you to dig into your fabric stash to find an unlikely contender for the fabric insert on this one. The fabric I used was originally purchased by my brother from a discount bin to use as a bed skirt. I inherited it when he moved, and my mom and I made curtains to filter the light in my apartment. Now the remnants have been reincarnated as part of this heat-beating T-shirt. What a life cycle! Tip: Check the give of your fabric–you shouldn’t have to worry too much about working on the bias (the diagonal of the fabric) since the rest of the T-shirt will have plenty of stretch, but consider your layout before you cut!

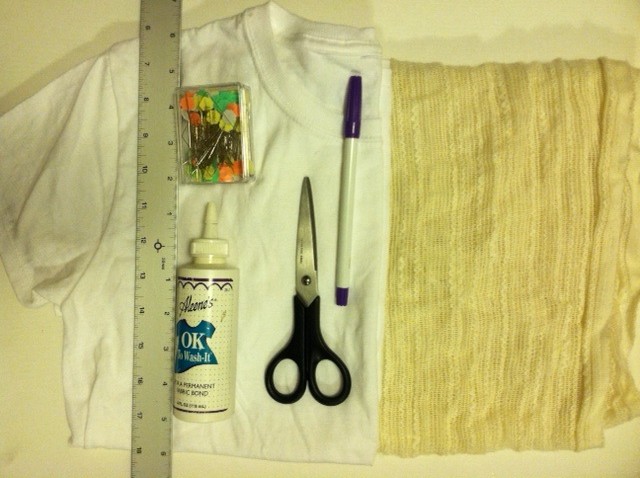
Materials:
-regular fit T-shirt
-fabric scissors
disappearing ink pen
-ruler
-straight pins (optional)
Aleene’s OK Wash-It fabric adhesive (or a sewing machine and thread to match your fabric)

Make it:

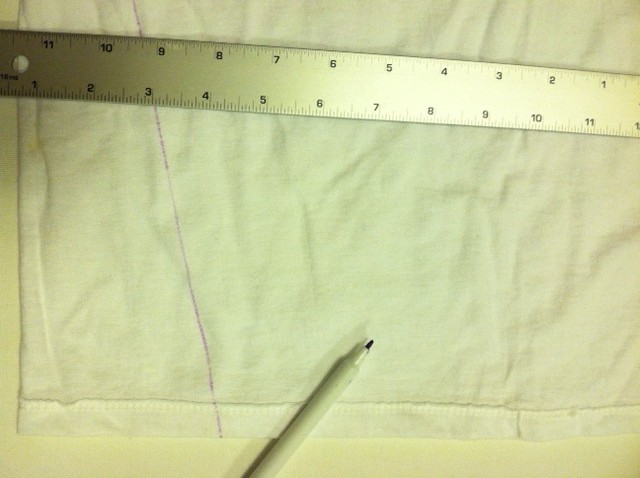
1. Turn the T-shirt inside out and lay it face down. Measure and mark about 3 1/2″ to 4″ in from either edge along the hem. Then draw a straight line from each mark to its adjacent sleeve (at the armpit).

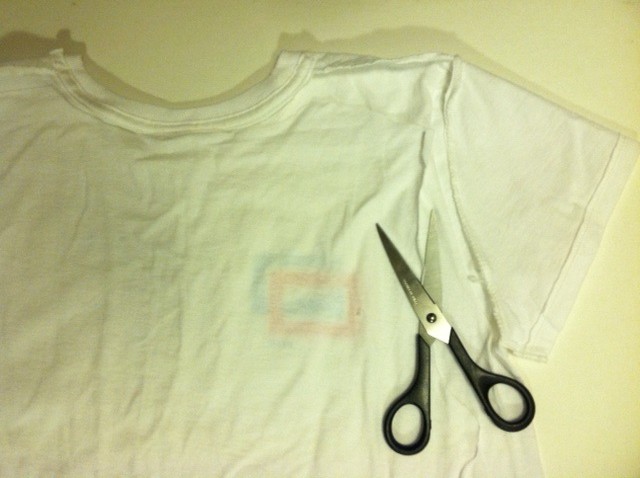
2. Cut along that line through only the back layer. Continue cutting around the sleeve, just inside the seam (again, through only the back layer), along the top shoulder seam, and along the back of the neckband. Continue cutting until the back panel of the shirt can be removed. Set the front of the shirt aside momentarily.

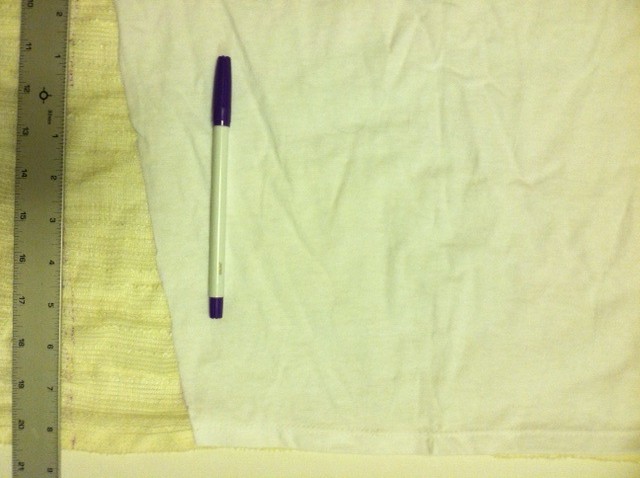
3. Lining up the bottom edges of the fabric pieces, lay the back panel of the T-shirt over the backing fabric and trace the panel, extending the shape on either side to accommodate for the 3 1/2″ to 4″ wedge that was cut away. (The extra fabric will help create the flare.) Cut out the shape from the backing fabric.

4. Lay the fabric against the front piece of the T-shirt so that the edges of the two pieces line up, right sides together. Use the permanent fabric adhesive to glue the inside edges together. Optional: Use straight pins to hold the fabric edges in place before you glue.)

5. Ease the edges together, pinching and pressing them in place. Then let dry completely.

6. Turn the tee right side out and touch up any gaps along the seams.

7. Layer the tee over a thin tank top if you’re feeling demure, or be bold by wearing a colorful, barely there undergarment (the point is to limit the layers of fabric on the skin after all!).

Variations:
-Replace a panel along the top of the sleeve as well.
-Replace a smaller panel in the back of the T-shirt with a cotton crocheted doily.
-Make the flare more exaggerated and fluttery.
-Experiment with different fabrics (silk scarf, old mesh sports jersey, a linen table cloth).

Next up? Though I quite like the subtle contrast in whites (the stark cream with the more ivory gauze), I’m going to experiment with dye the next time I make this design!


[ 4 Comments | Posted on July 24th, 2012 ]

I-Love-the-’80s Fringe Fabulous T-shirts

It’s springtime, which means one thing to me: T-shirt weather! It’s an exciting time here in the Land of Generation T, because as many of you know, it only gets better: After spring comes summer, which means we all get a little more scantily clad — T-shirts turn into tank tops and tube tops and ooh-la-la! So grab your scissors (to cut away some of that extra fabric, of course), crank up the color (bring on those fabric spray paints), and hop in your fabulous fashion time machine, because fringe is enjoying a bit of a renaissance this season. Last weekend, I dialed back the decades and dug into my craft stash to make some classic ’80s-inspired geometric tees.
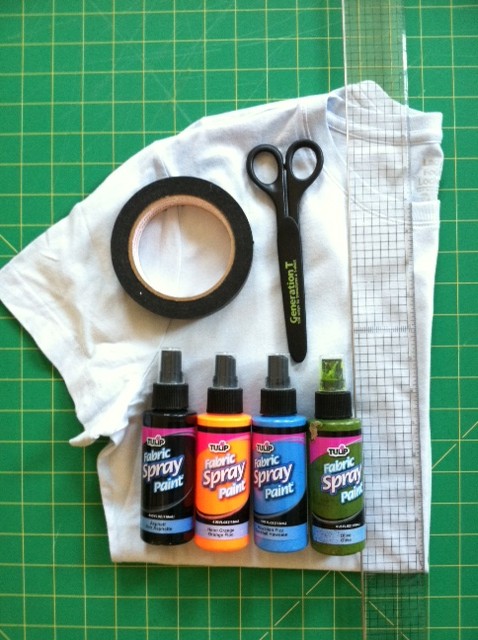
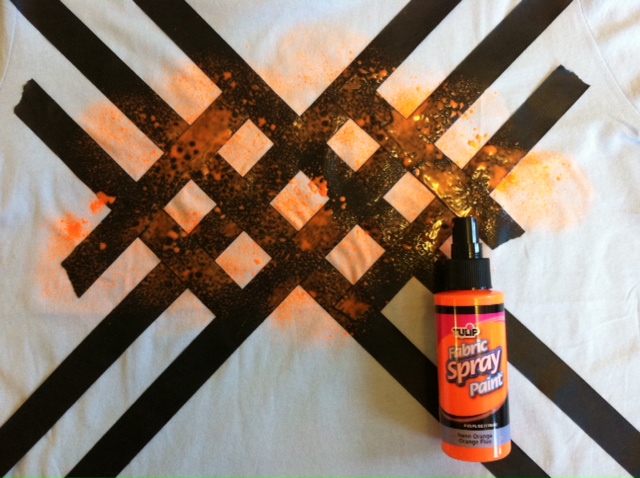
Materials:

-light-colored T-shirt (I used a light blue one)
-ruler

-masking tape
fabric scissors
fabric spray paint (variety of colors)
-scrap newsprint paper

Make it:

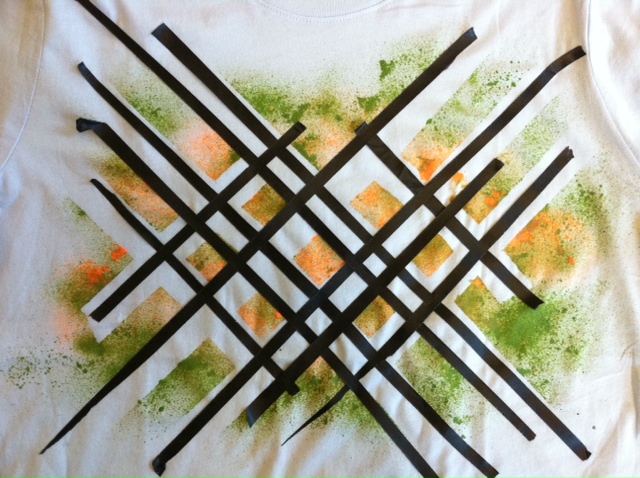
1. Lay the T-shirt flat. Use masking tape to mark a horizontal line about 8″ up from the bottom of the shirt. Find the vertical center of the shirt and apply tape to the chest-region of the T-shirt to create a crisscrossing geometric pattern.

2. Insert the newsprint paper between the layers of the T-shirt to prevent the paint from bleeding through. Then apply fabric spray paint over the taped area. Apply another color or two, then let dry.

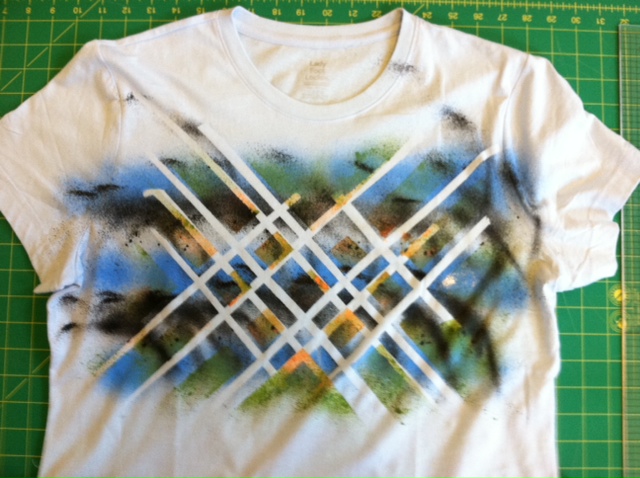
3. Peel back the tape, and then lay down more tape (I cut the tape strips in half, thirds, and quarters to make thinner lines) across your pattern to create a modified plaid pattern. Then spray paint more color!

4. Let dry completely before peeling off the tape to reveal your design.

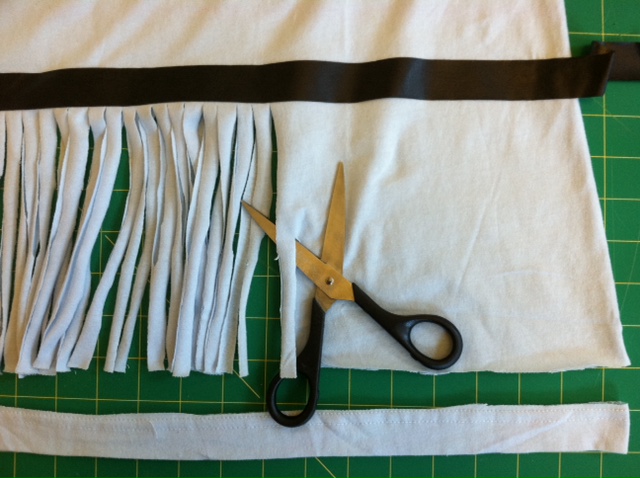
5. Cut off the bottom hem of the T-shirt, just above the stitching. Then, using the tape marker you pressed down in step 1 as your guide, cut 1/3″- to 1/2″-wide fringe from the bottom edge of the shirt.

6. Cut off the sleeve hems, just above the stitching, and cut out the neckband, just below the neckband edge in the front and the back, and about 2″ wider on the sides.

7. Gently tug on the fringe to stretch it out (the fabric edges will curl in). Try it on!

8. Grab up additional T-shirts and experiment with your paint patterns and fringe — cut it on a diagonal, in a chevron-inspired V-shape, make it long or short!

Then pack a picnic, sling your boombox over your shoulder, and turn up any of the decade’s Billboard hits!


[ 5 Comments | Posted on May 22nd, 2012 ]

Love from Rookie Mag!

Thanks to RookieMag contributor Stephanie (via the Rookie Tumblr) for embracing her crafty side and making (and then featuring!) the “Fun in the Sun” halter dress (project #20 in Generation T: Beyond Fashion) in a recent post. It looks positively smashing, don’t you think? It also makes me think of the warmer weather just around the corner.


[ Comments Off on Love from Rookie Mag! | Posted on February 29th, 2012 ]