Posts Tagged ‘iLoveToCreate’

10 Quick & Easy T-shirt Halloween Costumes II

Following up last year’s popular list of 10 Quick & Easy T-shirt Halloween Costumes, here is another collection of ten DIY costumes on the fly. From the cinematic to the everyday, from the historical to the commercial, from the sweet to the oh-so-punny (scroll down to #10)…. But let’s start with a classic.
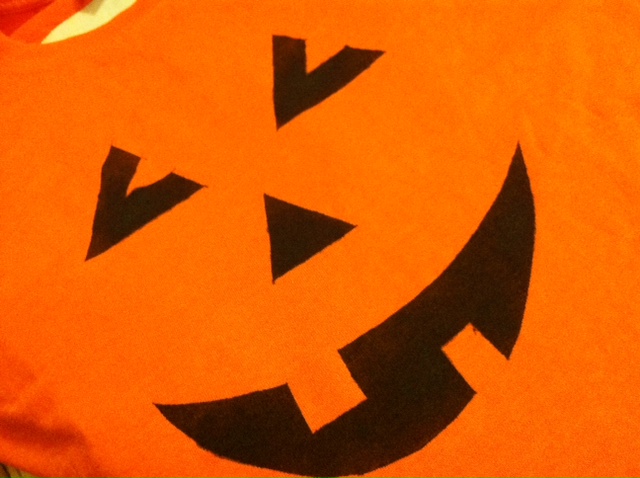
JACK-O-LANTERN T-SHIRT COSTUME

Materials:
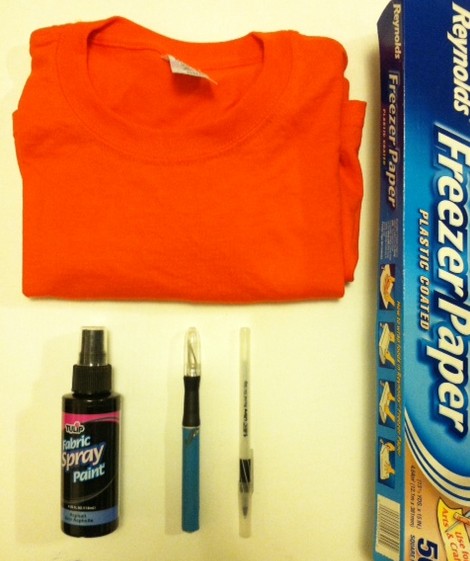
-Orange T-shirt
Tulip Fabric Spray Paint (in black)
-Pen
-Freezer Paper
-Craft knife and cutting mat
-Warm iron
-Newsprint paper

Make it:
1.
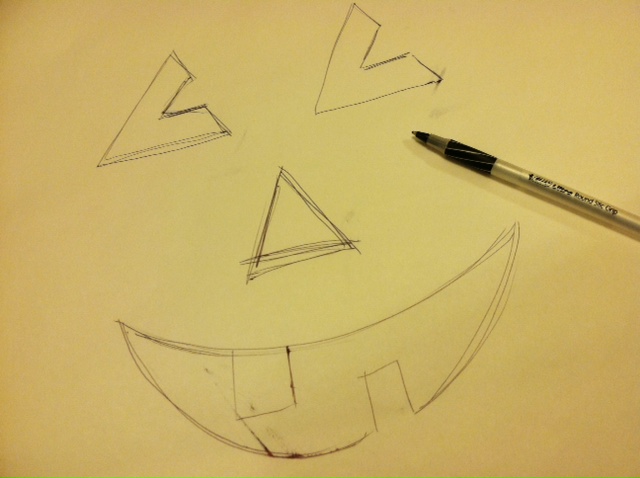
Use the pen to sketch out jack-o-lantern features on a sheet of freezer paper.

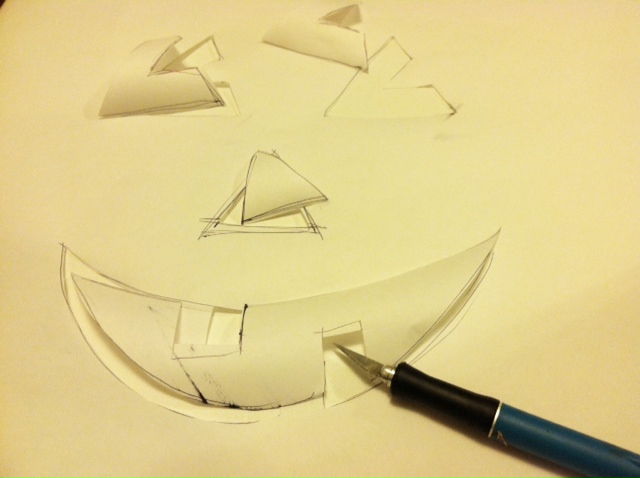
2. Use the craft knife and cutting mat to cut out the features.

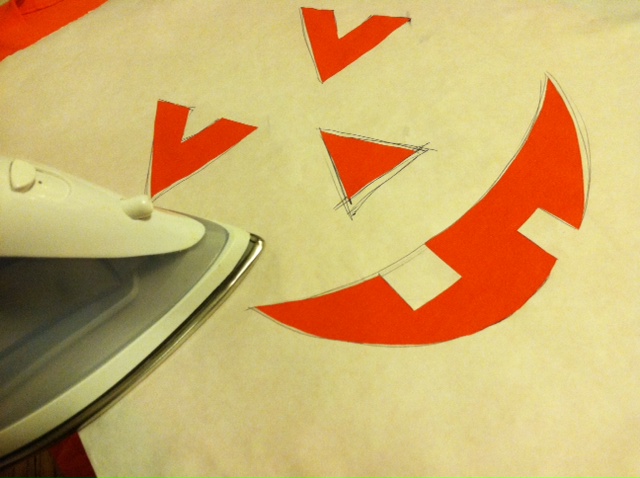
3. Iron the freezer paper stencil onto the front of the T-shirt. Insert a sheet of newsprint between the layers of the shirt to prevent the paint from bleeding through.

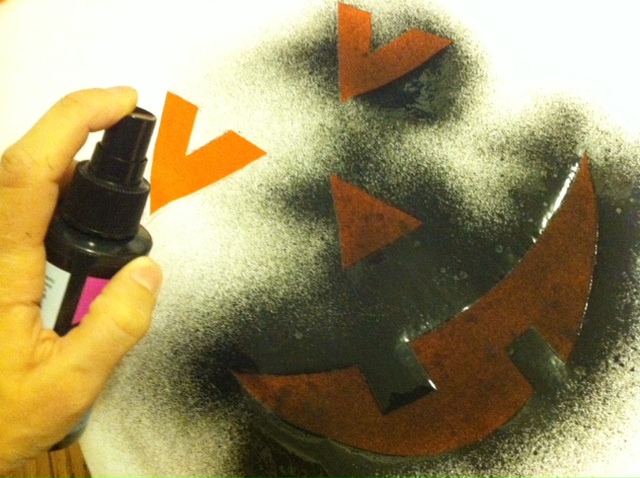
4. Mask the parts of the T-shirt that are still visible, and spray over the stencil with black paint.

5. Let the paint dry briefly, then peel up the stencil.

6. Let the paint dry completely, then try on the T-shirt and go find a pumpkin patch to haunt!

WITHOUT FURTHER ADO, HERE ARE 10 COSTUMES TO MAKE WITH T-SHIRTS (starting with the JACK-O-LANTERN)

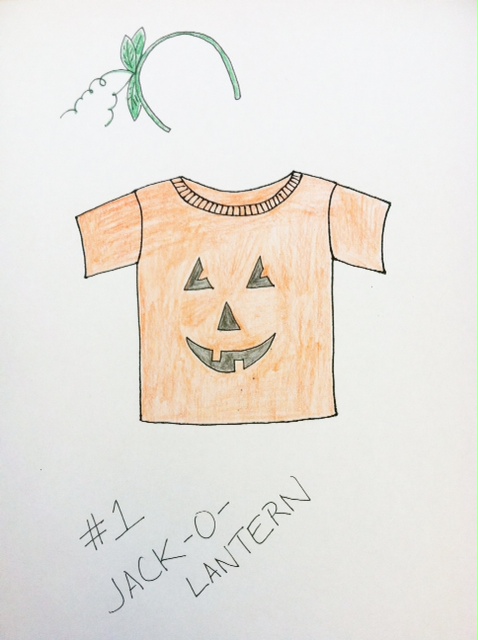
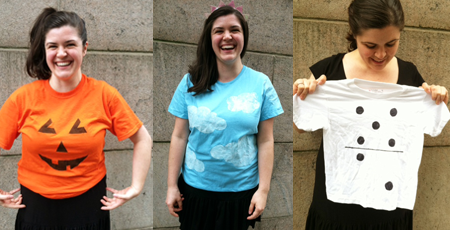
#1 Jack-o-lantern. As shown above, that pumpkin patch classic. Black paint on an orange T-shirt. Optional: Accessorize with a green vine and leaves headband.

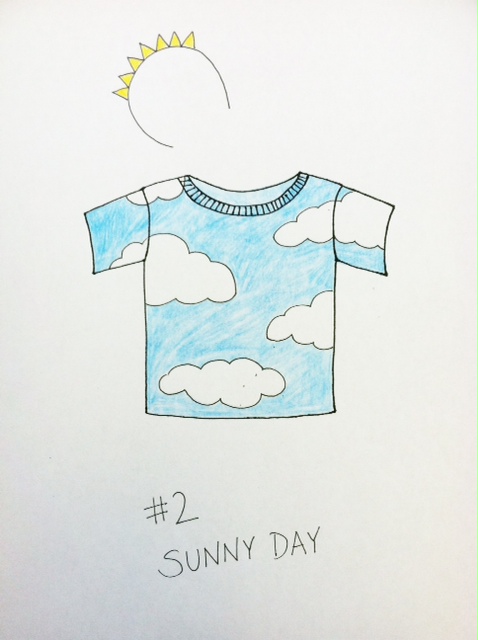
#2 Sunny day. Paint white clouds on a pastel blue T-shirt, or stick pillow stuffing on the T-shirt. Inspired by one of our readers, Emily A. (not to be confused with Emily P., our model for this post!), who used a variation of the Mohawk Mo’ Rock hat (from Generation T: Beyond Fashion) as the headpiece. We used this more recent accessory. And hey, you can always use the costume to moonlight in Ben & Jerry land.

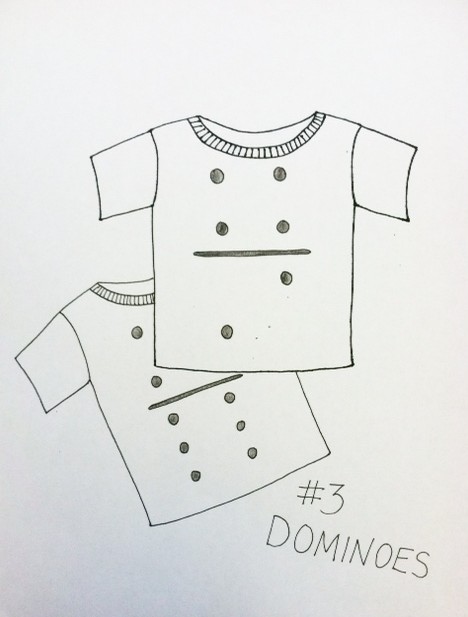
#3 Dominoes. A fun and very easy group costume (just leave the ears and tail at home so you don’t get mistaken for a dalmatian) — use black fabric paint or black permanent marker on a white T-shirt. And if you get tired at any point while wearing the costume, simply lie down adjacent or end-to-end with a matching number onĀ  a friend’s shirt!

#4 Strawberry. Paint yellow seeds on a red shirt, and use green T-shirt scraps to fashion a stem with leaves to sit a top your head. Go solo or meet up with friends to make blueberries, watermelon — a whole fruit salad!

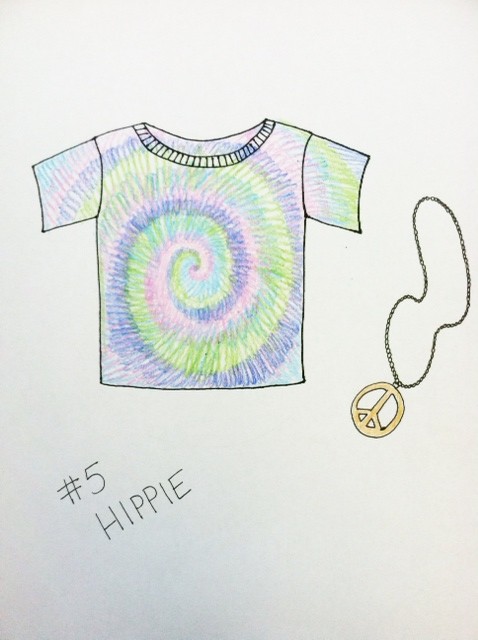
#5 Hippie. Tie-dye a T-shirt, then pair it with bell-bottom jeans, a headband, and any other . (Note: You have to schedule in additional drying time with this one.)
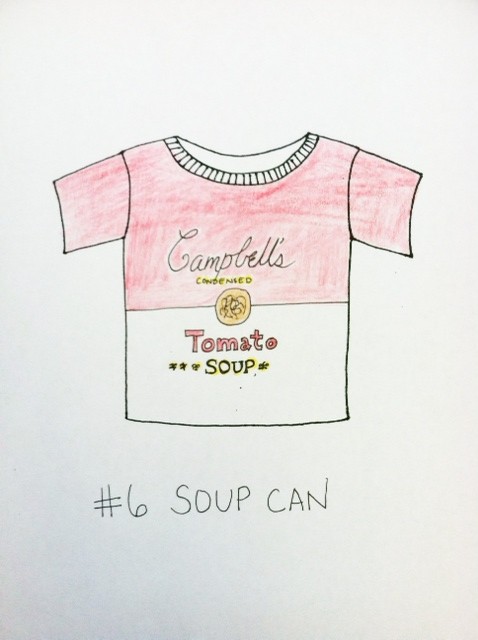
#6 Soup can. Start with a plain white T-shirt and use a black permanent marker, stencils, and red and yellow paint to embellish it. Then convince a pal to go as Andy Warhol!


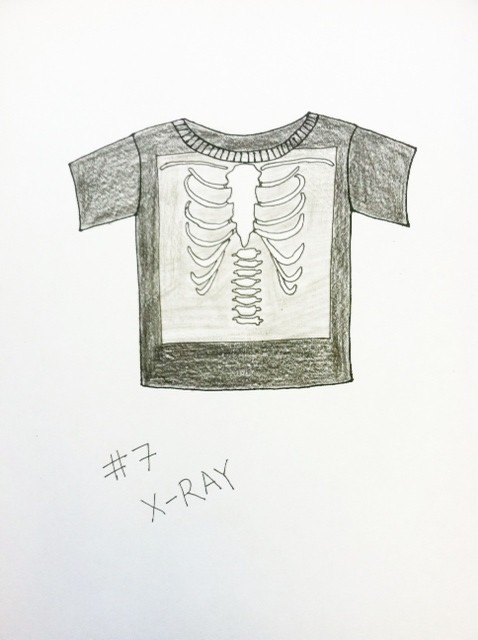
#7 X-ray. A great way to show some skeleton on Halloween, use white paint on a black T-shirt (and the painted parts will show up gray).


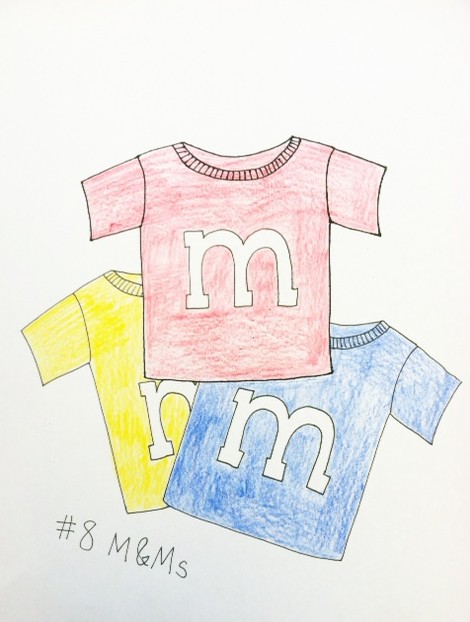
#8 M&M candies. Paint white lowercase ‘m’s onto red, yellow, blue, green, orange, and/or brown T-shirts. Then really go the extra mile and wear white gloves and white sneakers. Gather up a group of friends for a whole handful of candies. Note: This approach also works for Skittles!’


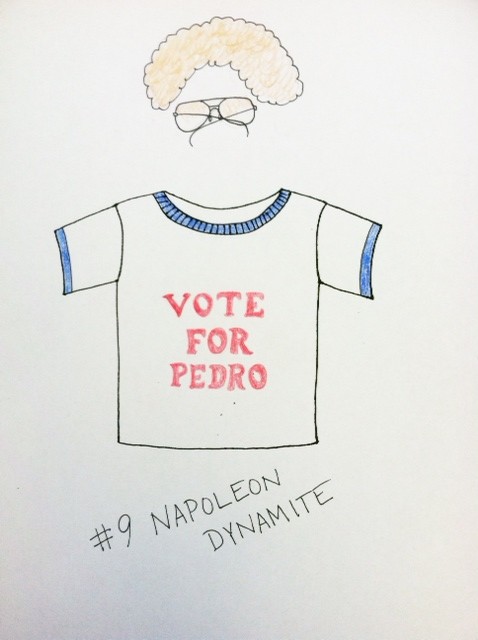
#9 Napoleon Dynamite. Based on the indie hit, paint blue edges on a white T-shirt to mimic a ringer tee; paint or iron on letters to spell “Vote for Pedro.” Top it off with some wiry glasses and a curly wig.

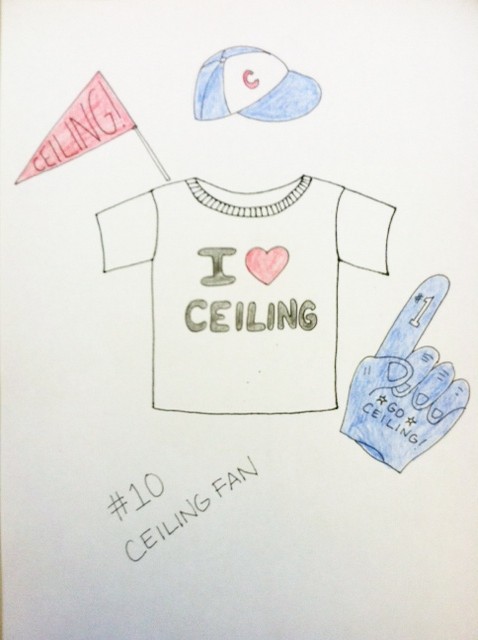
#10 Ceiling fan. Heh. Number 1 fan of the ceiling. Get it? Get it? Use fabric markers or paints on a white T-shirt — and plenty of cheerful props!

Happy trick-or-treating everyone! Here’s to last-minute costumes that are as easy as 1, 2, 3.


[ 3 Comments | Posted on October 23rd, 2012 ]

iLoveToCreate: Happy Shiny Pixie Headband!

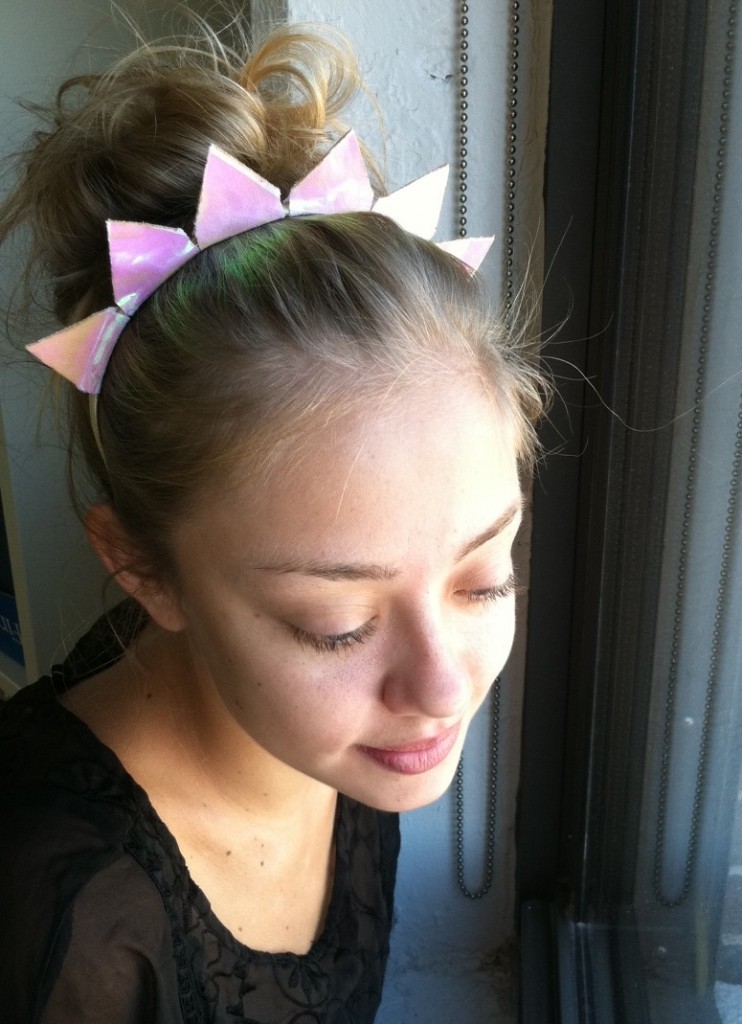
I attended a photo shoot recently and was inspired to make this headband after I saw a similar one in the stylist’s stash of goodies! While hers was glittery gold and mine is iridescent (I also doubt that hers was fashioned from an old T-shirt sleeve), it’s the Lady-liberty-inspired shape that’s so compelling.

I mean, it’s so bright and sunshine-filled (and a little prehistoric?), and I have to admit, though I was begging for cool temperatures back in the heat waves of July (and couldn’t be happier that nature has complied!), the shorter days are already threatening to change my mood. I’m already missing the sun! This happy, shiny, pixie headband brightens up the day wherever you are.

Materials:
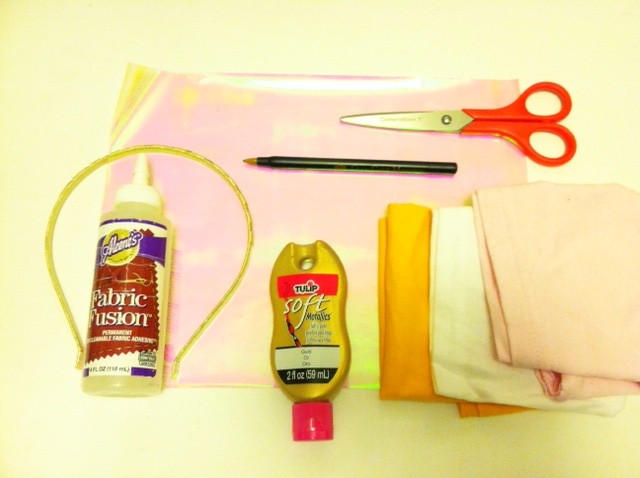
-T-shirt sleeve (or T-shirt scrap of equivalent size)
-scissors
Tulip Fashion Glitter transfer sheets
-ballpoint pen
-ruler
Aleene’s Fabric Fusion
-warm iron and pressing cloth
Tulip Soft Fabric Paint in gold metallic (optional)
-toothpick (optional, to use as a paint applicator)

Make it:
1.
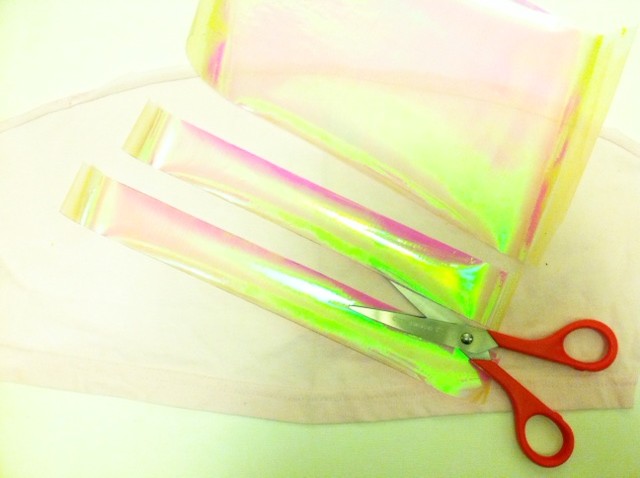
Cut out the underarm seam of the sleeve, and lay it flat, right side up. Measure, mark, and cut two 1 1/4″-wide to 1 1/2″-wide strips from the iron-on transfer sheets.

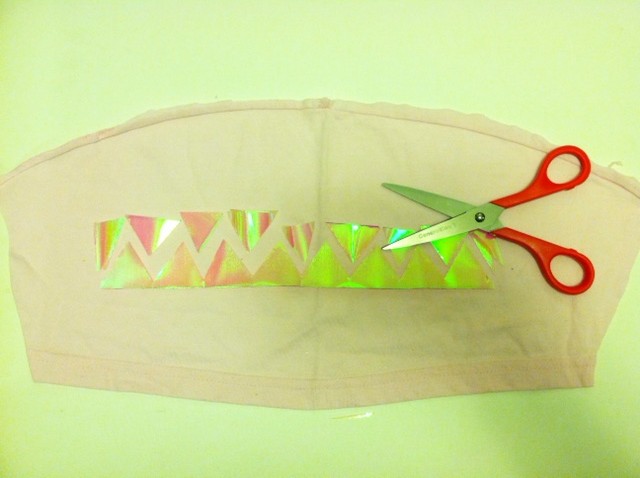
2. Sandwich the two strips together and cut out a series of triangles from one edge (through both layers), leaving a zigzag that runs the width of the strips.

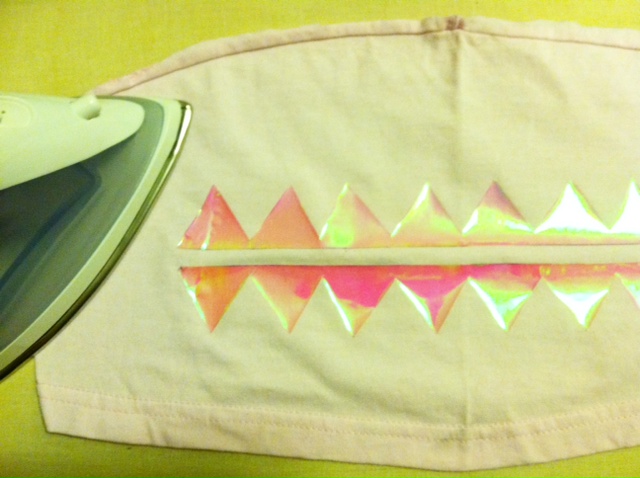
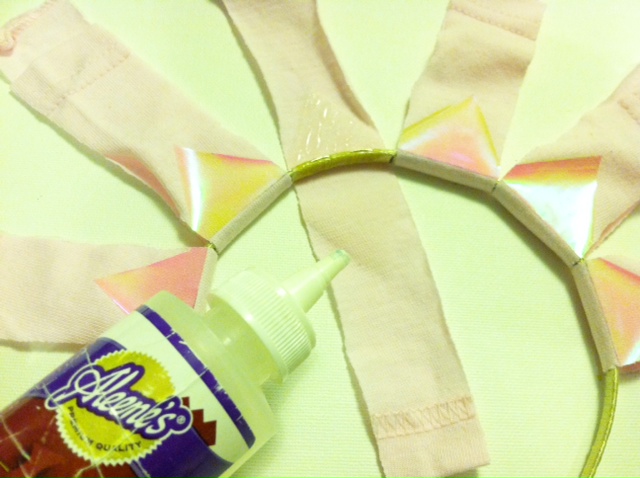
3. Separate the strips and align them along the straight edges, about 3/8″ apart. Use a pressing cloth and iron the strips onto the fabric.

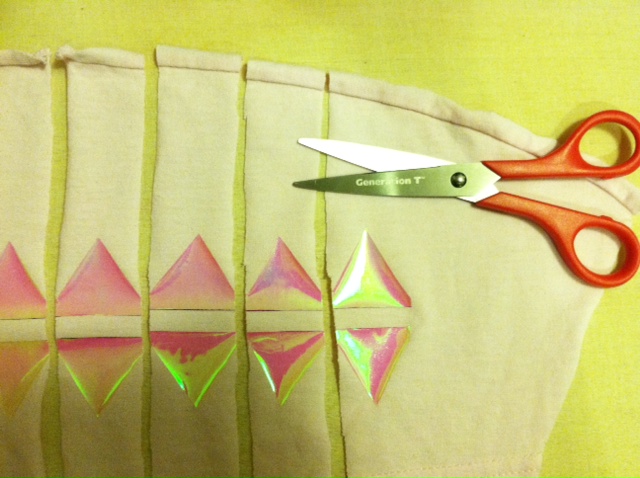
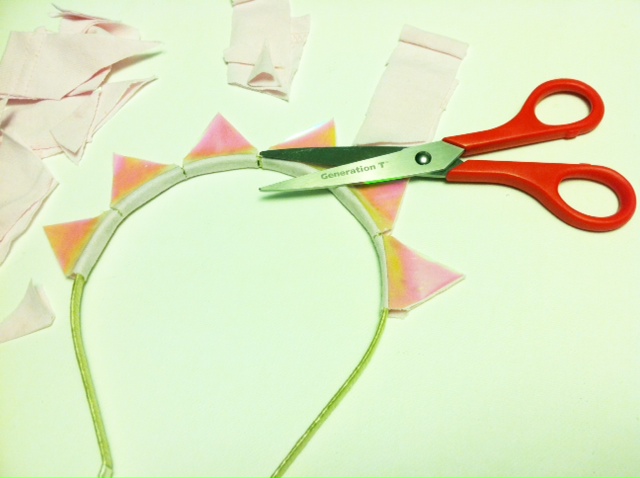
4. Make parallel cuts through the fabric, separating each pair of triangles from the row of zigzags.

5. Determine how many rays of sunshine you’d like (I debated between 5 and 6, and ultimately went with 6), and arrange them evenly around the arc of the headband. Working one ray at a time, spread fabric glue evenly along the inside of the headband, and wrap the flexible fabric piece around the headband, lining up the triangles. Apply glue evenly to the inside of the strip of fabric and press the triangles together (the triangles should seal beyond their edges).

6. Finish gluing each ray, and let them dry flat. (Note: If the fabric is pulling apart, use a clothespin or paperclip to pinch it while it dries.)

7. When the glue is completely dry, trim the fabric to the edges of the triangles.

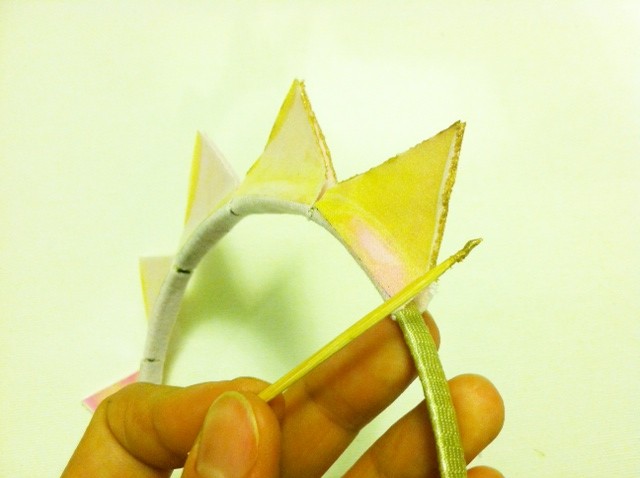
8. As an optional finishing touch, apply the metallic paint carefully with a toothpick along the fabric edges of the rays. Let it dry.

9. Try on the headband to spread a little sunshine both indoors and out!


[ 4 Comments | Posted on September 25th, 2012 ]

I Love to Create: Easy Breezy Heat Wave Tee

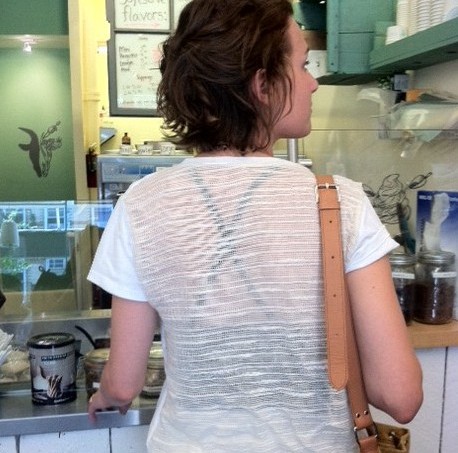
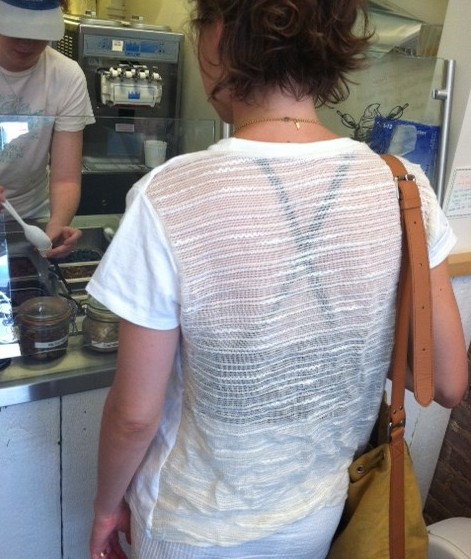
This design falls into the category of fashion as necessity: When temperatures push 90 and 100 degrees, there’s little else you want to wear besides a T-shirt. But even a tee can seem stifling when you add humidity to the mix. Here’s a T-shirt hack that’s meant to keep the air circulating–it features a cut-out back and a looser fit. (Of course, a trip to the local ice cream haunt doesn’t hurt the cooling plan either!)

I encourage you to dig into your fabric stash to find an unlikely contender for the fabric insert on this one. The fabric I used was originally purchased by my brother from a discount bin to use as a bed skirt. I inherited it when he moved, and my mom and I made curtains to filter the light in my apartment. Now the remnants have been reincarnated as part of this heat-beating T-shirt. What a life cycle! Tip: Check the give of your fabric–you shouldn’t have to worry too much about working on the bias (the diagonal of the fabric) since the rest of the T-shirt will have plenty of stretch, but consider your layout before you cut!

Materials:
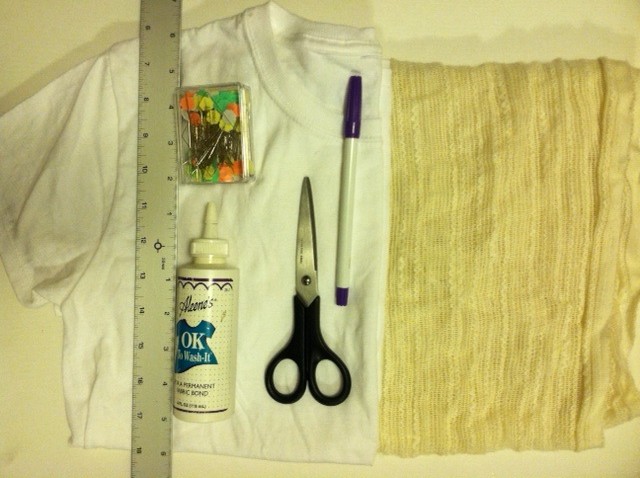
-regular fit T-shirt
-fabric scissors
disappearing ink pen
-ruler
-straight pins (optional)
Aleene’s OK Wash-It fabric adhesive (or a sewing machine and thread to match your fabric)

Make it:

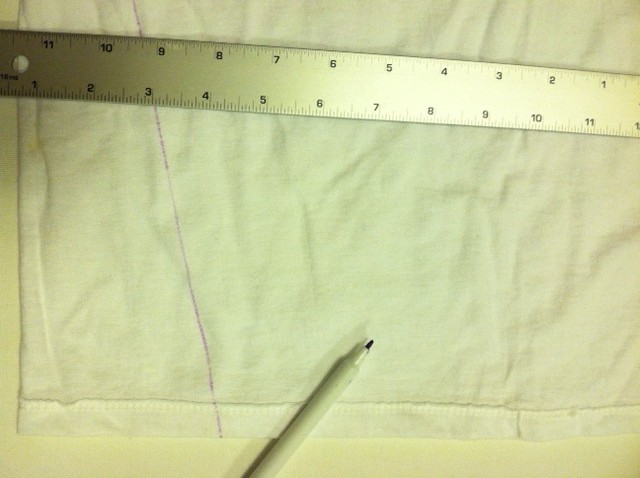
1. Turn the T-shirt inside out and lay it face down. Measure and mark about 3 1/2″ to 4″ in from either edge along the hem. Then draw a straight line from each mark to its adjacent sleeve (at the armpit).

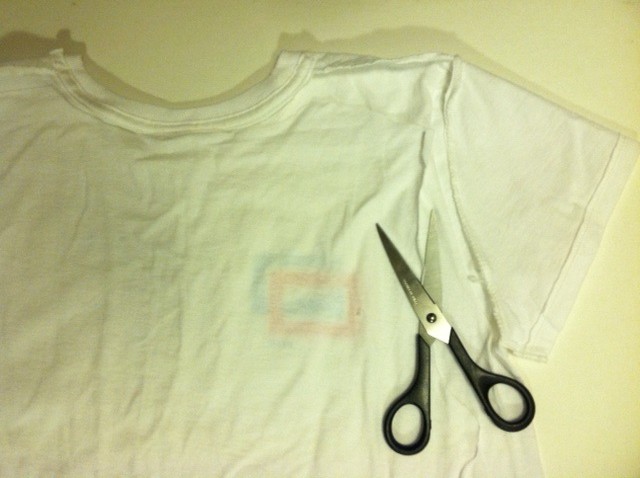
2. Cut along that line through only the back layer. Continue cutting around the sleeve, just inside the seam (again, through only the back layer), along the top shoulder seam, and along the back of the neckband. Continue cutting until the back panel of the shirt can be removed. Set the front of the shirt aside momentarily.

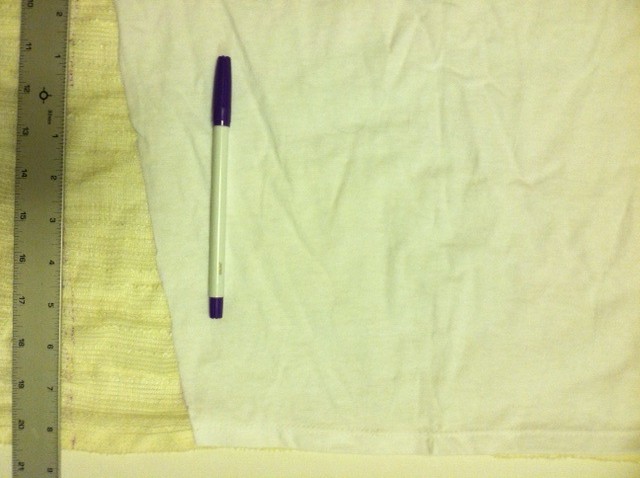
3. Lining up the bottom edges of the fabric pieces, lay the back panel of the T-shirt over the backing fabric and trace the panel, extending the shape on either side to accommodate for the 3 1/2″ to 4″ wedge that was cut away. (The extra fabric will help create the flare.) Cut out the shape from the backing fabric.

4. Lay the fabric against the front piece of the T-shirt so that the edges of the two pieces line up, right sides together. Use the permanent fabric adhesive to glue the inside edges together. Optional: Use straight pins to hold the fabric edges in place before you glue.)

5. Ease the edges together, pinching and pressing them in place. Then let dry completely.

6. Turn the tee right side out and touch up any gaps along the seams.

7. Layer the tee over a thin tank top if you’re feeling demure, or be bold by wearing a colorful, barely there undergarment (the point is to limit the layers of fabric on the skin after all!).

Variations:
-Replace a panel along the top of the sleeve as well.
-Replace a smaller panel in the back of the T-shirt with a cotton crocheted doily.
-Make the flare more exaggerated and fluttery.
-Experiment with different fabrics (silk scarf, old mesh sports jersey, a linen table cloth).

Next up? Though I quite like the subtle contrast in whites (the stark cream with the more ivory gauze), I’m going to experiment with dye the next time I make this design!


[ 4 Comments | Posted on July 24th, 2012 ]

I Love To Create: T-shirt Confetti Necklace!

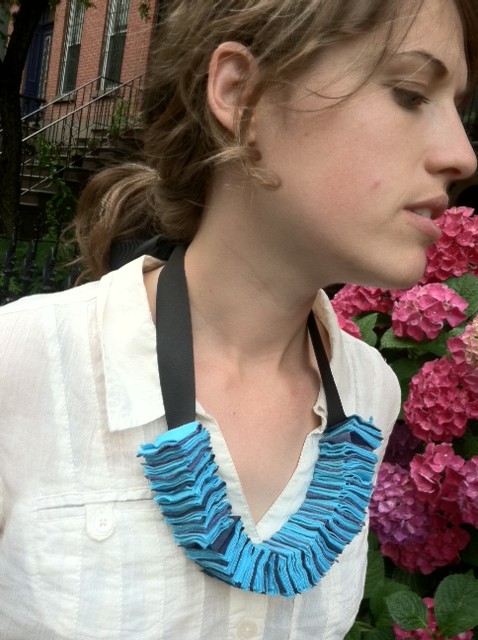
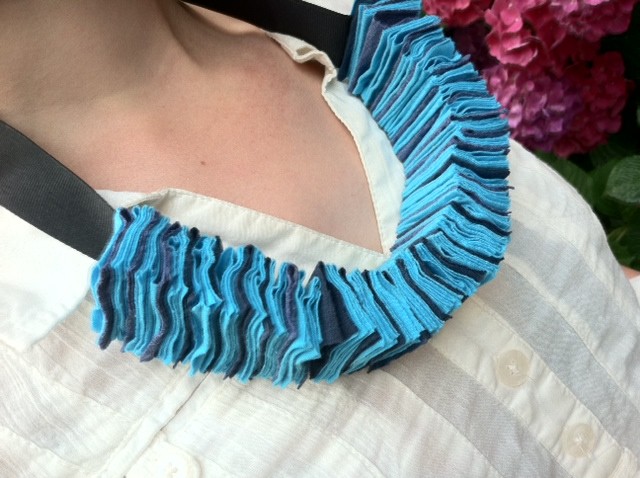
Interestingly, the inspiration for this festive, soft Fourth of July necklace came from south of the border — while I was on vacation in Oaxaca, Mexico, we happened upon a small gallery where I spotted an orange folded paper bracelet made by women in a local artist collective. The paper was so soft and fibrous, it reminded me of fabric. So when I set to re-imagining that bracelet stateside in my Generation T workshop (as a necklace of fabric and glue!), I was pleased that the results are even cozier — a wonderfully celebratory accessory fit for a summer barbecue! (I was intentionally playing it subtle with the shades-of-blue color palette, but a bold red, white, and blue color scheme would really pop.) And it’s comfy, too, when the sun goes down and it’s time to snuggle up and watch the fireworks.

Materials:
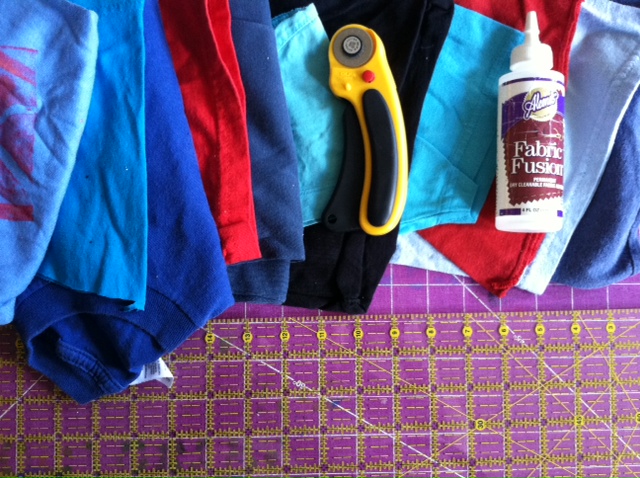
-T-shirt scraps (sleeves work well!), including one long one to use as the fastener
-Rotary cutter and cutting mat
-Quilting ruler
Aleene’s Fabric Fusion glue
-Ribbon (optional, in place of the long piece of T-shirt scrap to fasten the necklace)

Make it:
1.
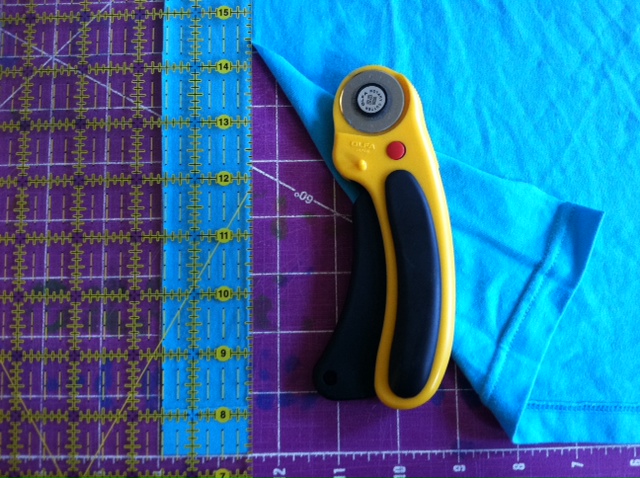
Cut 1 1/2″-wide strips from the T-shirt scraps.

2. Cut the strips into 2″ pieces to make rectangles that are 1 1/2″ x 2″. (I cut about 124 rectangles in two different colors to make an approximately 9″-long necklace segment.)

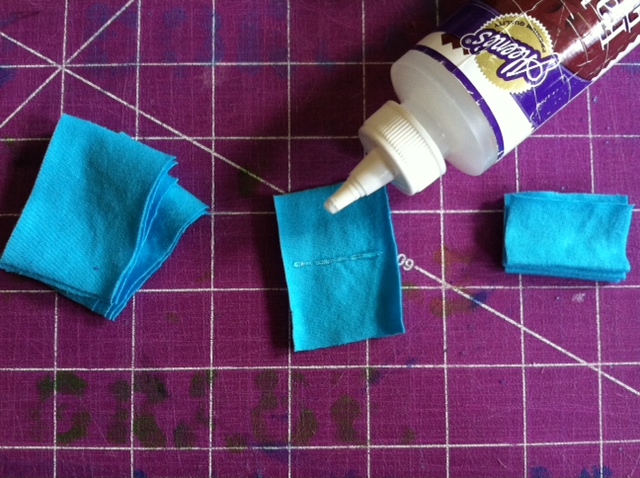
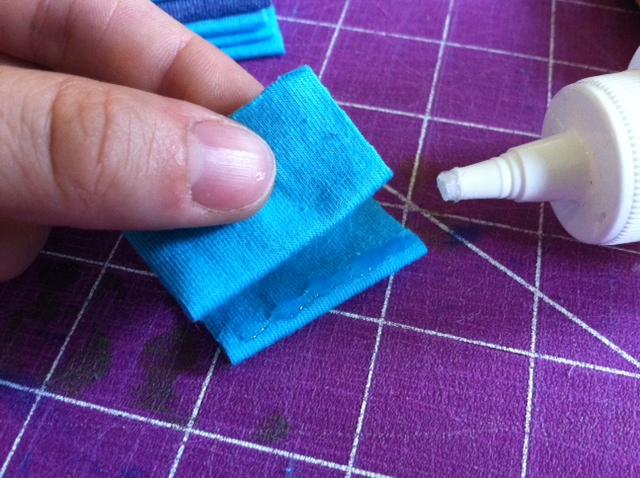
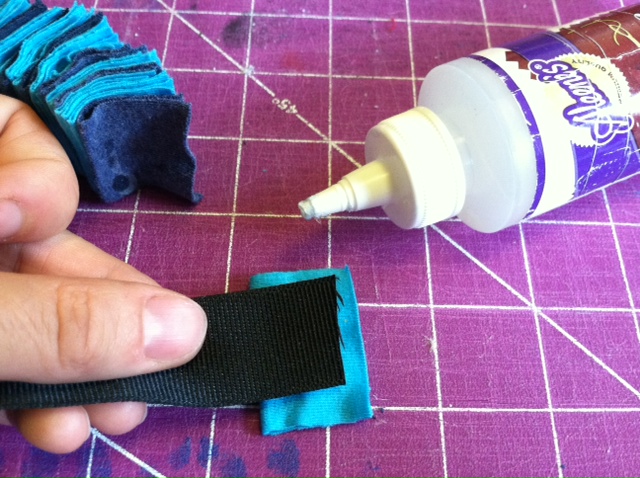
3. Lay one of the rectangles flat, wrong side up, and spread a thin line of glue slightly off-center and parallel to the short ends. Fold it in half so that the glue line retains the crease. Let the glue dry and repeat for the remaining rectangles.
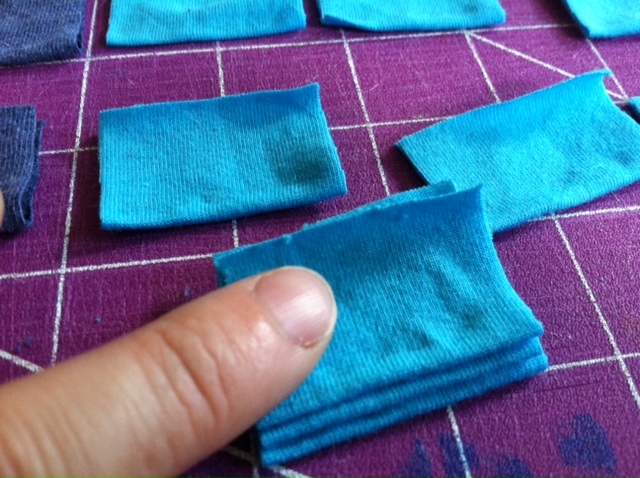
4. Squeeze a thin line of glue close to the folded edge of one of the rectangles and press another folded rectangle over it.

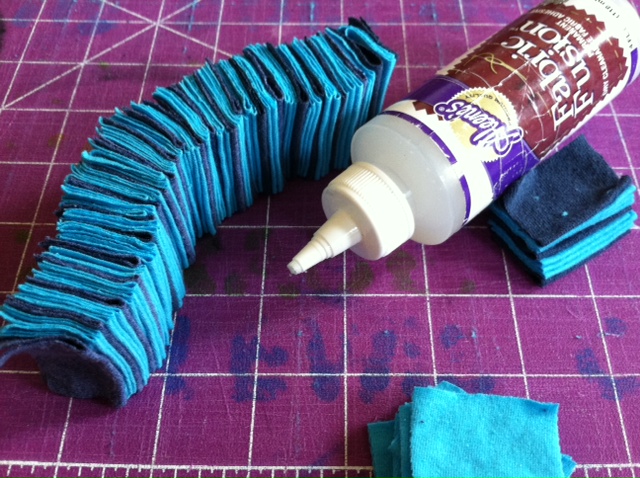
5. Repeat step 4 as many times as needed, to attach more rectangles together and create the necklace piece. (Arrange different colors to create a pattern!) Reserve two folded rectangles to use in step 7.

6. Let the necklace piece dry, then touch up any gaps as desired.

7. Spread glue along the end of a long T-shirt strip or ribbon (shown here), and center and press it along one of the spare rectangles from step 5.

8. Then add more glue to the ribbon and press it against one end of the necklace piece, aligning the T-shirt rectangles (the ribbon end should be sandwiched in between T-shirt material). Repeat on the opposite end of the necklace piece. Let dry completely. Then snip the T-shirt strip or ribbon in the middle so you have two ends for tying.

9. Tie the ends in a bow at the back of your neck.

Variations:
Experiment by making smaller rectangles for a more delicate piece (you can make a necklace this way, or, I made an accompanying bracelet using 1″ x 1 1/2″ rectangles).
Use chain in place of the fabric fastener. (I like the idea of an all-white necklace piece with a gold tone chain.)
Try wearing it as a headpiece! (My sister’s boyfriend tied the necklace around his head
as a joke, bonnet-style, but with the right messy up-do, it could be quite the statement piece.)
Play with color: Make the red-white-blue version mentioned above, use the color scheme from your favorite sports team to wear to the next game, or craft a rainbow to brighten your day!

Tune in later this week to see the second necklace I made using the scraps left over from this one–super easy, super fast, and also no-sew (no-glue, even!).


[ 6 Comments | Posted on June 26th, 2012 ]

I Love to Create: Paper Flowers 4 Ways!

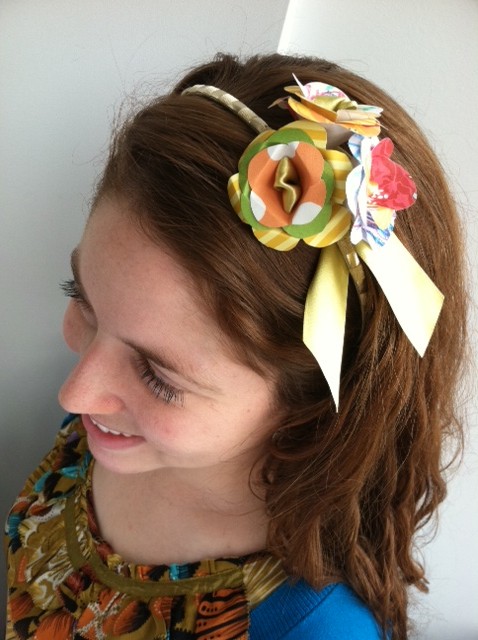
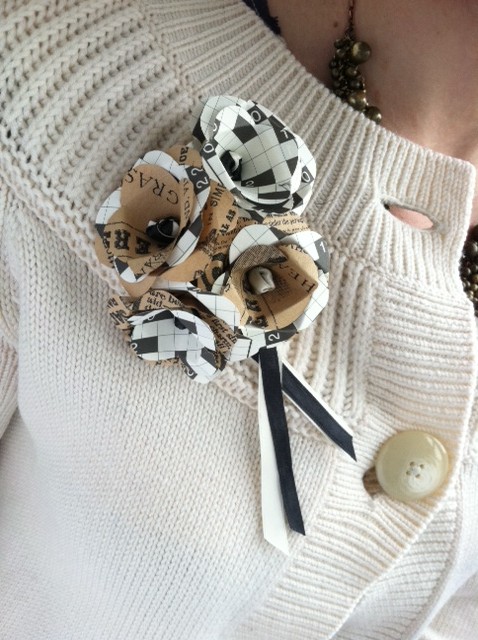
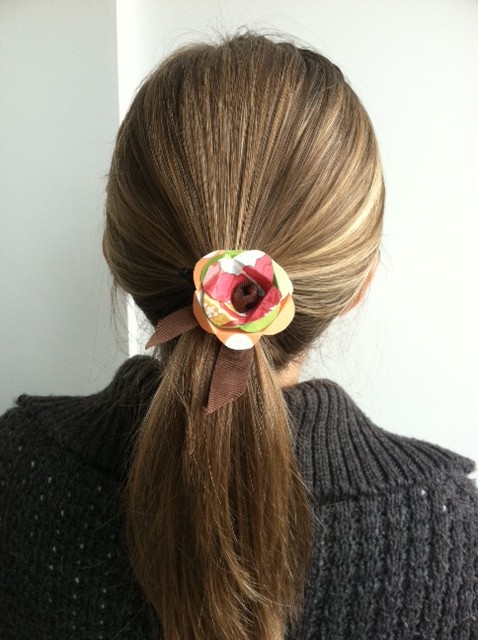
I’ve been playing with paper a lot lately over at my day job, so was inspired to dig into my own paper stash for this month’s iLoveToCreate project. With plenty of time until Mother’s Day, here’s a delicate flower that can be applied four different ways to create a non-wilting “bouquet” for her hand, her head, her hair, or her lapel.

Materials:
-Paper scrap for template (brown paper bag or a sheet from the printer paper recycling) at least 3″ x 3″
-Decorative paper scraps (card stock, book pages, paper bags, thick wrapping paper, etc., in variety of colors)
-All-purpose scissors
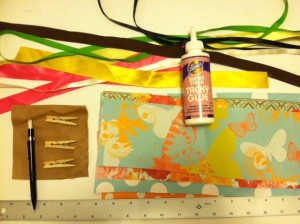
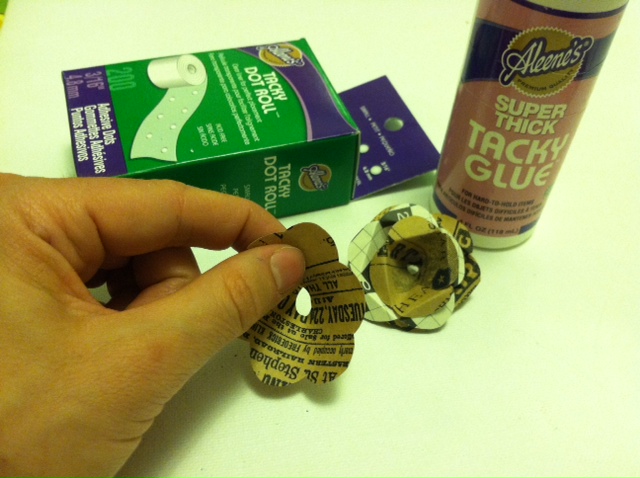
Aleene’s Tacky Glue and clothespins OR Aleene’s Tacky Dot Rolls
-Pencil
-Ruler
-Ribbon of varying colors, widths, and lengths

Make It:
1. Fold the paper scrap in half three times to create a folded “wedge.” Cut a curved edge about 1 1/4″ from the point.

2. Unfold the template (it’ll look a little like a four-leaf clover), lay it flat and trace it three times on one or more of the decorative paper scraps. Three tracings makes one flower.

3. Cut around the tracings to make three identical blossoms. Snip two straight lines into the center of the first blossom, cutting out a wedge equal to two “petals.” Cut three petals from the second blossom, and four petals from the third blossom. Mark and then cut a 1/4″ semicircle from the center of each blossom, as shown.
4. Curve each of the blossoms to the cut edges overlap a bit. Adhere with glue or dots, let dry if necessary, then fold back the tips of the petals.

5. To make a flower ring, nest the blossoms inside one another. Select a piece of ribbon, wrap it around your finger, and knot the ends so the loop fits your finger. Gently thread the loop through the center of the flower, so the knot catches and rests in the center of the flower. Trim the ends of the ribbon as desired.

6. Slip the loop over your finger and the ring is complete!

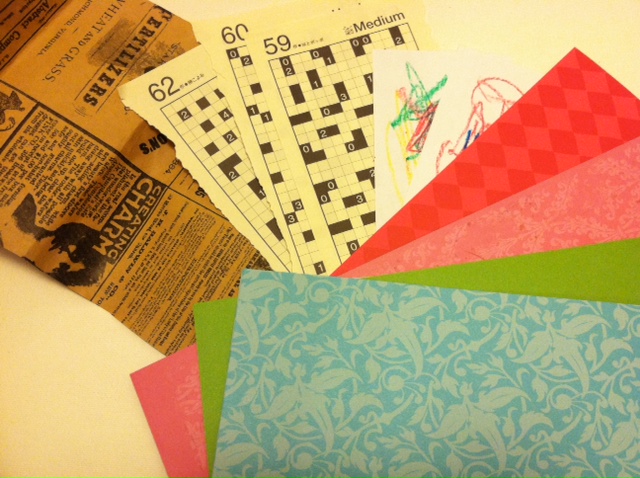
7. Return to your paper stash and repeat the process to make more! You can personalize your bloom using crayons and card stock (a sweet way for younger kids to get involved if it’s a Mother’s Day gift), go for a more muted geometric design using pages from an Japanese puzzle magazine, gather up some vintage appeal by cutting into that newspaper-printed paper gift bag, or simply dig into the scrapbooking scraps for some playful color.

8. Keep your flowers uniform and muted…

…or mix and match the colorful blossoms in a paper botany experiment!

9. To make the headband, brooch, or barrette, thread one end of the ribbon through the flower, back to front, knot it, and then thread the end back through the flower, front to back. Thread multiples together this way, too! Wrap the ends of the ribbon around the headband, brooch, or barrette base and glue or knot to secure it.

And now, the million-dollar question for the author of Generation T: Can you make these flowers with T-shirts? Absolutely! Substitute fabric glue for the adhesive, and trim the neckline of a shirt with these sweet little blooms.


[ Comments Off on I Love to Create: Paper Flowers 4 Ways! | Posted on April 24th, 2012 ]

ILTC: Ryan Gosling’s Scorpion Jacket

Hey Girl.

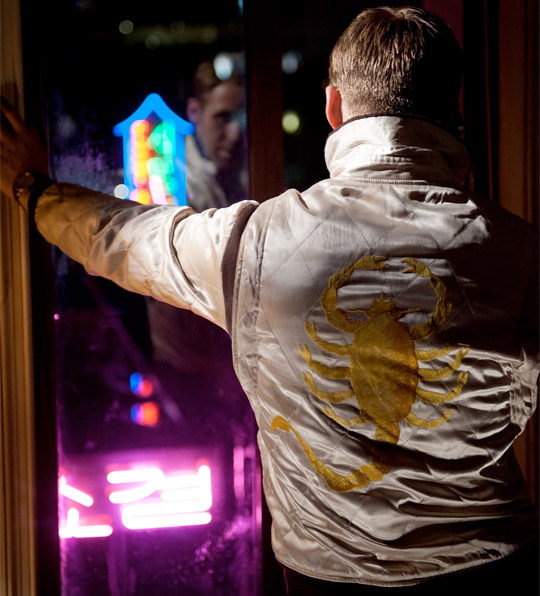
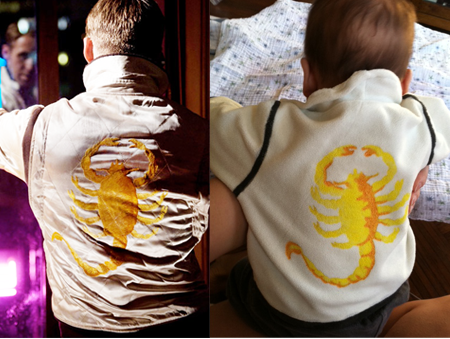
As one popular Tumblr ode to Ryan Gosling says, he’s “your favorite sensitive movie dude-turned-meme.” Another Tumblr puts it more bluntly. And a recent video by Gosling doppelganger Joey shares “How to Look Like Ryan Gosling.” Which got me thinking about snagging Ryan Gosling’s style. Forget the hoodie and well-groomed 5 o’clock man-scruff. I mean, did you see that embroidered scorpion jacket he wore in Drive? If you didn’t, well, feast your eyes:

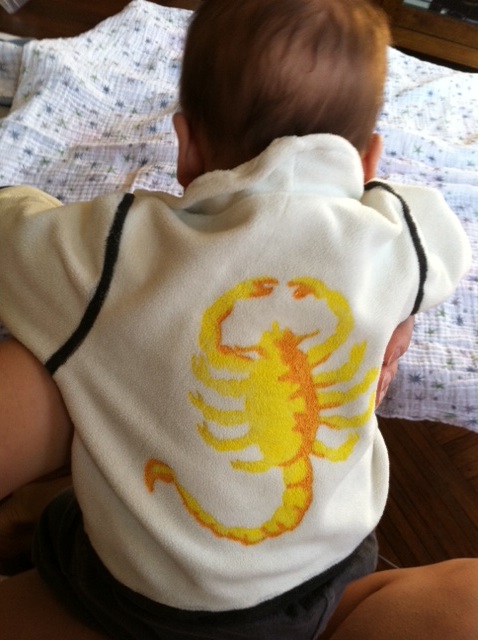
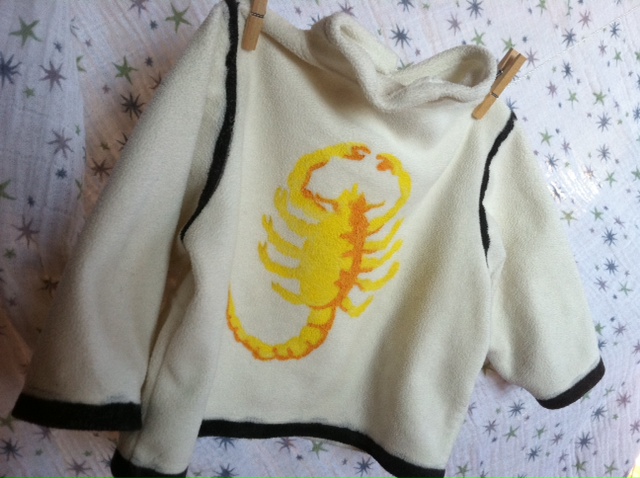
You can actually buy it — oh, but making it would be so much more fun. And so, for my newest iLoveToCreate blog post, I set out to make some sweet scorpion threads inspired by that original jacket — no satin quilting, no embroidery, just a white jacket from a thrift store and some fabric paint. And since my favorite new sensitive dude happens to be pint-sized, I’ve decided to make it in miniature for my little gosling. (Note: These instructions can produce a version for a full-sized goose as long as you start with a full-sized jacket!)

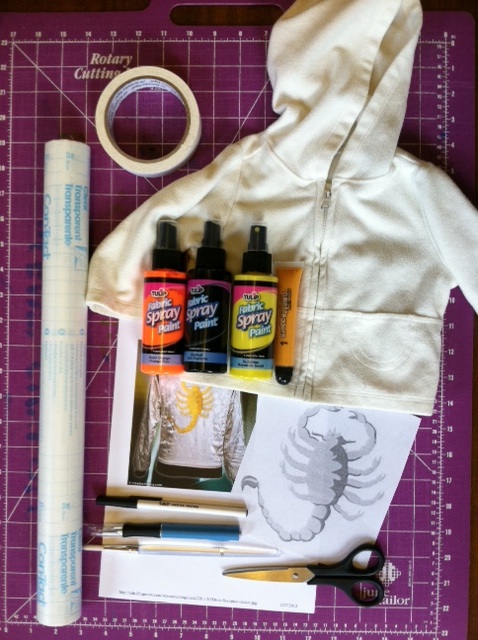
Materials:
-White
zip-front jacket or sweatshirt
-Pen
-Contact paper
-Craft knife and cutting mat
-Masking tape
Yellow fabric paint, brush or spray on (for scorpion)
Orange fabric paint, brush or spray on (for highlights)

Black fabric paint, brush or spray on (for trim)
Paint brushes (optional)
-Sewing machine threaded with white thread (optional)
-Scissors (optional)

Make it:

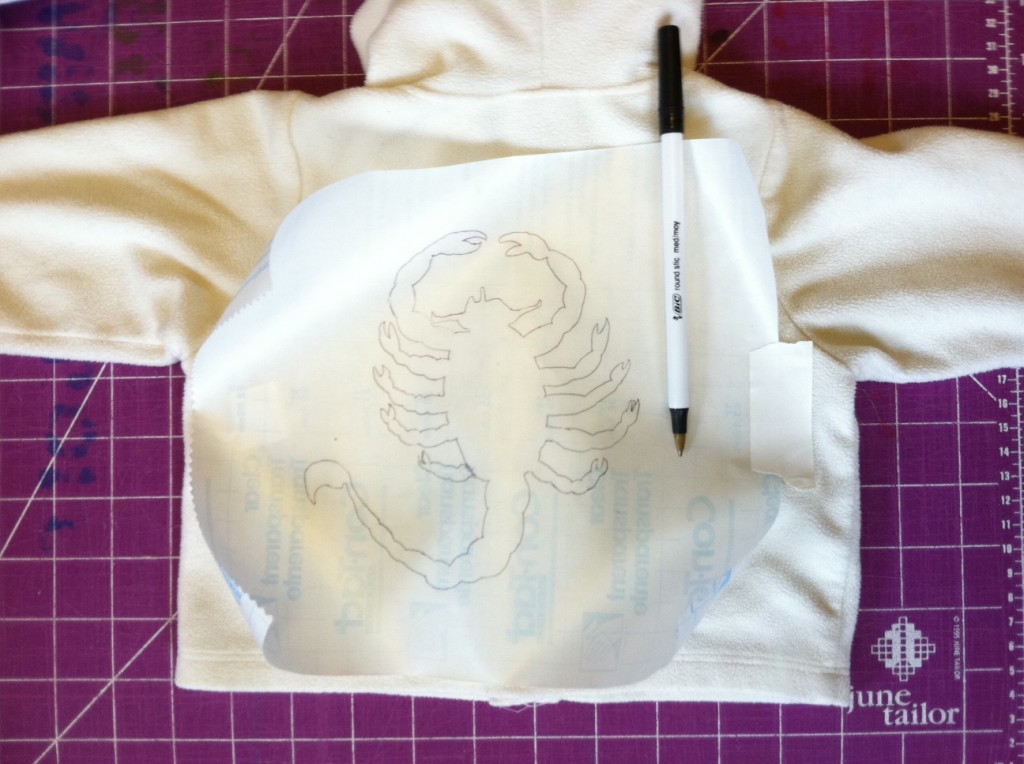
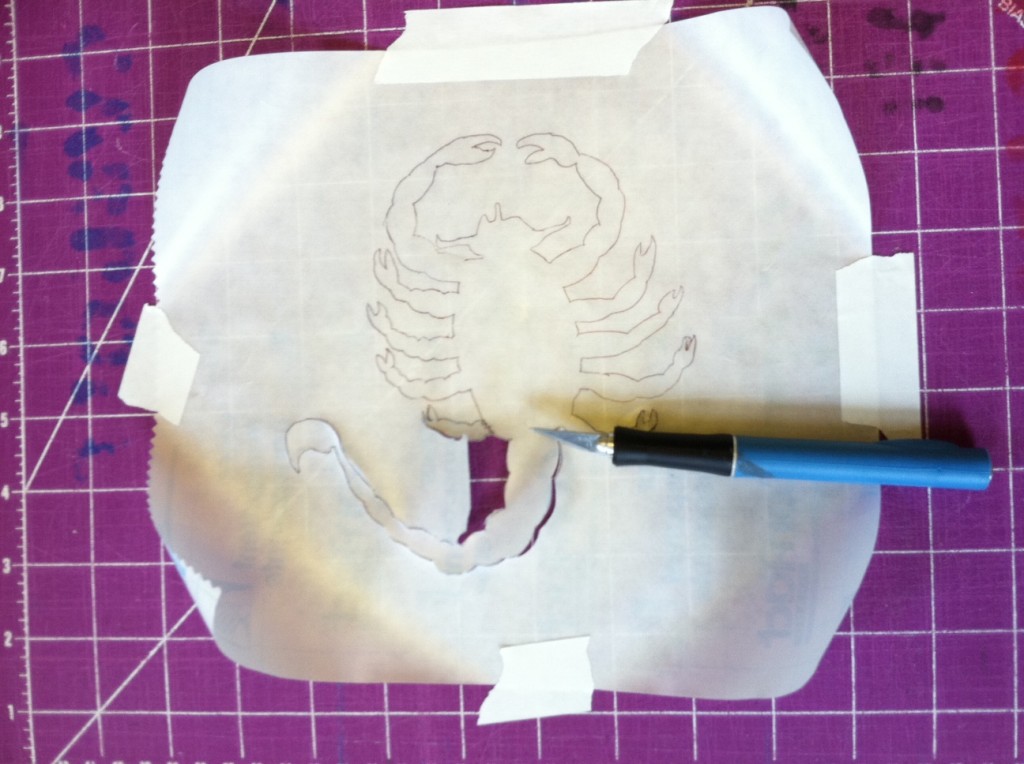
1. Lay the jacket flat and measure the approximate dimensions of the back panel. Cut a piece of contact paper to those dimensions. Draw or trace the outline of a scorpion onto the paper.

2. Use the craft knife and cutting mat to cut out the contact paper stencil.

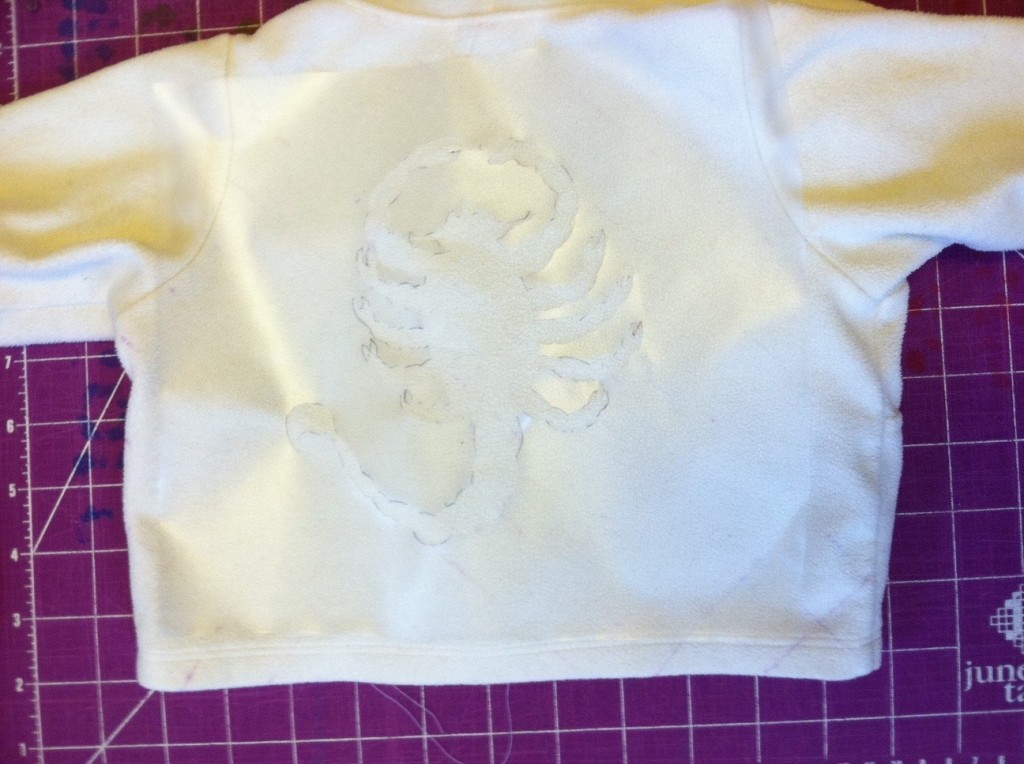
3. Peel off the paper backing of the contact paper and press the stencil onto the back of the jacket.

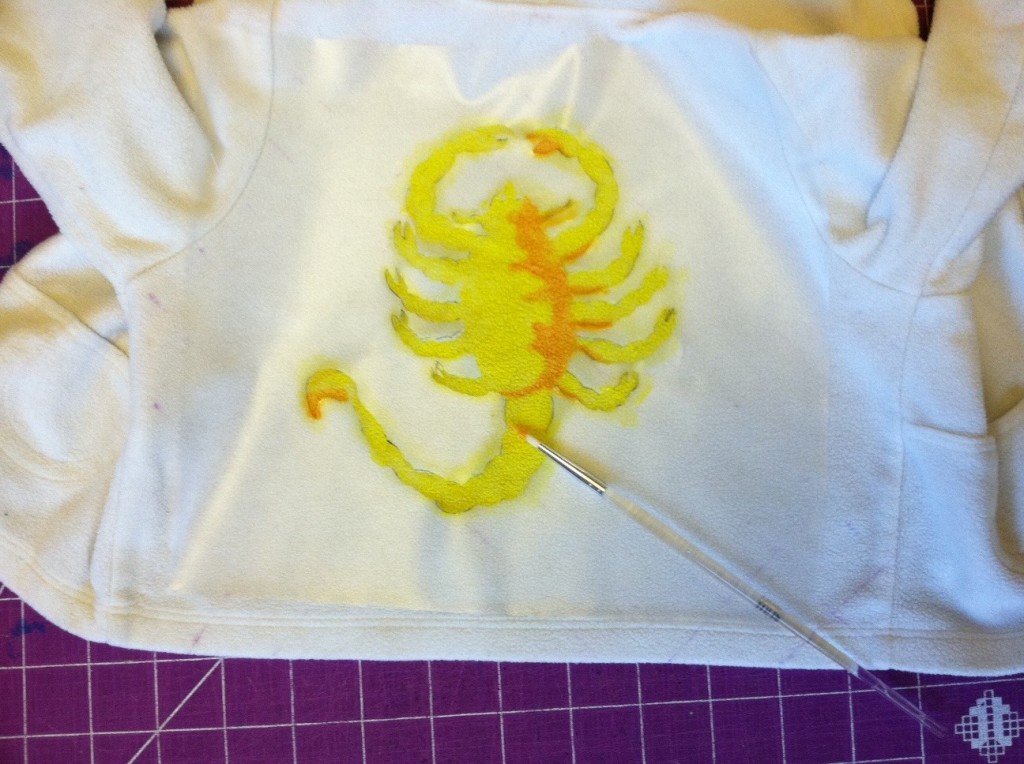
4. Paint the entire scorpion shape with yellow paint. (Use spray paint or paint it on with a brush for more control.)

5. Paint some highlights on the scorpion in orange to show the shadows.

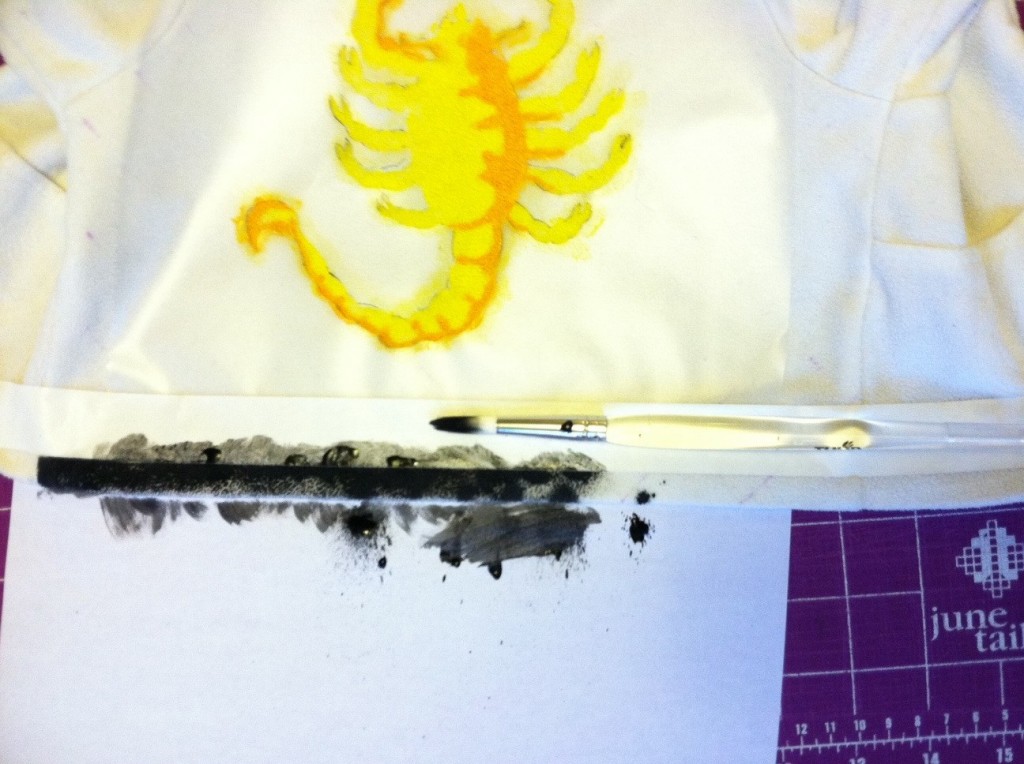
6. Line the bottom edge of the jacket, the sleeve ends, and the shoulder seams with masking tape and paint them black.

7. Let the paint dry completely and carefully peel off the tape and stencil. Optional: If the jacket has a hood (mine did), cut and hem it to create a collar (because I’m nerdy like that, and I’m going for authentic!).

8. Try the jacket on your littler driver. Okay, so he can’t even hold his head up yet, but he sure knows how to grip the wheel! Next up: Get him a driver’s license…in 16 years.

I love this stencil!! Now to apply it to a T-shirt…or what about painting a scorpion wrapping around the bottom of a pant leg or stockings?

Photo of Ryan Gosling via FirstShowing.

[ 10 Comments | Posted on February 28th, 2012 ]

New York, NY @ BurdaStyle Book Party

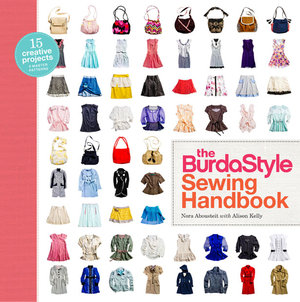
Please join Megan Nicolay at Housing Works Bookstore this Thursday November 10, 2011 to help celebrate the launch of The Burdastyle Sewing Handbook by Nora Abousteit and Alison Kelly (co-founder and creative director at BurdaStyle/ former Project Runway contestant, respectively).

She’ll be without her trusty scissors and T-shirts, but instead representing iLoveToCreate and wielding a mean set of Tulip glitter tattoo materials — all the better to “ink” you with, my dears! But even if you don’t want the tattoo, come for to meet the BurdaStyle team, the book contributors (I bet they’ll even sign a book if you ask them nicely!), and some of your favorite DIY bloggers and craft personalities. But there’s more: Check out the Singer Make-and-Take Lounge, the photobooth, Spoonflower fabrics — or hey,Ā  just enjoy the wine, beer, and hors d’oeuvres!

BurdaStyle Book Party
Housing Works Bookstore
126 Crosby Street, New York
(212) 334-3324

[ 2 Comments ]

I Love to Create: Studded Leggings!

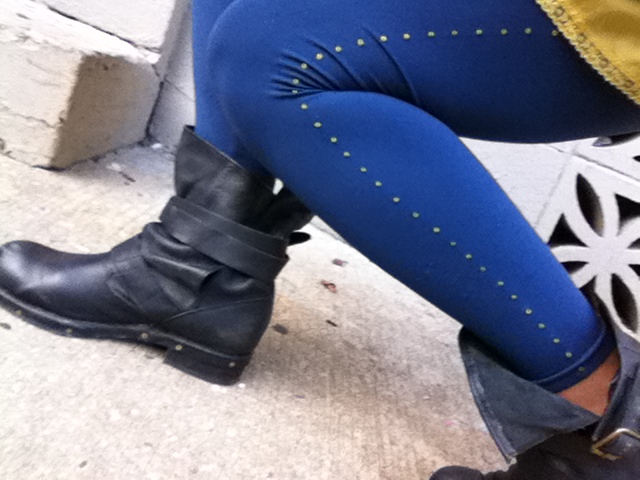
I spotted a pair of studded leggings in a magazine once, and though they were just for styling, not for sale (I would have snatched them in an instant!), perhaps it was actually a lovely DIY blessing so that that years later, when I unpacked my tubes of Beads in a Bottle for the first time, I’d know just what to do. I pulled the slightly wrinkled page from my “future inspirations” notebook and set to work!

Materials:
-leggings or footless tights
Tulip Beads in a Bottle paint in desired colors
-chalk marker
-ruler or straightedge
-iron (optional)


1. Prewash the leggings and let them dry completely. Fold the leggings so the sides are facing out. Find the center line down each leg, from hip to ankle and use the ruler and chalk marker to mark dots 3/4″ to 1″ apart along that line. Optional: Set the iron to a low setting and press the leggings flat to make a crease along the outside of each leg before measuring the dots.

2. Select a Beads in a Bottle color to match or contrast the leggings (though you can’t tell from the late-night craft lighting in the photos, I was working with blue leggings, so I chose a light yellow for nice contrast). Make sure the leggings are on a flat surface, with your marked dots facing up. Hold the tip of the tube about 1/16″ above the first dot and gently squeeze out the paint to form a bead. Note that the beads shrink slightly when they dry, so be a little generous without going overboard.

3. Continue adding dots along the length of the legging until you reach the hip, making sure to lift the tip of the tube straight up after you’ve applied the bead to prevent smearing. Note: If plan to wear your leggings with that hot leotard you have hiding in the back of the closet, you may consider extending the line of dots waistband-high, but otherwise, you only need to squeeze beads up to the hemline of your skirt, shorts, or dress.


4. If you can lay the second leg flat without disturbing the wet beads on the first leg, do so, and repeat steps 2 and 3 to complete the look. Otherwise, let one side dry completely (about 4 hours) before dotting the other side.


5. Let both sides of the leggings dry and get ready to rock them! The beads dry three-dimensionally, so you do get a slightly studded effect that can be seen when silhouetted from the front. Cool, very cool.

Variations: Experiment with different patterns — zigzag your beads down your legs, cluster them around the ankles so they “explode” up the leg, or apply them in a nice line up the back of each leg–reminiscent of old-school seamed pantyhose.


[ 3 Comments | Posted on September 27th, 2011 ]

I Love to Create: Spray 4 Ways!

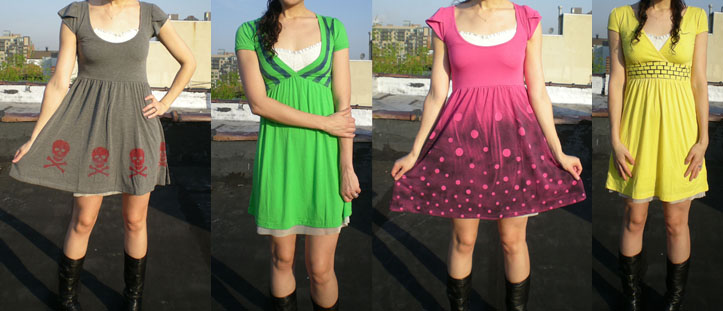
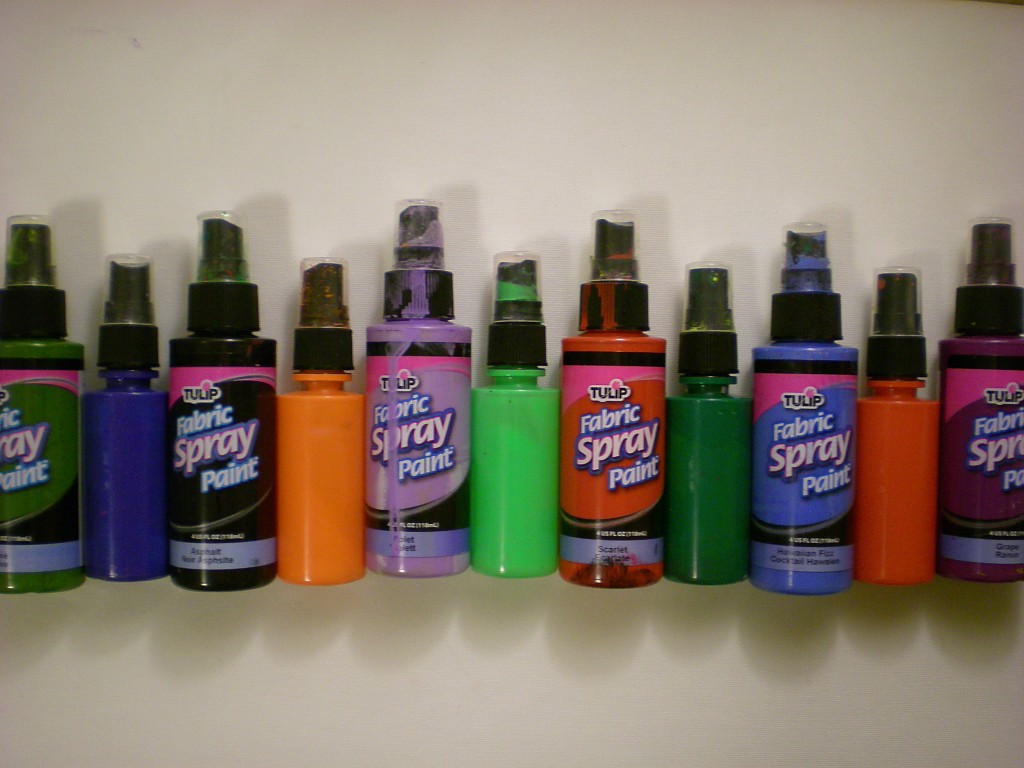
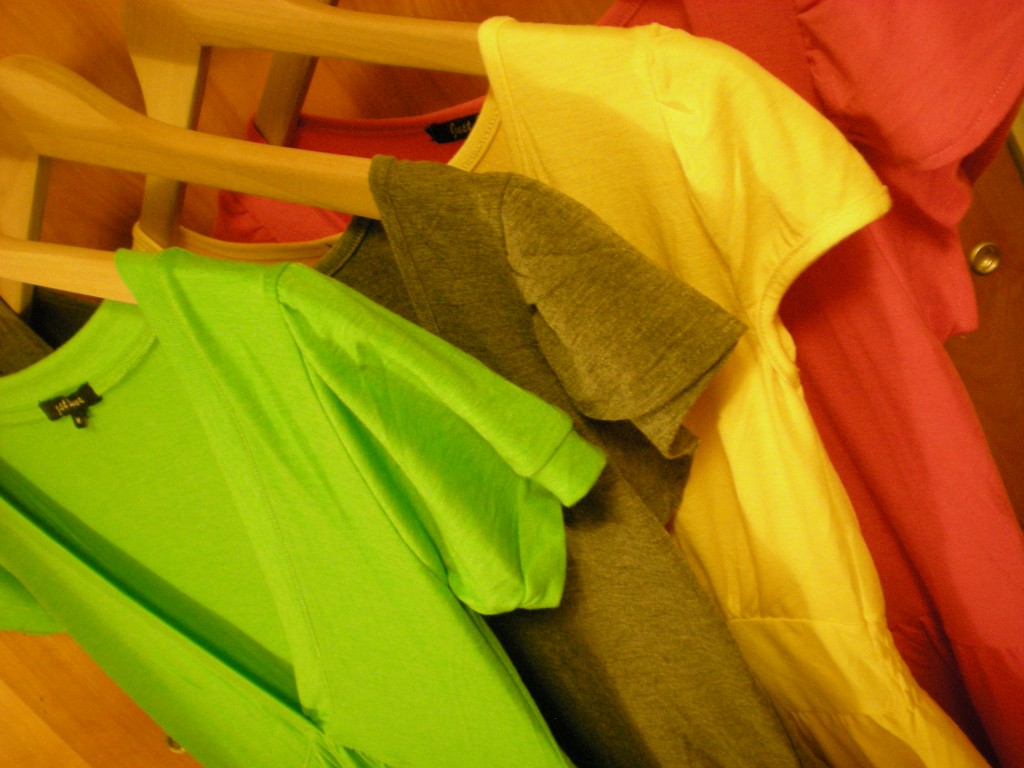
As some of you know, I’ve been just a little bit obsessed with my spray paints lately. And it’s because they’re the perfect quickie spiff-up and surface embellish for T-shirts, pillows, dresses–or any other fabric item you want to spray! Since it’s spring, though, I grabbed up some plain cotton dresses to spray. Here are four different ways to pair those fabric spray paints with templates made from materials around the house including masking tape, stationery stickers, and freezer paper. Pull your spray paints from your holsters!

Once your paints are assembled, select your surfaces (in all different colors–though light colors will take the paint best).

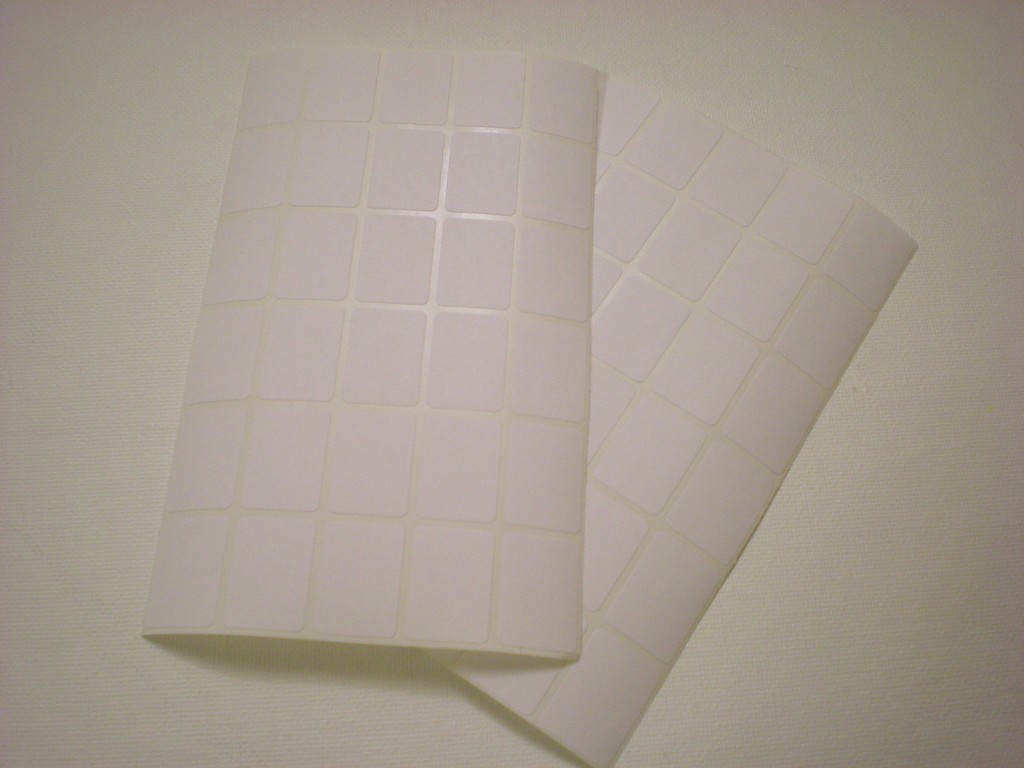
Then introduce any number of “secret weapons from around the house” (items that can be used as templates or stencils to mask parts of the fabric, e.g. freezer paper, permanent marker, a craft knife; map dot stickers; rectangle sticker labels; masking tape) in each of the individual projects below!

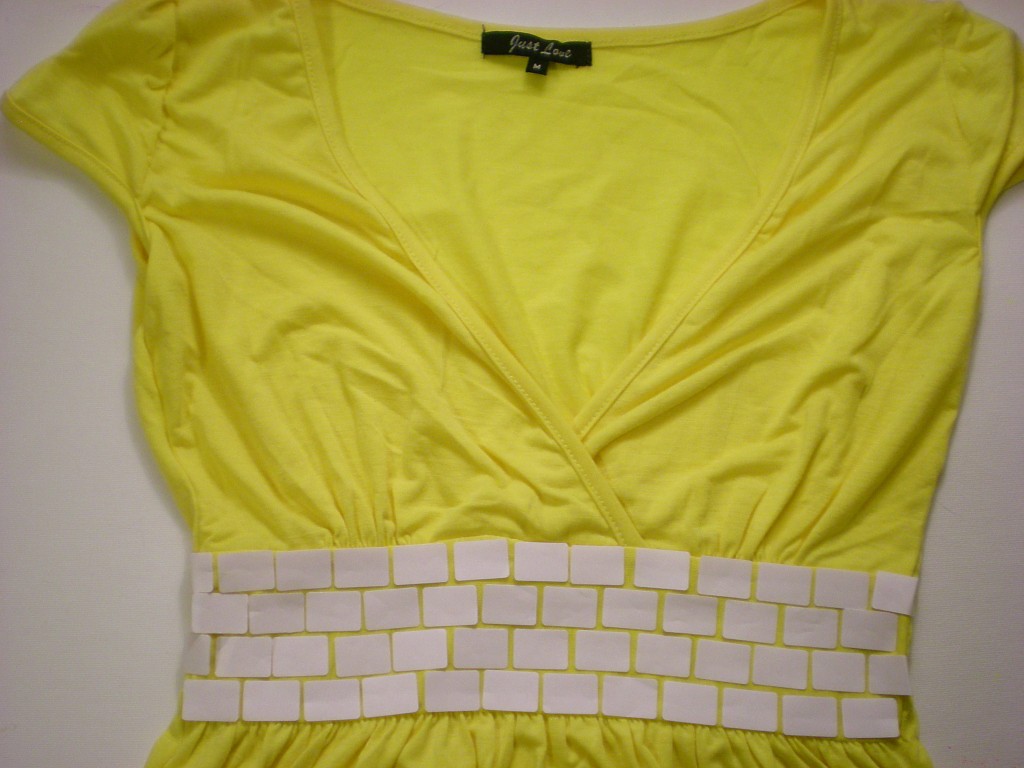
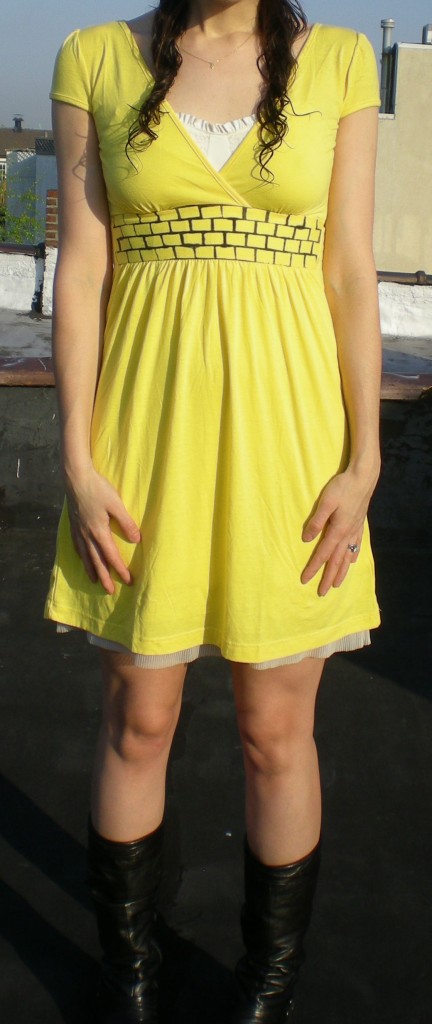
1. Yellow Brick Road

Secret weapon from around the house: Rectangle sticker labels

Originally, my plan was to stick on these labels in a checkerboard pattern to give the dress the feel of a racing flag. But the stickers so easily lent themselves to being bricks, that I immediately thought of the yellow brick road in the Land of Oz.

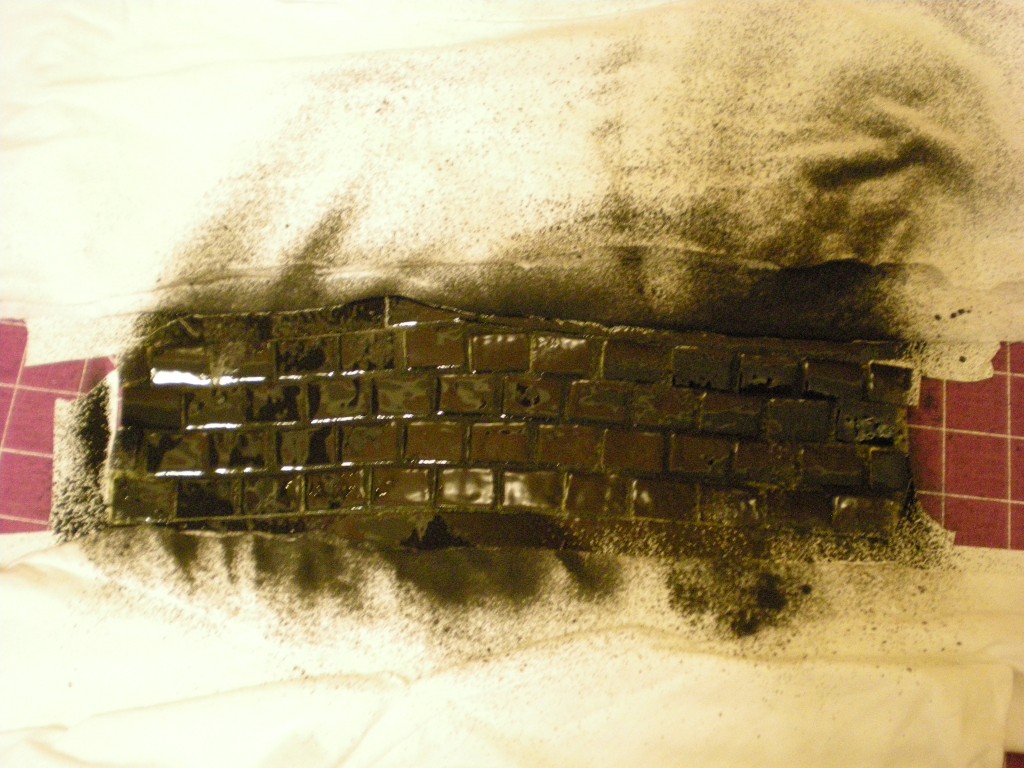
I chose to follow the yellow brick road along the waistband, but you could lay your bricks around the hem of the dress, up and over the shoulder, or a circle them all over the dress. I laid one row of bricks and then stuck down a second row, offsetting the first brick in the second row so that the rest of the stickers in that row would be slightly staggered to create the brick pattern.

Mask the rest of the garment before spraying (I used T-shirt scraps and paper from my recycling bin) so that you can contain the paint to only the area you want to color. I used black spray paint to make the yellow bricks really pop!

Let the paint dry completely before you peel off the brick stickers and try it on!

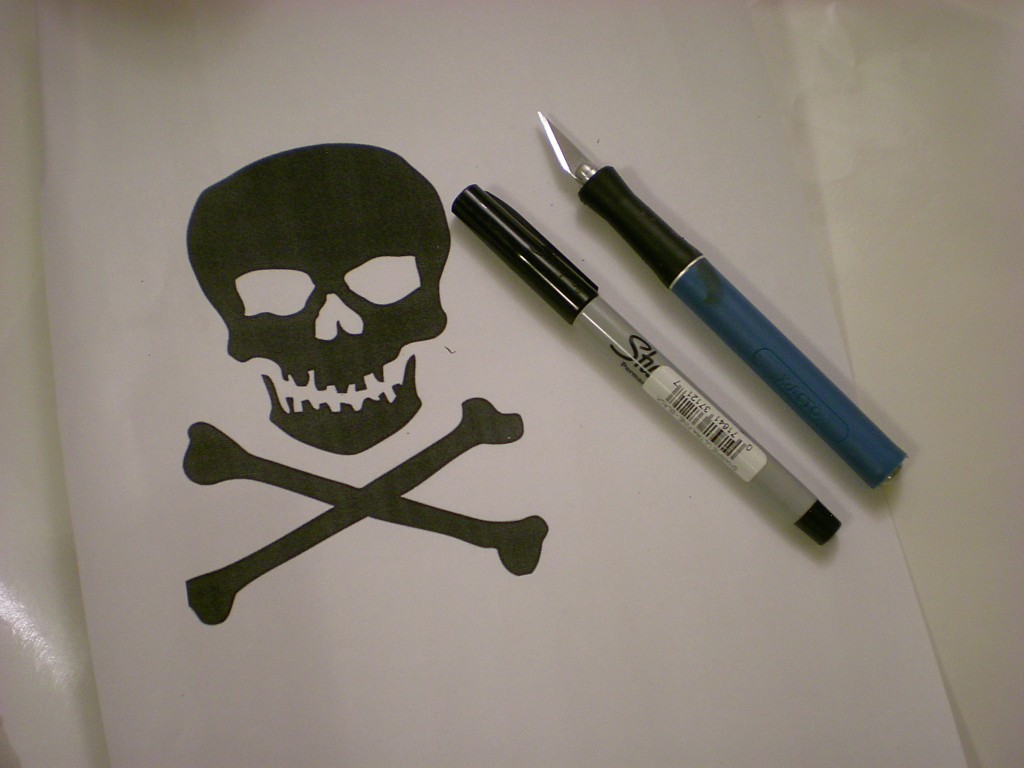
2. Skull & Bones

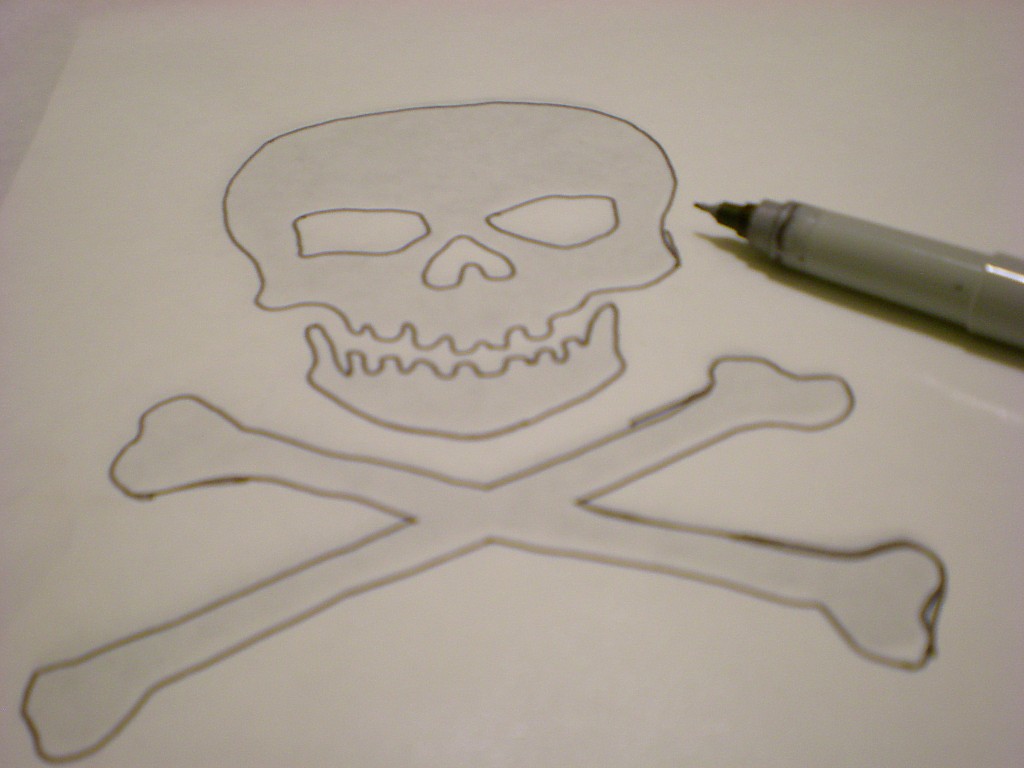
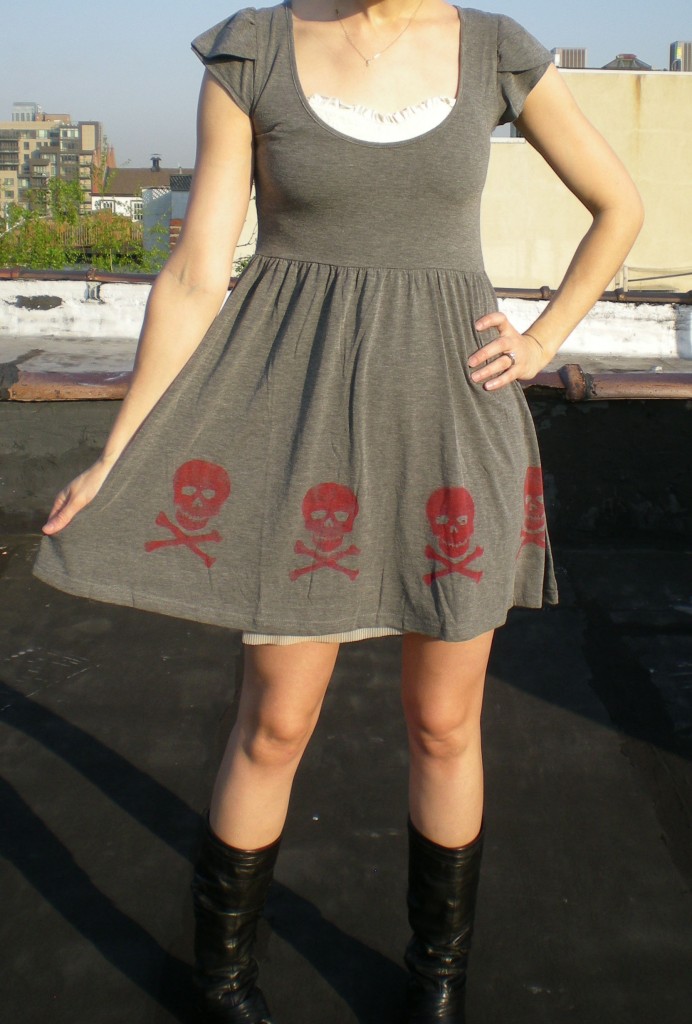
Secret weapons from around the house: Freezer paper, high-contrast image printout, marker, craft knife, and cutting mat

I chose the classic skull and crossbones as my image to download and print for creating the stencil, but any image is fair game!

Trace the design onto a sheet of freezer paper.

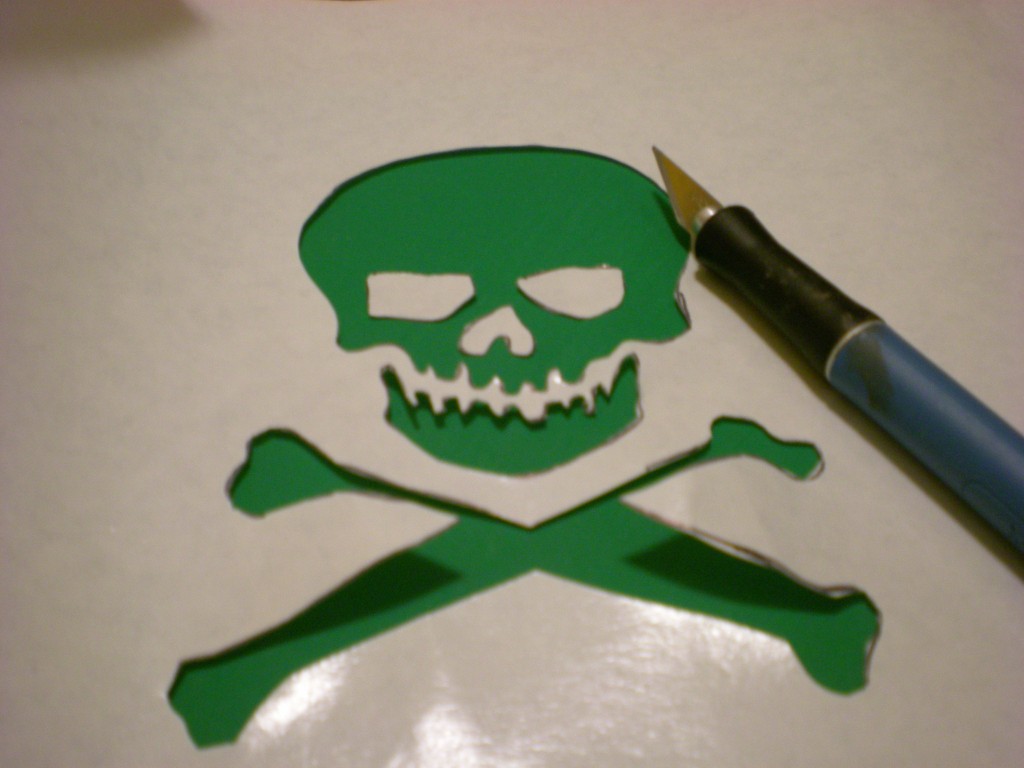
Then use the craft knife to carefully cut out the shapes.

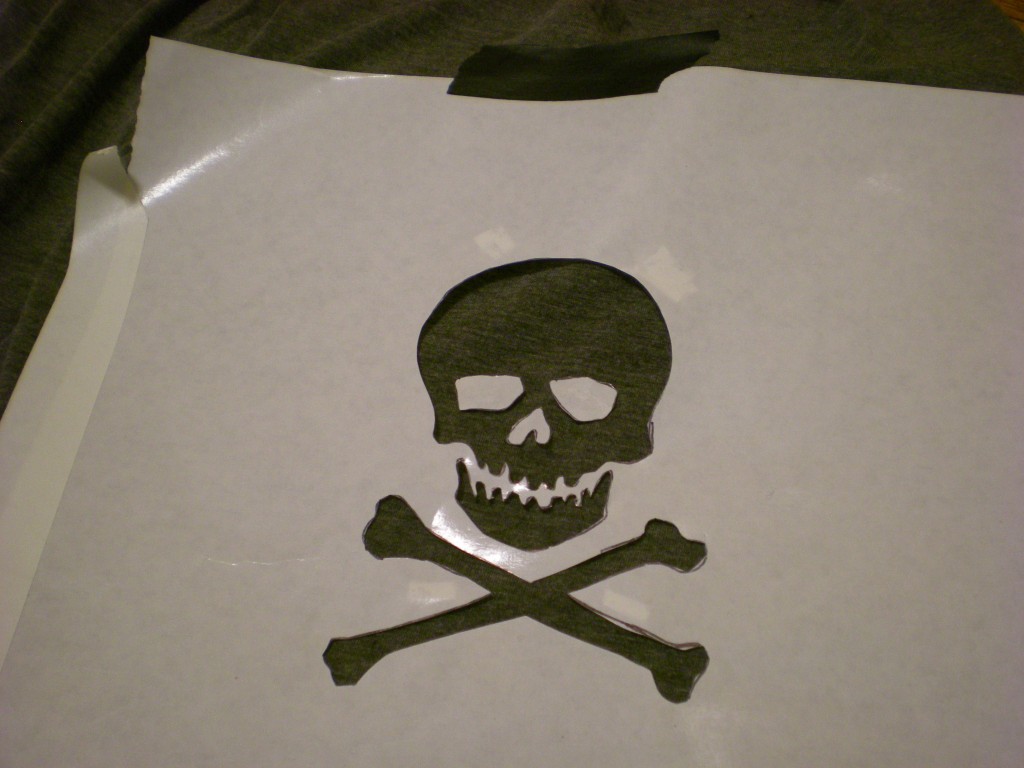
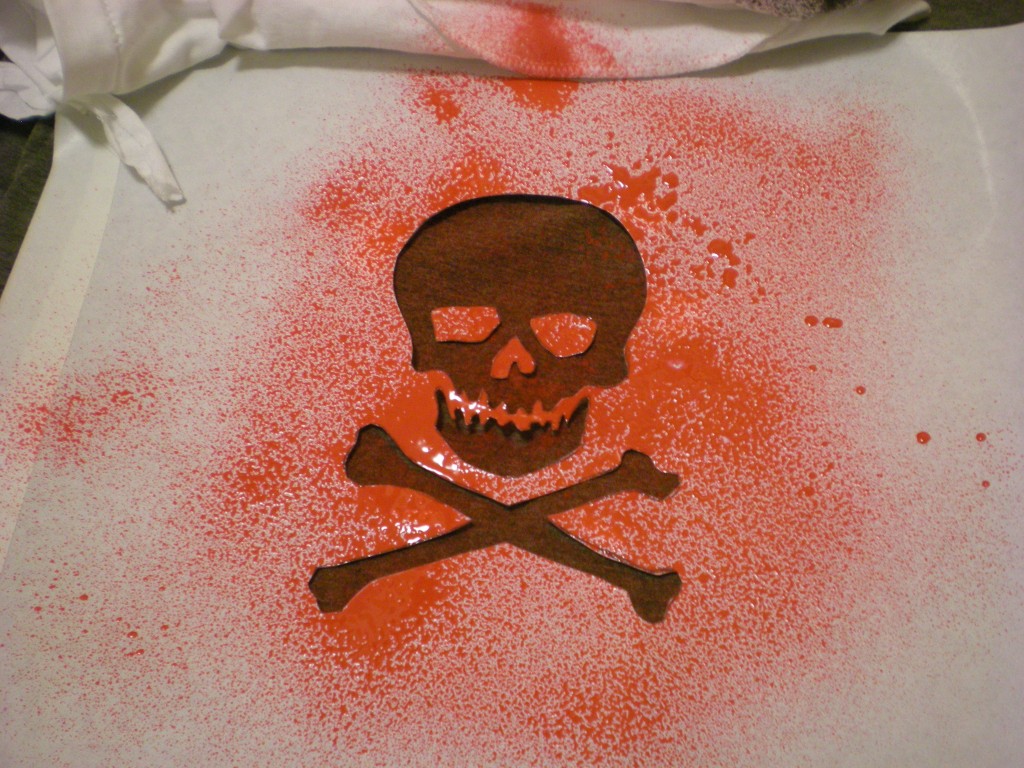
Tape the stencil onto the fabric surface (I placed it along the hem). Don’t forget to place any loose pieces (in this case, the eye sockets and nose cavity!). I sprayed red spray paint on the charcoal gray surface and reused the stencil to create a pattern around the bottom of the skirt.

Let each image dry slightly before moving the stencil to another part of the fabric.

Then let the image dry completely before spraying it onto the back of the garment. Let all the paint dry completely before you try it on!

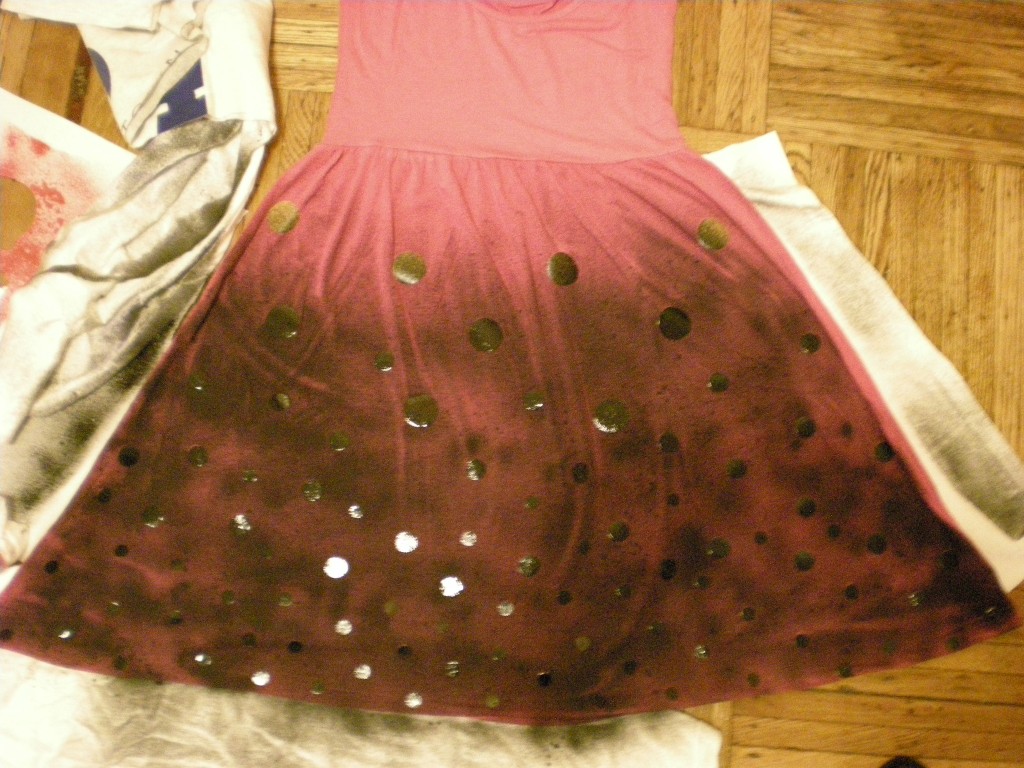
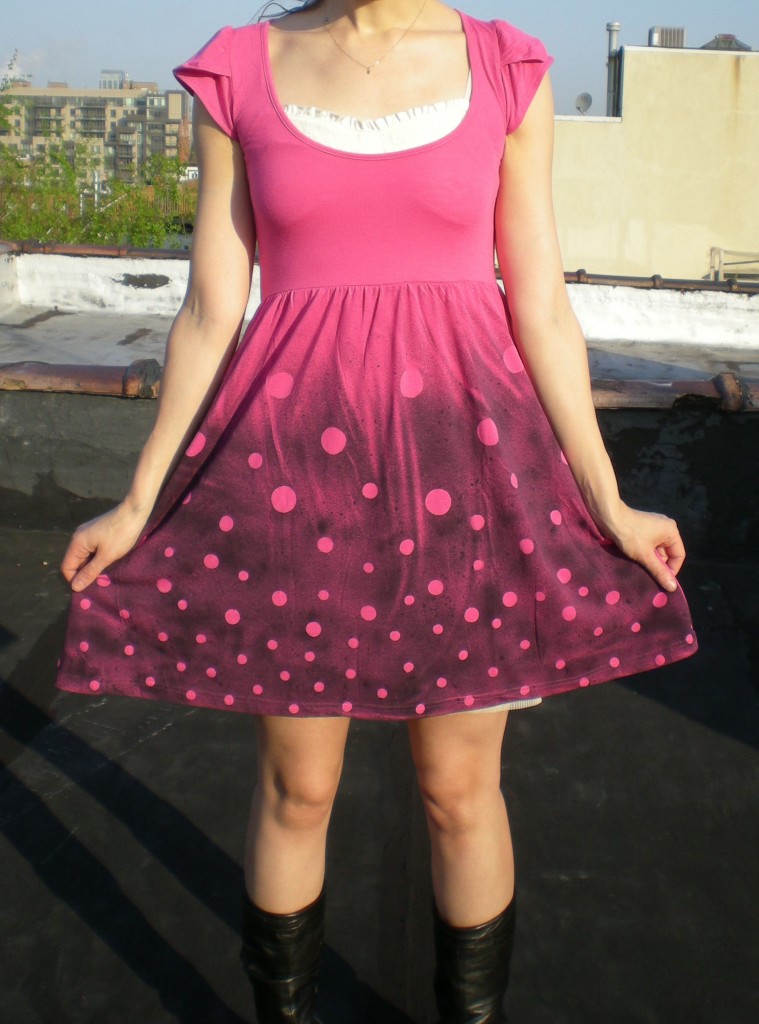
3. Bubble, Bubble, Toil, and Trouble

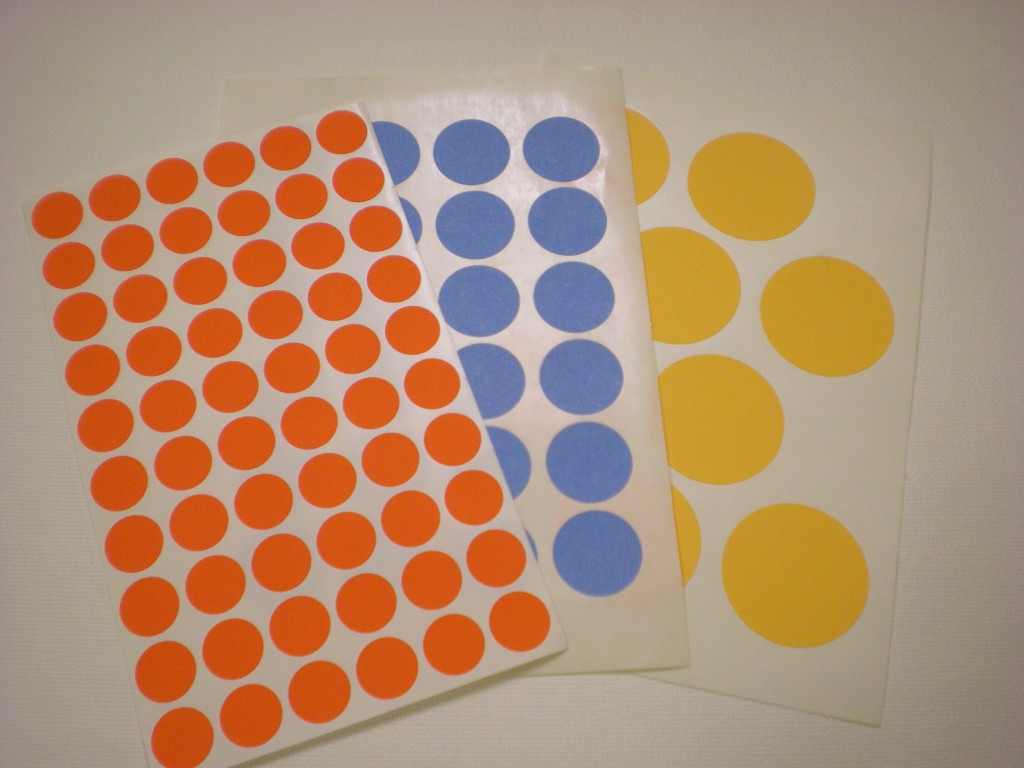
Secret weapon from around the house: Map or garage sale dot stickers in different sizes.

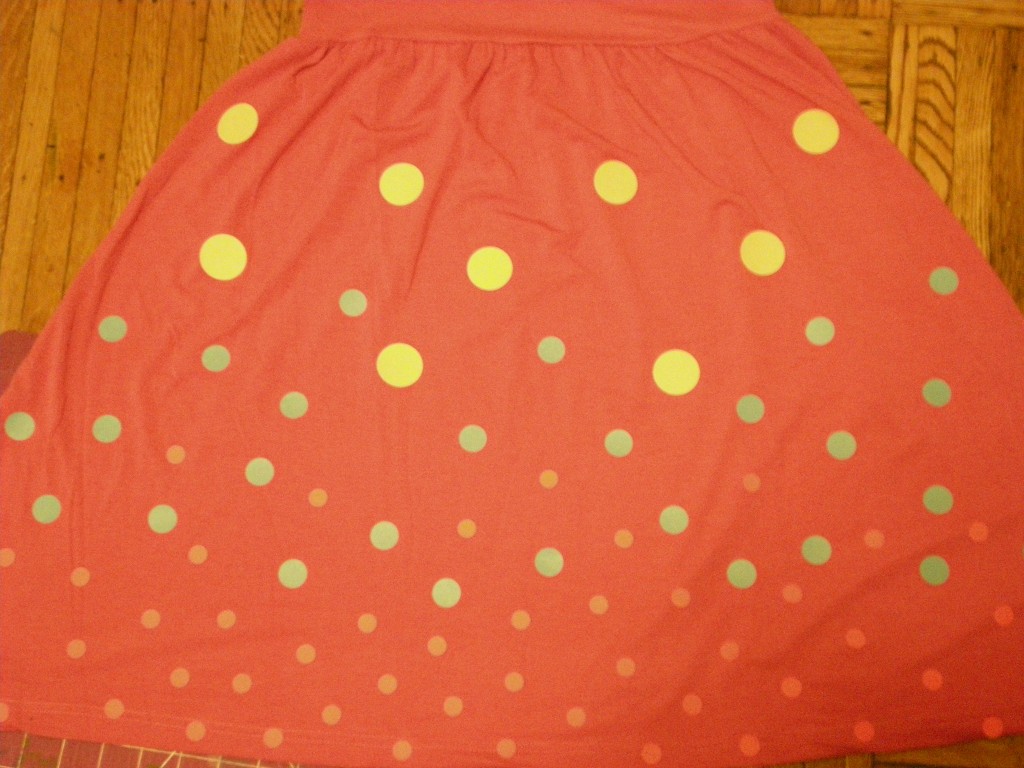
These stickers have so much potential. Beyond mixing up the sizes, you can arrange them into patterns, overlap them, use the surrounding sticker bits to create reverse dots, and so on. I used three sizes (3/4″, 1 1/4″, and 1 3/4″).

To create the appearance of bubbles rising up to the surface, I started with closely spaced small dots at the hem, then transitioned to more widely spaced medium dots, with the large dots finishing below the bodice.

Mask all the parts of the garment you don’t want to color. I used black spray paint, fading out at the top, to make the pink really shine through! I also allowed the naturally occurring wrinkles caused by the gathered skirt to form “cracks” in the paint.

Let the paint dry completely before you put it on. Now that you’ve made your bubbles, go out and make some trouble!

4. Yipes Stripes!

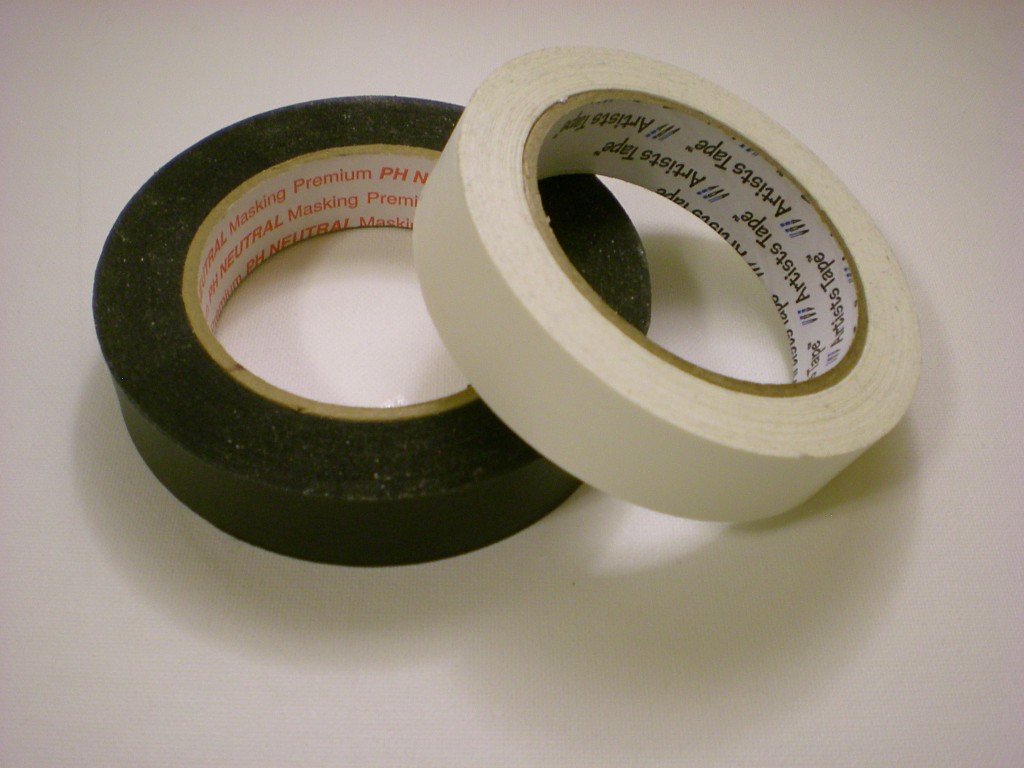
Secret weapon from around the house: Masking or Artists tape

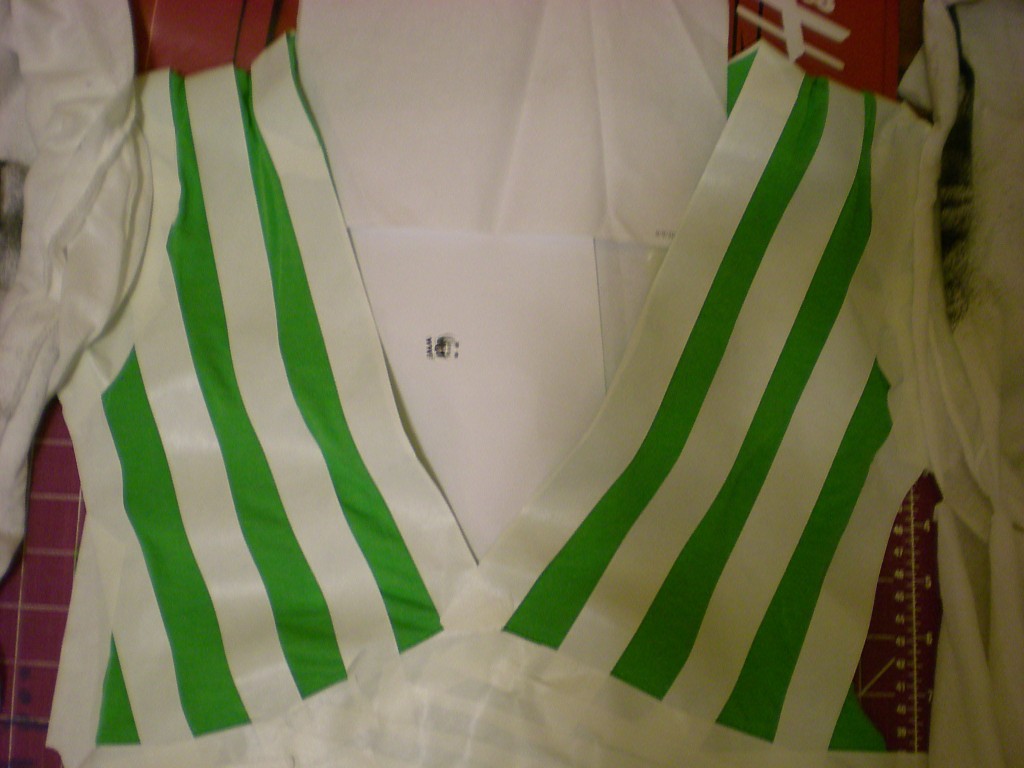
Stripes are just the beginning–you can create plaid, checkered, or gingham patterns with a roll of masking tape. Keep in mind that the width of the tape (and how closely you align them) determines the width of your stripes!

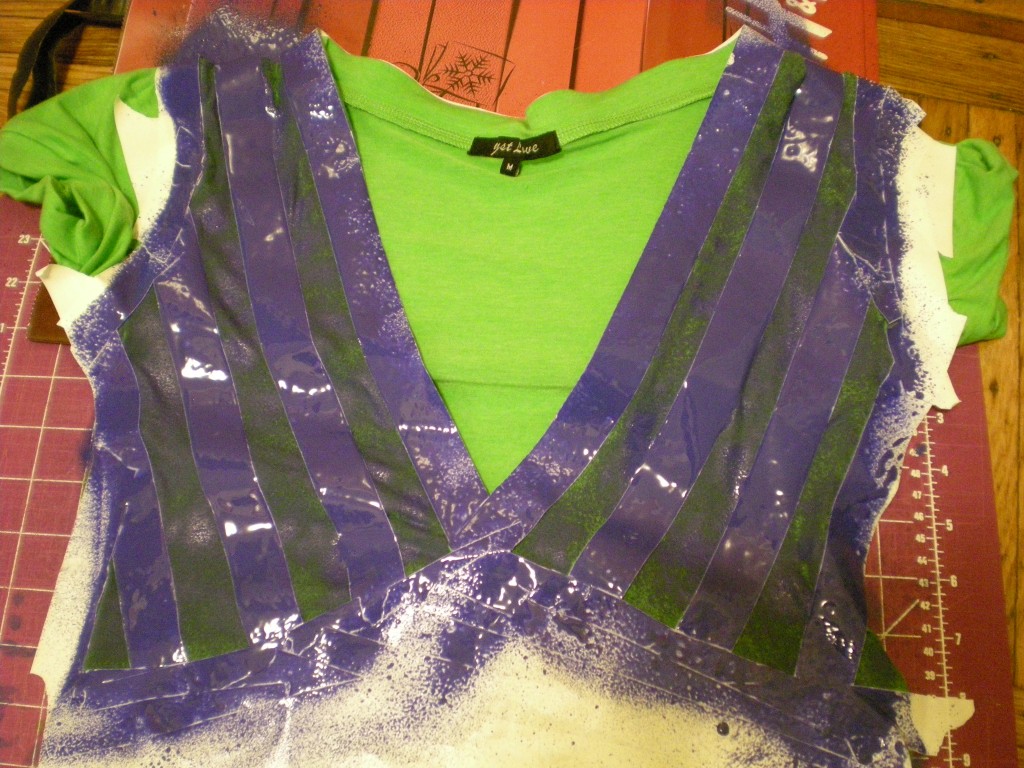
I followed the V-neck cut of the dress to create gently slanting diagonal stripes. Be careful to line up the tape strips carefully in order to keep your design symmetrical and even.

As always, mask the fabric you don’t want to paint! I chose blue spray paint to pair with my bright green frock–a springtime inspiration, for sure!

Let the paint dry before peeling off the tape to reveal your sassy stripes!

One, two, three, four — don’t stop now, let’s spray some more! How many more ways can you spray?


[ 20 Comments | Posted on April 26th, 2011 ]

The Spray (Paint)s of Our Lives…

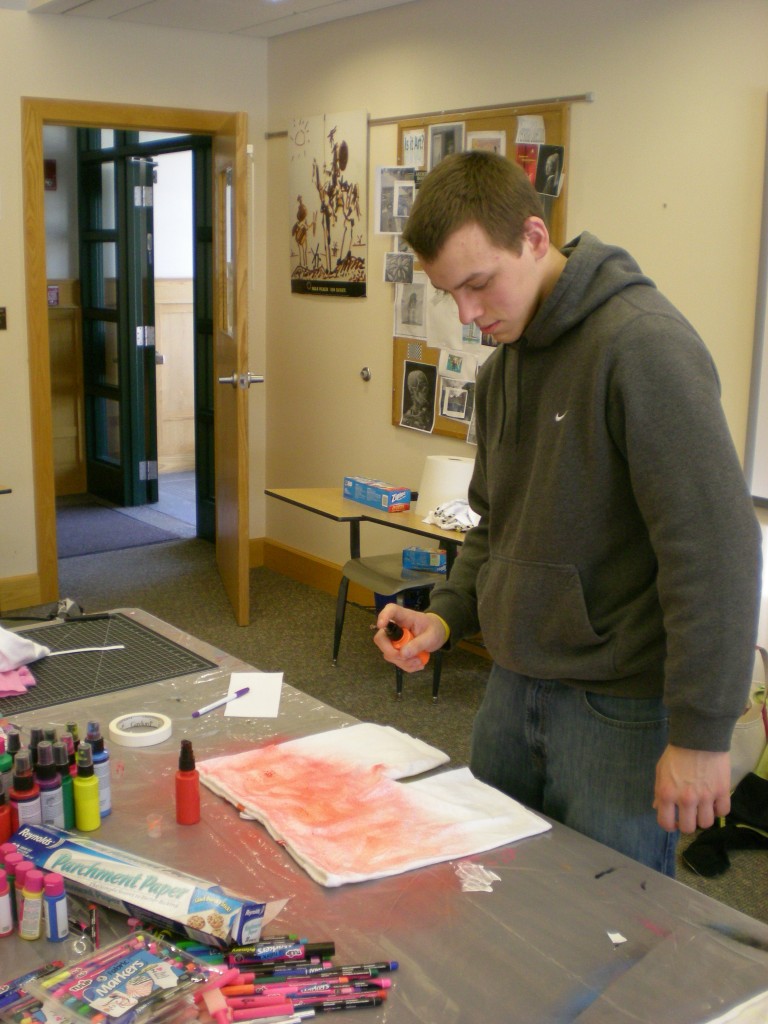
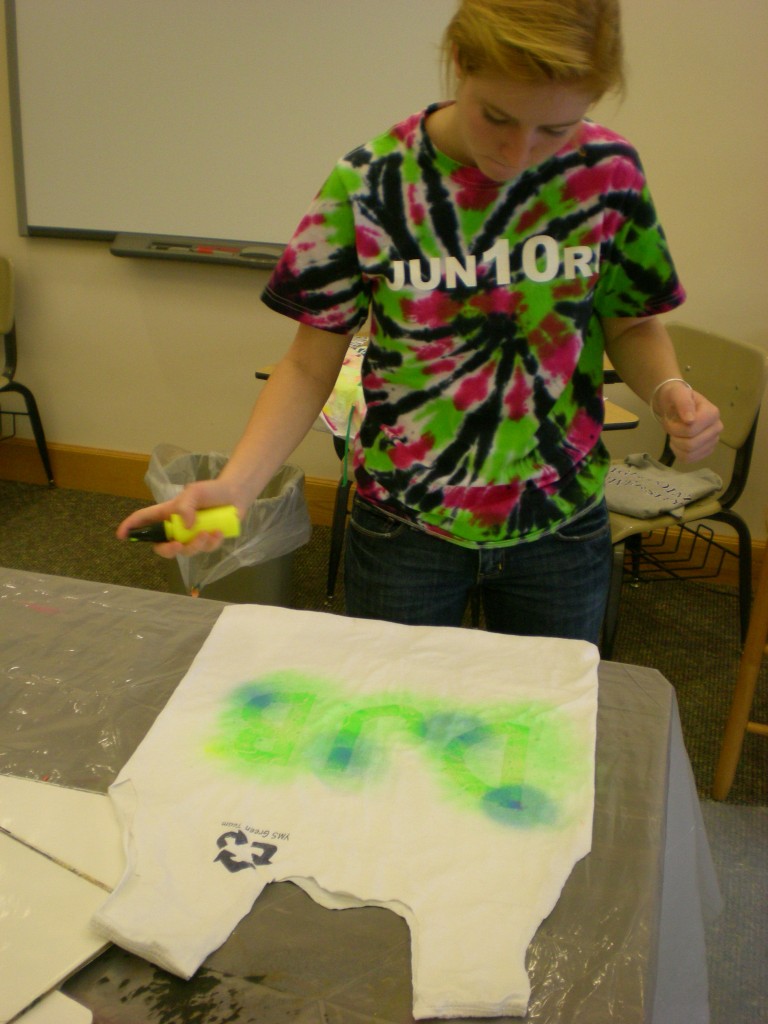
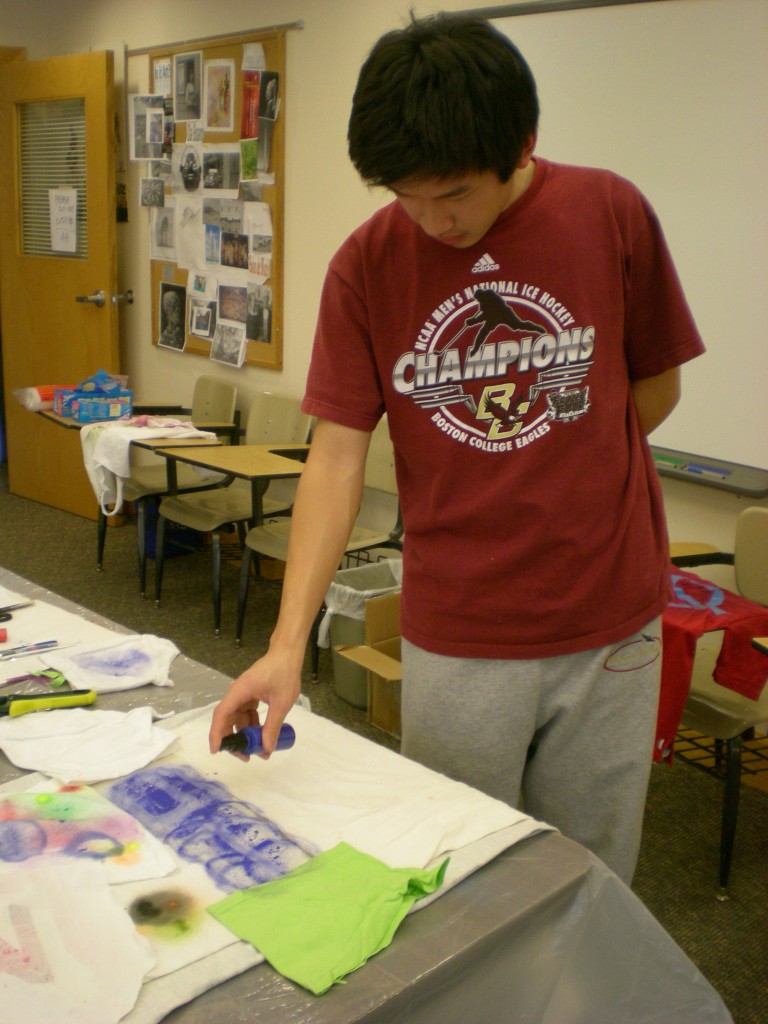
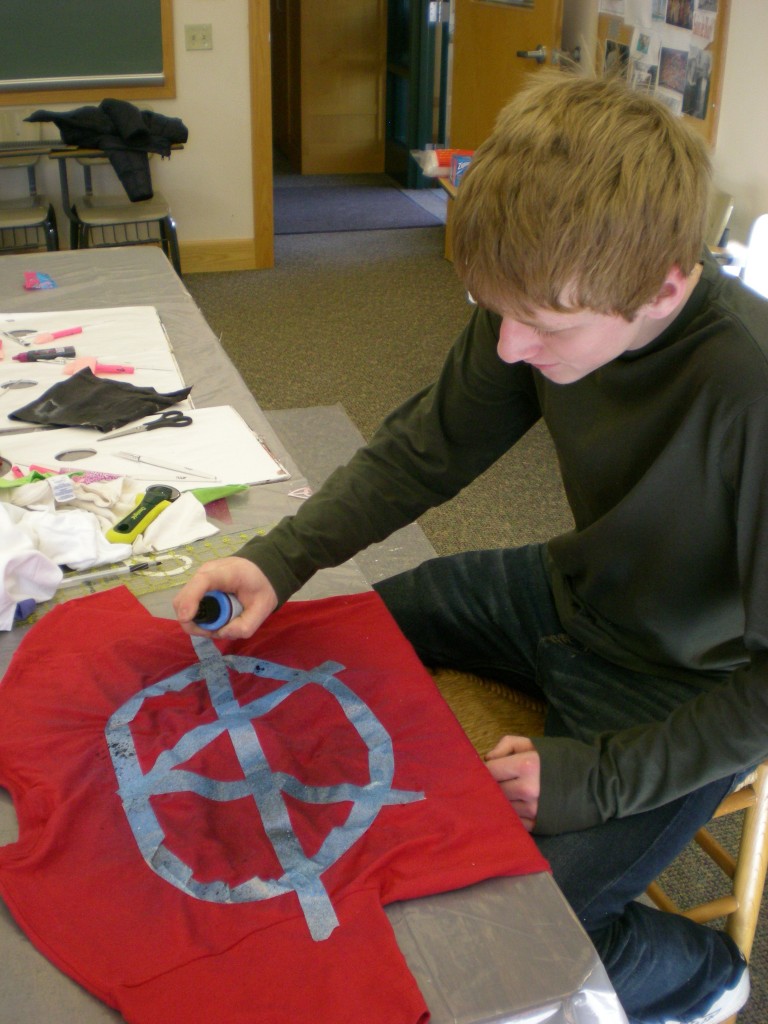
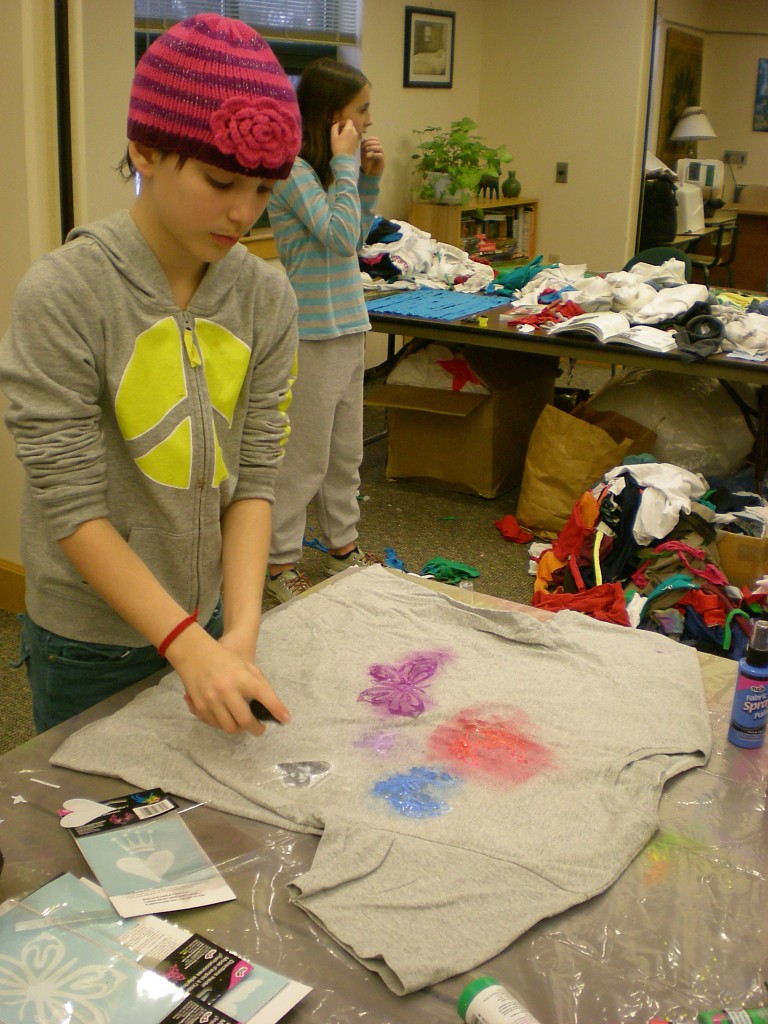
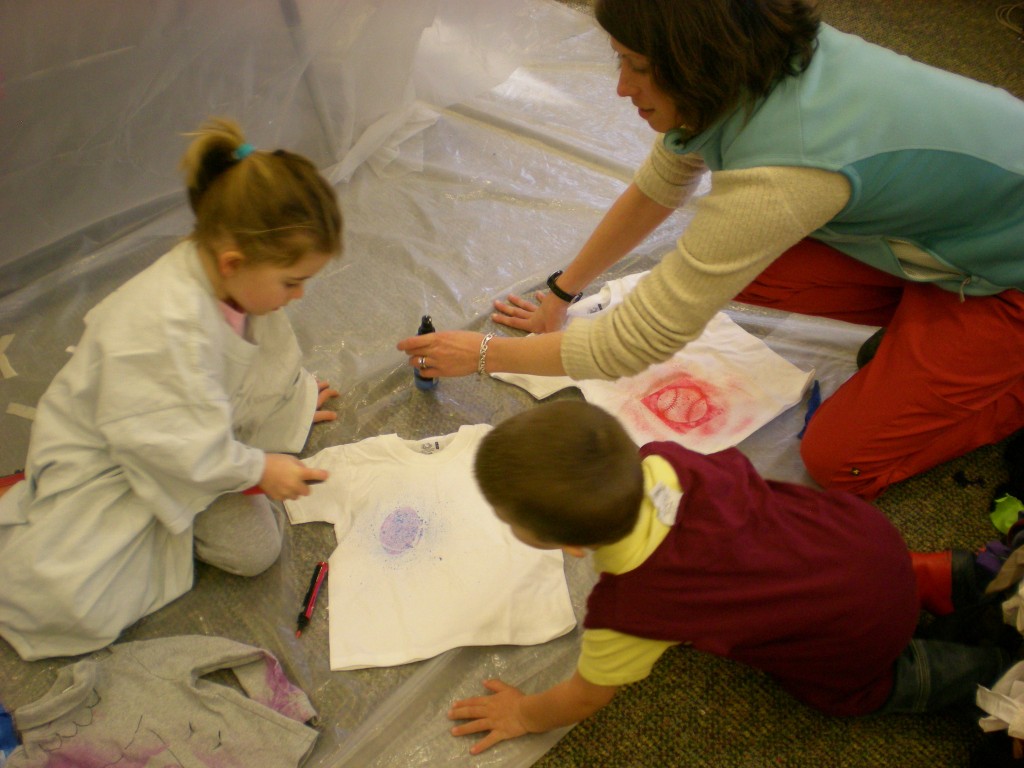
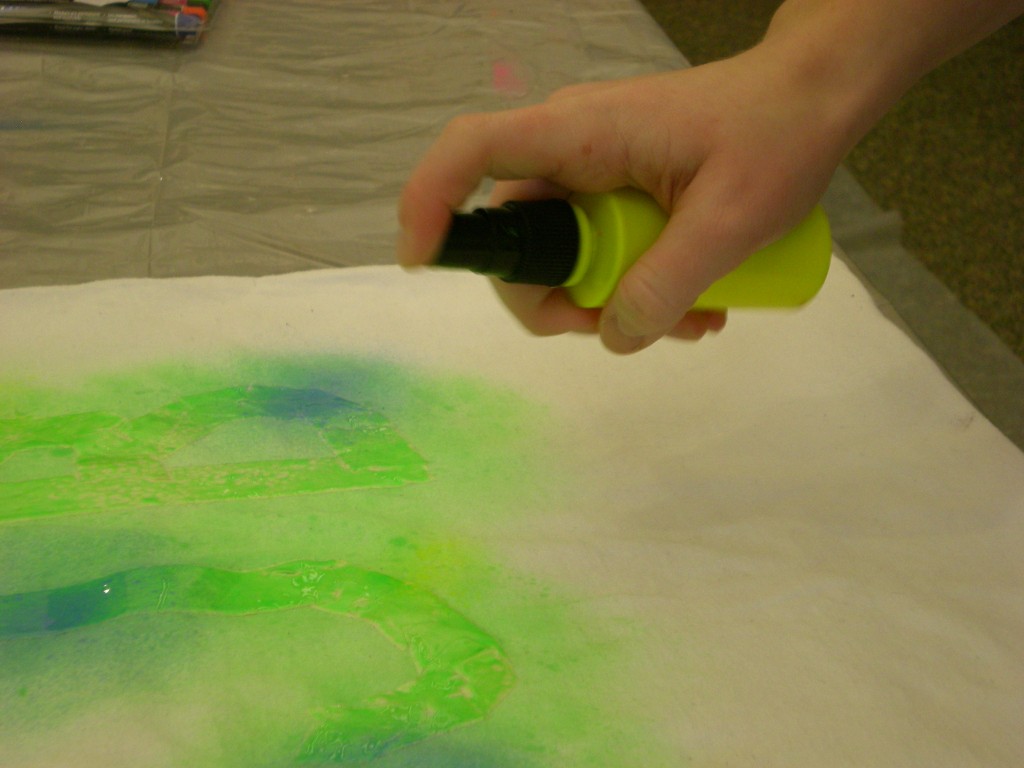
Like sand fabric paint through the hourglass a small nozzle, so go the sprays of our lives… Isn’t that how it goes? Last month I was up in NH for Artward Bound, where I was teaching T-shirt refashioning, and we set up a whole “wet station” dedicated to fabric pens, markers, stencils, and paints (thanks to sponsor iLovetoCreate)! And spray paints were decidedly the most popular kids in class. Students (of all ages, as you’ll see below) experimented with spraying freehand in tie-dye-like formations; they sprayed over reusable stick-on stencils; on foam stencils they brought from their dorms; they also experimented with making their own shapes and patterns using rolls of masking tape. Here’s a sampling of 10 ways to use your fabric spray paint!

Christian used masking tape over the backside of his boxer briefs (pattern based on Ansty Pants, project #57 in Generation T: Beyond Fashion)

Molly wrote the initials DJB with masking tape to personalize the grocery tote (Plastic Surgery, project #42 in Generation T: Beyond Fashion) she stitched up for her mom.

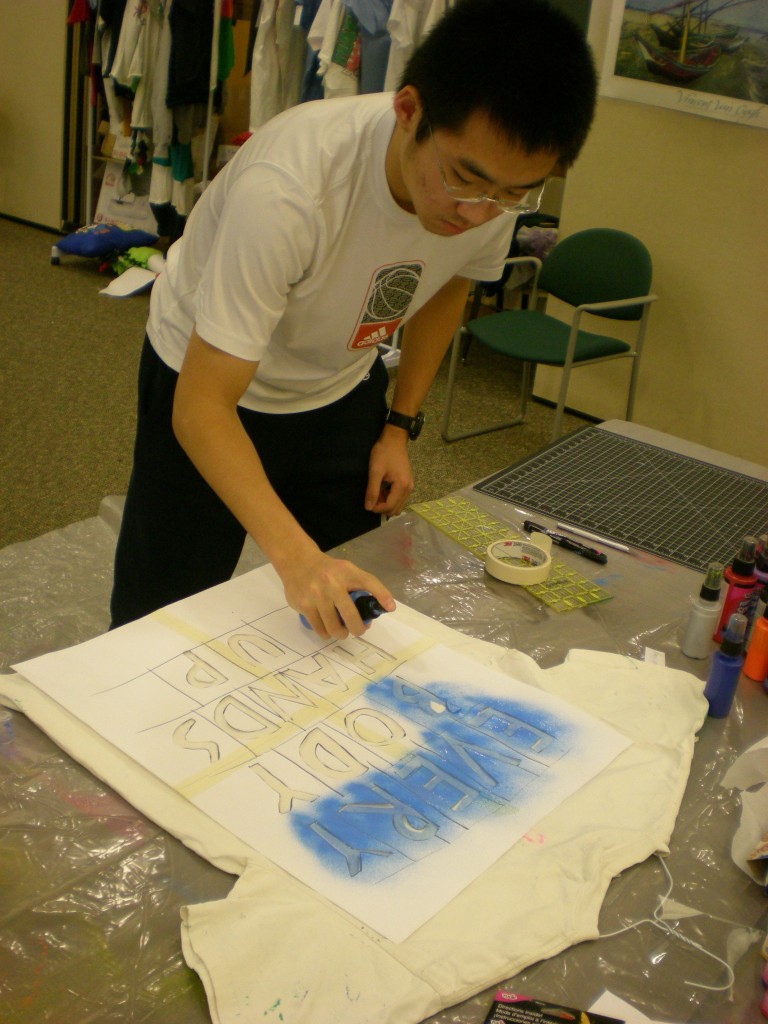
Kangdi diligently cut out all of the letter shapes from a larger sheet of paper we tiled together in order to fit the back of the T-shirt. “Everybody, hands up!” (On the front of the shirt, he used his hands as stencils — one guy who’s not afraid to get messy!)

Dan wanted to spray the number 35 for his DIY basketball jersey, carefully screening the rest of the shirt from excess paint with fabric scraps.

Ben expressed his anarchist tendencies in masking tape.

Even young Lindon, son of one of the faculty leaders, stopped by in a T-shirt smock to spray a football onto an old shirt.

Anna sought out the butterfly stencils to add color to the gray base T-shirt.

More footballs and baseball stencils for this young posse.

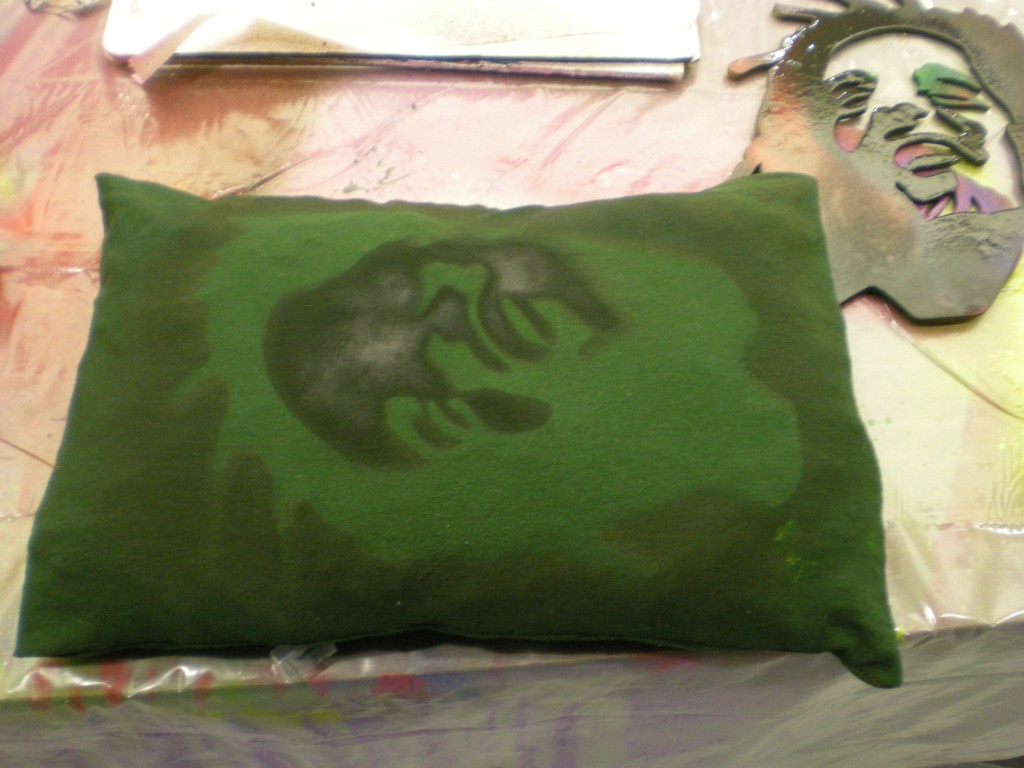
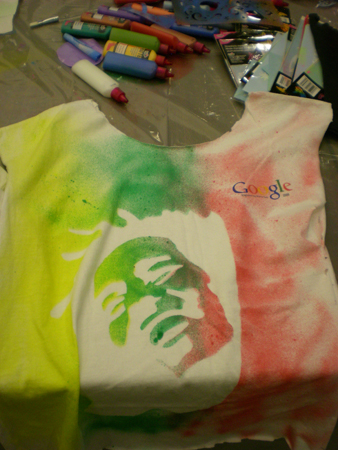
Michael brought his Bob Marley stencil from his dorm room — to make it a veritably Marley-fest. Pillows, T-shirts…

…and tank tops were just the beginning!

Thanks again to iLoveToCreate for the generous donation of spray paints, markers, and stencils for the workshops! As you can see, all the materials were put to wonderful and creative use!

What design would you spray paint? What technique would you use?

[ Comments Off on The Spray (Paint)s of Our Lives… | Posted on April 18th, 2011 ]