Posts Tagged ‘iLoveToCreate’

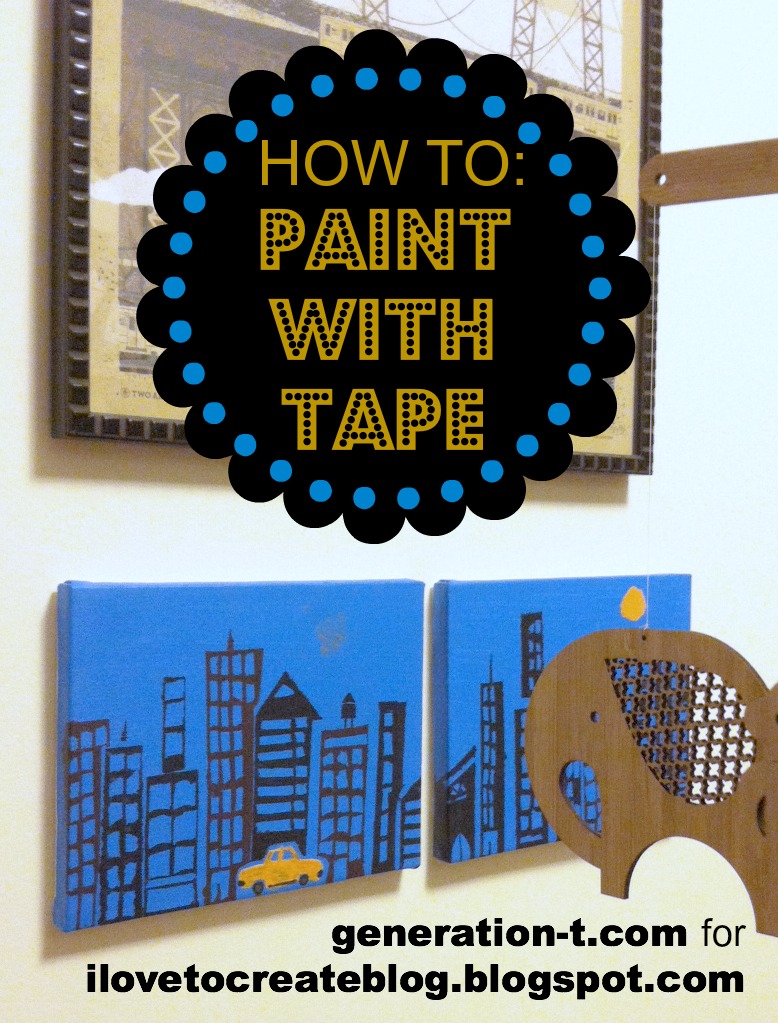
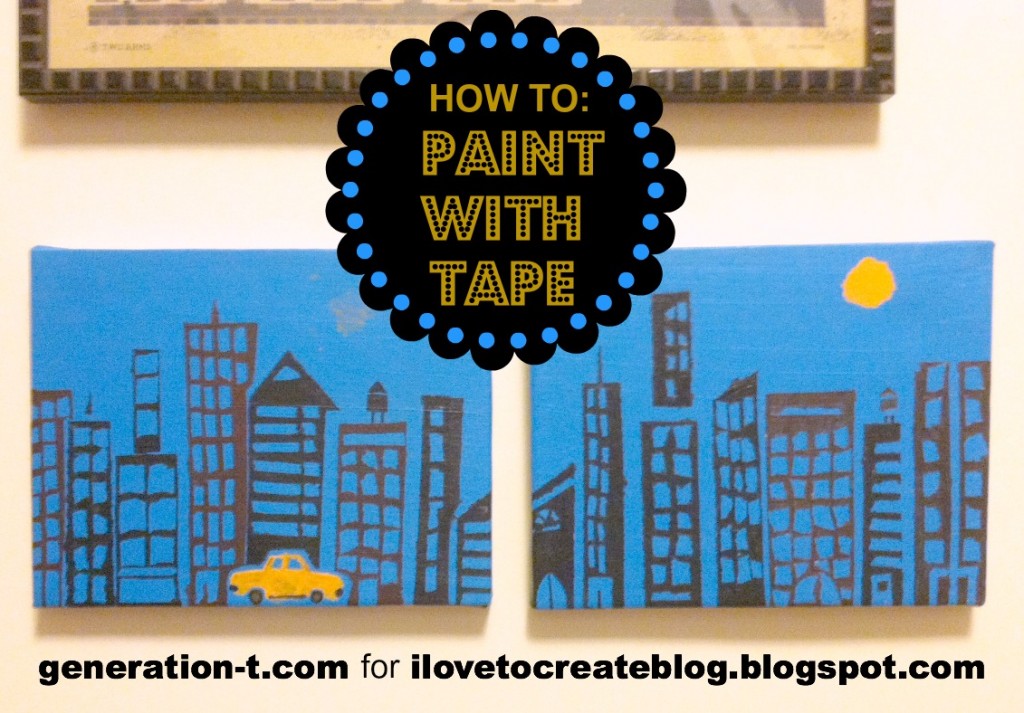
How to: Paint a Cityscape with Tape!

Though my motivation was nursery decor (inspired particularly by my son’s love for taxis and trucks — hey, we live in Brooklyn!), this technique could easily be applied to any shapes that benefit from a grid-like treatment — like robots, or alphabet tiles, or basic shapes. I was inspired by the geometry of the landscape where we live, but your cityscape could be urban or rural (or suburban, for that matter!). The tape technique works like any resist–I love the rough-hewn, batik-like result, and the effect, as I mentioned, could be applied to any subject matter, to suit any room in the house!

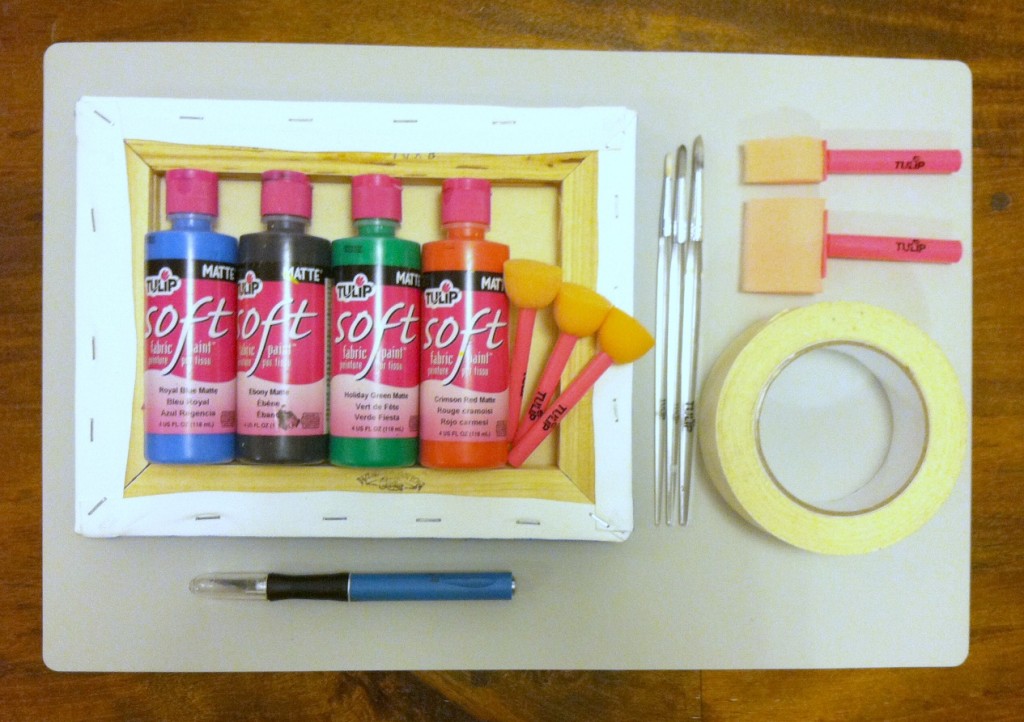
Materials:
-Stretched canvas (mine is 10″ x 8″)
Tulip Soft Fabric Paint
Tulip Sponge Pouncers and other foam brushes
Tulip Fabric Paintbrushes
-Artist’s tape (or masking tape, but artist’s tape peels off more easily)
-Craft knife and cutting mat
-Paper plates (to use as paint palettes)

Make it:
Gather your materials, and click on through to the I Love to Create Blog for the complete tutorial!

My imaginary city is the perfect accompaniment to the New York City “Bridges” print by Two Arms Inc. and the Safari Mobile by PetitCollage that we already have hanging. I’m thinking of adding Sophie Blackall’s subway poster to my urban/jungle theme….

[ Comments Off on How to: Paint a Cityscape with Tape! | Posted on July 24th, 2013 ]

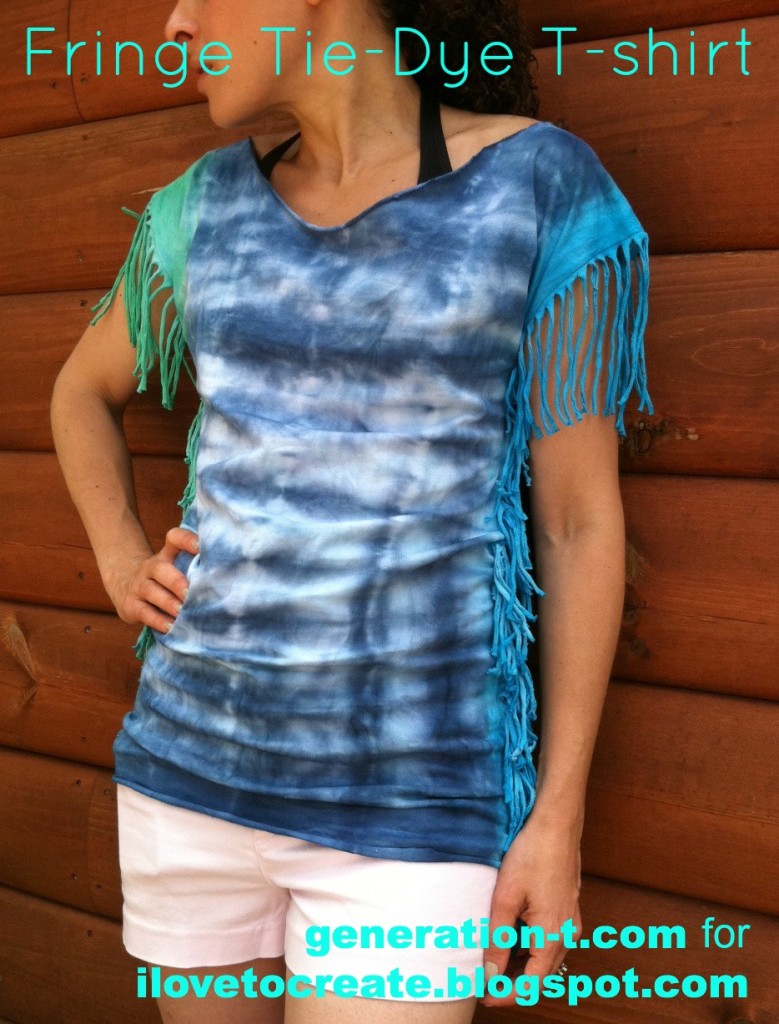
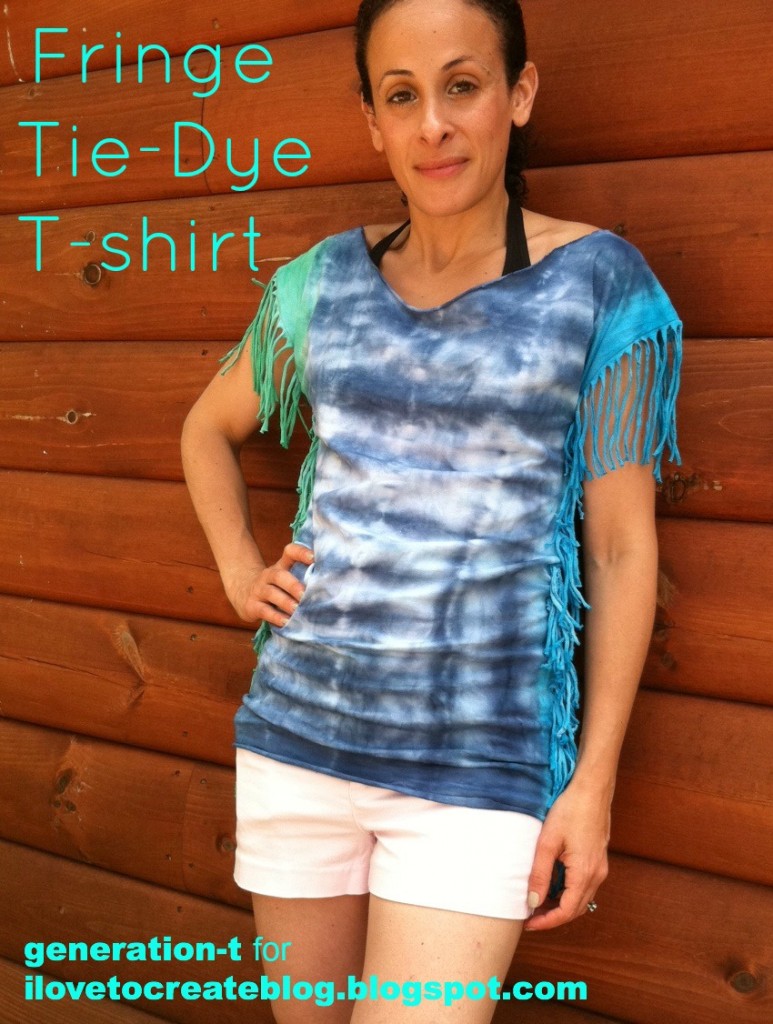
How to: Side-Fringe Tie-Dye T-shirt

While most fringe T-shirts have the fringe tailing off the bottom, I went with horizontal fringe on this one. The side fringe gives nice movement and flow to the tee, and it’s a great project for making a slightly-too-big T-shirt into a just-right T-shirt. Add a touch of ombre tie-dye, and it’s a perfect summertime staple. Throw it over your bathing suit, and head beachward!

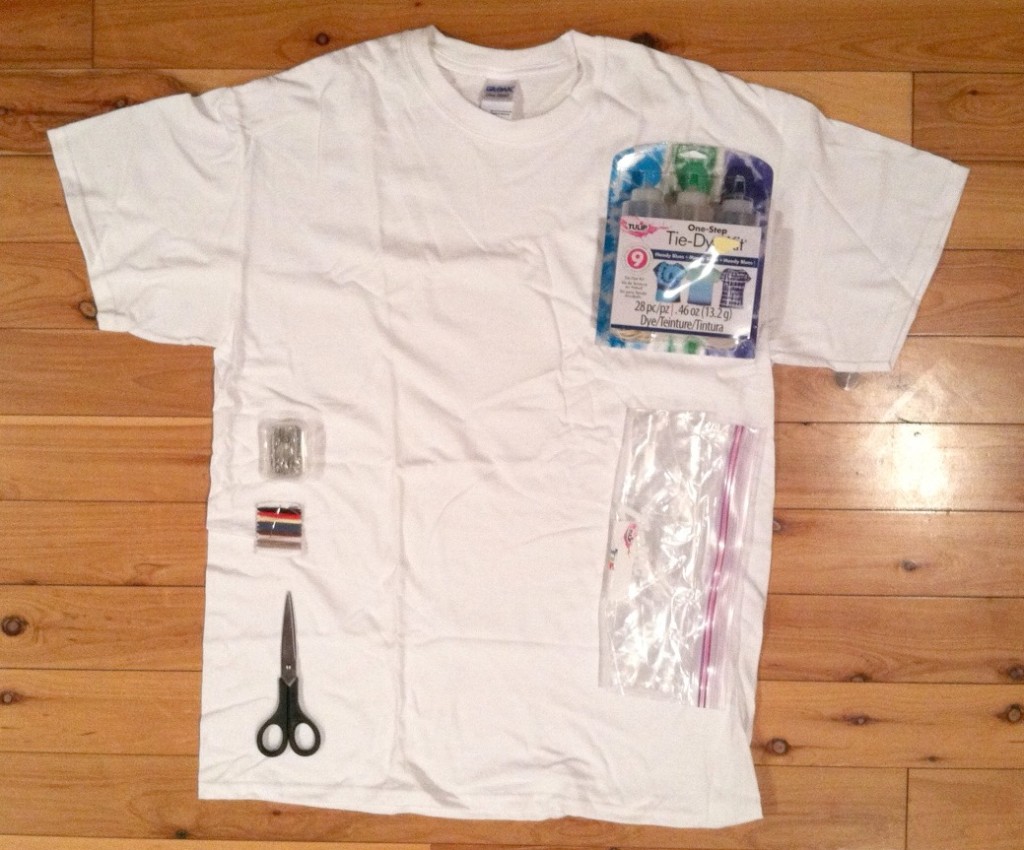
Materials:
-Plain T-shirt (one to two sizes larger than you’d ordinarily wear)
Tulip One-Step Tie-Dye Kit (includes rubber bands, bottles, dyes, two pairs of plastic gloves, and an instruction/inspiration sheet)
-Plastic table cloth or plastic garbage bag to cover your work surface
-Paper towels
-Plastic cling wrap or zip-lock bags
-Scissors
-Sewing machine with thread or needle and thread
-Safety pins (optional)

Note: If you’re working with new T-shirts, pre-wash and dry them to make sure any shrinking that’s going to happen has happened!

Make it:
Head over to my post at the iLoveToCreate blog for the step-by-step photo tutorial.

Note: You can make a no-sew version of this shirt by cutting the fringe first and then knotting the front fringe piece with the corresponding back fringe all the way up and down both sides (the shoulder fringe remains unknotted). I like this version because it’s quick (particularly if you are using a sewing machine), and the fringe fall nicely without the bulk of the knots.


[ Comments Off on How to: Side-Fringe Tie-Dye T-shirt | Posted on July 8th, 2013 ]

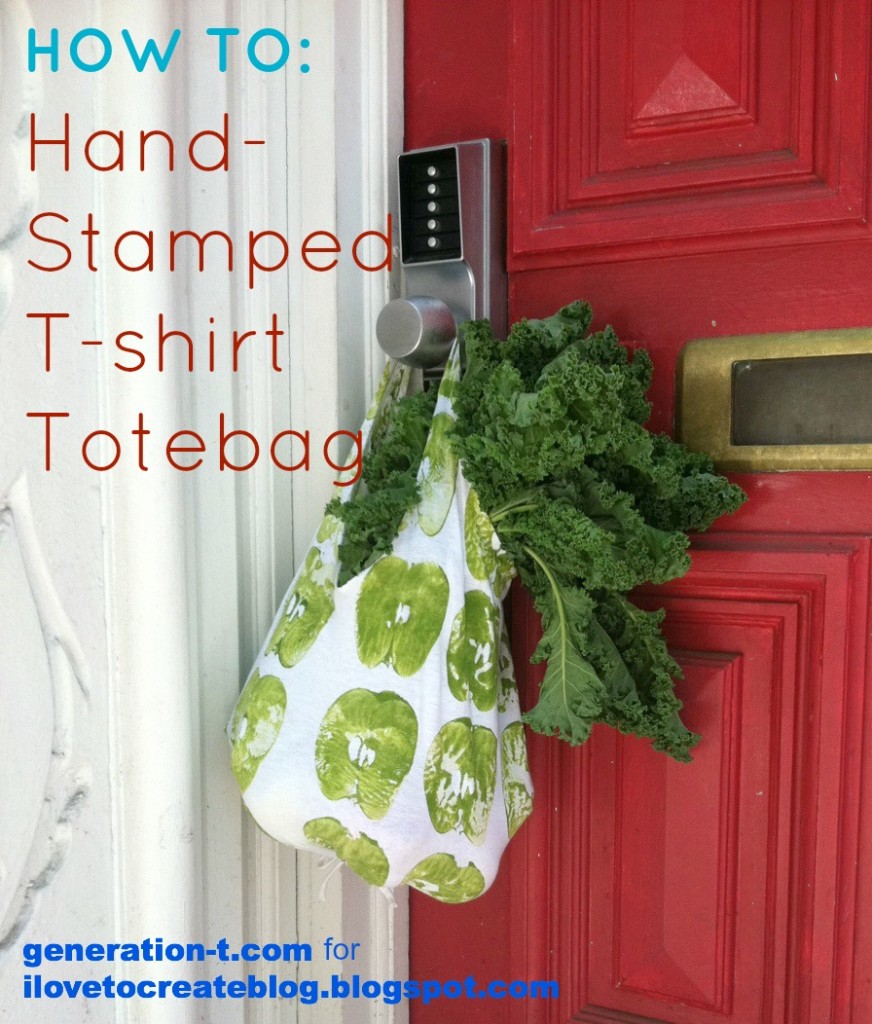
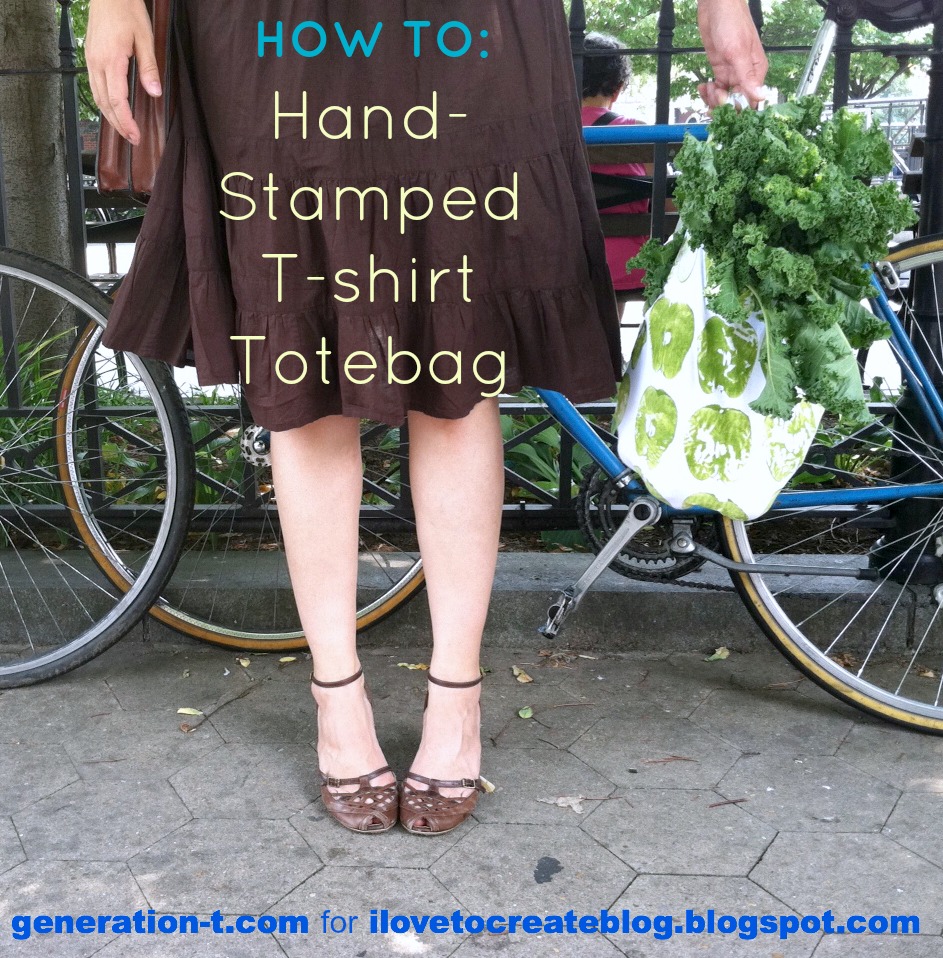
How to: No-Sew T-shirt Grocery Tote!

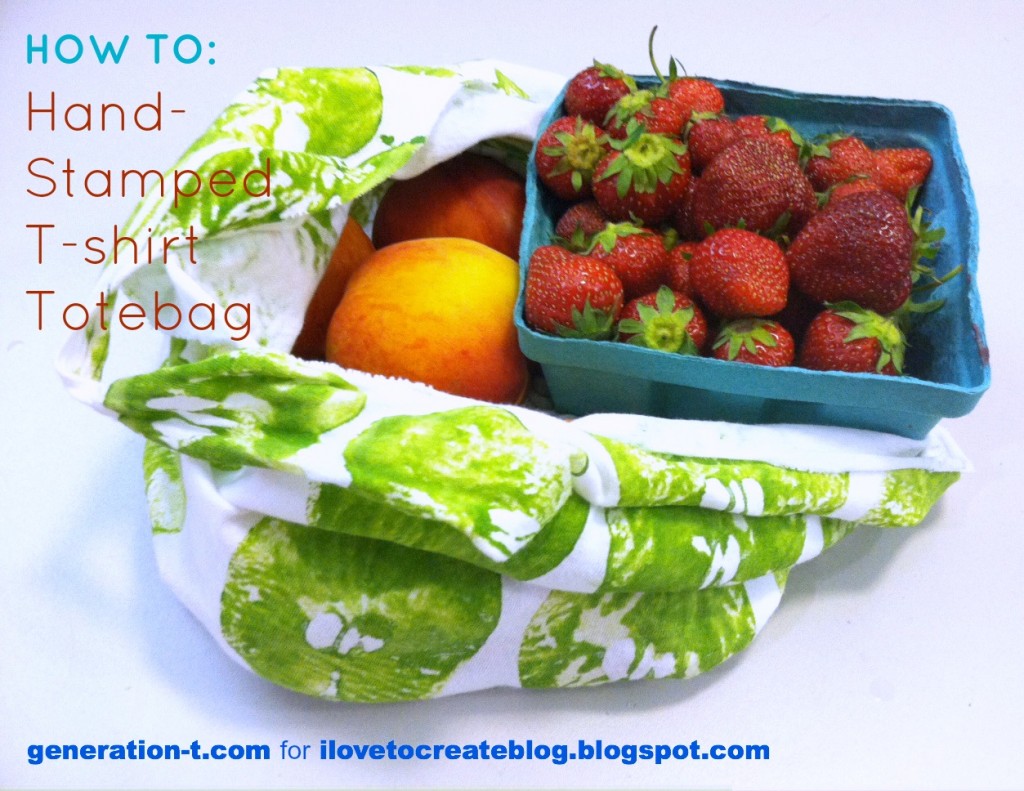
Move over potato stamping! There are some other fruits and veggies that want in on the action. Printing with fruits and veggies is nothing new — but when applied to a grocery or green market bag, you get a tote that forecasts what should go inside (apples, onions, peppers, celery, corn…). Not to mention, you can construct this sturdy bag from an old T-shirt without sewing–a single safety pin is the closest you’ll get to any specialty tools. I worked out the bag particulars while I was in residency at a workshop up in NH (I’ve since discovered a great tutorial for a very similar technique by Lee Meredith over at Leethal.net, which I imagine works particularly well for larger T-shirts, where the bottom bunching can be redistributed between several gathers). And I was inspired to use an apple after seeing Kayte Terry’s lovely apple-printed tote (I wish my apple had had a stem on it!).

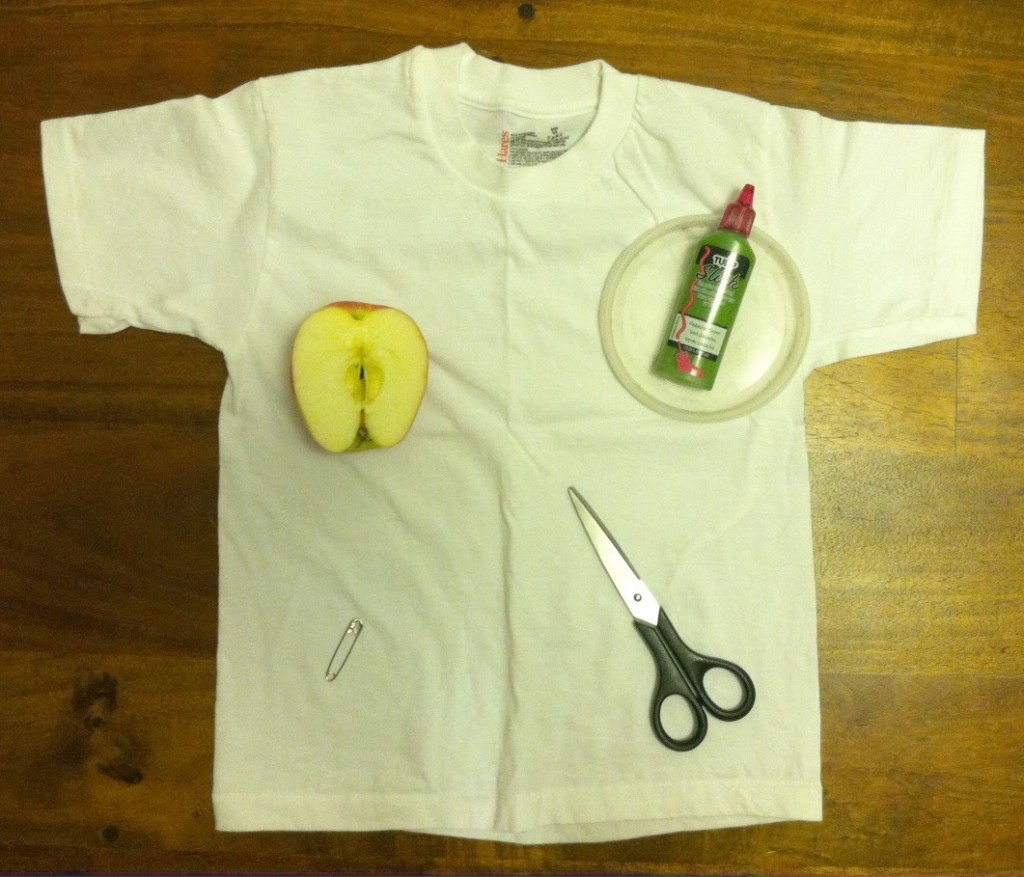
Materials:
-Plain old T-shirt (I used a kid’s size 6-8 for this particular one)
Tulip Dimensional Paint or Tulip Soft Fabric Paint Tubes
-Plastic lid to use as a paint palette
-Half an apple (or bell pepper, or onion, or…) to use as a stamp
-Scissors
-Safety pin
-Scrap paper (optional)

Make it:

Head on over to iLoveToCreate blog for the complete step-by-step tutorial! You’ll be ready to hit the farmer’s market (or beach! or park!) in no time.

And don’t forget to share your bounty!

Stay tuned: Another veggie-printed, no-sew tote bag tutorial is coming your way right here on Generation T next week!

[ 1 Comment | Posted on June 25th, 2013 ]

How to: Tie-Dye Your Life! (via Your Wardrobe)

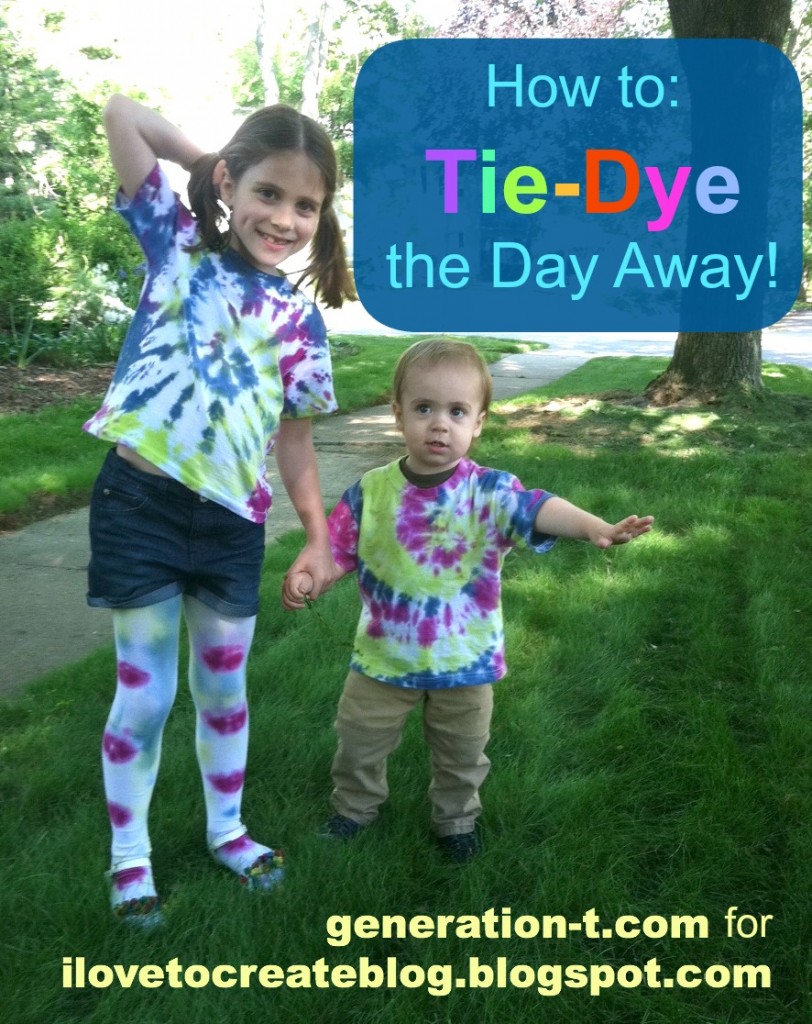
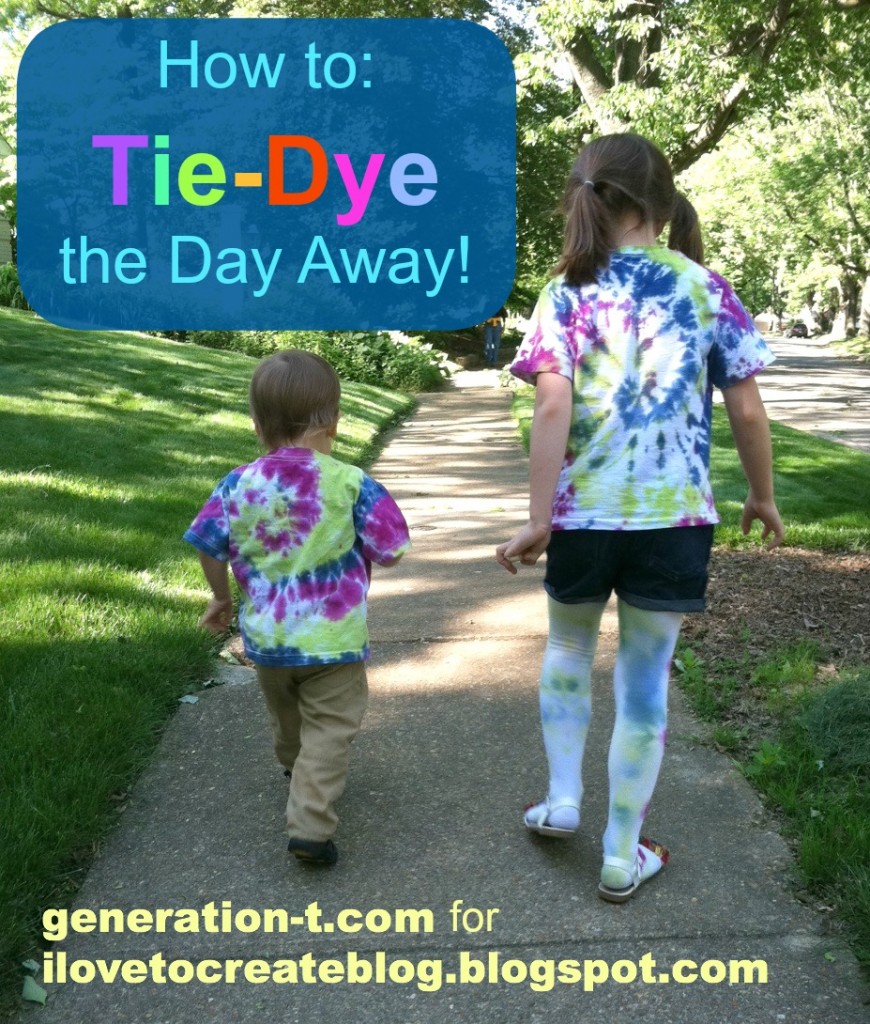
I always bring a craft project when I visit my niece, Dorothy. One time it was Embroidery Day, another it was Felt Cat Ear Day…this time it was Tie-Day Day! Our goal, which we nobly chose to accept: to tie-dye an entire wardrobe. As you can see, we got pretty darn close…

So, despite all my T-shirt proclivities, I have to confess I actually have never tie-dyed in my adult life. I don’t know what made me think that it would be so hard, but honestly, the only thing that could have made this easier was a nice picnic table outside to craft on (and that’s just me asking for a luxurious upgrade).

The takeway: Tie-dye. Is. So. Easy.

I would go so far as to say it’s foolproof! Next time you have a family reunion, skip ordering the printed T-shirts: Set up a tie-dye station for all the siblings and cousins–by morning, you’ll have a full set of T-shirts perfect for a very colorful family portrait!

Materials:
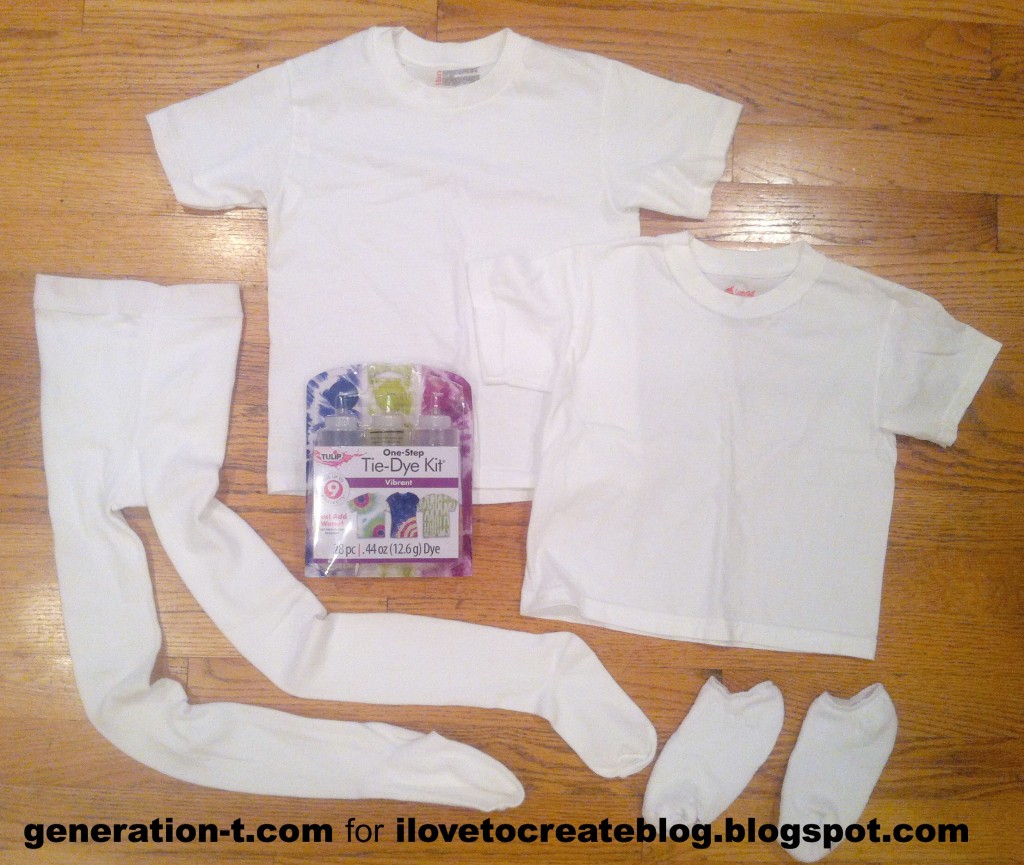
Tulip One-Step Tie-Dye Kit (color: “Vibrant” — includes rubber bands, bottles, dyes, two pairs of plastic gloves, and an instruction/inspiration sheet)
-Cotton things to dye: We picked T-shirts (in two sizes, for the two cousins), tights, and socks!
-plastic table cloth or plastic garbage bag to cover your work surface
-paper towels
-plastic cling wrap or zip-lock bags

Note: If you’re working with new T-shirts, pre-wash and dry them to make sure any shrinking that’s going to happen has happened!

Make it:
Hop on over for the how-to at the I Love to Create Blog! (Plus a cute photo-bomb by my niece.) We tie-dyed spirals onto T-shirts, sunbursts onto tights, diagonal stripes onto another T-shirt, horizontal stripes onto socks, and a bullseye design onto yet another T-shirt.

After her cousin, Niko, woke up from his nap, it was time to try on the matching Swirl design tie-dye T-shirts!

Did I mention tie-dye is also great for obscuring grass stains? An added bonus, for sure! There’s definitely more tie-dye to come this summer — and quite likely in my size this time.

[ 2 Comments | Posted on May 28th, 2013 ]

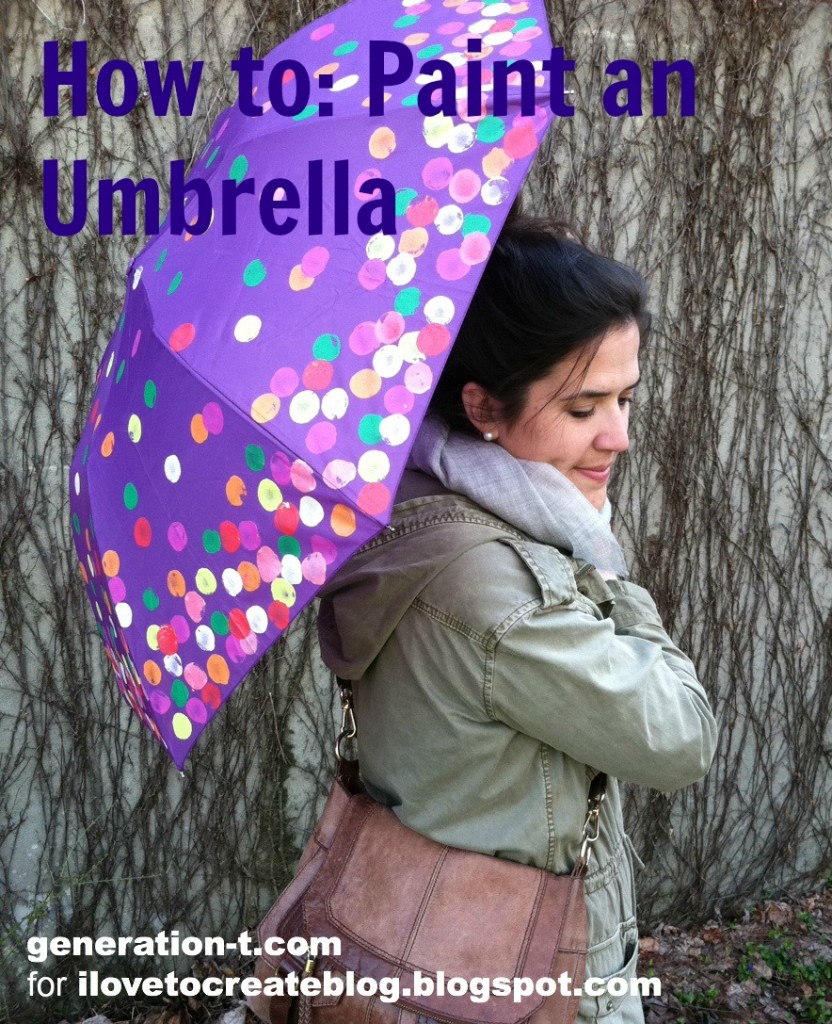
I Love to Create: A Painted Umbrella!

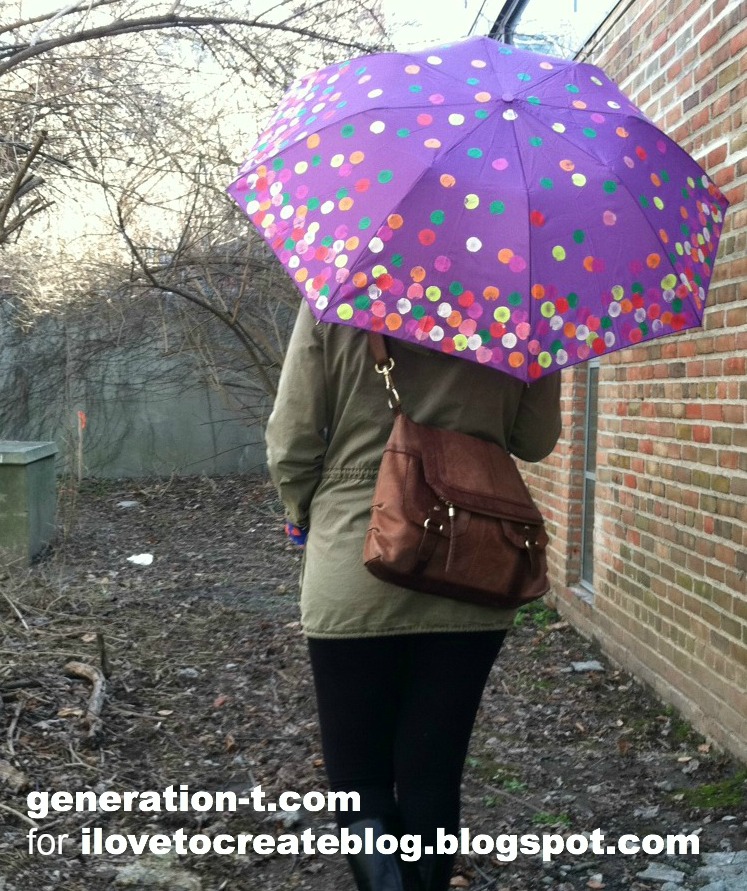
They say that April showers bring May flowers. And in some parts of the country this year there’ve even been April flurries to herald in the blooms! While Mother Nature keeps us on our toes, here’s a colorful springtime project that really brings the flowers when it rains. It’s just one of a slew of ways to decorate an umbrella with paint (because let’s face it, sometimes a purple umbrella isn’t quite bright enough). It’s part pop art (a gumball machine!), part impressionism (Monet’s gardens at Giverny) — and a whole lot of color to brighten any dreary day! We often think of fabric paints in the context of T-shirts and other wearables, but it’s fun to experiment with paint on other fabric-based surfaces: embellished pillows, couches, canvas director chairs, curtains, and…umbrellas!

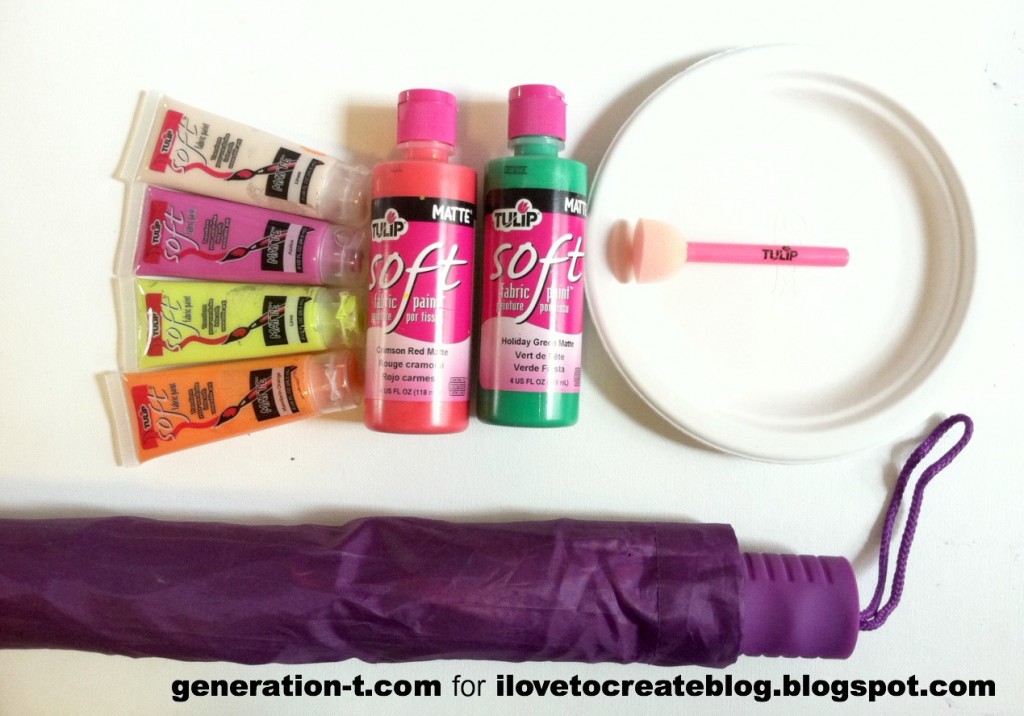
What you need:
-plain umbrella
Tulip Soft Fabric Paint in a variety of colors (I used Azalea, Lime, Mandarin Orange, Linen, Crimson Red Matte, and Holiday Green Matte)
Tulip Sponge Pouncers (foam paintbrush)
-paper plate (to use as a paint palette)

Make it:
Click through to the the iLoveToCreate Blog
to watch the how-to video I did for About.com, and follow the step-by-step photos.

What a nice vibrant splash of color while we wait for more flowers to poke through!

[ Comments Off on I Love to Create: A Painted Umbrella! | Posted on April 23rd, 2013 ]

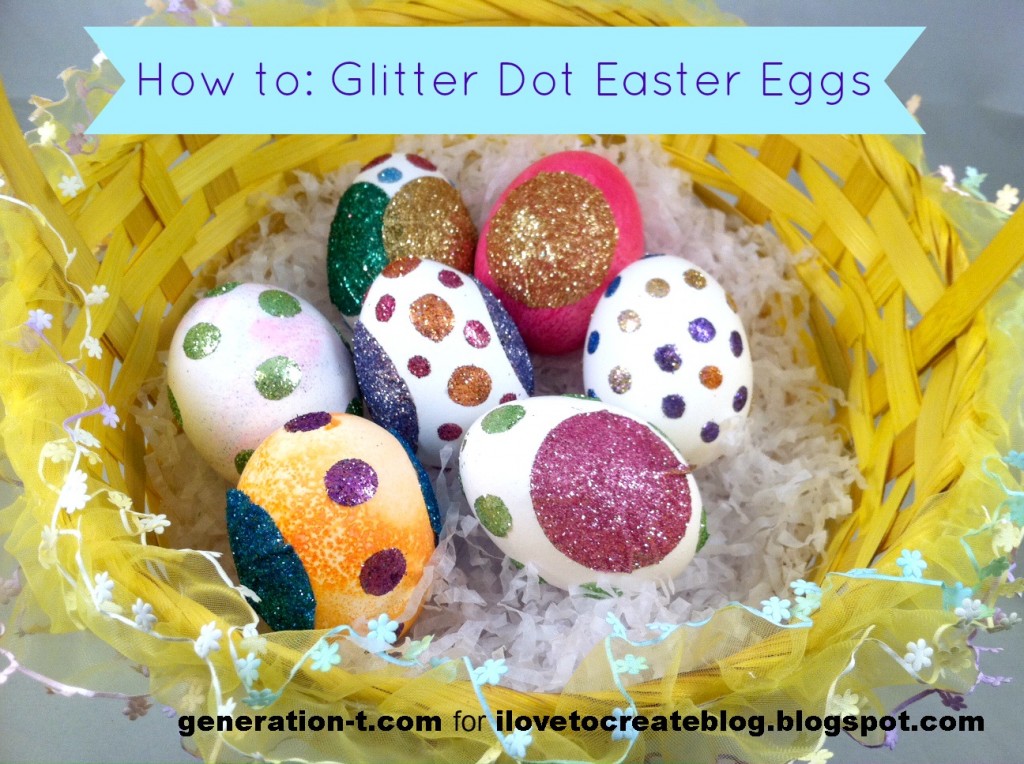
iLoveToCreate: Glitter Polka Dot Easter Eggs

I’m pretty traditional when it comes to decorating eggs at Easter time (dollar store egg dying kit, anyone?), but to be honest, it was getting kind of dull year after year. So this year, I dug through my craft stash to find a material that might have good crossover potential — one that was likely developed for one particular use (say, scrapbooking) that I could easily apply to something else (like Easter eggs). And voila!

Bring on the polka dots! Bring on the disco sparkle! The best part? No waiting around for dye to set or glue to dry. This is egg decorating with immediate (and rather shimmery) results.

For materials for the project and how to make these sparkle-riffic eggs, click below to watch the video tutorial I did for About.com and/or follow the step-by-step illustrated instructions (and a variation) at iLoveToCreate.com!


[ 2 Comments | Posted on March 26th, 2013 ]

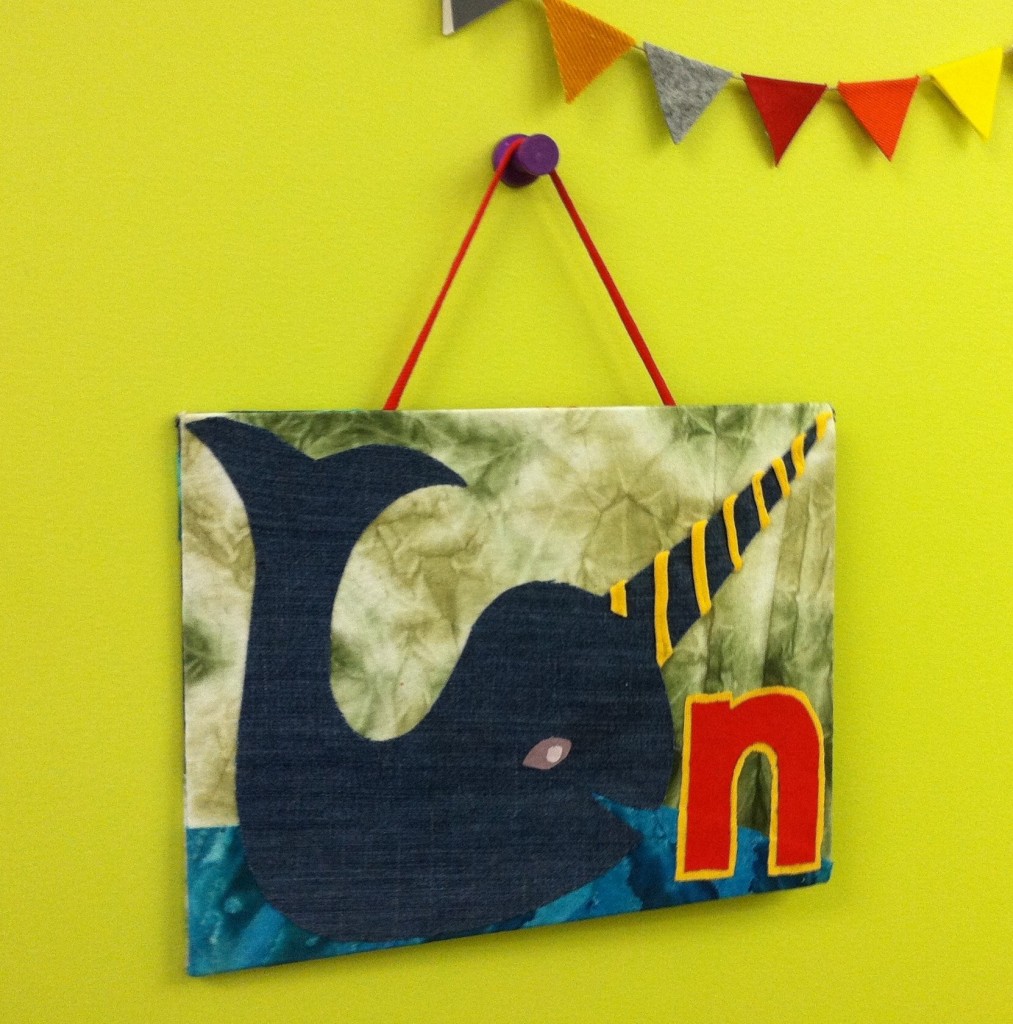
I Love to Create: A is for Animal Wall Decor

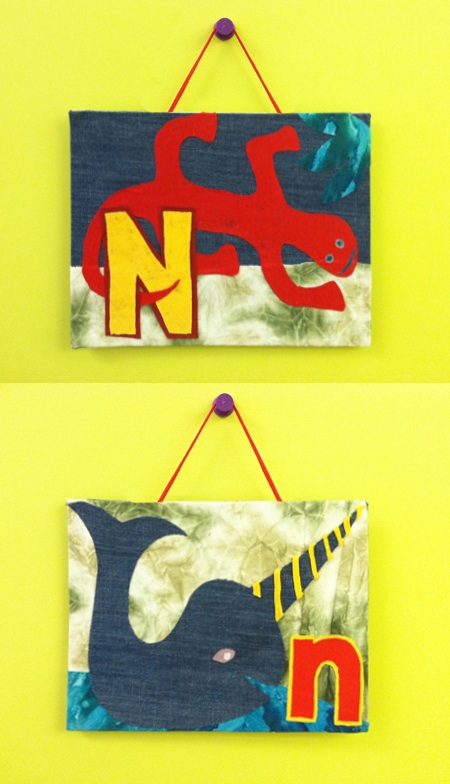
A is for Ant, B is for Beetle, C is for Cat…. Here’s an easy way to turn old clothing scraps (in this case, T-shirts and jeans) into personalized decoration for a young (or young at heart) friend’s bedroom wall or door. Whether you stick with the animal theme, or go with fruits and veggies (A is for Apple, B is for Broccoli, C is for Carrot), geography (A is for Australia, B is for Belgium, C is for China), or a more random selection of words (A is for Astronaut, B is for Bubbles, C is for Castle), part of the fun is brainstorming the image that will represent the recipient’s initial. For my son, N is for Narwhal was a shoo-in. N is for Newt came second. What animal would you choose?
Materials:
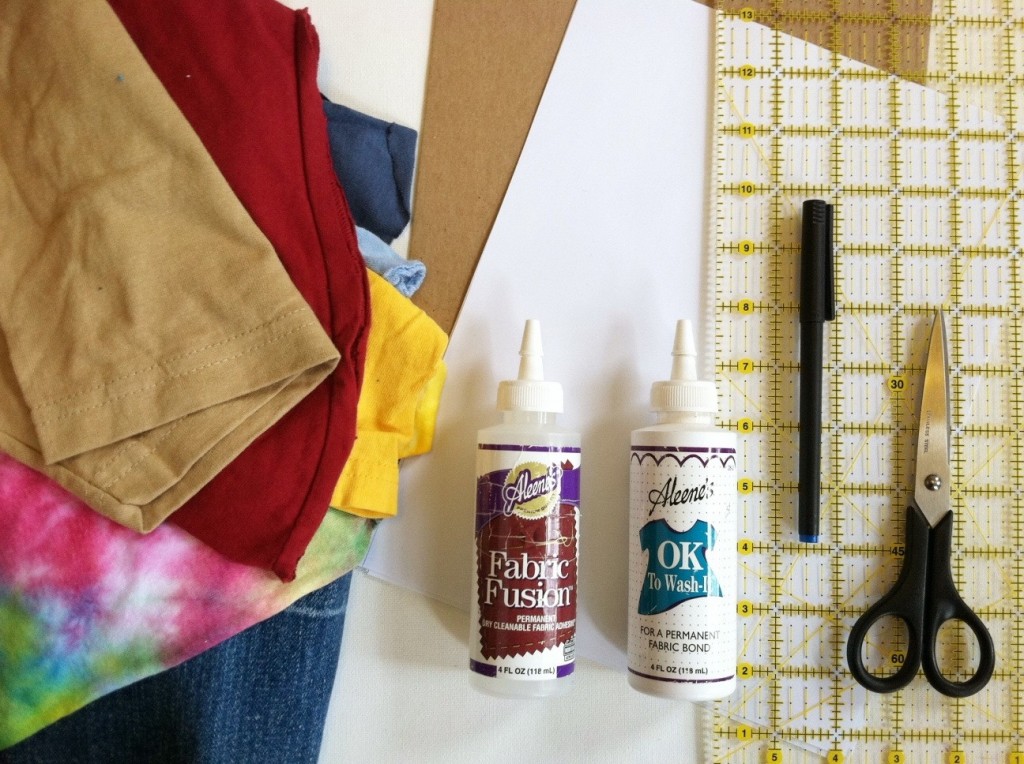
-Paper
-Pen
or pencil
-Scissors
-Fabric scraps (old T-shirts and denim pieces)
-2 sheets 8 1/2″ x 11″ medium-weight cardboard (often used as stiffener in a flat parcel)
Aleene’s OK to Wash It
or Aleene’s Fabric Fusion permanent fabric adhesive
-Ruler
Fabric paints (optional, for additional embellishment)
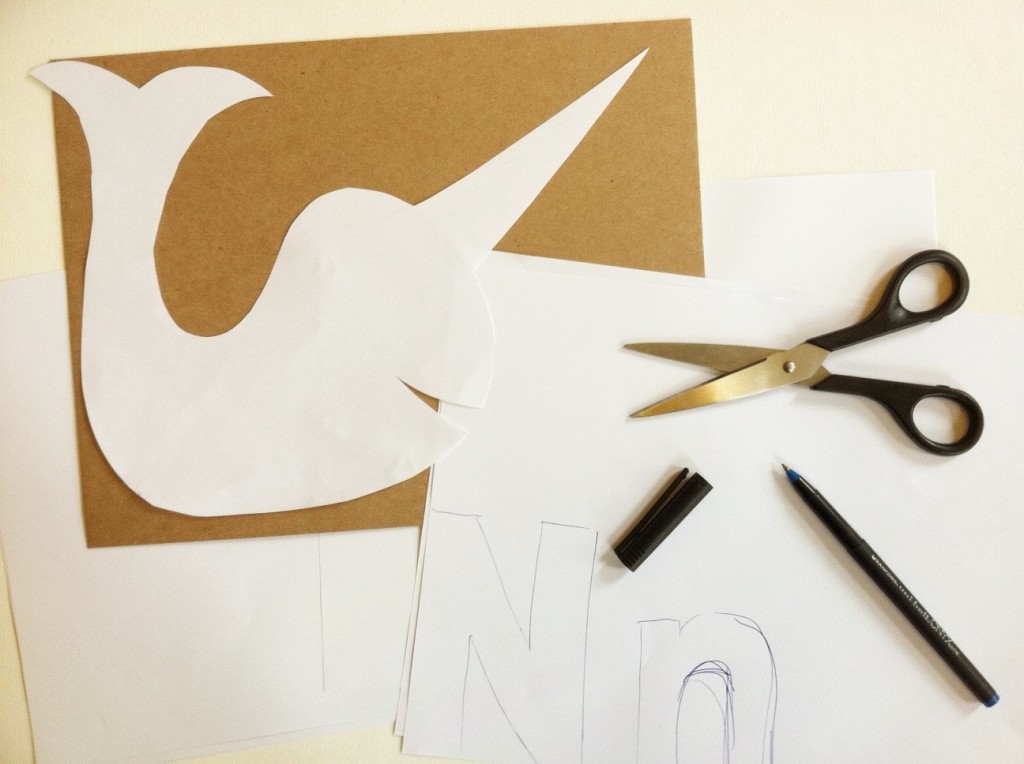
1. Select a friend’s or child’s first initial and then choose an animal (or two) with a name that also begins with the letter: I chose to start with N for Narwhal (that fabulous sea mammal that looks like it was crossed with a unicorn) and N for Newt (an orange salamander. Draw an outline of each animal and the capital and lowercase letter. Cut them out and arrange them on the cardboard to make sure they’ll fit. Set them aside.
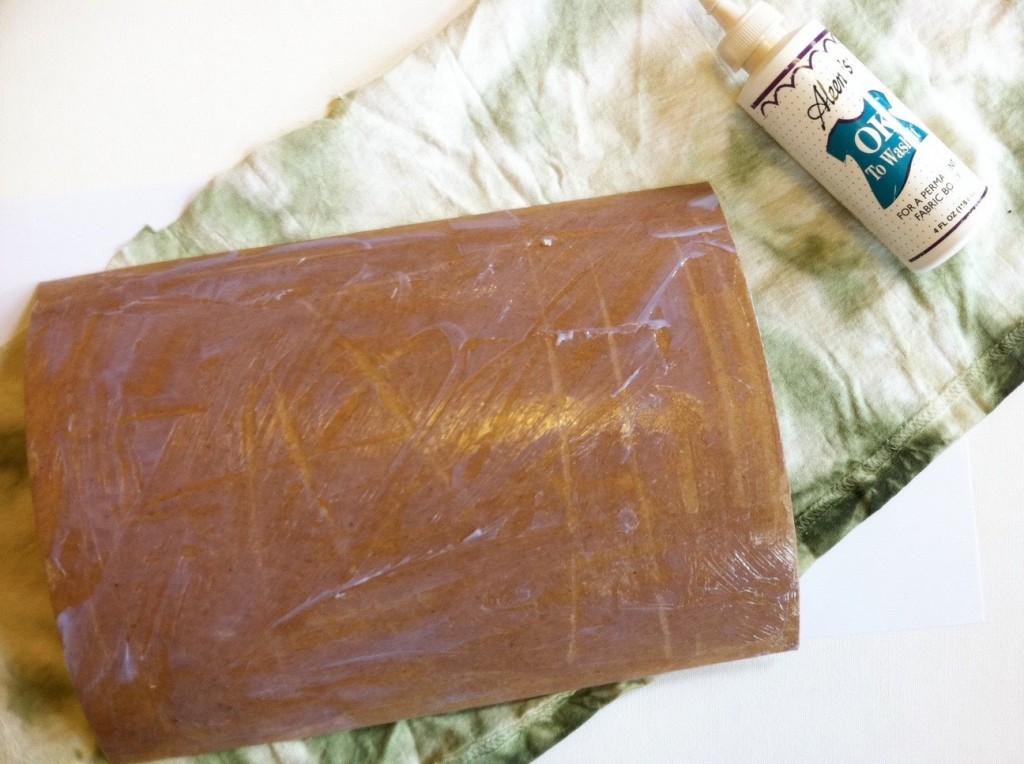
2. Spread fabric glue evenly over one side of one of the sheets of cardboard and press it onto fabric.
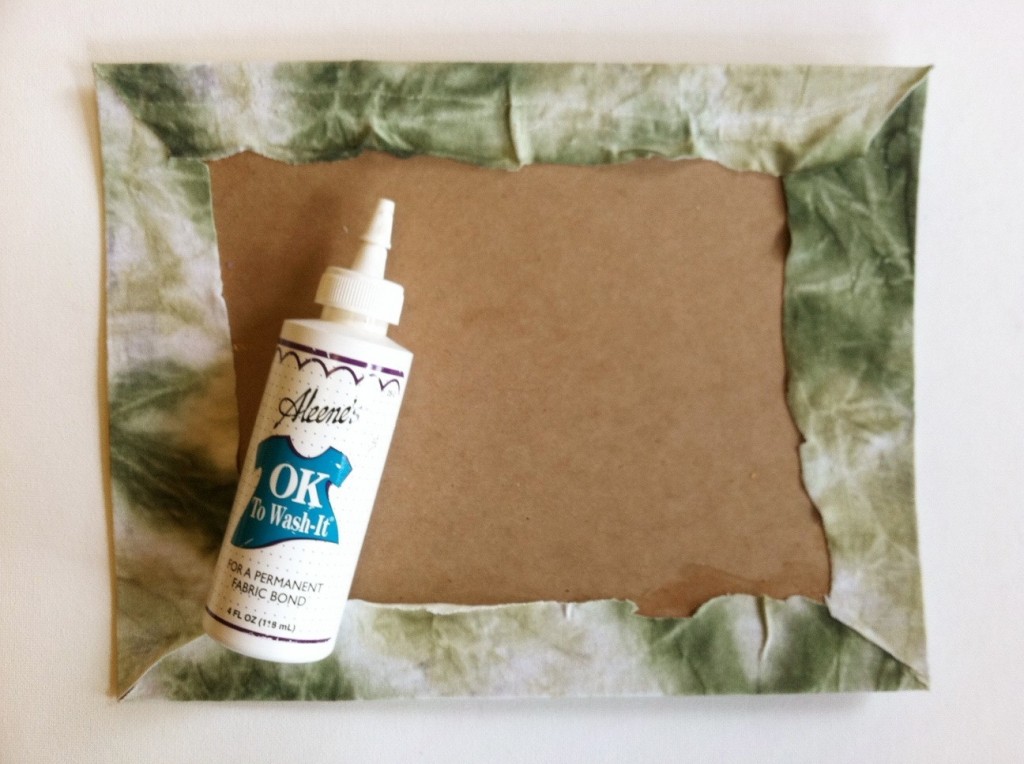
3. Fold and glue the edges to the back of the cardboard. (It’s okay if the edges are messy — they’ll be covered up.)
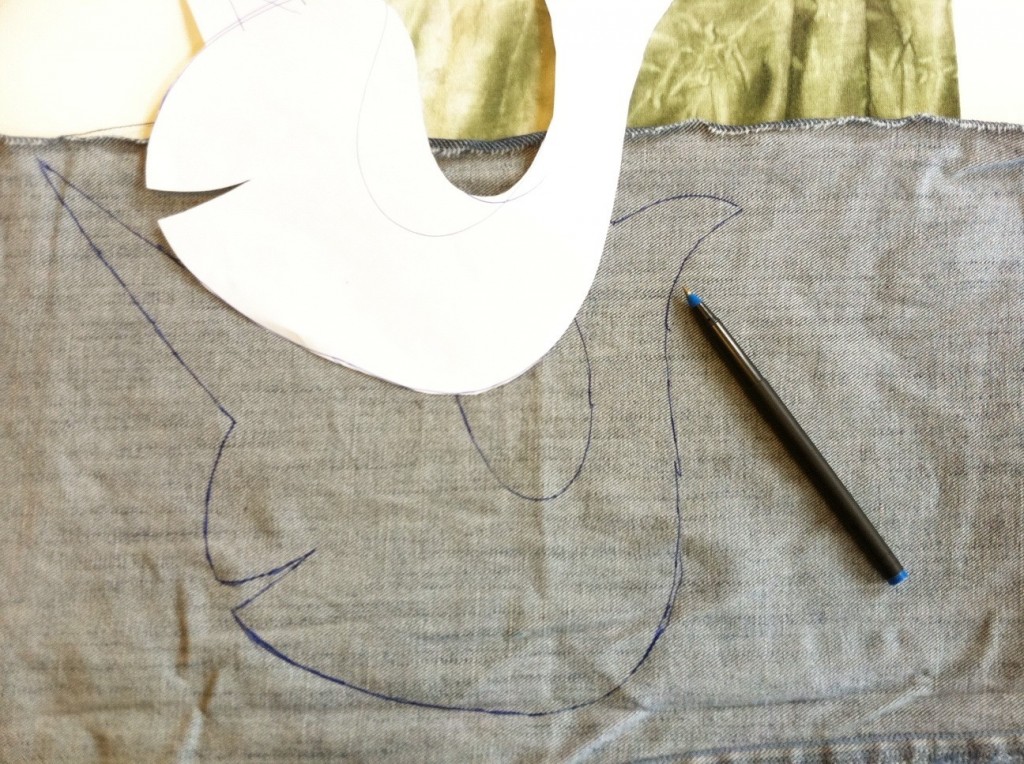
4. Trace one of the paper animal templates (in reverse) onto the wrong side of one of the fabric scraps. Repeat with different scraps with the letters and second animal.
5. Arrange and glue each of the elements onto the fabric-covered cardboard. Add background (like water!) and details (spiral on the horn, eyes!), making sure to layer the pieces appropriately. Let it dry and proceed to decorate the second piece of cardboard!
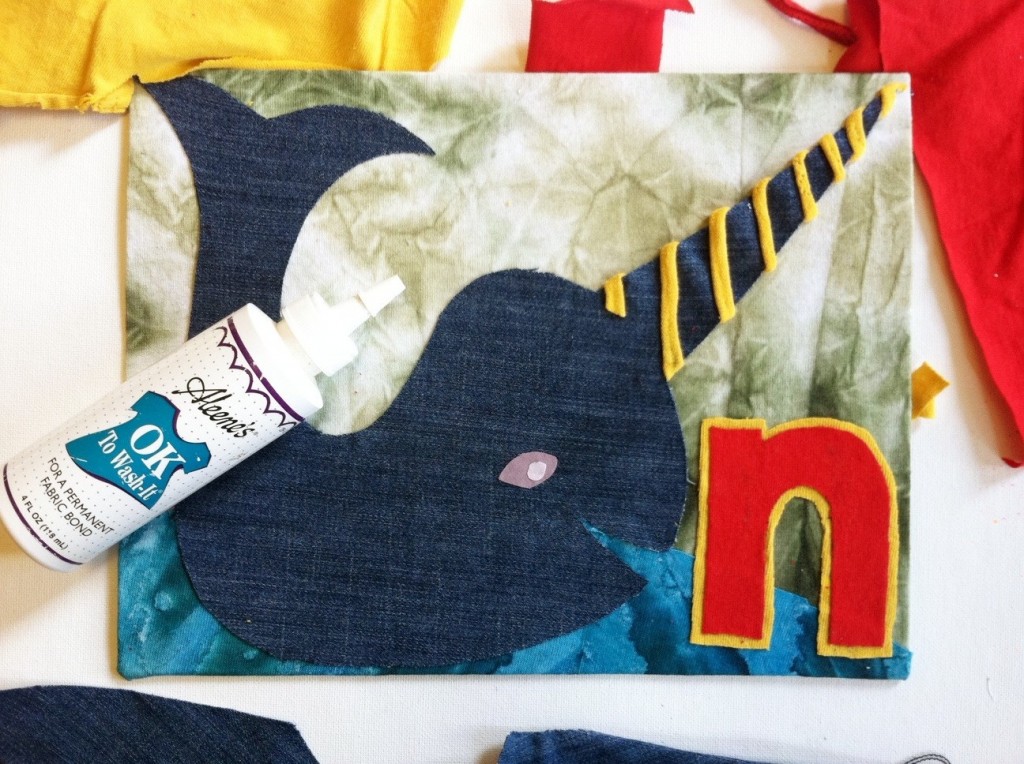
6. Cover the second piece of cardboard by following steps 1 and 2. Arrange and glue on the embellishments by following steps 4 and 5.
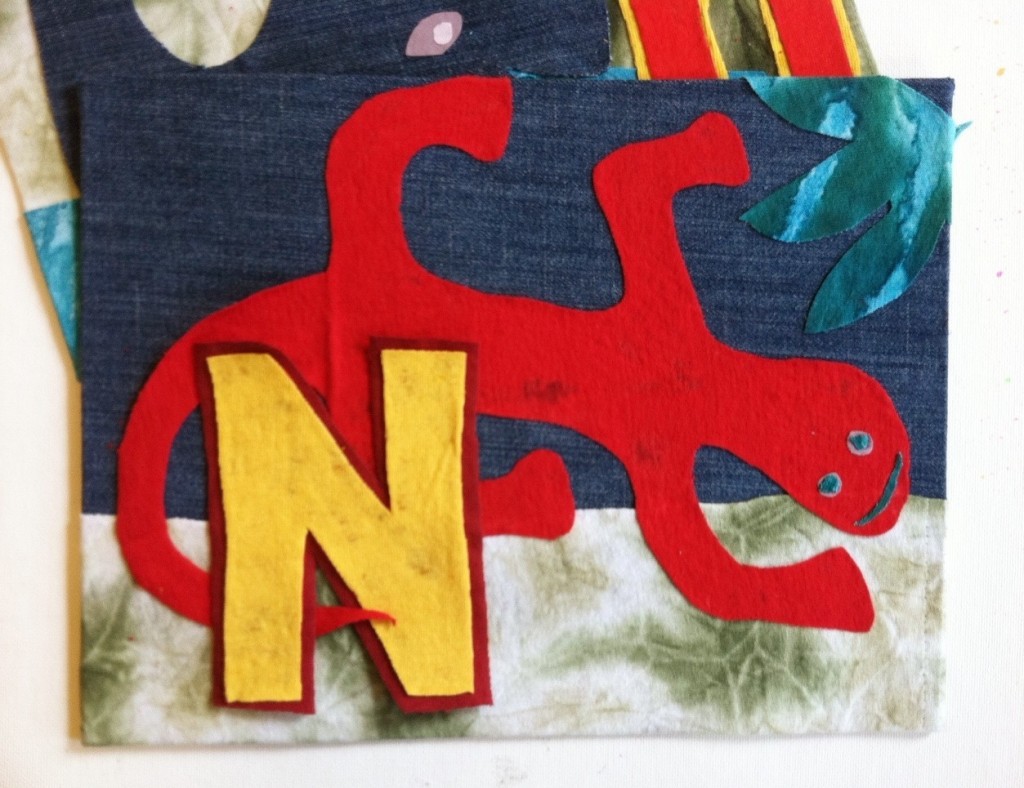
7. Flip one of the panels backside up and measure about 3″ in from each side. Mark each point.

8. Squeeze fabric glue at each mark, and press the length of a T-shirt cord into each line of glue.
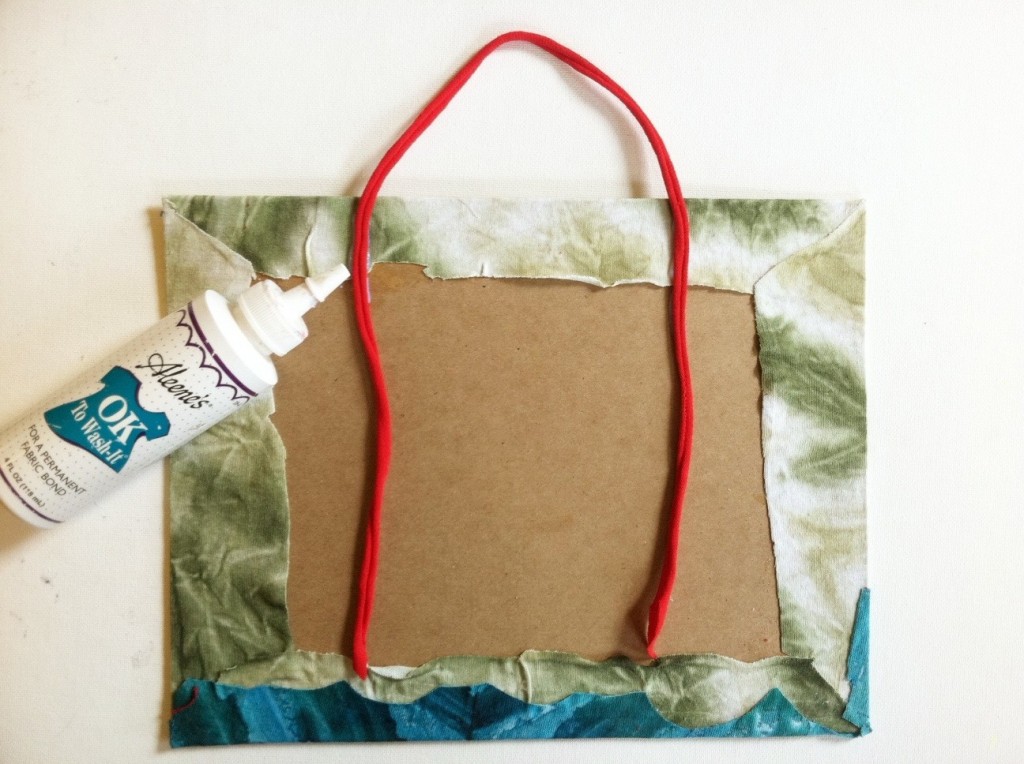
9. Then spread glue across the entire backside of one of the panels and press it firmly to the back of the other, sandwiching the hanging strap ends between them. (This tidily covers any messy work and makes the sign reversible, whether you prefer caps or lowercase — or narwhals or newts.) Let it dry.

10. A, B, C, D, E, F, G…H, I, J, K, L, M, N is for Newt and Narwhal!
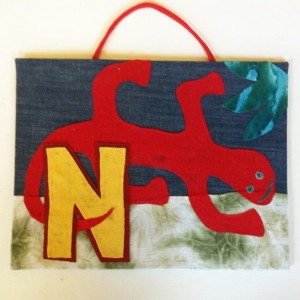
After it’s completely dry, choose a side to display and hang it up!
Variations:
-If you’re feeling ambitious, make multiple signs to spell out a person’s name. Arrange them in a row, a column, or rectangle.
-If you’re feeling really ambitious, make the whole alphabet, and line the edges of the room with A through Z animals!


[ 6 Comments | Posted on February 26th, 2013 ]

An iLoveToCreate iPad Holiday Giveaway!

They’re sure doing more than hanging mistletoe around iLoveToCreate studios. The company I blog for once a month (check out my recent holiday T-shirt project) is celebrating the season with a pretty sweet giveaway!  You can enter to win an Apple iPad — you know, one of those well-designed electronic tablets on which to read all your favorite inspiration sites and blogs all year long — you know, like (ahem) ilovetocreate.com or generation-t.com. Details below…


1 Lucky Winner will win:

Apple iPad Wi-Fi 16 GB – 3rd generation

Pick up the iPad and suddenly, it’s clear. You’re actually touching
your photos, reading a book, playing the piano. Nothing comes between
you and what you love. To make that hands-on experience even better,
they made the fundamental elements of iPad better – the display, the
camera, the wireless connection. All of which makes the third-generation
iPad capable of so much more than you ever imagined. Everything you do
with iPad, you do through its large, beautiful display. And when the
display is better, the entire iPad experience is better. The Retina
display on the iPad features a 2048-by-1536 resolution, 44-percent
greater color saturation, and an astounding 3.1-million pixels – in the
same 9.7-inch space. That’s four times the number of pixels in iPad and a
million more than an HDTV. Those pixels are so close together, your
eyes can’t discern individual ones at a normal viewing distance. When
you can’t see the pixels, you see the whole picture. Or article. Or
game. In ways you never could before.

Product Features

  • 9.7 Retina Display; 2048 x 1536 Resolution
  • Apple iOS 5; Dual-Core A5X Chip with Quad-Core Graphics
  • 5 Megapixel iSight Camera; 1080p Video Recording
  • Wi-Fi (802.11a/b/g/n); 16 GB Capacity: 1 x Headphones – Mini-phone
    stereo 3.5 mm, 1 x Docking / port replicator – 30-pin dock connector
  • Up to 10 Hours of Battery Life; 1.44 lbs

Giveaway ends December 31st at 11:59pm, open to US residents only, ages 18+. See Rafflecopter’s Terms and Conditions to enter please use the Rafflecopter form below. Good luck!

a Rafflecopter giveaway

[ 4 Comments | Posted on December 5th, 2012 ]

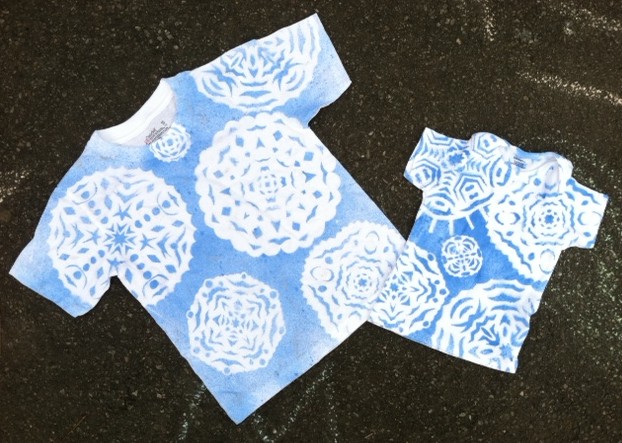
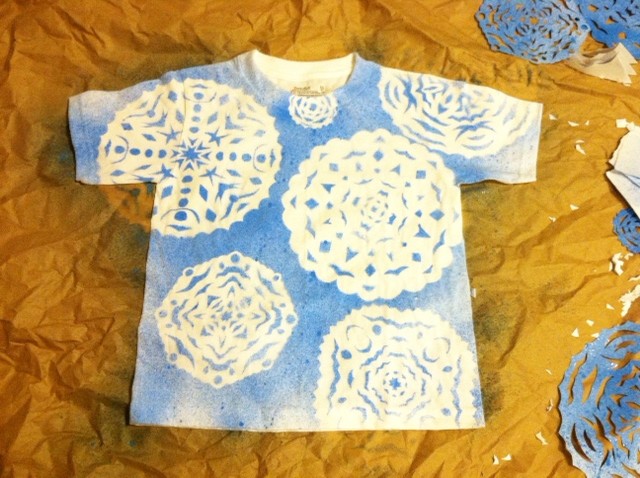
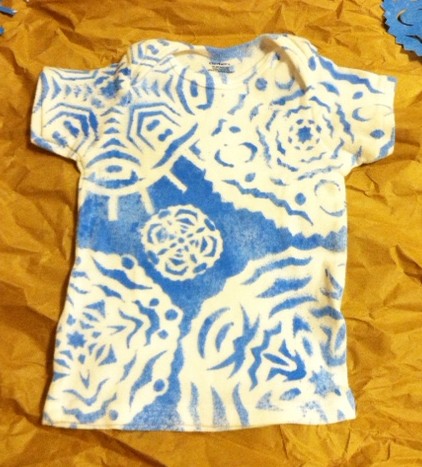
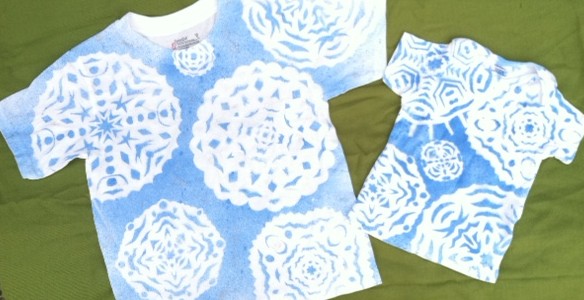
I Love to Create: Snowflake Stencil T-shirts!

We had a wicked nor’easter blow through the East Coast last week, and though the snow pile-up lasted less than twenty-four hours, it sure put me in the mood for winter. So with a family gathering around the corner, I decided to make some wintery-themed T-shirts for the two young cousins in attendance–a little something to wear inside when it’s too cold outside! And a nice alternative to the ubiquitous holiday sweater, don’t you think?

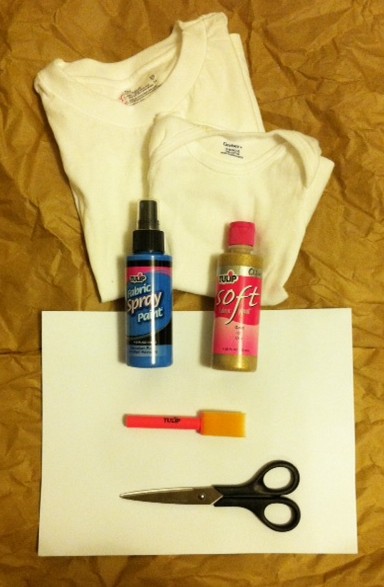
Materials:
-white T-shirt(s) in appropriate size(s)
Tulip fabric spray paint (light blue)
-white printer paper
-paper scissors
-iron and press cloth
Tulip Soft Fabric Paint (Gold Glitter, optional)
Tulip Sponge Brush (optional)

Make it:
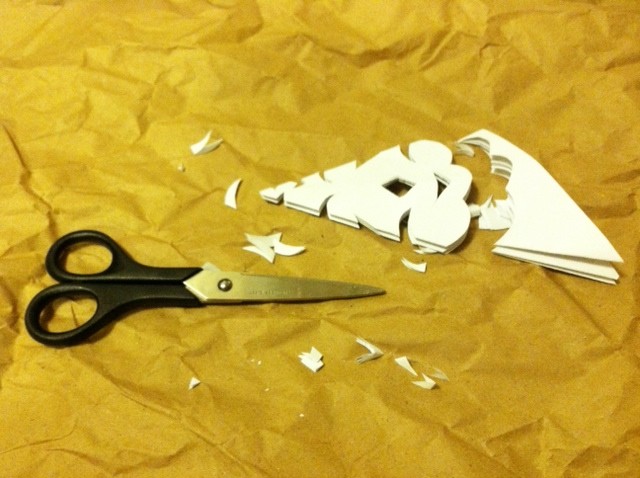
1. Fold one of the sheets of paper on a diagonal to “square” it. Use scissors to cut off the excess strip of paper.

2. Bring the lower left corner up to fold the triangle in half again.

3. And again!

4. Use your scissors to start cutting notches along the folded edges: zigzags, circles, crescents, curls, diamonds, and so on! Don’t forget to cut the open edges in an arc, so that the snowflake will be somewhat round in appearance when you unfold.

5. Unfold!

6. Repeat to make many snowflakes (no two will be alike)!

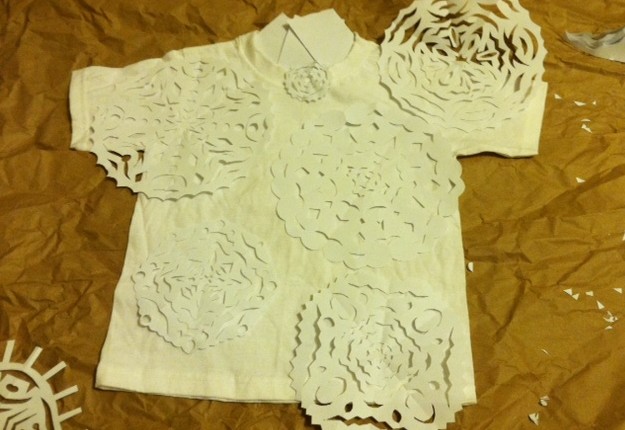
7. Lay the T-shirt flat on your work surface. Arrange the snowflakes onto the front, and press them with a warm iron to keep them relatively flat. (Note: The weight of the spray paint will actually help them stay flat, too.)

8. Lightly spray blue paint over the entire T-shirt (I masked the inside back neckband with paper scraps).

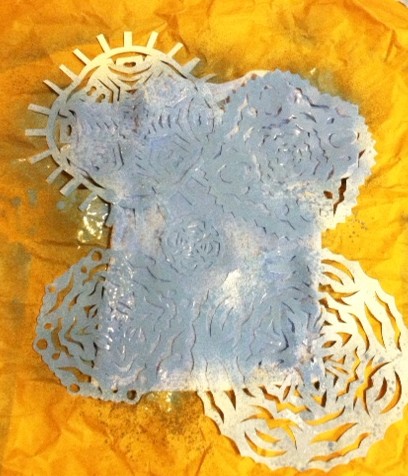
9. Carefully peel off the snowflakes and set them aside. Let the T-shirt dry.

10. Reuse the snowflakes to make T-shirt number two!

Optional: Use the foam brush and glitter paint to add sparkly highlights to the snowflakes.

Let dry, then try on the shirt (or gift it to its recipient!), and curl up by the fire, knowing your snowflakes will never melt.


[ 2 Comments | Posted on November 20th, 2012 ]

Happy Halloween! T-shirt Pumpkins!

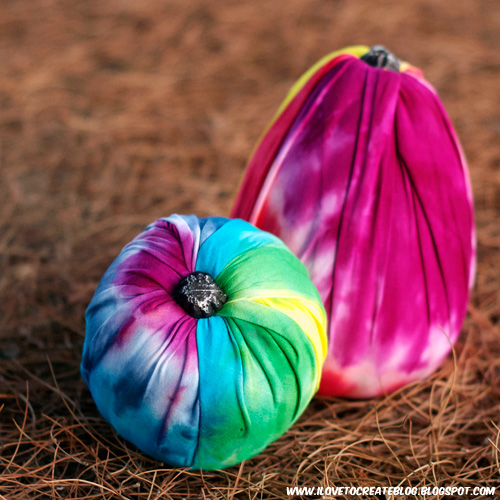
Wishing you all a happy Halloween with these colorful T-shirt pumpkins made by this oh-so-Swell Designer for iLoveToCreate.

Click here for the full T-shirt pumpkin tutorial, or follow along with this video from The Swell Life (and use your powers of imagination to substitute tie-dye T-shirt fabric for a red bandana!).

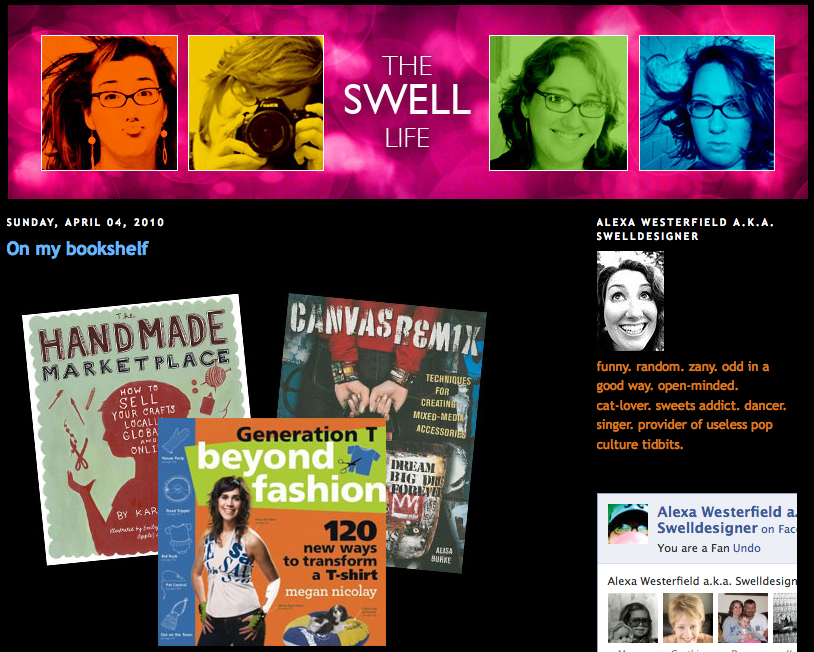
(PS: Alexa at The Swell Life has so many swell ideas for holiday decor — especially for Halloween — and we’re just plain tickled pink that she has one of our books on her shelf! Proof below.)

Pumpkin image via iLoveToCreate; video via The Swell Life

[ Comments Off on Happy Halloween! T-shirt Pumpkins! | Posted on October 31st, 2012 ]