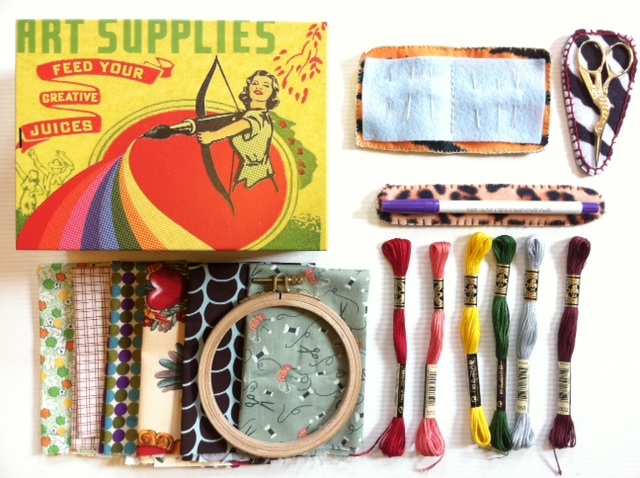
As you may know, my niece became very enthusiastic about embroidery over the holidays, and now that another very important holiday is upon us (her 6th birthday, of course!), I decided to put together a personalized “my first embroidery kit” for her. It has a combination of store-bought and handmade elements, so you can make your shopping and DIY lists accordingly.
Here’s what I included:
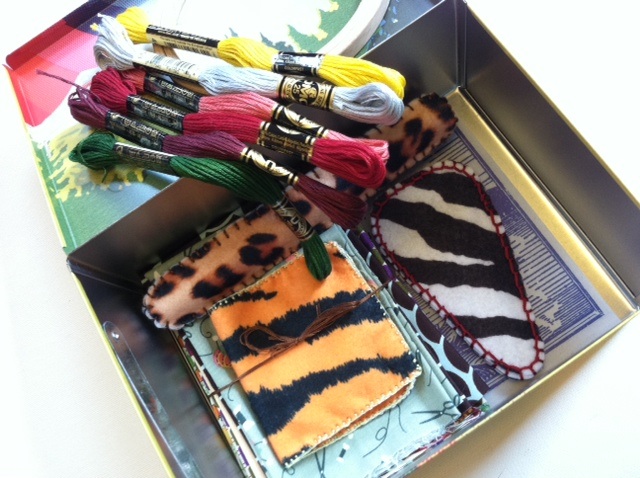
–Tin box (or a basket, or a small tote bag)
-6 swatches of about 10″ by 10″ fabric (snipped from my own fabric stash — lots of geometric patterns for easy stitching)
-6 skeins of embroidery floss in different colors
-4″ wooden embroidery hoop
-Classic stork embroidery scissors and a felt sheath
-6 needles and a felt case
–Disappearing ink pen and a felt sleeve
To make the scissor sheath, trace about 1/4″ to 1/2″ around the scissors on a piece of felt (tip: use the disappearing ink pen before packaging it up!). The shape should be approximately 4 1/4″ by 2 1/4 at its longest and widest.
Cut four matching pieces of felt using the tracing as your guide. If you’re using printed felt (with a right and a wrong side), pair off the four pieces, wrong sides together.
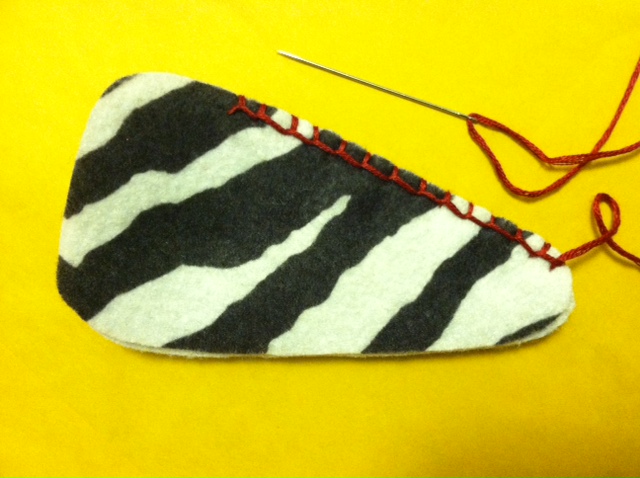
Then sandwich all four pieces together and blanket stitch along the edge with a contrasting color embroidery floss. Starting about 3/4″ from the top, stitch around the bottom of the sheath (where the point of the scissors will rest) through all four layers, then stop again on the other side, 3/4″ from the top.
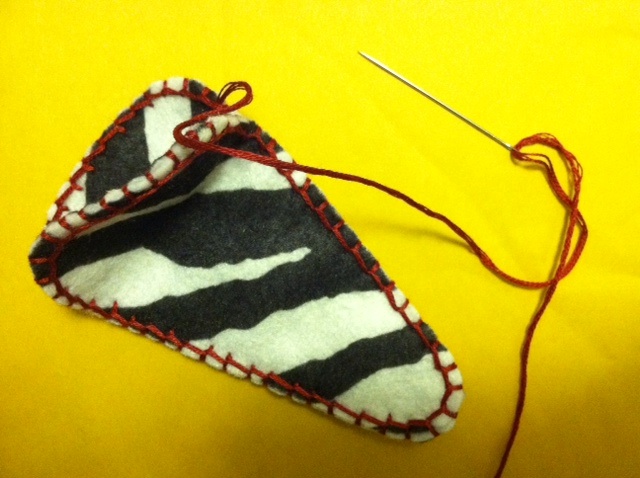
Without tying off the thread, stitch through only two layers at a time to finish the edges at the top of the sheath (where the scissors will be inserted).
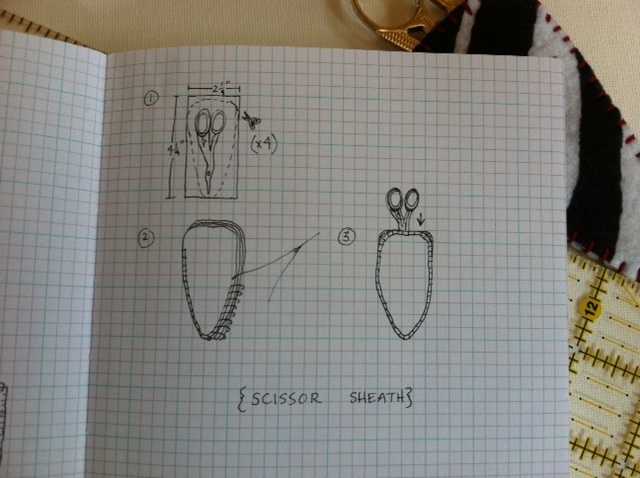
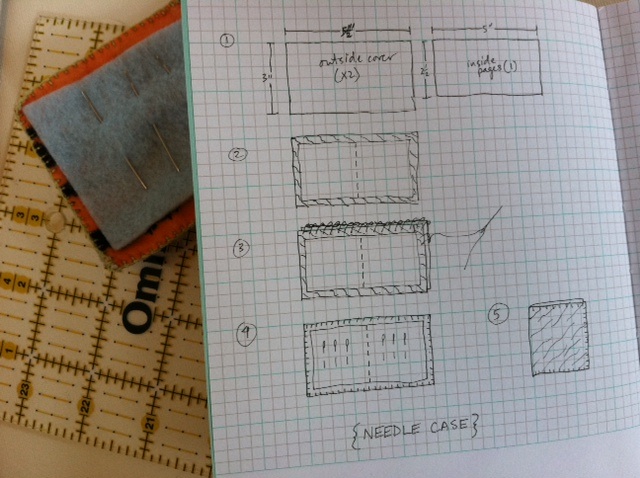
Tie off and snip the thread, and insert the scissors! Here’s a diagram from my sketchbook as a refresher:
For the needle case, cut two 3″ by 5 1/2″ felt rectangles for the cover and one 2 1/2″ by 5″ rectangle for the inside page (1). Center the inside page on the right side of one of the larger rectangles and sew a straight running backstitch along the center to create the interior “spine” of the needle case (2). Then sandwich the second larger rectangle against the first, wrong sides together, and blanket stitch around the edges (3)! Arrange the needles onto the inside page (4), and fold the book closed (5).
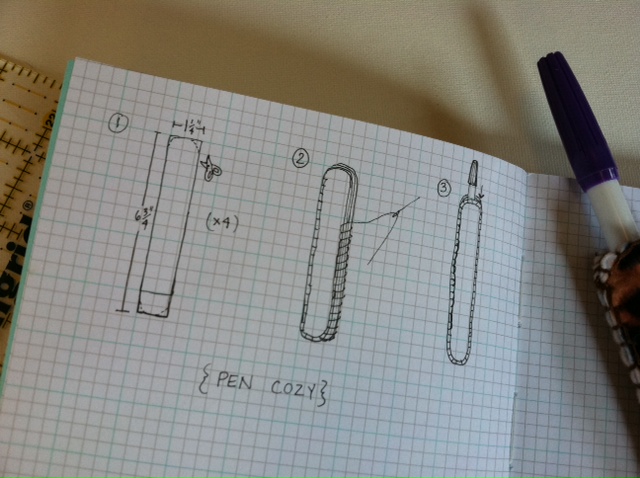
For the disappearing ink pen sleeve/cozy, cut four pieces of 1 1/4″ by 6 3/4″ felt rectangles (1). Stack them together as you did the pieces of the scissor sheath and blanket stitch them the same way: through all four layers and then through just two layers at a time around the opening (2). Tie off the end, snip the thread, and insert the pen (3)!
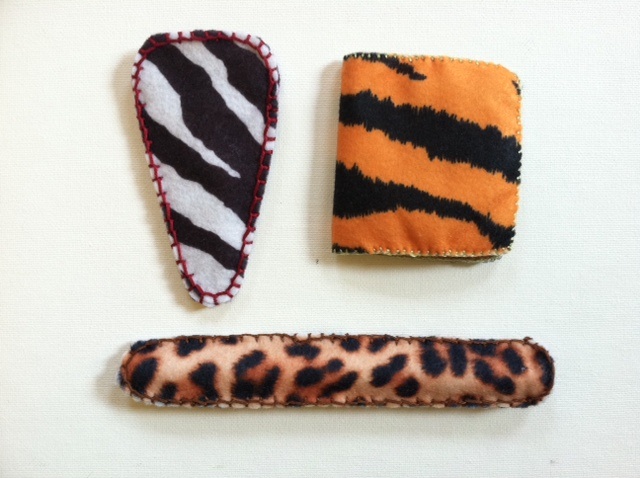
Here’s a look at the finished felt DIY components.
Then it’s time to assemble everything. Make sure it looks nice and neat — because it’s likely the last time it’ll look that way!
What would you put in a first embroidery kit? I thought about some iron-on patterns, but for now I think she’s at the stage where she’s experimenting and doing her own thing (but I’ve got my eye on this one for future gifting!). I also thought about including a stitch card (there’s a tear-out one from this book and I was tempted to include the one from my copy).

