Posts Tagged ‘fabric paint’

No-Sew T-shirt Infinity Top

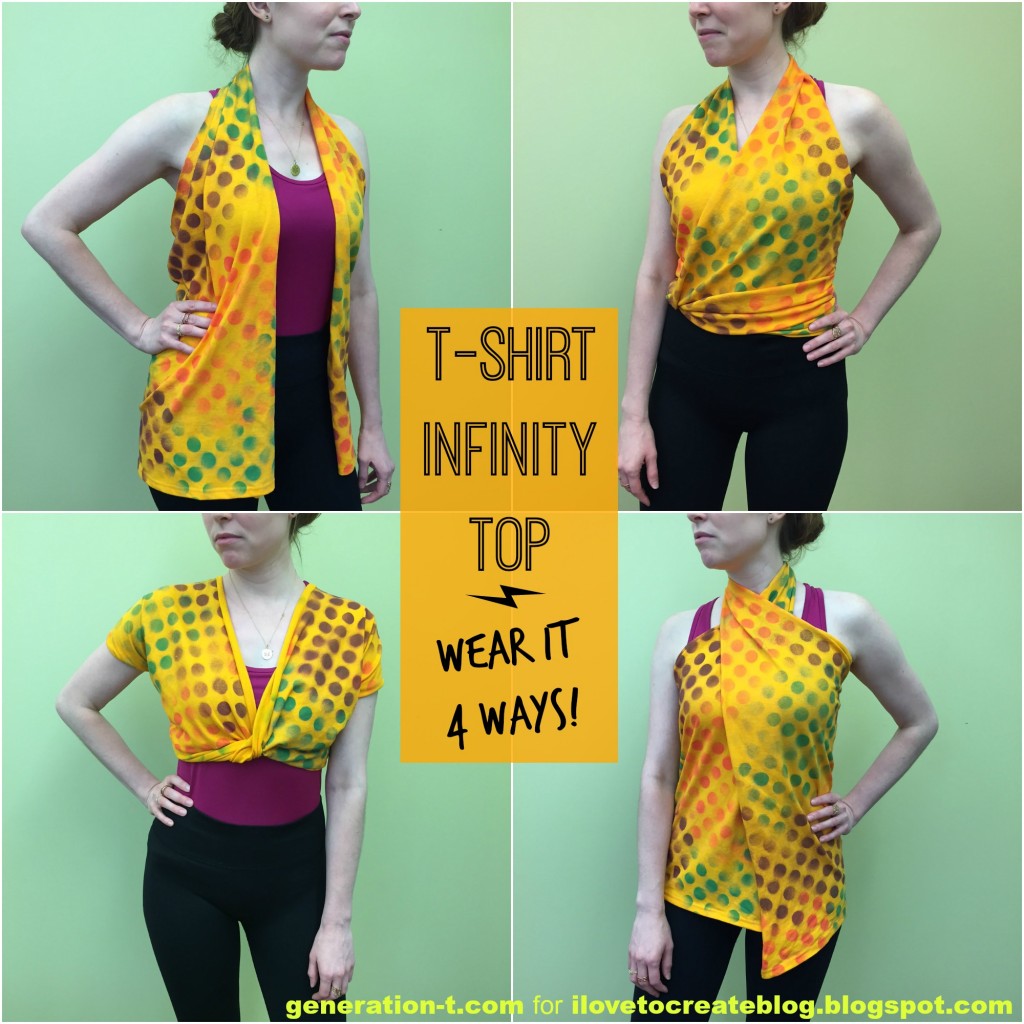
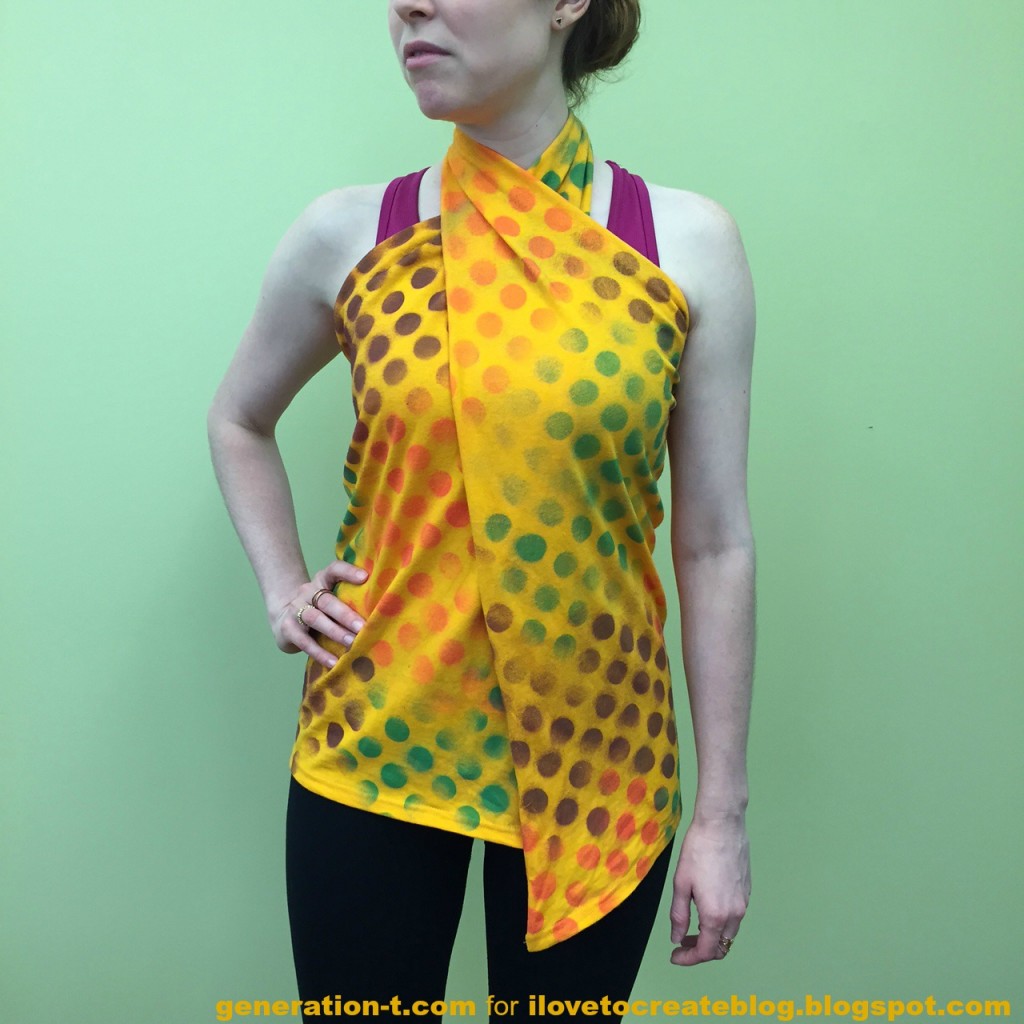
The best thing about T-shirt season? Umm…T-shirts. Here’s a no-sew T-shirt project to help you kick off your totally sweet summer. Punch it up with custom textile designs, and then wear it any way you like — the possibilities are infinite…or nearly!

Tshirt Infinity Top generation-t.commegan-nicolay-blog-footer-1

Materials:
Tulip Color Shot Instant Fabric Color
-Light-colored T-shirt (baggy)
-Stencil (I used a panel from a modular stacking unit that I scored at a stoop sale last spring!)
-Scrap paper or cardboard (to insert between the layers of the T-shirt)
-Fabric scissors

Make it:
Head over to the iLoveToCreate blog for step-by-step instructions for achieving the 4 different looks.

halter look generation-t.com


[ Comments Off on No-Sew T-shirt Infinity Top | Posted on May 27th, 2015 ]

Fall Fashion: Decorating with Leaves, 3 Ways!

Before the snowflakes make their grand and permanent seasonal entrance, I’m stuck on fall. The leaves are so beautiful this time of year in Brooklyn. I was up in New England for peak color, but even the last few weeks in Brooklyn have yielded a lovely array of color and variety.Leaf main generation-t.com

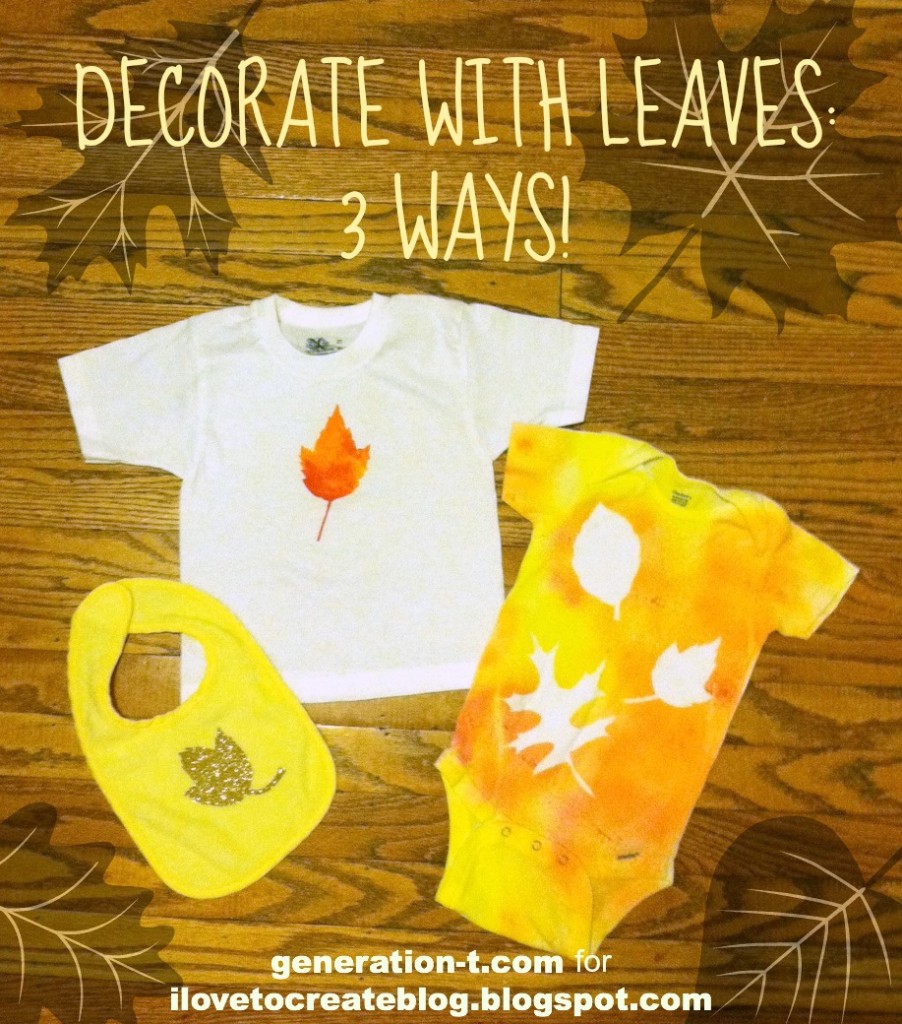
Of course, no matter how you try to keep them, the color fades, and they become dry and brittle. Here are three projects with a common autumnal theme that, like the snowflakes I made and painted last year, help make nature last a little longer.

megan-nicolay-blog-footer-1

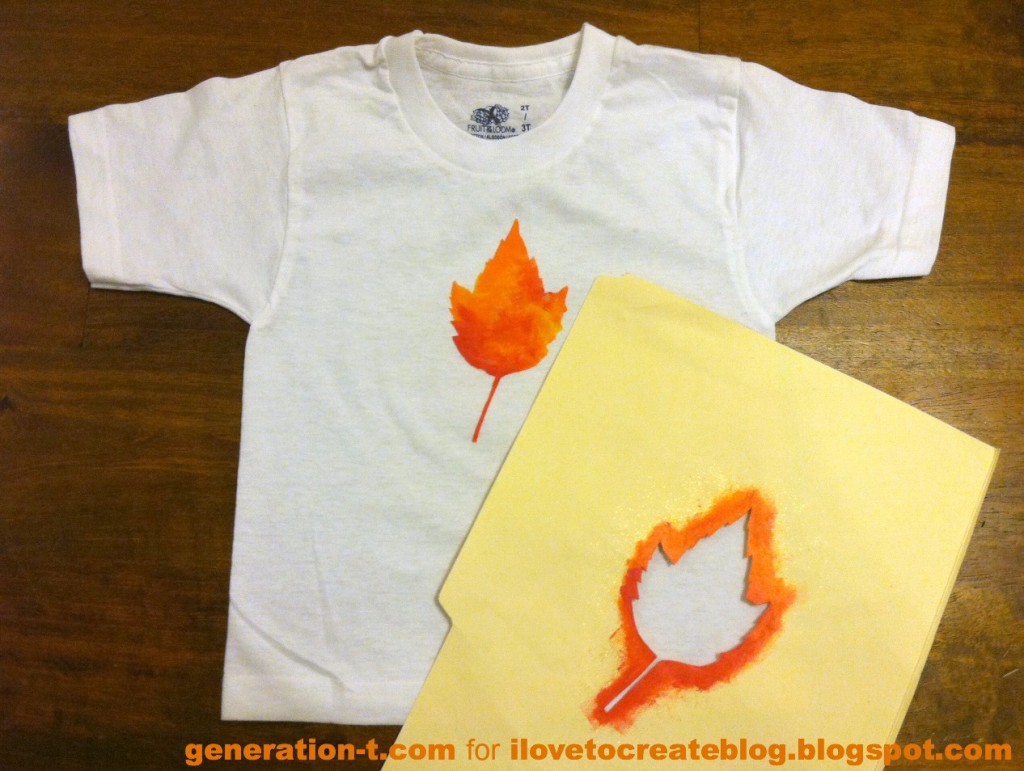
INSPIRATION 1: DIY Leaf Stencil: This one starts with your basic stencil…

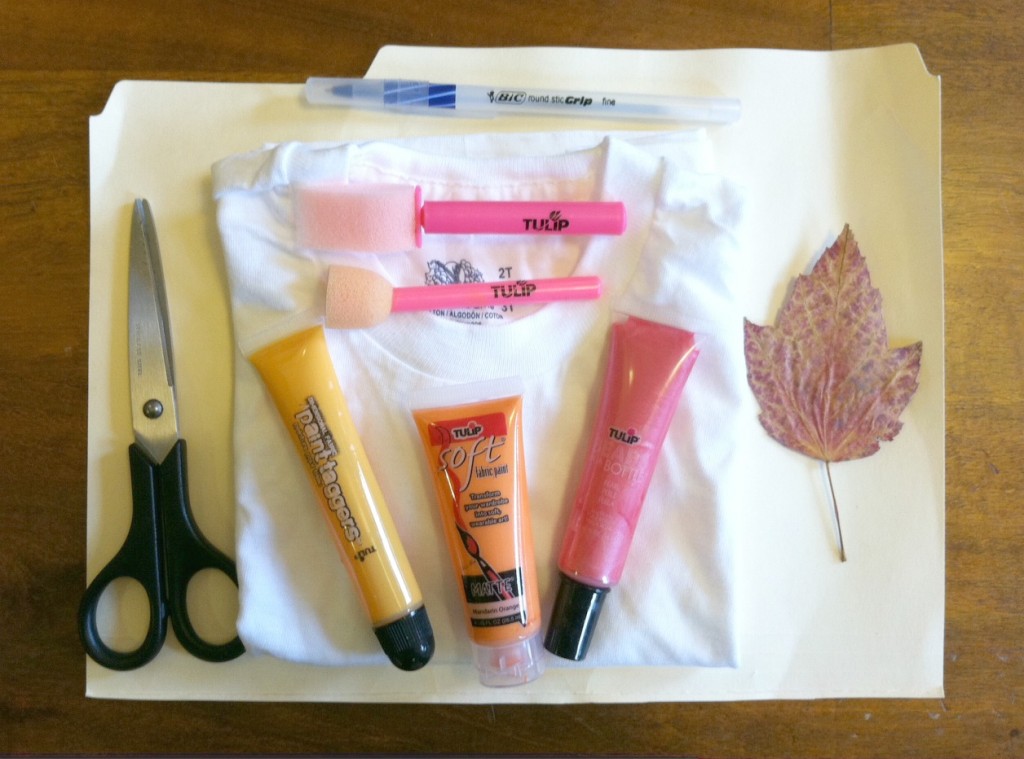
Leaf stencil materials
Materials:
-variety of Tulip soft paints and/or Tulip 3D Fashion Paints (in shades of red, orange, and yellow)
Tulip sponge brushes and/or Tulip sponge pouncers
-variety of pressed leaves for inspiration
-sheet of card stock (or scrap manila folder)-pen or pencil
-scissors or craft knife and cutting mat
-plain T-shirt (lighter colors work best, but white is not required!)
-paint palette (or a plastic container from the recycling bin)
-scrap paper (optional) for inserting between the layers of a T-shirt

Make it:
For complete step-by-step instructions, visit the iLoveToCreate blog.

Leaf stencil paint finish

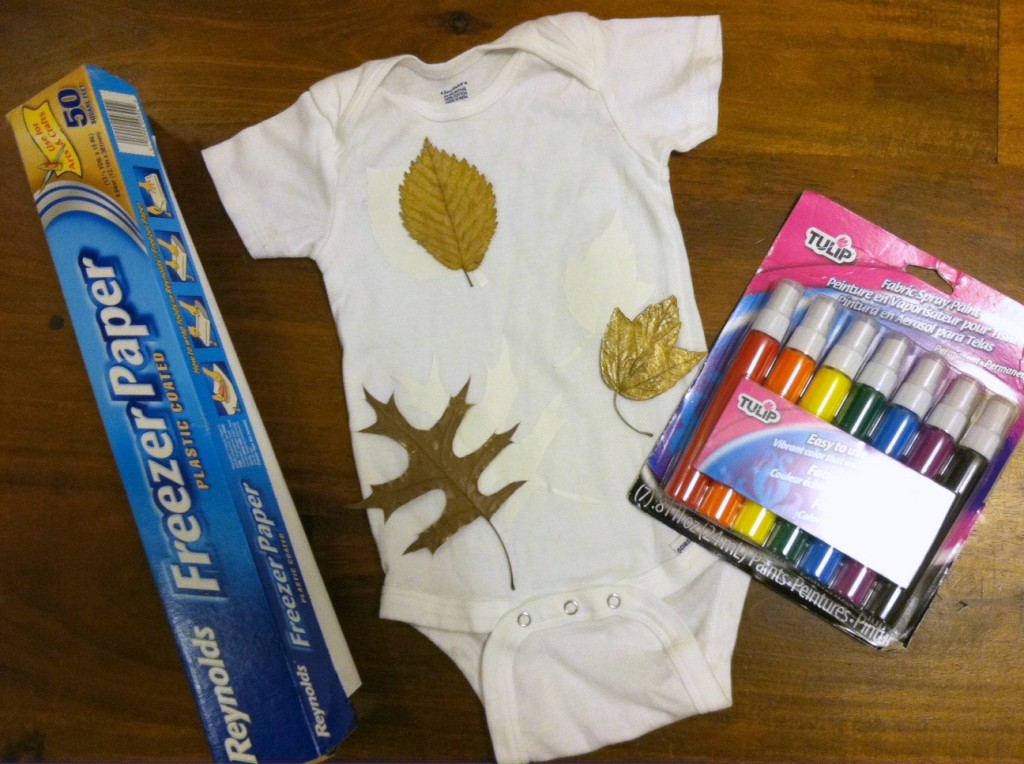
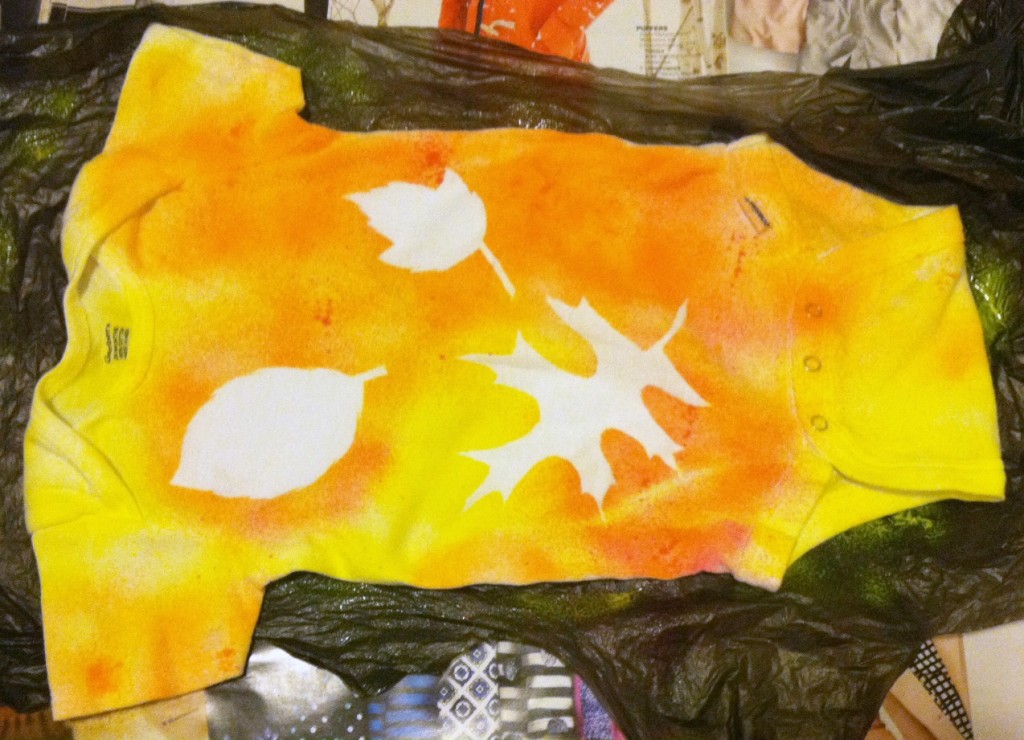
INSPIRATION 2: Reverse Leaf Stencil: This is the same concept as the stencil out of card stock, but you’re instead using freezer paper as your mask, and painting the space around the leaf.

Leaf reverse materials

Materials:
-variety of Tulip Fabric Sprays (in shades of red, orange, and yellow)
-variety of pressed leaves for inspiration
-sheet of freezer paper
-pen or pencil
-scissors or craft knife and cutting mat
-iron and ironing board
-plain T-shirt or onesie (lighter colors work best, but, again, white is not required!)
-scrap paper (optional) for inserting between the layers of a T-shirt and to protect your work surface from paint

Make it:
For complete step-by-step instructions, visit the iLoveToCreate blog.

Leaf reverse peel

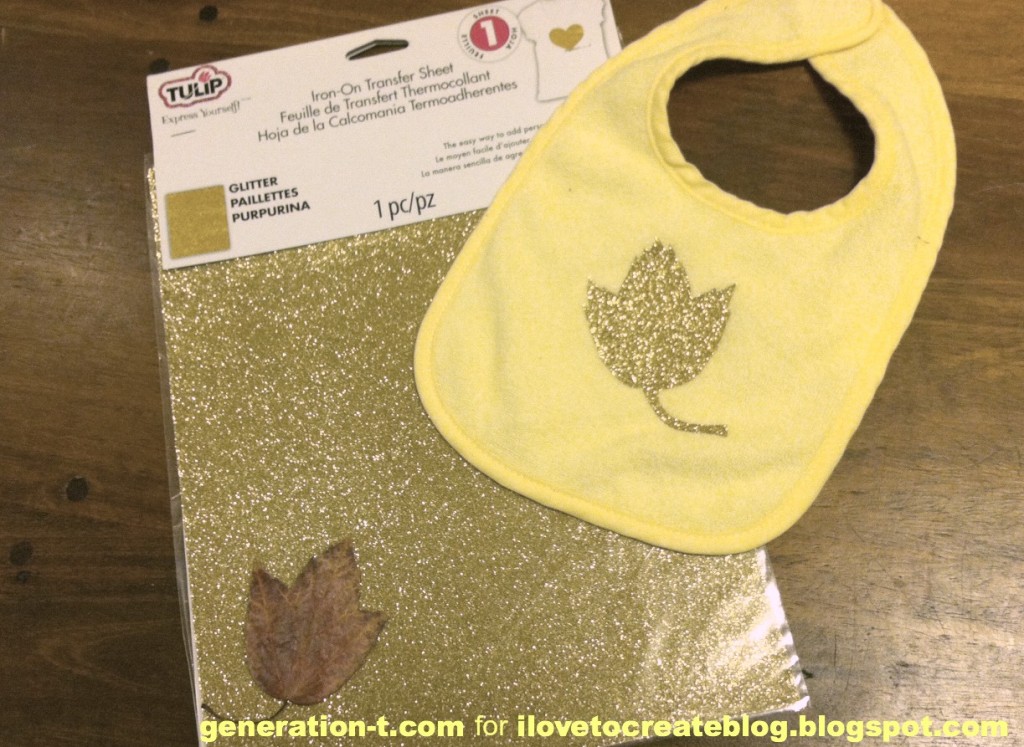
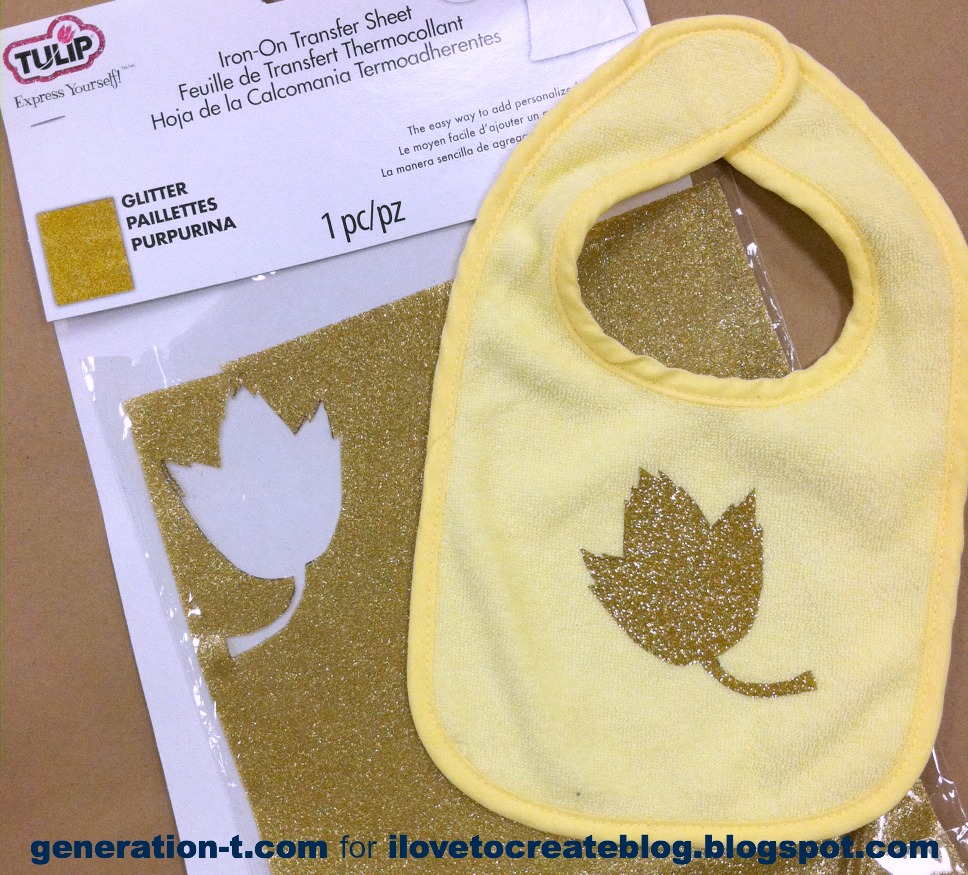
INSPIRATION 3: Glitter Leaf Appliqué: Like the reverse leaf stencil, you’re using the actual leaf shape (rather than the negative space) to create your decoration. The best part about this one? No waiting around during drying time–since there is no drying time!

Glitter leaf materials

Materials:
Tulip Fashion Shimmer Iron-on Sheet (in gold)
-variety of pressed leaves for inspiration
-ballpoint pen
-scissors or craft knife and cutting mat
-iron and ironing board

-plain bib, T-shirt, or onesie

Make it:
For complete step-by-step instructions, visit the iLoveToCreate blog.

Glitter Leaf finish

Stay tuned next week for one more way to use autumn leaves as inspiration for decorating fabric. (PS: I made myself a really rad upcycled skirt!)

[ 1 Comment | Posted on November 26th, 2013 ]

10 Quick & Easy T-shirt Halloween Costumes III

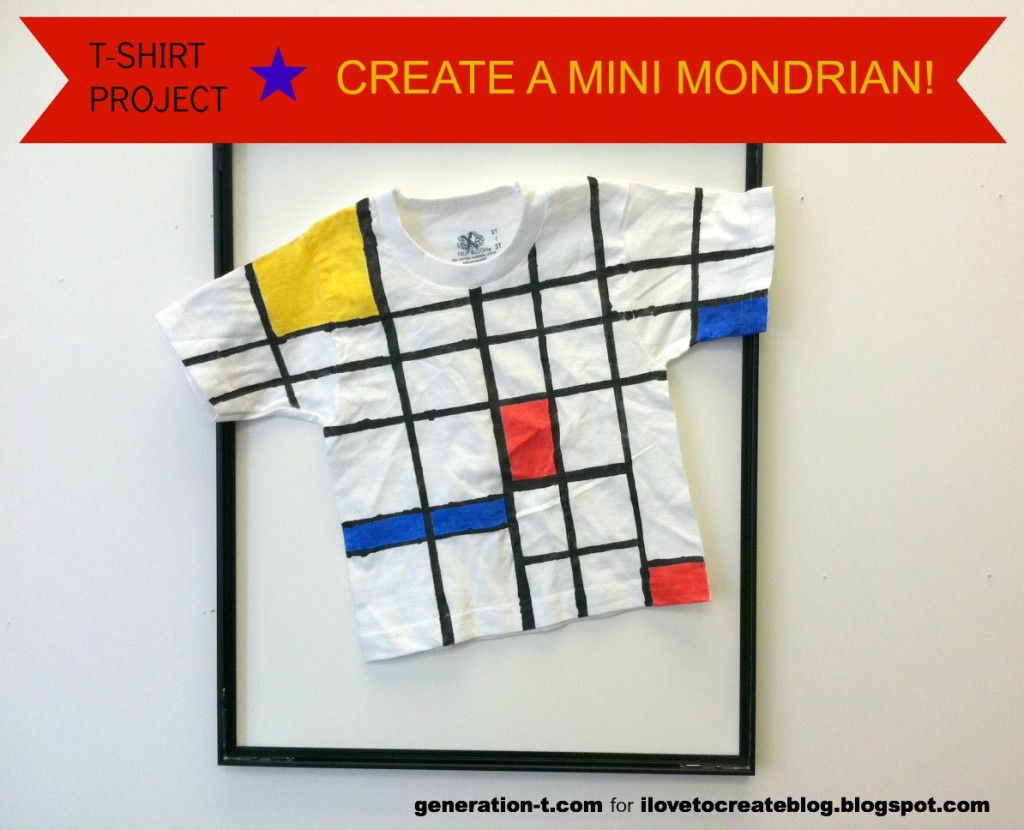
Well, I’ve started a tradition, serving all of you would-be Halloween revelers who are down to the wire when it comes to your costume. For the third year running (see year 1 and year 2 here), we have another 10 quick-and-easy T-shirt-based Halloween costumes. From the literary to the painterly, nerdy to the nostalgic, from pop culture to popcorn. In most cases, all you need is a blank T-shirt and some fabric paint or markers. First up, make a masterpiece in just a couple of hours — grab a frame and hit the trick-or-treating circuit!

MondrianFinish generation-t.com

megan-nicolay-blog-footer-1

MONDRIAN MASTERPIECE T-SHIRT

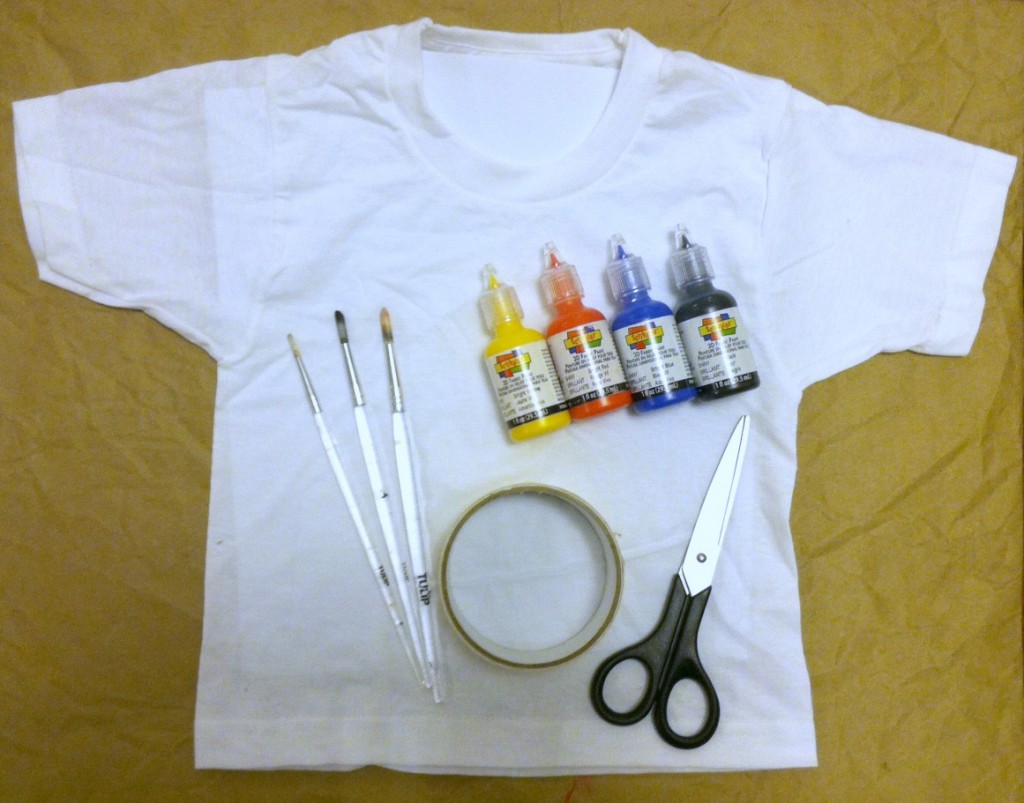
Materials:
-Plain white T-shirt (since I’m making a Mini Mondrian, it’s size 2T)
Scribbles 3D Fabric Paint (in black, red, blue, and yellow)
Tulip Fabric Paintbrushes
-Scissors
-Masking tape
-Scrap paper (to insert between the layers of the T-shirt in order to prevent the paint from seeping through)
-Newsprint paper or similar (to protect your work surface)

MondrianMaterials generation-t.com

Make it:

 1. Visit the iLoveToCreate blog for the the full Mondrian Masterpiece Tutorial. See below for 9 more ideas for quick costumes!


AND NOW, WITHOUT FURTHER ADO, HERE ARE 10 COSTUMES TO MAKE WITH T-SHIRTS (starting with the MONDRIAN MASTERPIECE)

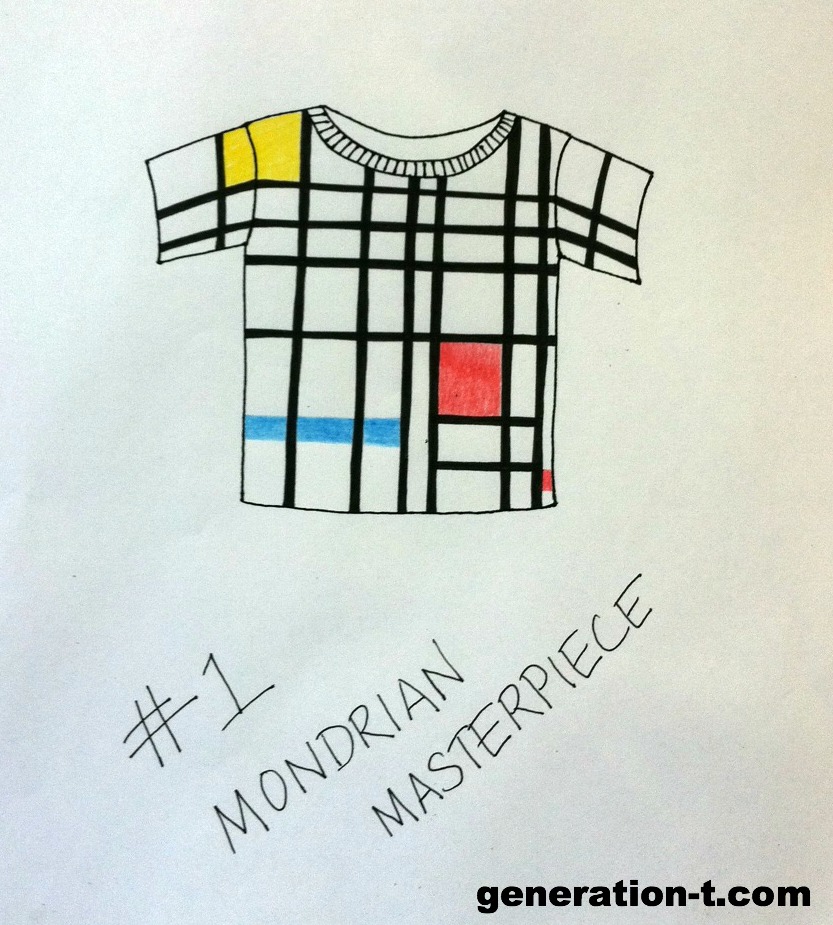
#1 Mondrian Masterpiece. Create a masterpiece! Or wear one inspired by the works of Piet Mondrian.
1Mondrian generation-t.com

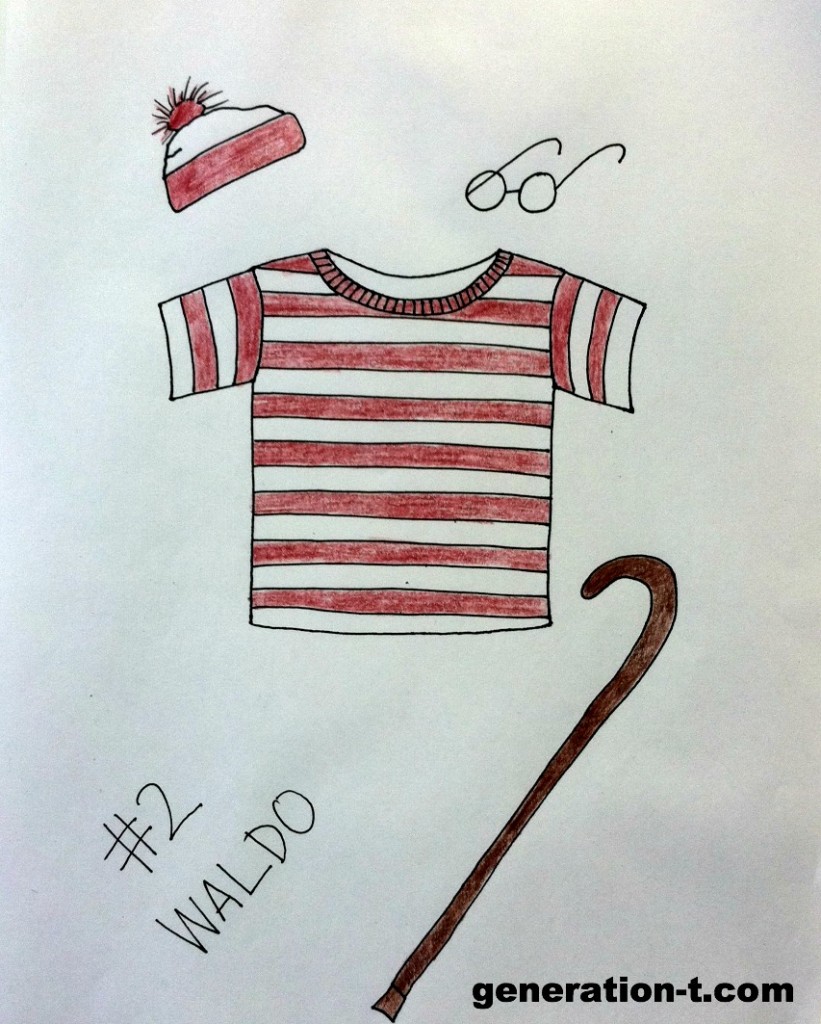
#2 Waldo. Dress in stripes to be the title character (or his pal Wanda) from the children’s classic Where’s Waldo?  (You know, before Harry Potter came along to claim those round specs). Just pair with denim.
2Waldo generation-t.com

#3 Popcorn. There are plenty of a baby costumes for freshly popped popcorn (parents as popcorn vendors), but this T-shirt rendition is limited only by the size of your T-shirt.
3Popcorn generation-t.com

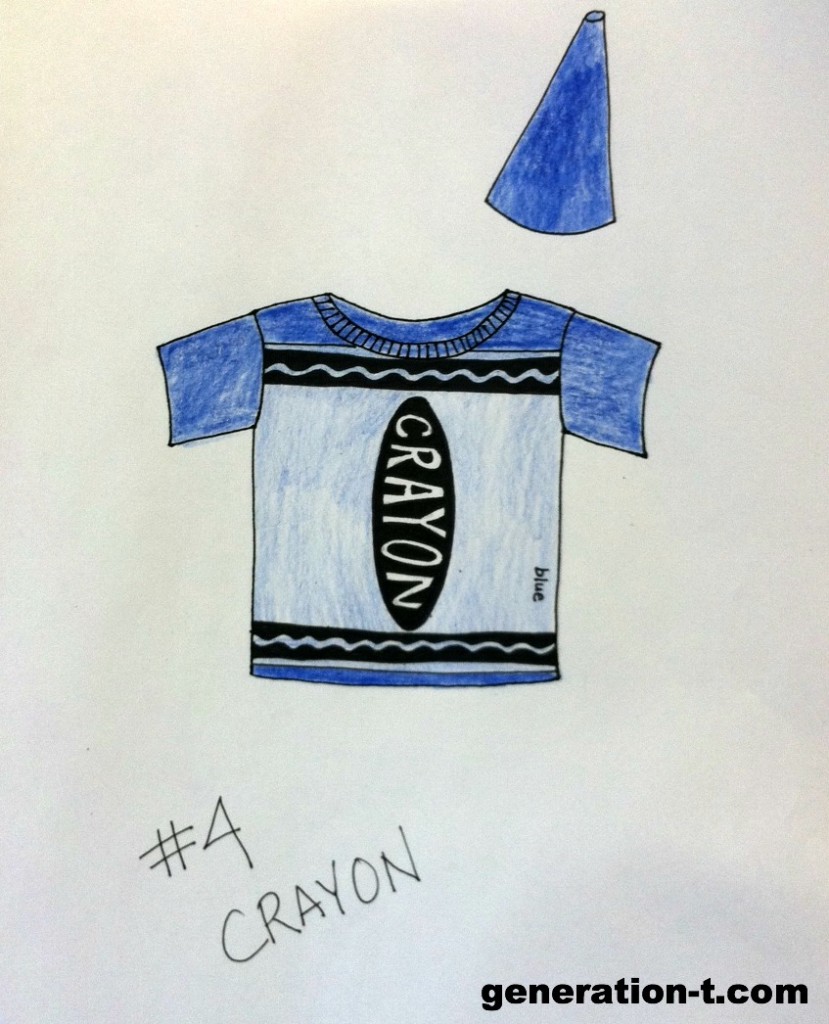
#4 Crayon. Go solo as a blue crayon (don’t forget the sharpened top of the crayon!) or grab your friends and make a whole box of crayons.
4Crayon generation-t.com

#5 Mickey Mouse. Recognizable a mile away, add a pair of ears to top off this costume (and some yellow sneakers wouldn’t hurt either!). Swap out the bottom of the T-shirt for red with white polka dots for Mickey’s main squeeze, Minnie. 5Mickey generation-t.com

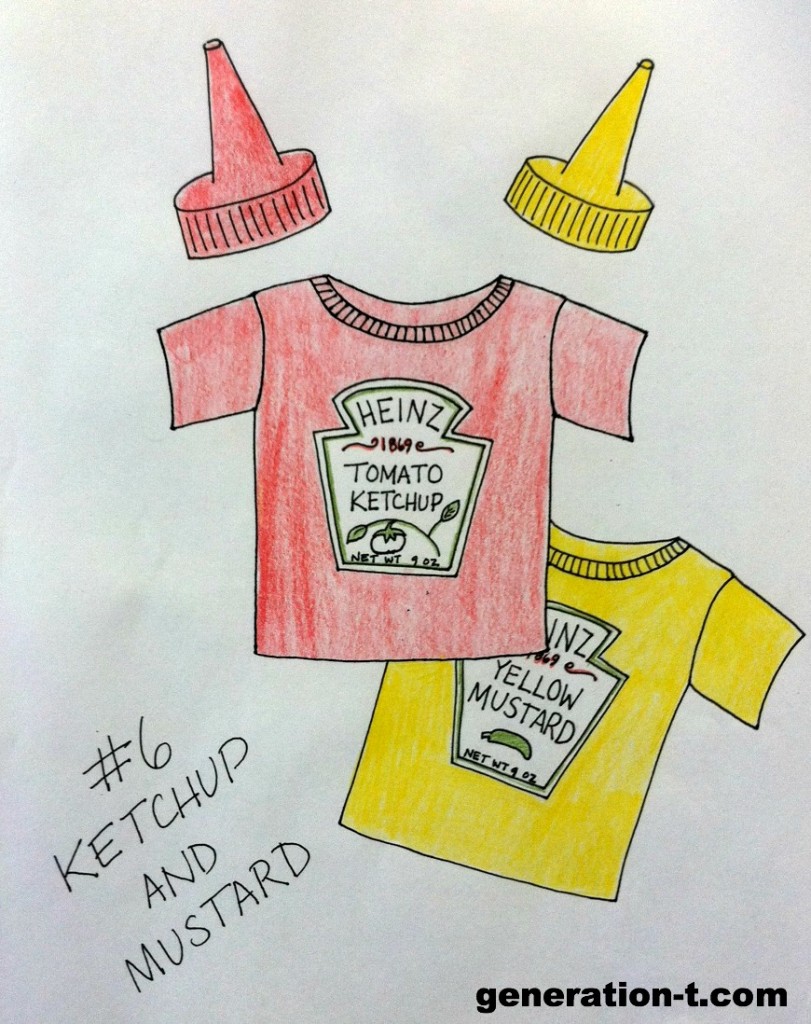
#6 Ketchup and Mustard. For couples, roommates, or other easily paired people, it’s everyone’s favorite condiments!
6KetchupMustard generation-t.com

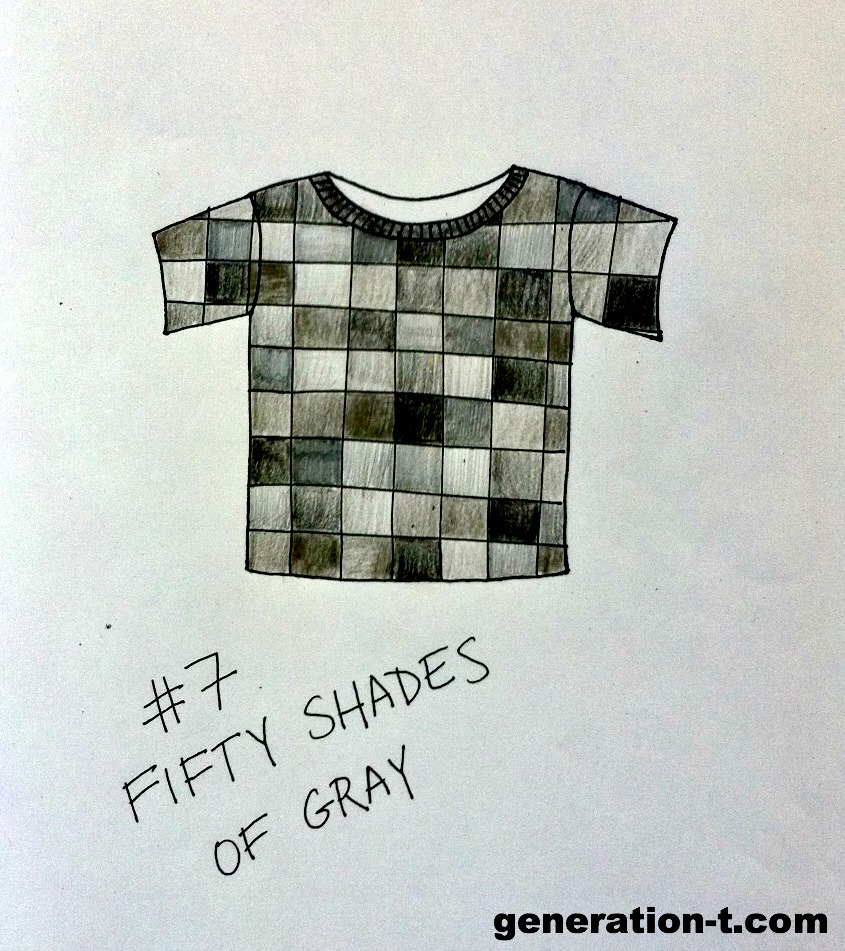
#7 Fifty Shades of Gray. A tame version of Fifty Shades of Gray that you could wear around the office. Alternatively, attach the actual Pantone color swatches all over the surface of the T-shirt.

7FiftyShadesGray generation-t.com

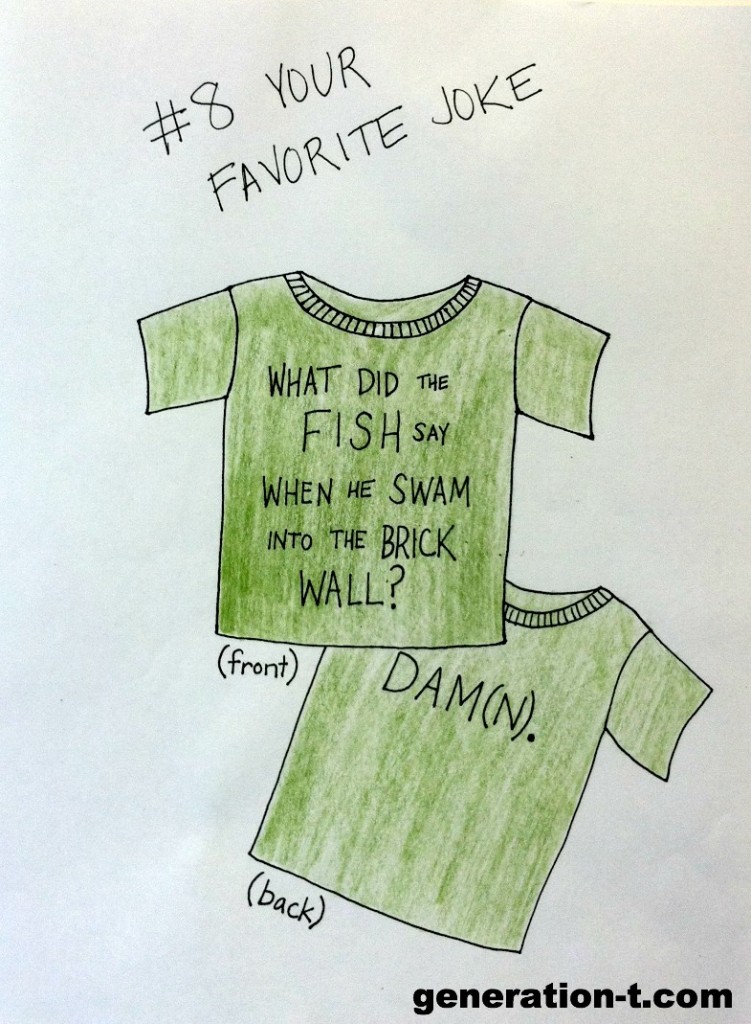
#8 Your Favorite Joke. I used my all-time favorite joke. But you should insert your own: Setup on the front, punchline in back!8Joke generation-t.com

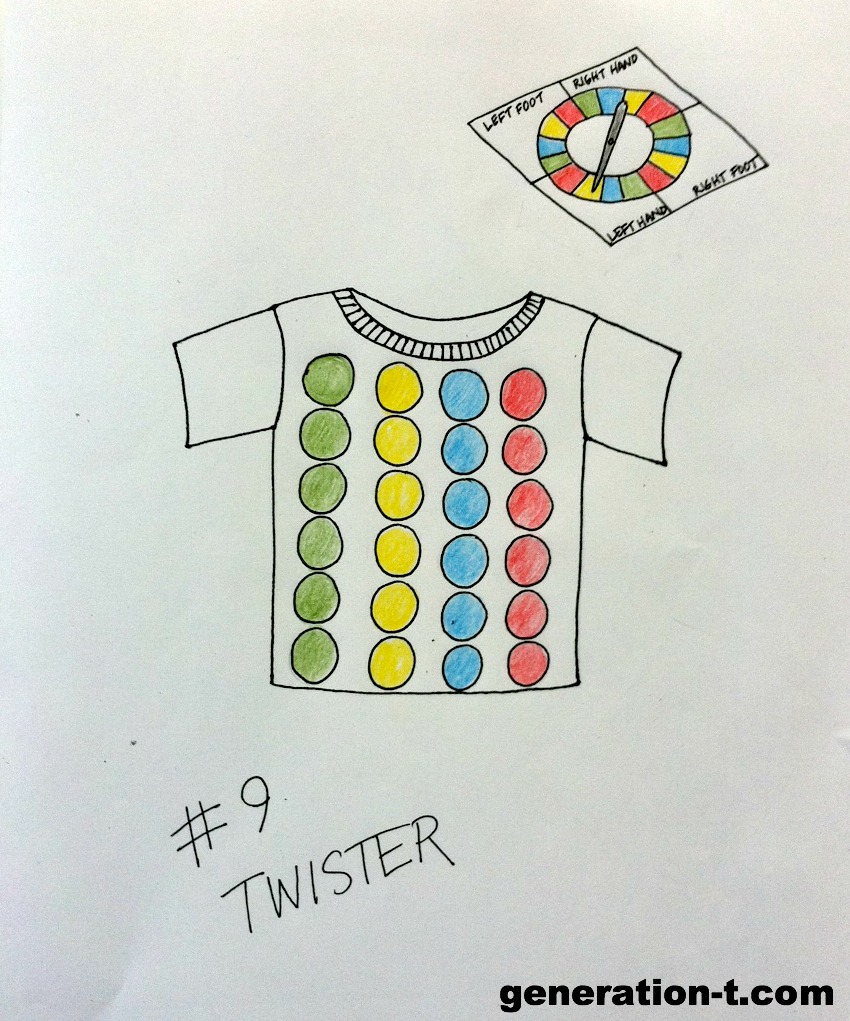
#9 Twister. Twister falls into that beloved classic family game category with the likes of Sorry!, Scrabble, and Pictionary. Fashion the spinner into a headpiece to complete the look!
9Twister generation-t.com

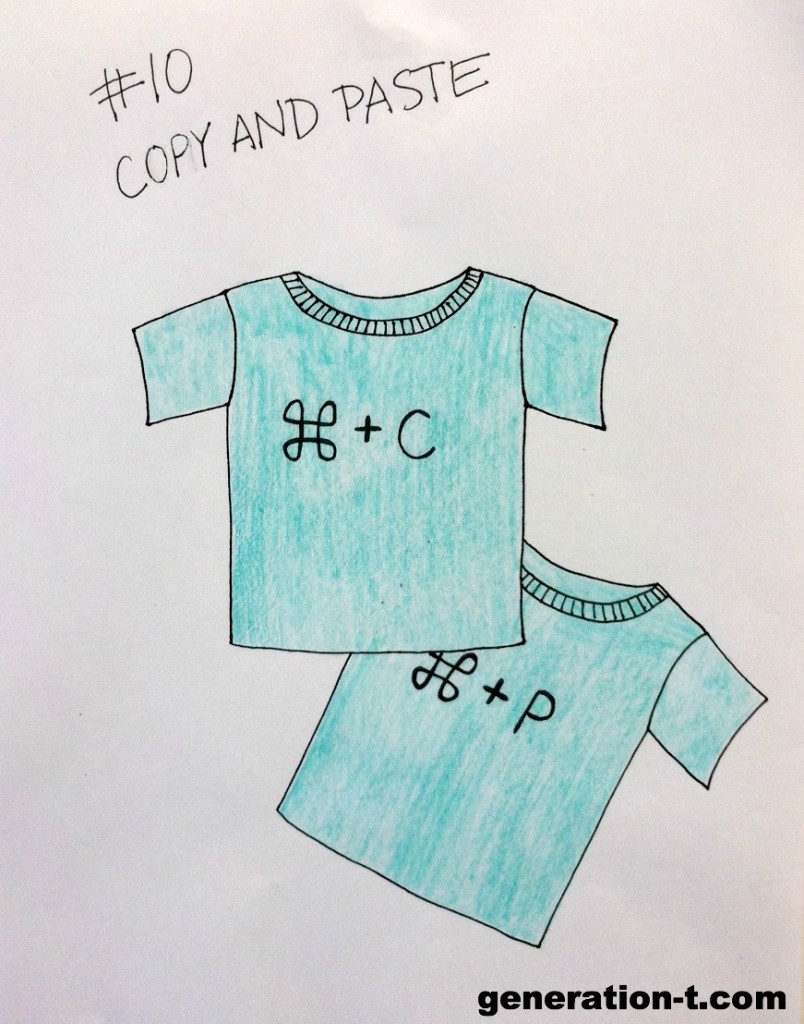
#10 Copy and Paste. Nerd alert! Perfect for twins (or bestie lookalikes), “Copy” and “Paste” (for Macs). Slight modifications (Ctrl + C and Ctrl + V) should be made for PCs.

10CopyPaste generation-t.com

Safe and happy haunting!


[ 1 Comment | Posted on October 29th, 2013 ]

I Love to Create: A Painted Umbrella!

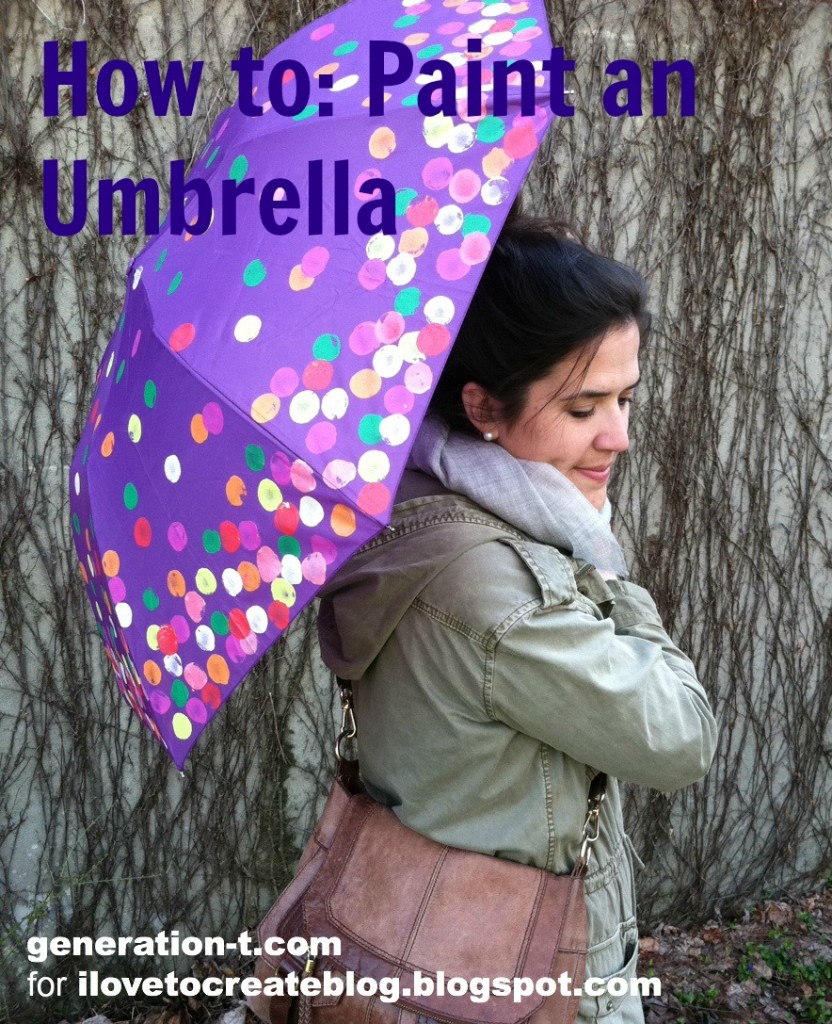
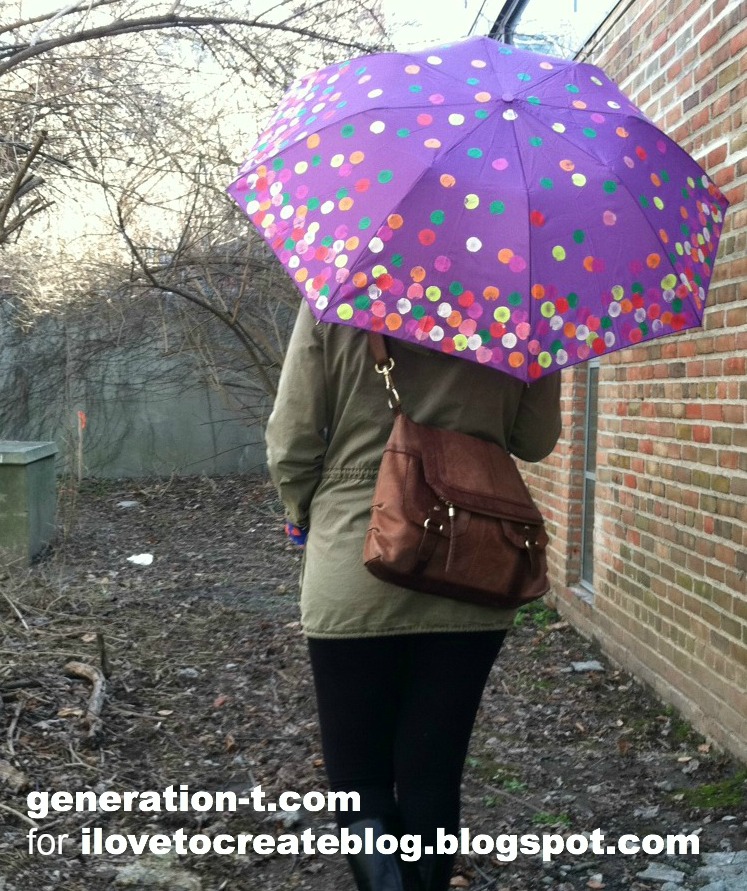
They say that April showers bring May flowers. And in some parts of the country this year there’ve even been April flurries to herald in the blooms! While Mother Nature keeps us on our toes, here’s a colorful springtime project that really brings the flowers when it rains. It’s just one of a slew of ways to decorate an umbrella with paint (because let’s face it, sometimes a purple umbrella isn’t quite bright enough). It’s part pop art (a gumball machine!), part impressionism (Monet’s gardens at Giverny) — and a whole lot of color to brighten any dreary day! We often think of fabric paints in the context of T-shirts and other wearables, but it’s fun to experiment with paint on other fabric-based surfaces: embellished pillows, couches, canvas director chairs, curtains, and…umbrellas!

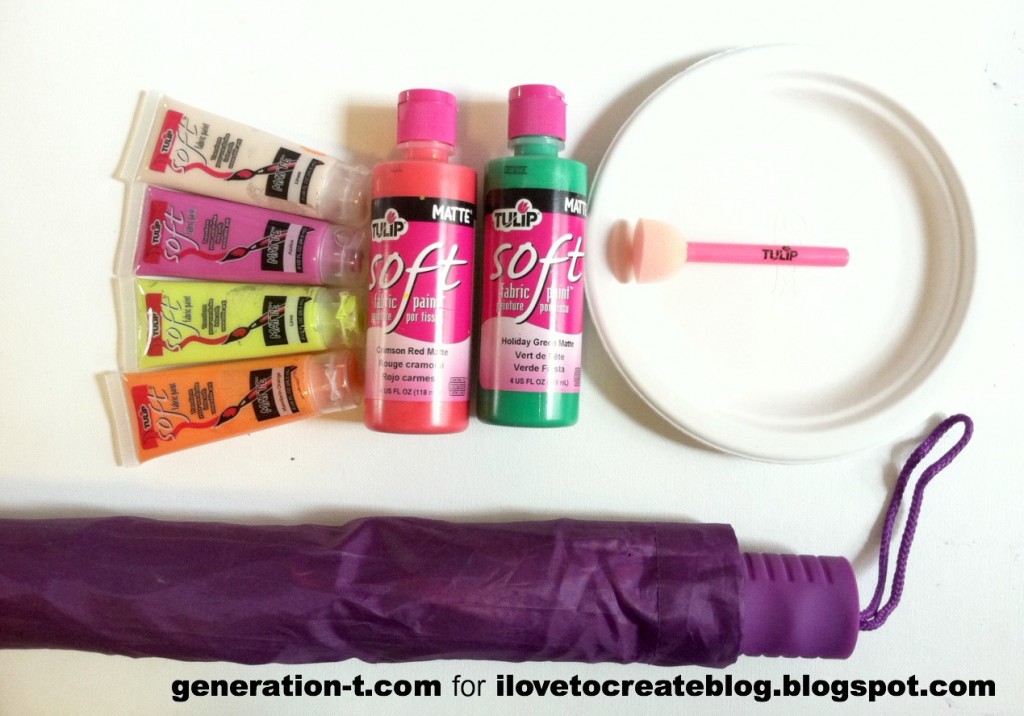
What you need:
-plain umbrella
Tulip Soft Fabric Paint in a variety of colors (I used Azalea, Lime, Mandarin Orange, Linen, Crimson Red Matte, and Holiday Green Matte)
Tulip Sponge Pouncers (foam paintbrush)
-paper plate (to use as a paint palette)

Make it:
Click through to the the iLoveToCreate Blog
to watch the how-to video I did for About.com, and follow the step-by-step photos.

What a nice vibrant splash of color while we wait for more flowers to poke through!

[ Comments Off on I Love to Create: A Painted Umbrella! | Posted on April 23rd, 2013 ]

I Love to Create: Snowflake Stencil T-shirts!

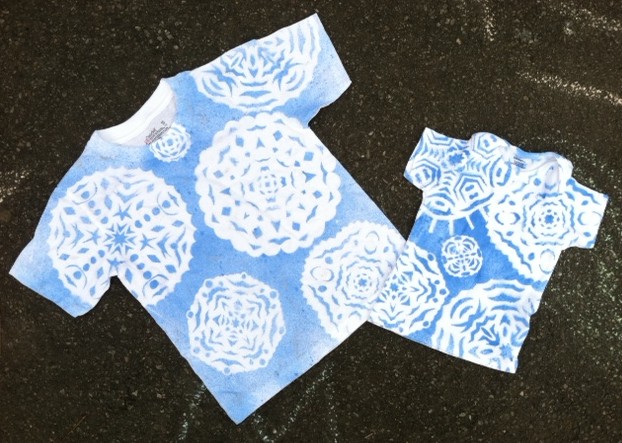
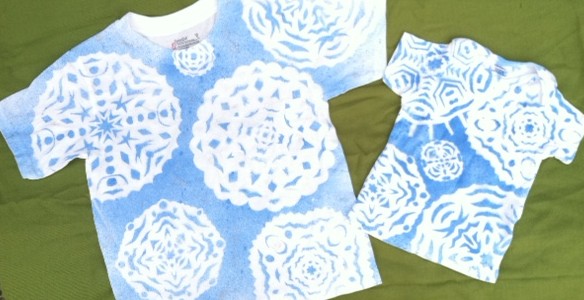
We had a wicked nor’easter blow through the East Coast last week, and though the snow pile-up lasted less than twenty-four hours, it sure put me in the mood for winter. So with a family gathering around the corner, I decided to make some wintery-themed T-shirts for the two young cousins in attendance–a little something to wear inside when it’s too cold outside! And a nice alternative to the ubiquitous holiday sweater, don’t you think?

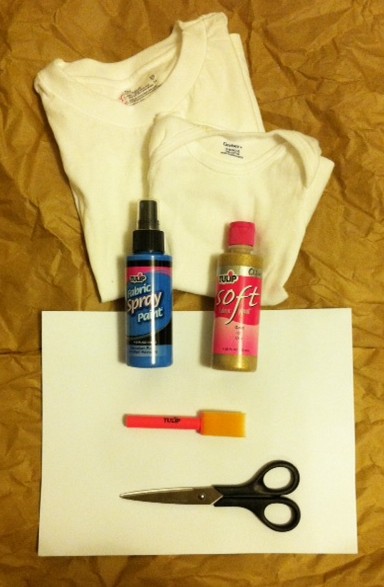
Materials:
-white T-shirt(s) in appropriate size(s)
Tulip fabric spray paint (light blue)
-white printer paper
-paper scissors
-iron and press cloth
Tulip Soft Fabric Paint (Gold Glitter, optional)
Tulip Sponge Brush (optional)

Make it:
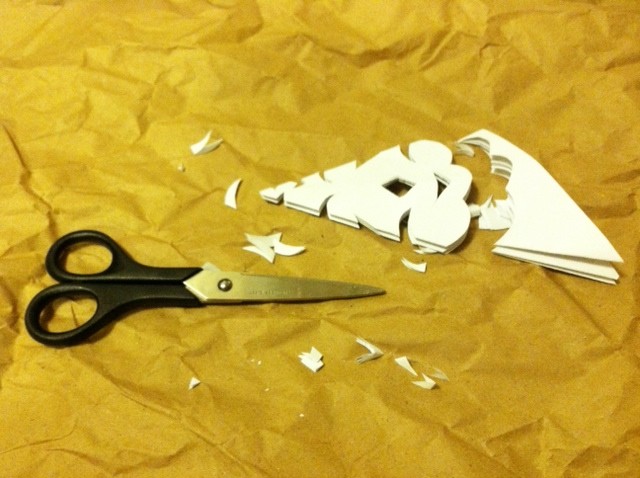
1. Fold one of the sheets of paper on a diagonal to “square” it. Use scissors to cut off the excess strip of paper.

2. Bring the lower left corner up to fold the triangle in half again.

3. And again!

4. Use your scissors to start cutting notches along the folded edges: zigzags, circles, crescents, curls, diamonds, and so on! Don’t forget to cut the open edges in an arc, so that the snowflake will be somewhat round in appearance when you unfold.

5. Unfold!

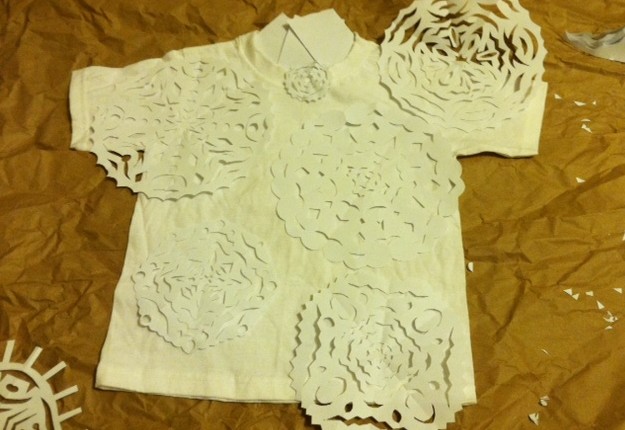
6. Repeat to make many snowflakes (no two will be alike)!

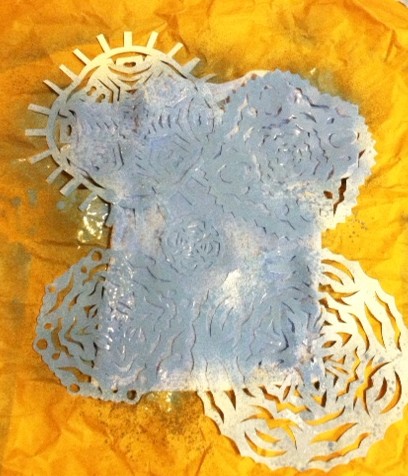
7. Lay the T-shirt flat on your work surface. Arrange the snowflakes onto the front, and press them with a warm iron to keep them relatively flat. (Note: The weight of the spray paint will actually help them stay flat, too.)

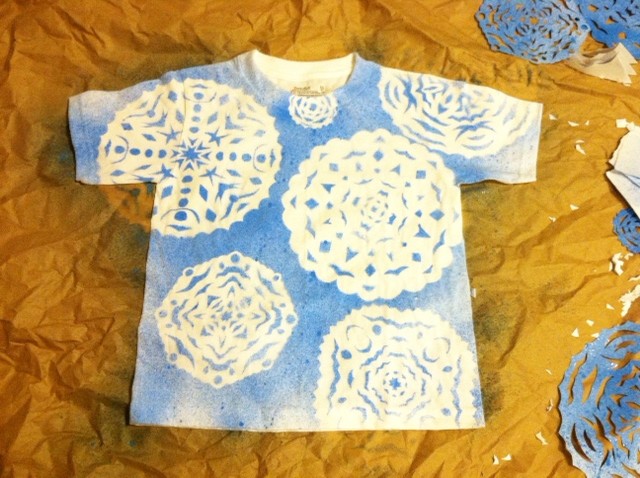
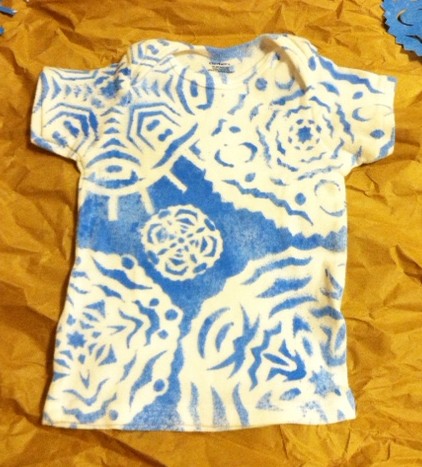
8. Lightly spray blue paint over the entire T-shirt (I masked the inside back neckband with paper scraps).

9. Carefully peel off the snowflakes and set them aside. Let the T-shirt dry.

10. Reuse the snowflakes to make T-shirt number two!

Optional: Use the foam brush and glitter paint to add sparkly highlights to the snowflakes.

Let dry, then try on the shirt (or gift it to its recipient!), and curl up by the fire, knowing your snowflakes will never melt.


[ 2 Comments | Posted on November 20th, 2012 ]

ILTC: Ryan Gosling’s Scorpion Jacket

Hey Girl.

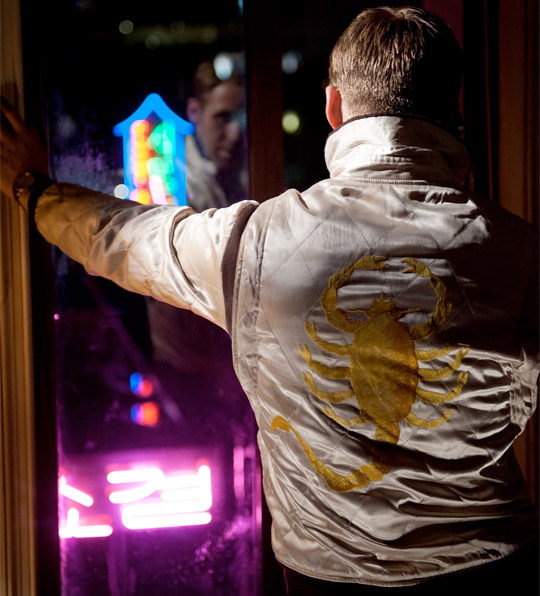
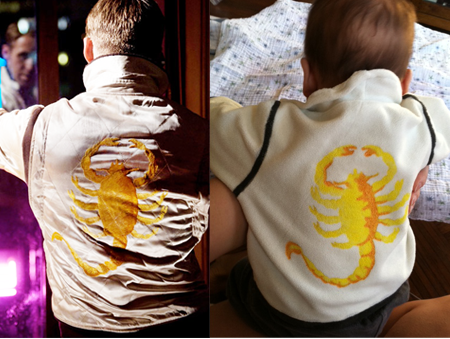
As one popular Tumblr ode to Ryan Gosling says, he’s “your favorite sensitive movie dude-turned-meme.” Another Tumblr puts it more bluntly. And a recent video by Gosling doppelganger Joey shares “How to Look Like Ryan Gosling.” Which got me thinking about snagging Ryan Gosling’s style. Forget the hoodie and well-groomed 5 o’clock man-scruff. I mean, did you see that embroidered scorpion jacket he wore in Drive? If you didn’t, well, feast your eyes:

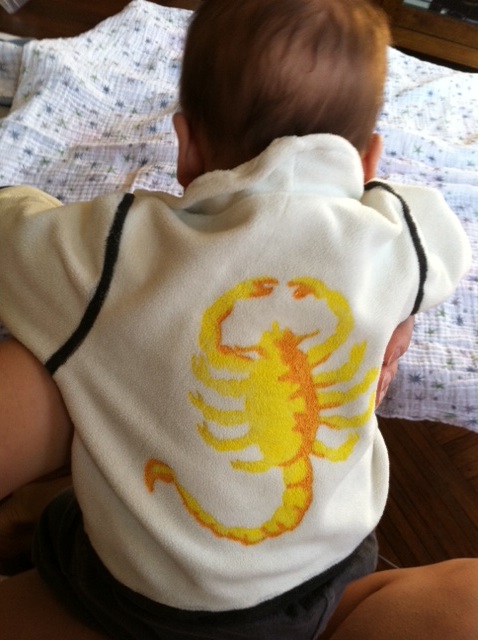
You can actually buy it — oh, but making it would be so much more fun. And so, for my newest iLoveToCreate blog post, I set out to make some sweet scorpion threads inspired by that original jacket — no satin quilting, no embroidery, just a white jacket from a thrift store and some fabric paint. And since my favorite new sensitive dude happens to be pint-sized, I’ve decided to make it in miniature for my little gosling. (Note: These instructions can produce a version for a full-sized goose as long as you start with a full-sized jacket!)

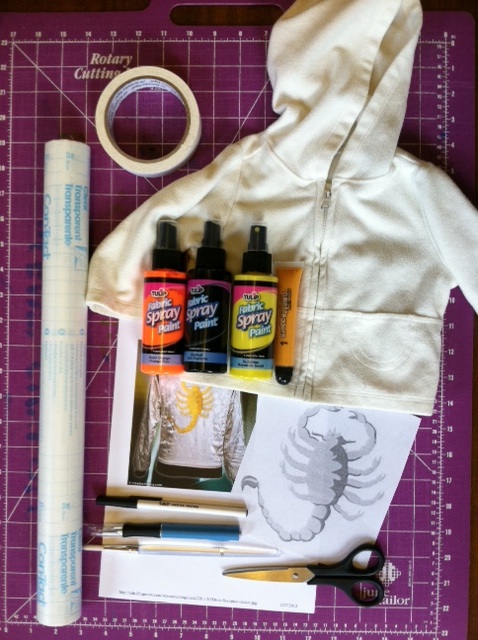
Materials:
-White
zip-front jacket or sweatshirt
-Pen
-Contact paper
-Craft knife and cutting mat
-Masking tape
Yellow fabric paint, brush or spray on (for scorpion)
Orange fabric paint, brush or spray on (for highlights)

Black fabric paint, brush or spray on (for trim)
Paint brushes (optional)
-Sewing machine threaded with white thread (optional)
-Scissors (optional)

Make it:

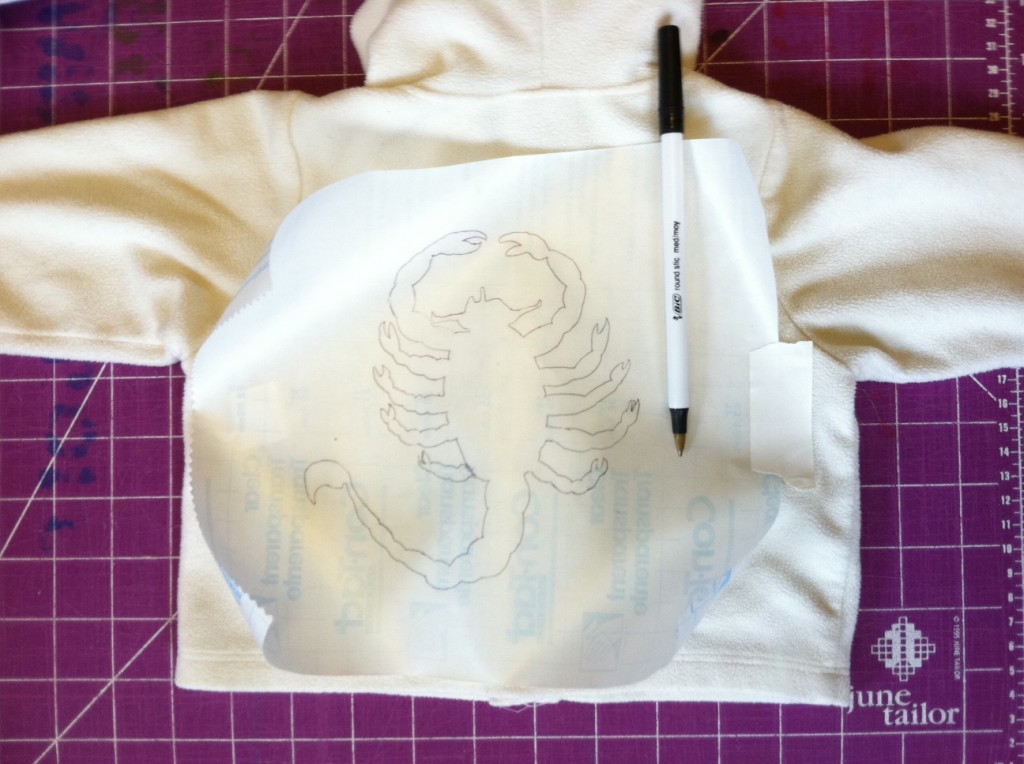
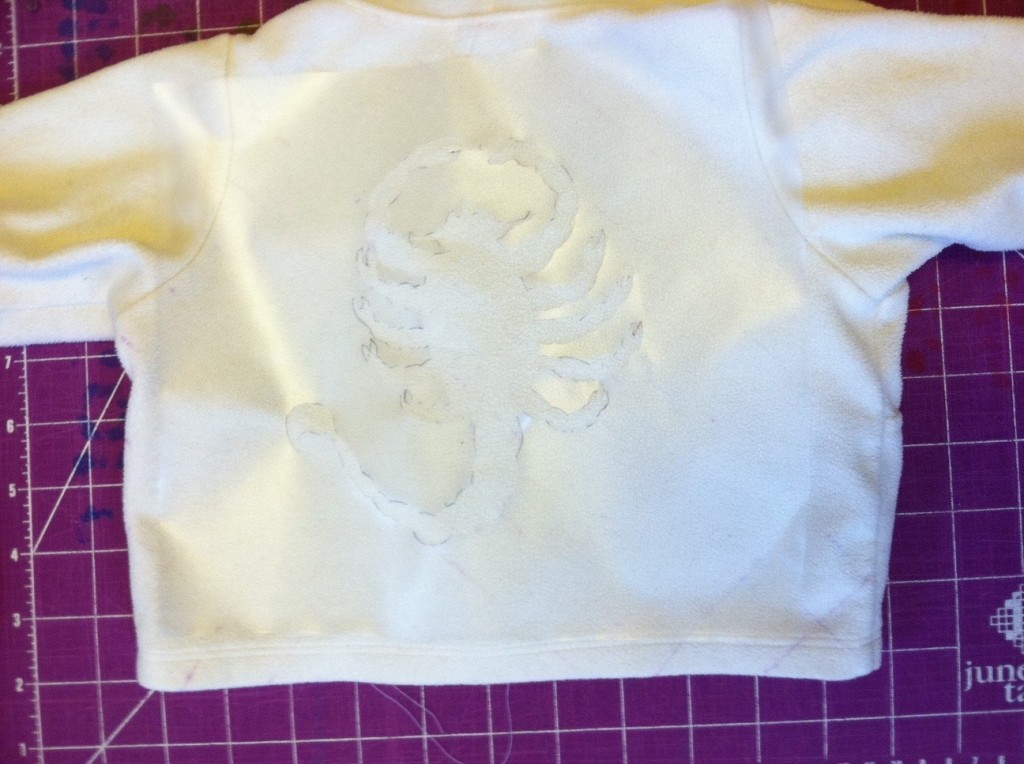
1. Lay the jacket flat and measure the approximate dimensions of the back panel. Cut a piece of contact paper to those dimensions. Draw or trace the outline of a scorpion onto the paper.

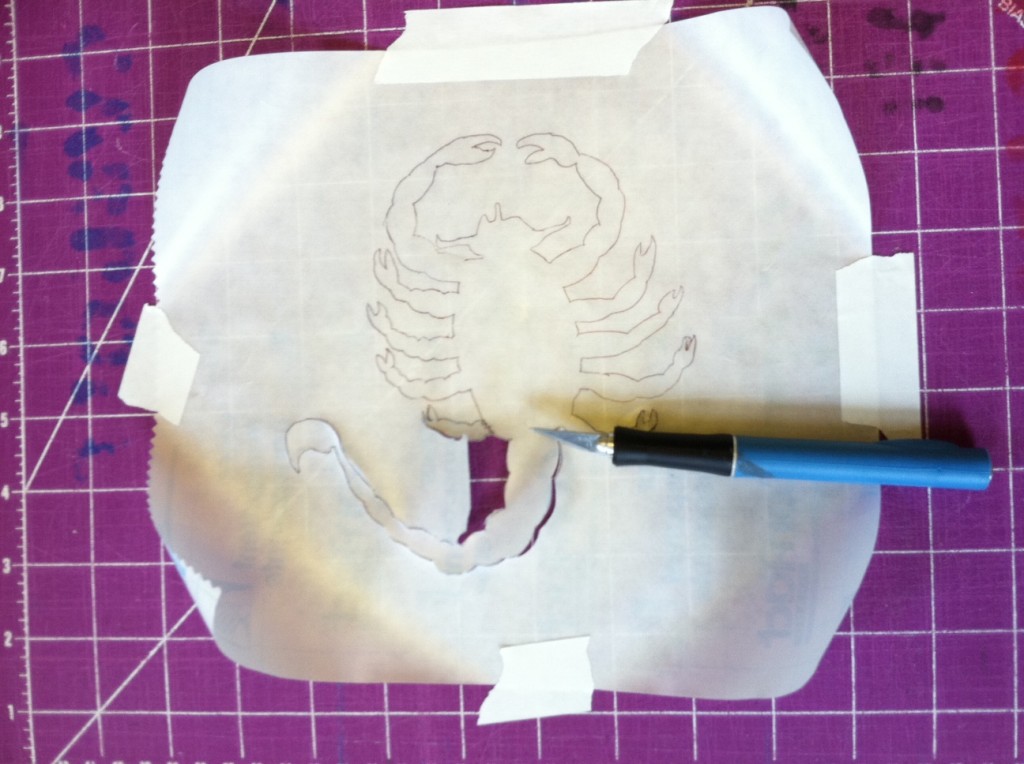
2. Use the craft knife and cutting mat to cut out the contact paper stencil.

3. Peel off the paper backing of the contact paper and press the stencil onto the back of the jacket.

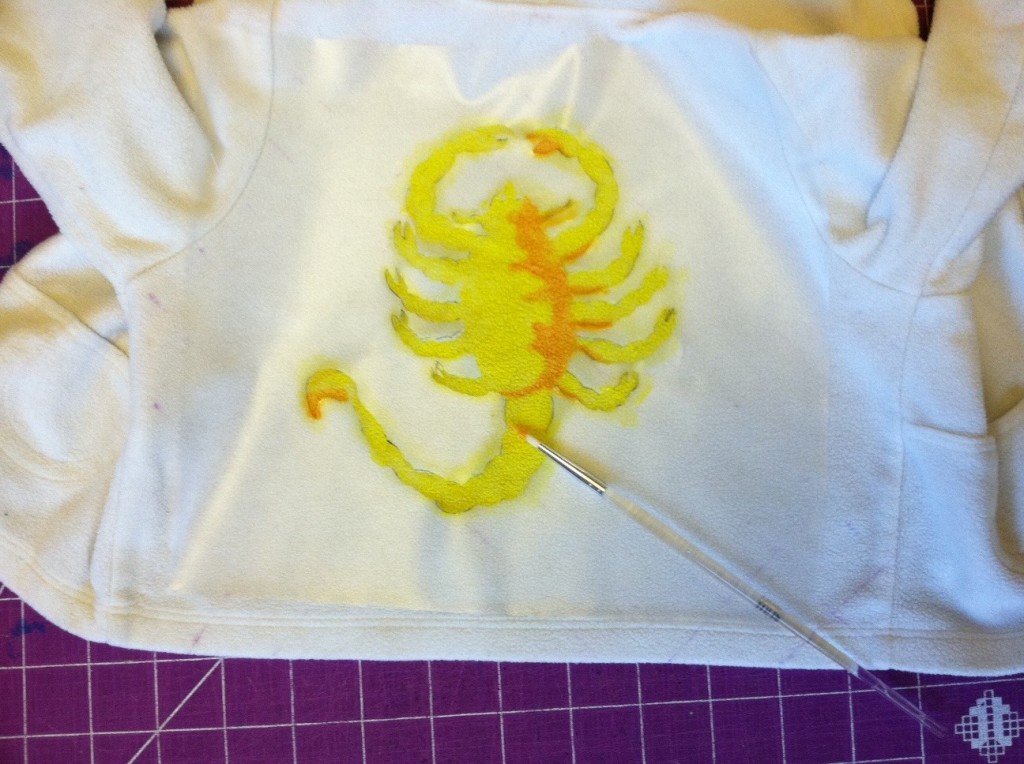
4. Paint the entire scorpion shape with yellow paint. (Use spray paint or paint it on with a brush for more control.)

5. Paint some highlights on the scorpion in orange to show the shadows.

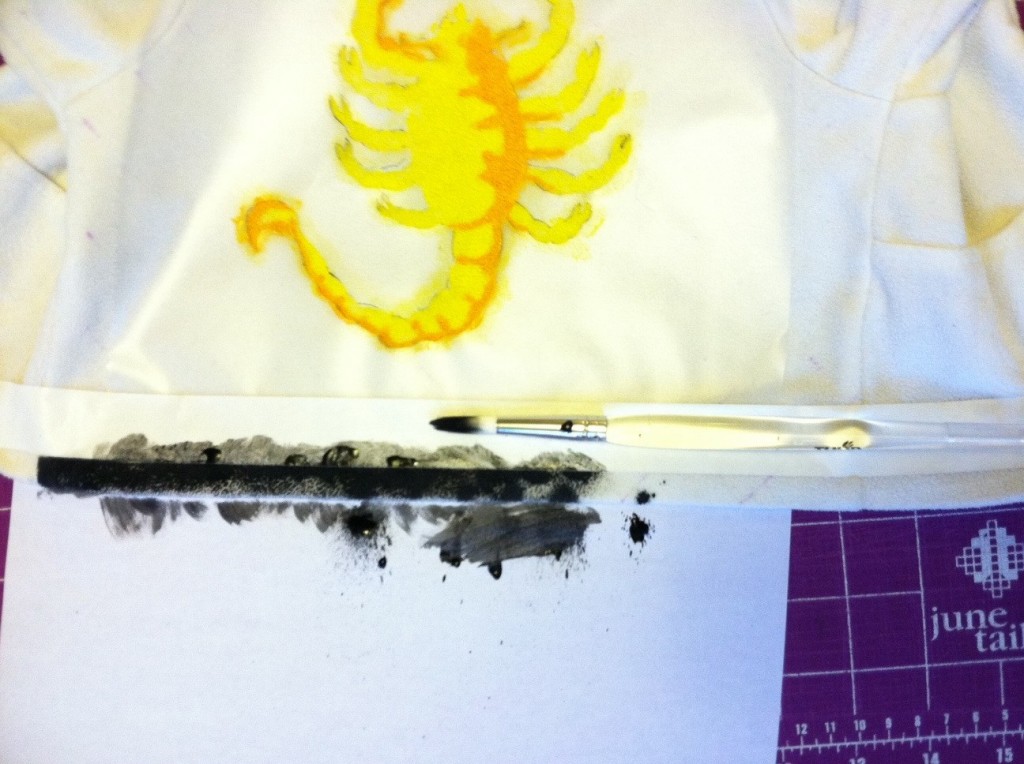
6. Line the bottom edge of the jacket, the sleeve ends, and the shoulder seams with masking tape and paint them black.

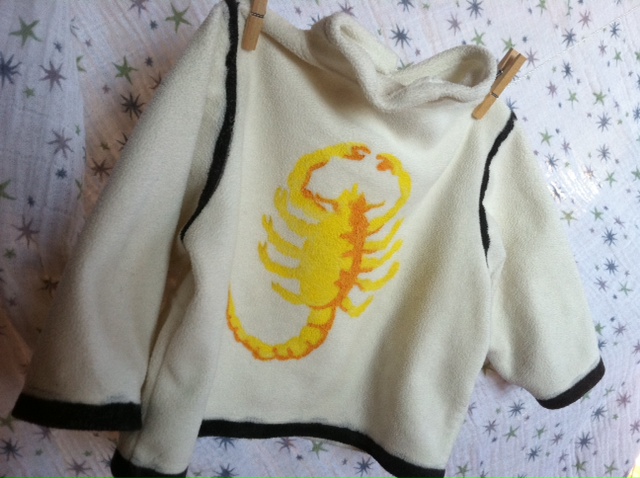
7. Let the paint dry completely and carefully peel off the tape and stencil. Optional: If the jacket has a hood (mine did), cut and hem it to create a collar (because I’m nerdy like that, and I’m going for authentic!).

8. Try the jacket on your littler driver. Okay, so he can’t even hold his head up yet, but he sure knows how to grip the wheel! Next up: Get him a driver’s license…in 16 years.

I love this stencil!! Now to apply it to a T-shirt…or what about painting a scorpion wrapping around the bottom of a pant leg or stockings?

Photo of Ryan Gosling via FirstShowing.

[ 10 Comments | Posted on February 28th, 2012 ]

I Love to Create: Studded Leggings!

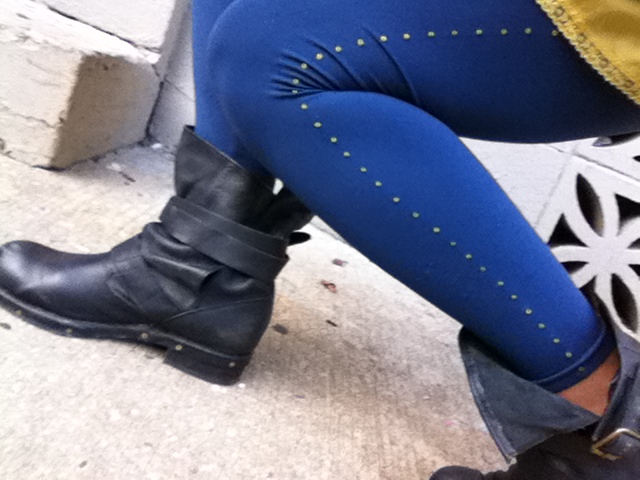
I spotted a pair of studded leggings in a magazine once, and though they were just for styling, not for sale (I would have snatched them in an instant!), perhaps it was actually a lovely DIY blessing so that that years later, when I unpacked my tubes of Beads in a Bottle for the first time, I’d know just what to do. I pulled the slightly wrinkled page from my “future inspirations” notebook and set to work!

Materials:
-leggings or footless tights
Tulip Beads in a Bottle paint in desired colors
-chalk marker
-ruler or straightedge
-iron (optional)


1. Prewash the leggings and let them dry completely. Fold the leggings so the sides are facing out. Find the center line down each leg, from hip to ankle and use the ruler and chalk marker to mark dots 3/4″ to 1″ apart along that line. Optional: Set the iron to a low setting and press the leggings flat to make a crease along the outside of each leg before measuring the dots.

2. Select a Beads in a Bottle color to match or contrast the leggings (though you can’t tell from the late-night craft lighting in the photos, I was working with blue leggings, so I chose a light yellow for nice contrast). Make sure the leggings are on a flat surface, with your marked dots facing up. Hold the tip of the tube about 1/16″ above the first dot and gently squeeze out the paint to form a bead. Note that the beads shrink slightly when they dry, so be a little generous without going overboard.

3. Continue adding dots along the length of the legging until you reach the hip, making sure to lift the tip of the tube straight up after you’ve applied the bead to prevent smearing. Note: If plan to wear your leggings with that hot leotard you have hiding in the back of the closet, you may consider extending the line of dots waistband-high, but otherwise, you only need to squeeze beads up to the hemline of your skirt, shorts, or dress.


4. If you can lay the second leg flat without disturbing the wet beads on the first leg, do so, and repeat steps 2 and 3 to complete the look. Otherwise, let one side dry completely (about 4 hours) before dotting the other side.


5. Let both sides of the leggings dry and get ready to rock them! The beads dry three-dimensionally, so you do get a slightly studded effect that can be seen when silhouetted from the front. Cool, very cool.

Variations: Experiment with different patterns — zigzag your beads down your legs, cluster them around the ankles so they “explode” up the leg, or apply them in a nice line up the back of each leg–reminiscent of old-school seamed pantyhose.


[ 3 Comments | Posted on September 27th, 2011 ]

The DIY Necktie: Update

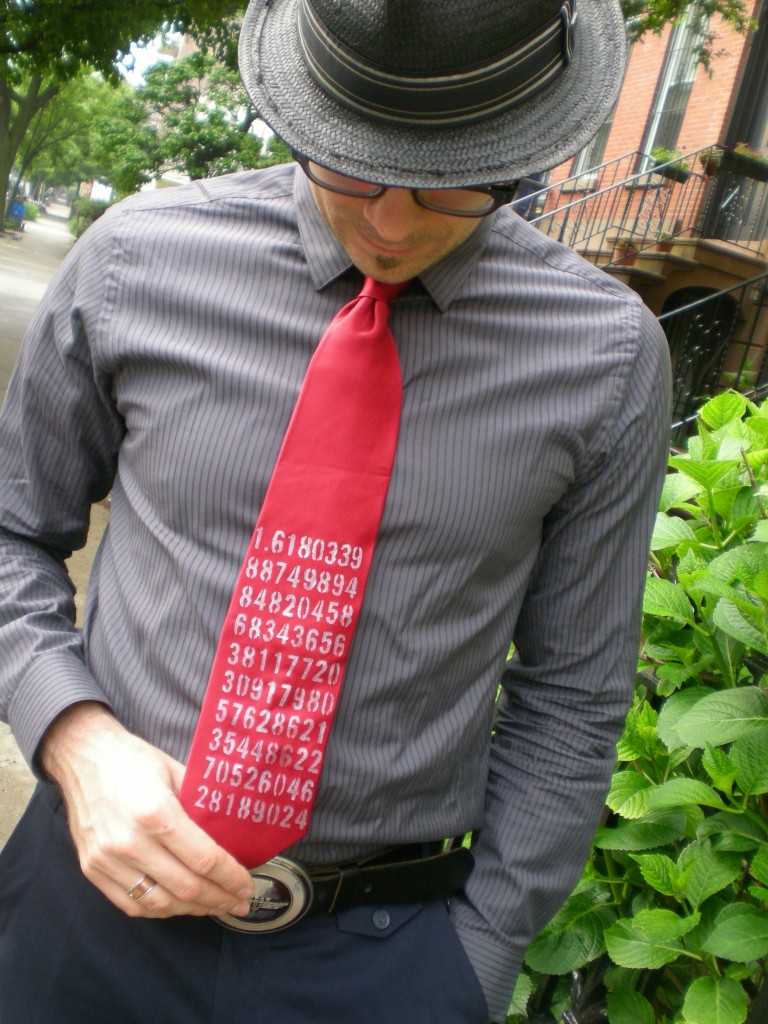
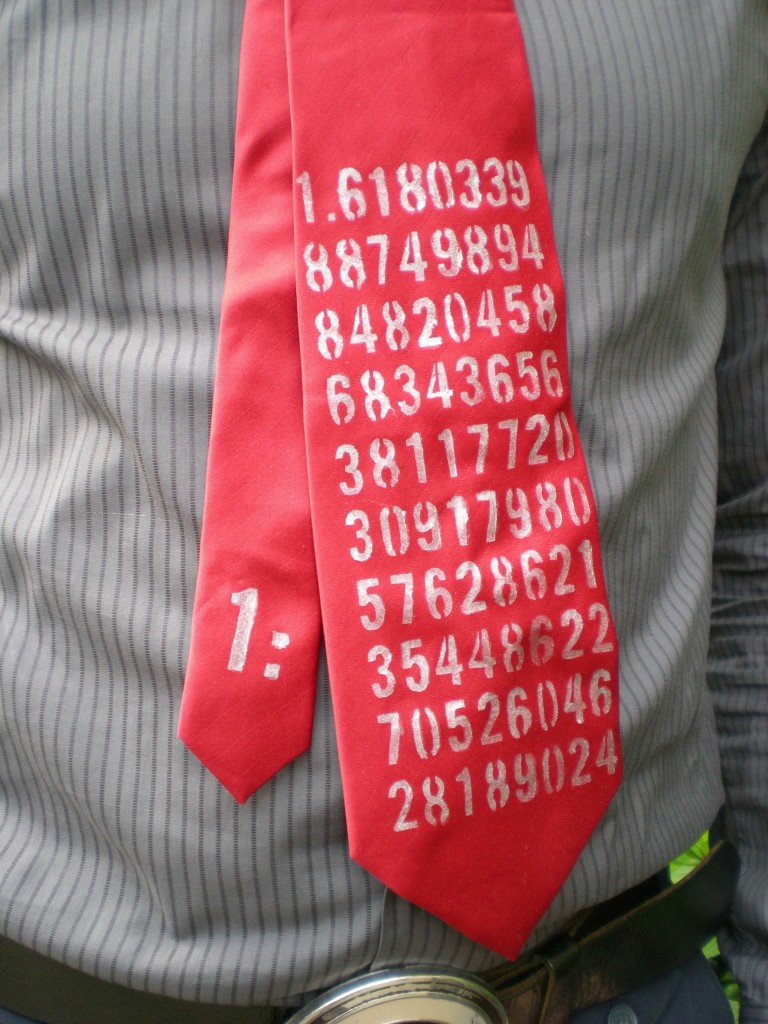
Remember last month’s I Love to Create project? Here’s the update: A rather avant-garde self-portrait taken by my dear ol’ Dad shortly after he received the flashy Father’s Day tie I made him! (It features the numeric representation of the naturally occurring ratio of 1 to 1.618… otherwise known as the Golden Ratio.)

He was on his way to an art opening in his newest geek-tastic fashion accessory. Lookin’ sharp, Dad!

[ 1 Comment | Posted on July 14th, 2011 ]

I Love to Create: A DIY Necktie for Dad!

I know, I know — a tie can be the ultimate in clichéd gifts for dad. But hear me out: The problem isn’t with ties themselves, it’s boring ties.  Below is a technique for making a one-of-a-kind tie for that one-of-a-kind guy. Note: Lest there be any confusion, the photo below is not my dear ol’ dad, but my charming husband (“Mr. T”), who’s always a good sport when it comes to modeling my projects!
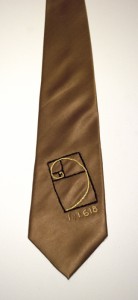
I have a history of making ties for my dad — not because he’s necessarily a tie-wearing kind of guy, but the school where he teaches has a dress code that states that all the guys have to wear a tie. It seems a little silly, given that he’s an art teacher and a tie dangling into a tray of photo developer or getting splattered with clay in the ceramics room is far from ideal, but he’s always embraced the tie with a great bit of humor and creativity. Though we couldn’t dredge up the handmade tie I gifted him when I was 7 (suffice it to say, I must have cut out the tie myself, too, because it was about 6″ wide and at least 6″ too short), I decorated it with felt pieces arranged into the shape of a smiley face. In high school, I was obsessed with going to the bead store, so I stitched some metal charms onto a black silk tie (above left). More recently, I embroidered the golden spiral inside a golden rectangle on the end of a tie (above right). But for my dad’s next tie, I’m using fabric paint. Here’s a project that a kid of any age can get into, and any dad will appreciate.

Materials:

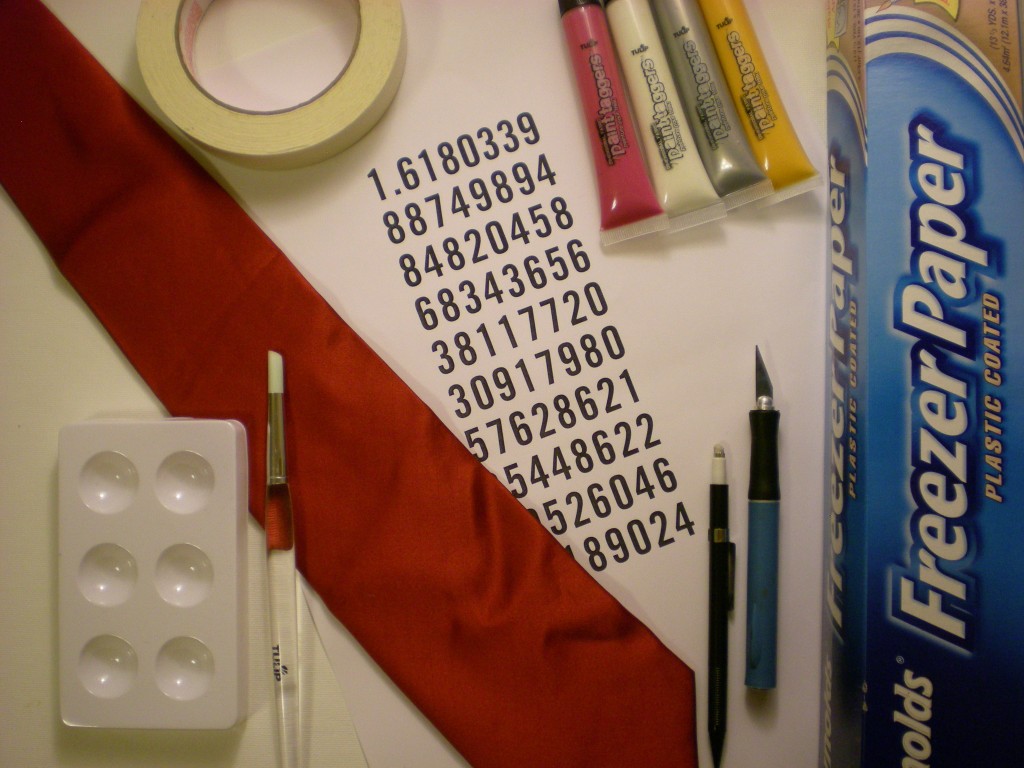
-Plain necktie

-Image or pattern to turn into a stencil

-Freezer paper

-Pen or pencil

-Craft knife and cutting mat

-Artist’s tape

Tulip Fashion Graffiti Paint Taggers fabric paint

Round paintbrush (for stenciling)

Paint tray

Make it:

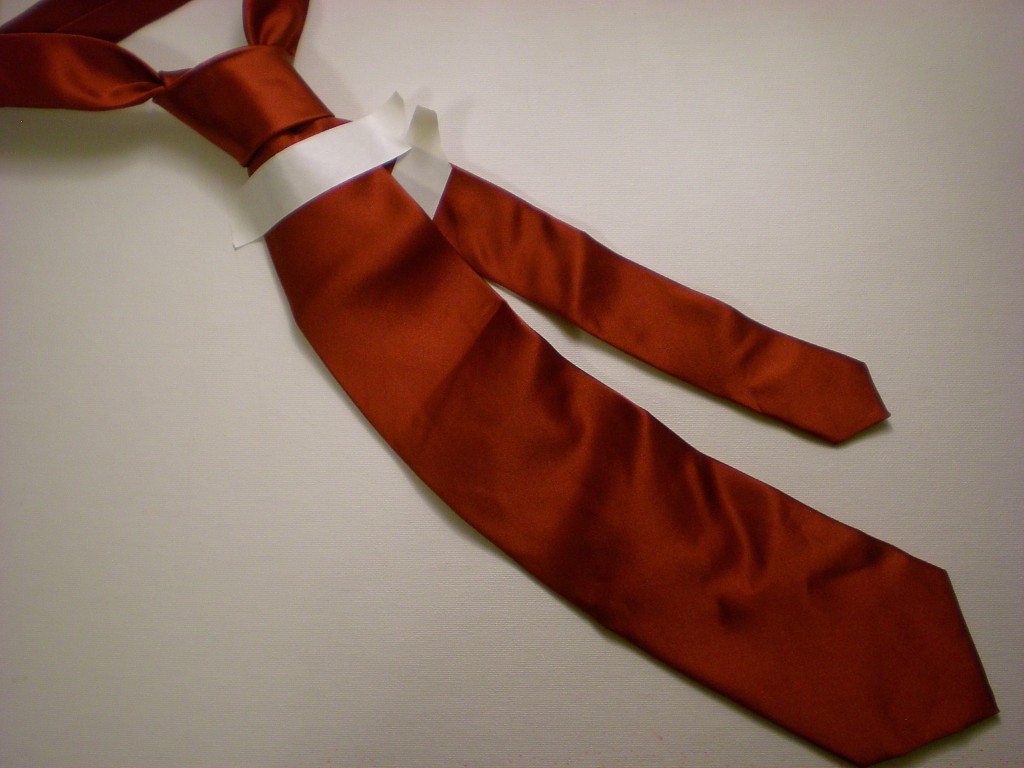
1. If you have the option, first tie the tie properly and mark the areas of fabric that will be most visible (it would be a shame to spend time on some delicate design only to have it hidden in the middle of the knot or under the collar). Otherwise, it’s wise to keep the design down on the widest part of the tie. (I marked my tie, but then decided to keep the design near the ends.)
2. Choose your design and print it out. My dad has always been fascinated by the golden mean, a naturally existing ratio of approximately 1 to 1. 618 (see the embroidered tie above) that is used to describe the relationship of many living things found on earth (it’s in the  pattern of the seeds in a sunflower, the architecture  of the spiral chambers in a shell, the growth of leaves on a plant stem, the ratio of hand to elbow and head to torso, and so on…). My dad even designed the house I grew up in using this ratio as the model. Then layer a piece of freezer paper over the printout and trace it. If you use letters or numbers (like I did), make sure you add the appropriate vertical lines to the type treatment so that when it comes to cutting and painting, you don’t end up with an “O” or a zero that’s missing its center. Use the craft knife to carefully cut out the stencil. Note: At this point, yes, I fully recognize that “#1 Dad” would have been far easier, but hey, it’s all about personalization, and he happens to be my “#1 to 1.618033988749894848204586343656 Dad.”
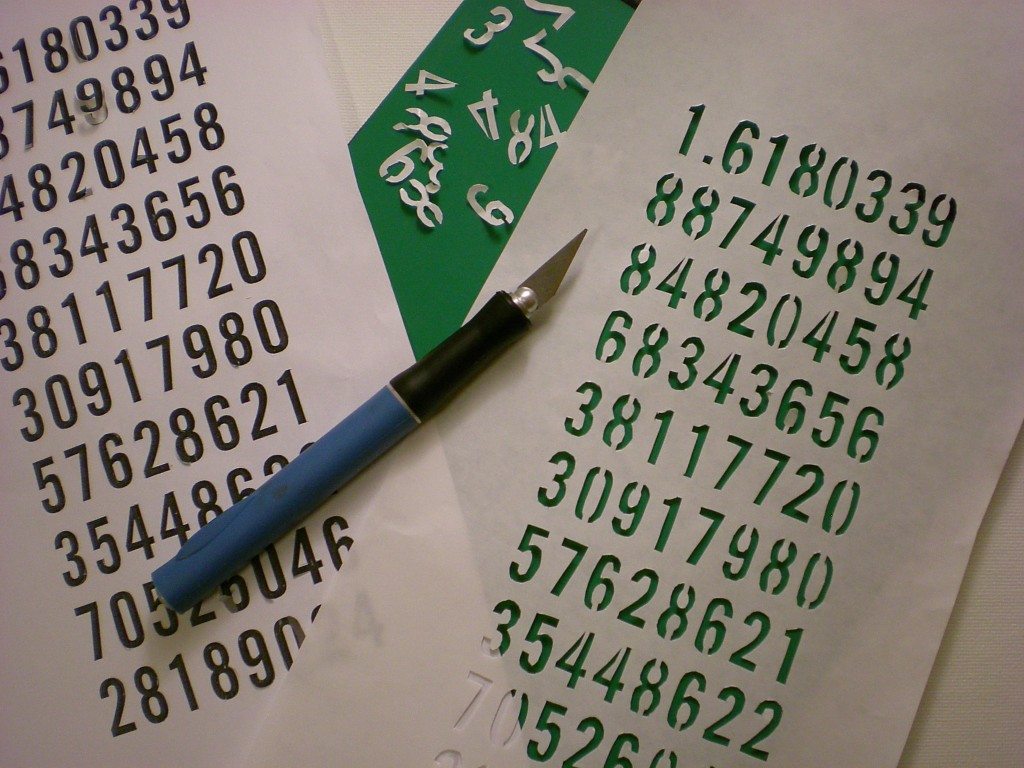
4. Arrange the stencil over the tie and tape it in place to prevent shifting. (I taped the front and back to make sure it was secure.) Note: Artist’s tape should peel off well, but test a piece on the back of the tie to make sure it won’t damage the fabric.
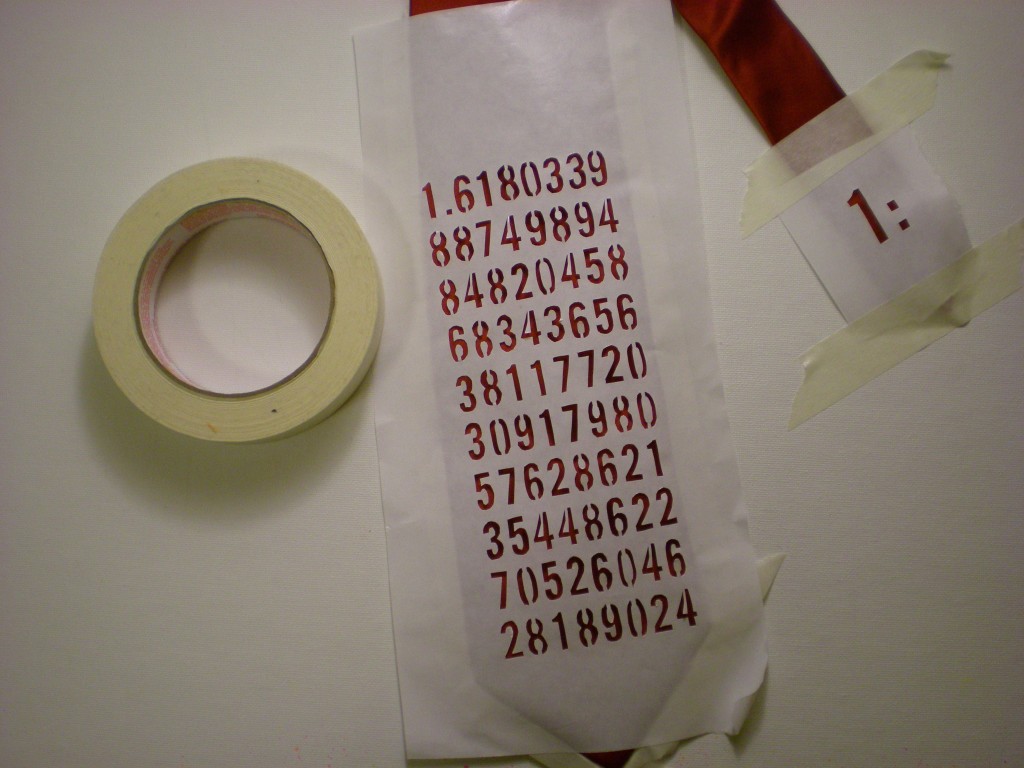
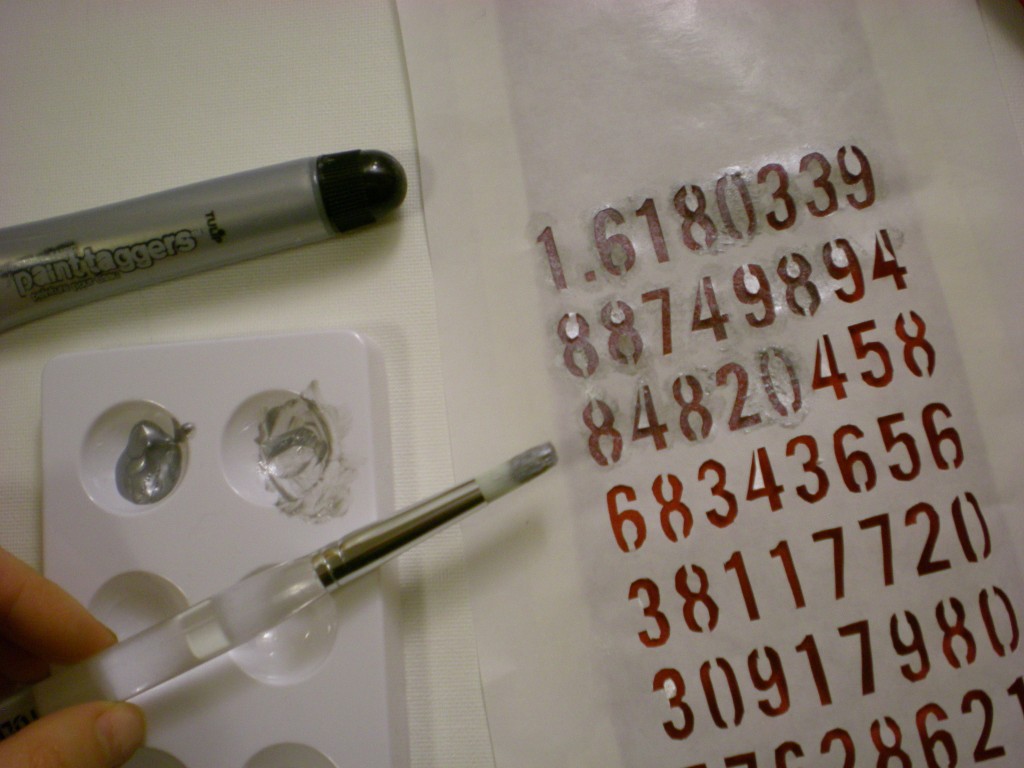
5. Adding very little paint at a time, dab the brush over the stencil. I picked a metallic silver paint, because I like the sheen and my dad can handle a little flair. To keep the paint from spreading underneath the edges of the stencil, hold the brush vertically so the bristles are perpendicular to the paint surface, and use a blotting motion.
6. When you finish painting (don’t forget the short end of the tie — I decided to incorporate the first part of the golden ratio there, but you could also hide any semi-secret message there), let it dry.
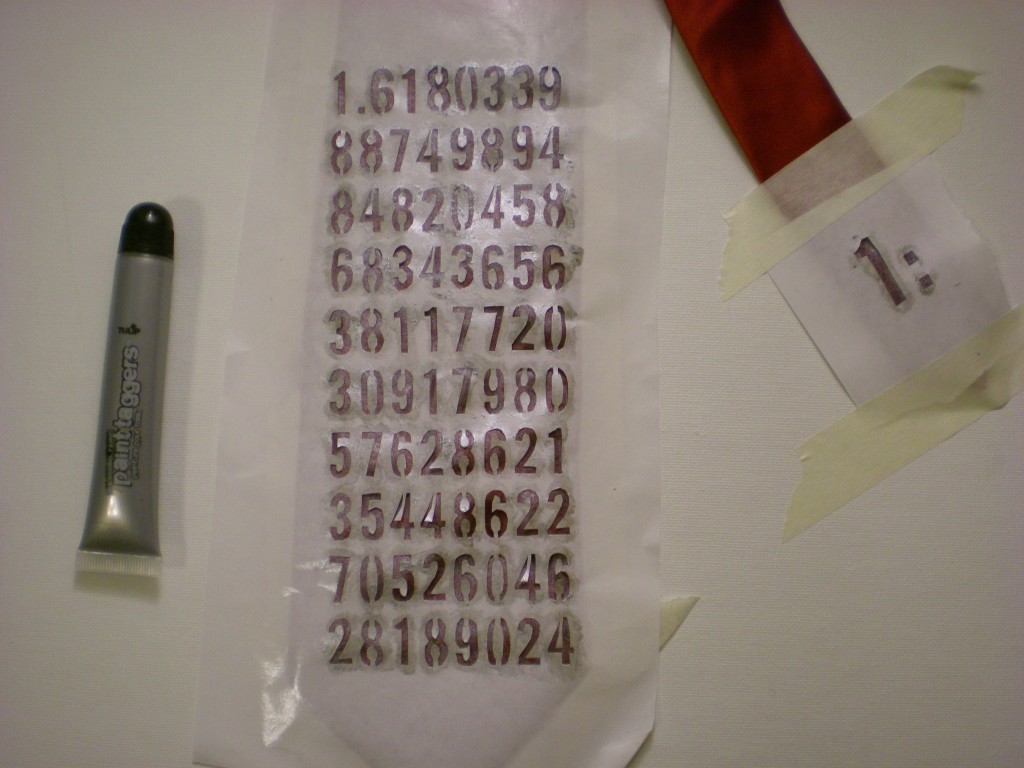
7. When the paint has dried completely, carefully remove the tape and peel the stencil off the tie.
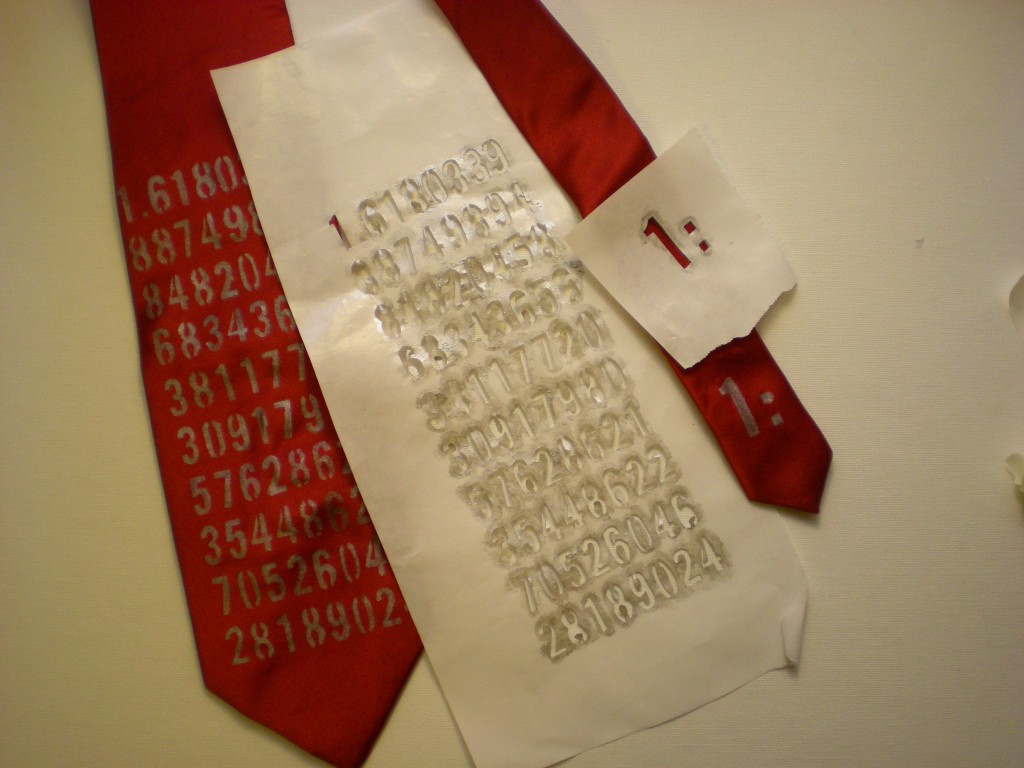
7. Now it’s time to gift it. (Or convince your husband that he has to try it on this morning before he goes to work so you can photograph it before you pack it up and ship it off in time for Father’s Day on June 19!)
Variations:

-For different pattern ideas, try any of the paint or sticker techniques in my 4 Ways to Spray post.

-Forget the stencils altogether and freehand a design with fabric paint.

-Forget the paints altogether and glue on felt appliqués!

-Bonus points if you make the tie out of T-shirts!


[ 14 Comments | Posted on May 24th, 2011 ]

I Love to Create: A Poetic Pocket Square!

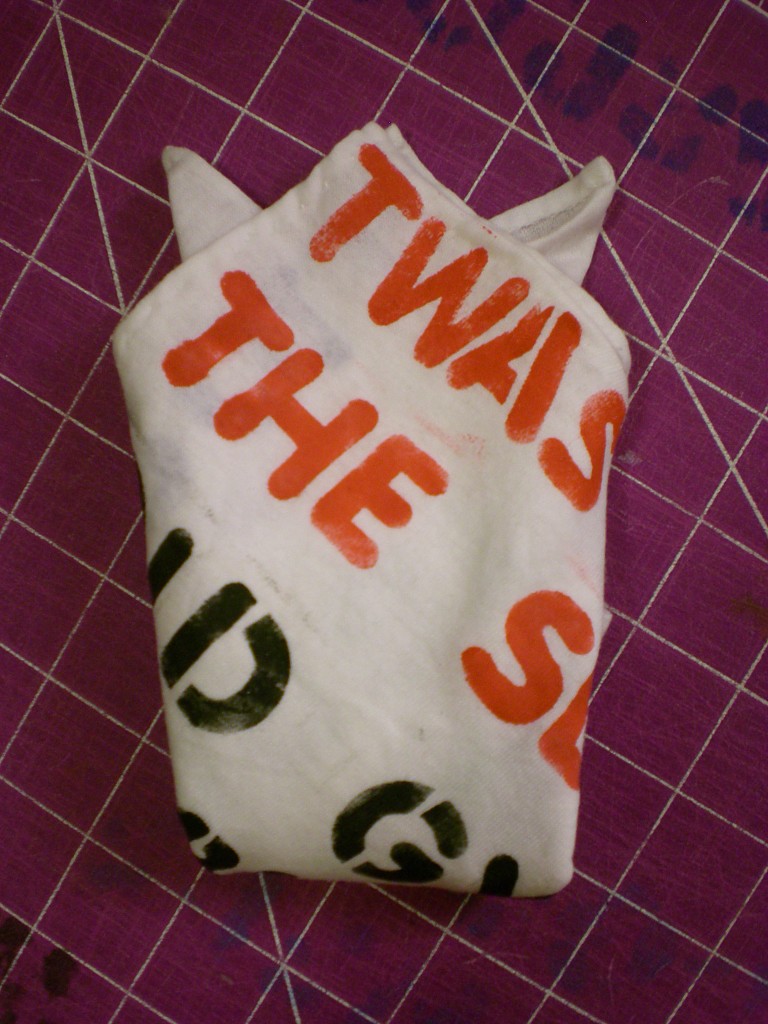
Looking ahead to April, it’s National Poetry month, and to celebrate, the Academy of American Poets is sponsoring National Poem in Your Pocket Day on April 14, 2011. Basically, you carry a poem around in your pocket, and take it out and share it throughout your day with friends, colleagues, and family. The poem can be an old classic, a modern ode, long, short, silly, or serious — Anne Sexton or Dr. Seuss, Will Shakespeare or Shel Silverstein,  Emily Dickinson or e.e. cummings… And if you can’t find a poem you’d like to share, write your own! But my point is, why limit the printed word to paper (or digital smart phone)?

Perhaps I’m taking this pocket thing too literally, but I do like to play with words and type — experimenting with the way the letters themselves can create fascinating visual patterns (even before we get anywhere near discussions of assonance, alliteration, and onomatopoeia!). A pocket square (or a hanky — just pop it in your purse!) is a more permanent way to commit to that poem. And, bonus: If you forget to take the poem out of your pocket before laundry day, you won’t end up with a pocket full of disintegrated, dried paper pulp.

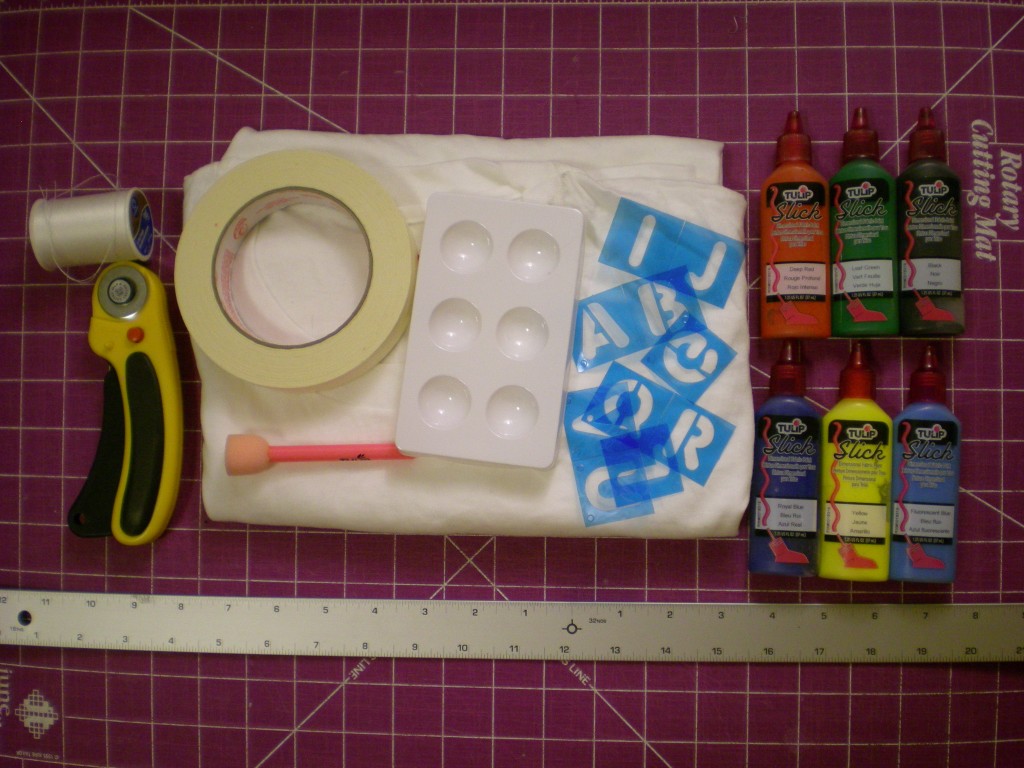
Materials:

-white or light-colored T-shirt

-rotary cutter, ruler, and cutting mat (or ruler, marker, and scissors)

-masking tape

-letter stencils

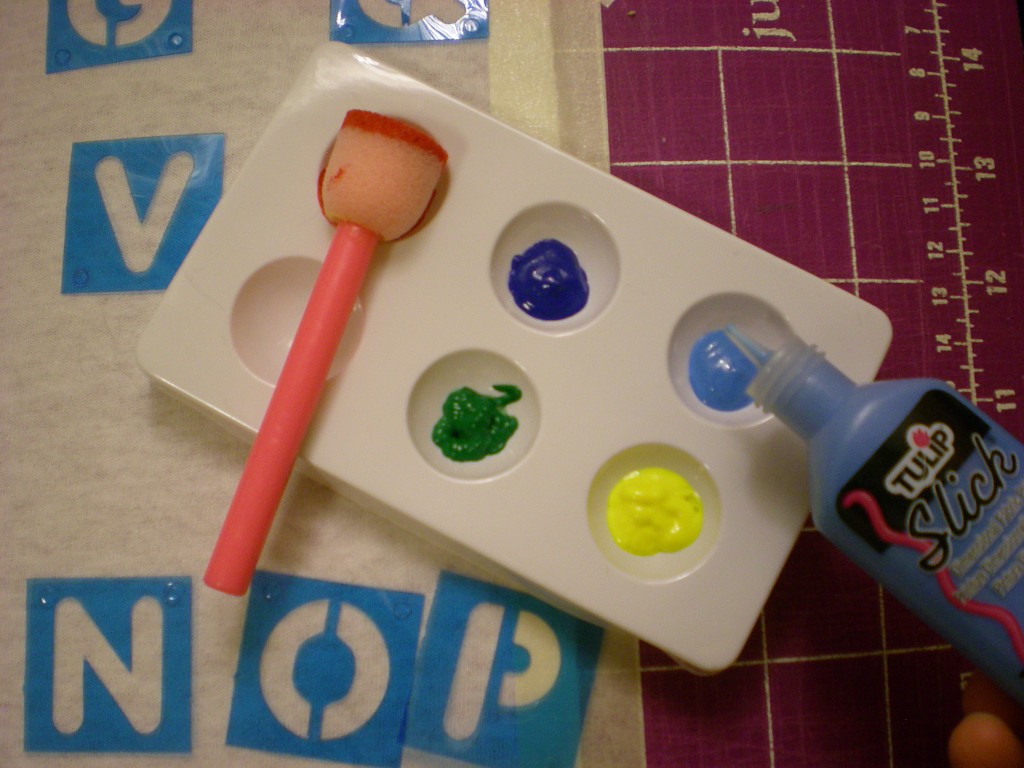
fabric paint (variety of colors)

paint tray (optional)

sponge brushes

-needle and thread (in a color to match the T-shirt)

Make It:

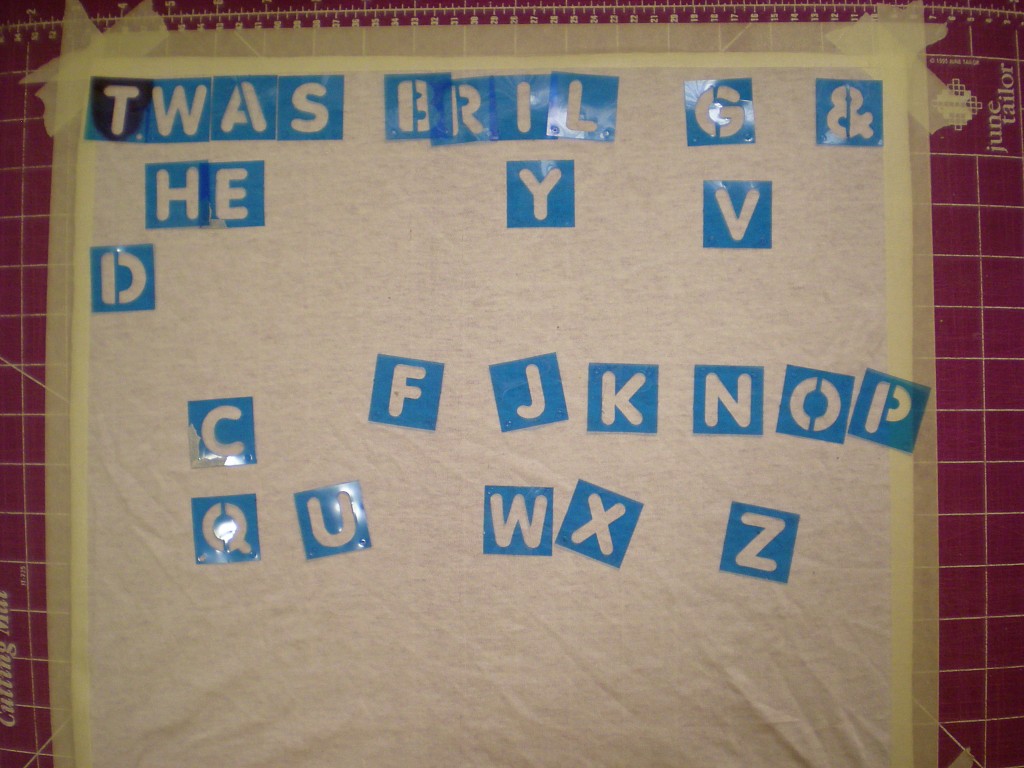
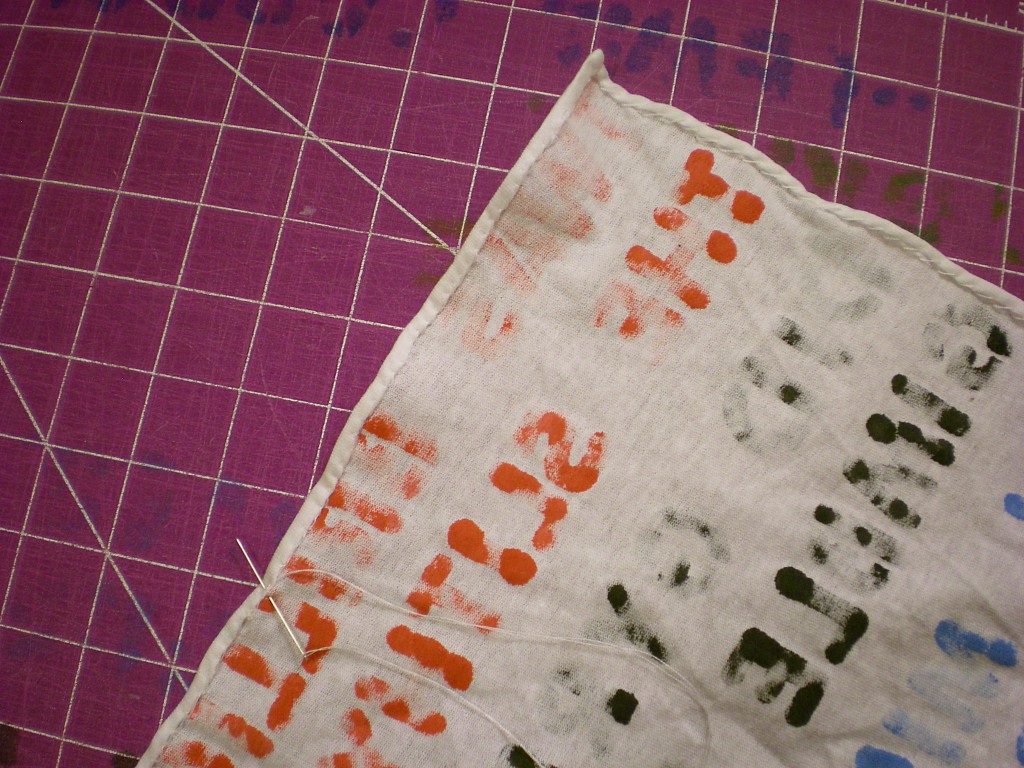
1. Cut a 17″ x 17″ square (or smaller, depending on your preference) from one layer of the T-shirt. Tape the edges of the square to your painting surface with masking tape. (This will allow for a margin as well as keep the fabric straight while you’re painting it.) Choose a poem or stanza and arrange the letter stencils on the T-shirt square. And don’t forget to save room to credit your poet! Note: The paint will bleed through (as evidenced in the following photos!) — use a paint surface that you don’t mind making permanently colorful!

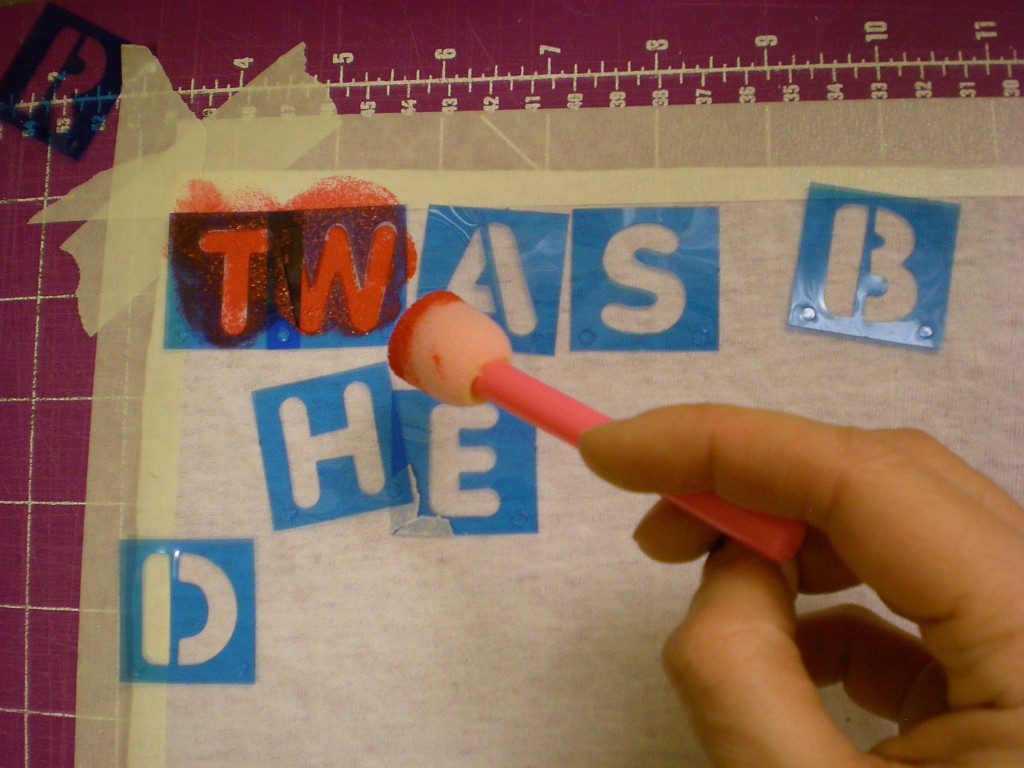
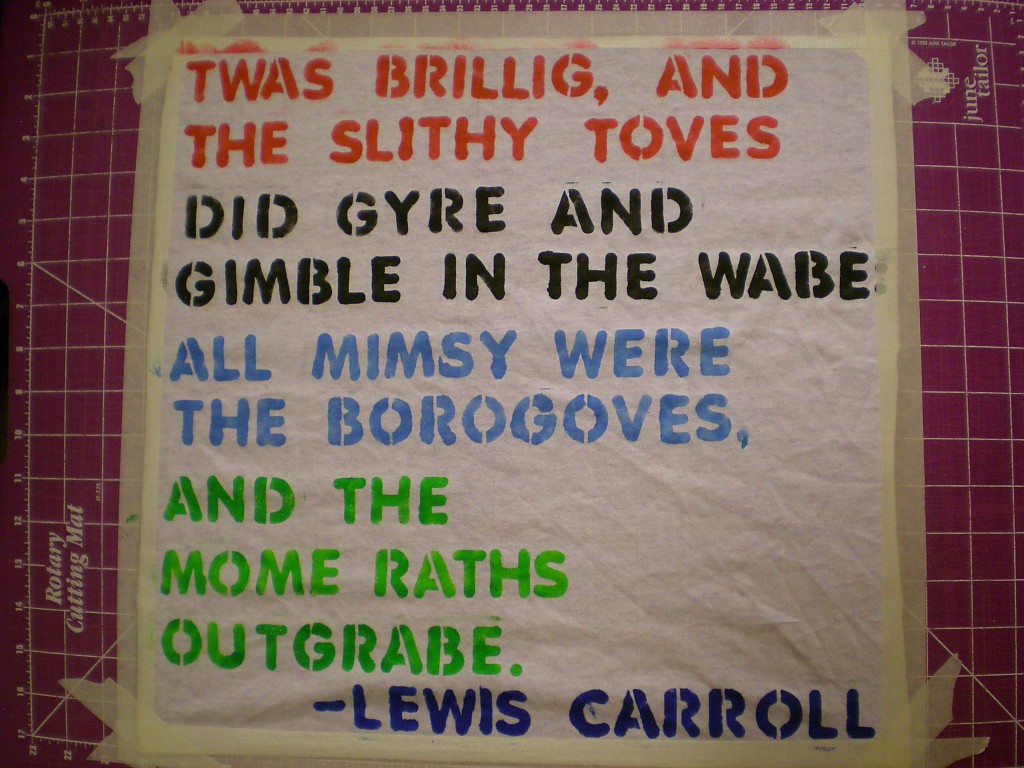
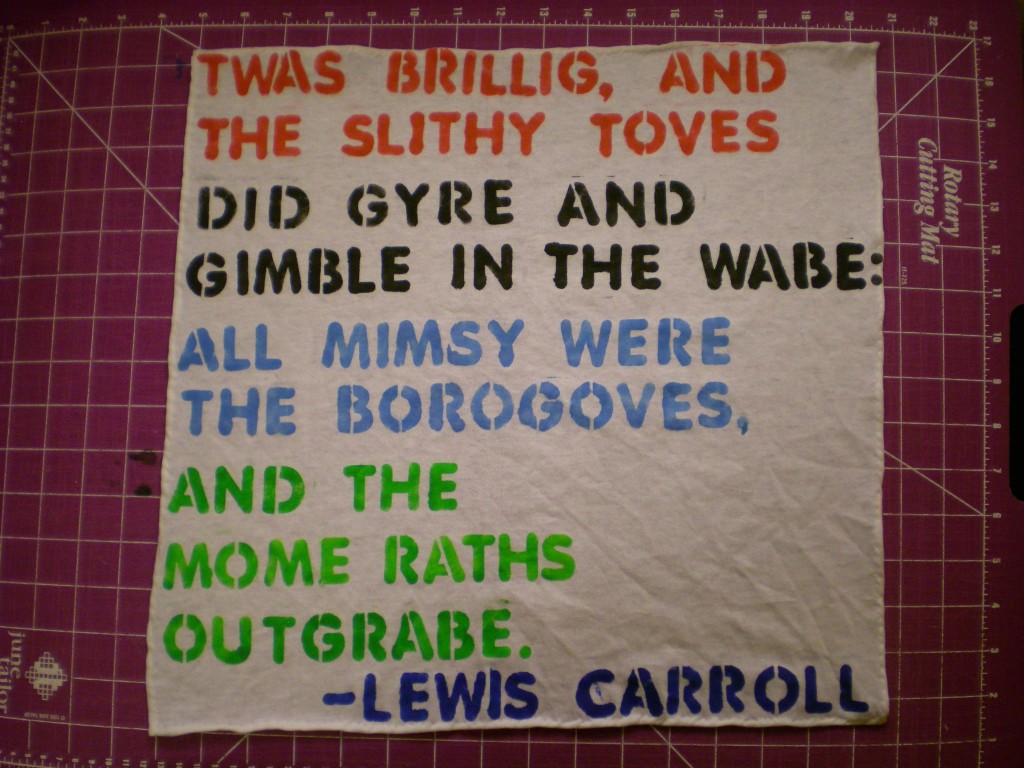
2. Select your paint colors. I chose to use a different color for each line of the poem to highlight the original line breaks. (P.S. Can you guess the poem, Wheel of Fortune-style, based on the letters placed above?)

3. Use the sponge brush to dab the paint over the stencil one letter at a time. Note: Some of the letters will need to be moved as you go, to ensure even spacing and to account for repeated letters.

4. Continue painting, changing colors as needed, until the square is filled and/or your stanza or poem is complete. (P.S. Yes, it’s Lewis Carroll’s “Jabberwocky.”)

5. Remove all the letters and peel off the masking tape to release the T-shirt square. Let the paint dry completely. (Don’t forget to wash your fingers if you, like me, inadvertently gave yourself a rather colorful but clumpy-looking manicure!)

6. Thread the needle, knot the end and carefully turn the edges under twice. Use a slip stitch to sew the edges in place around the perimeter of the T-shirt square.

7. Tie off the ends, snip your threads, and look online to….

8. …learn to fold (and unfold and fold and unfold–and read–and fold again) your poetic pocket square! So, is that a poem in your pocket, or are you just happy to see me?

Variations:

-Use fabric markers in lieu of paint and stencils to fit more text (and/or more stanzas) on the square.

-If poetry’s not your thing, paint or print a quotation that inspires you!


[ 3 Comments | Posted on March 22nd, 2011 ]