Posts Tagged ‘crafting with scraps’

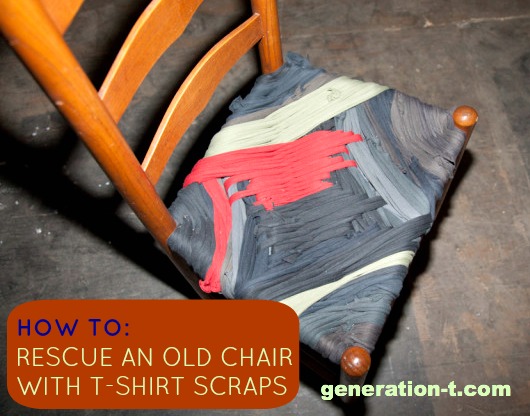
How to: Rescue an Old Chair Using T-shirts!

(Photo by Peter Stanglmayr)

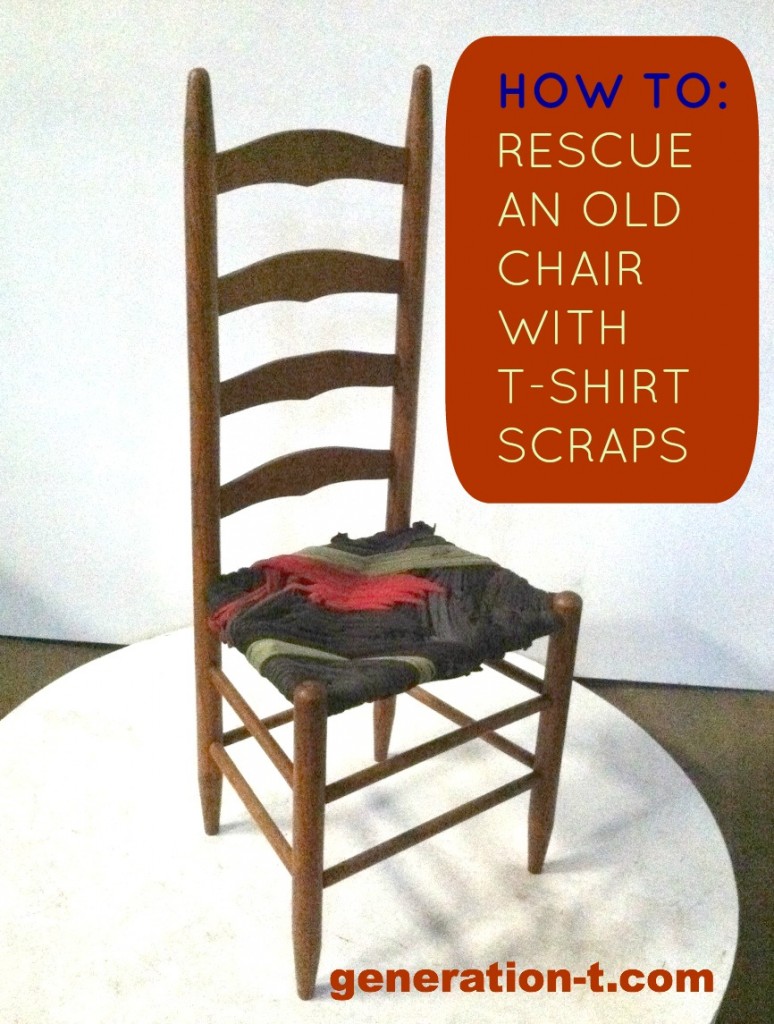
You’ve probably seen the Beanbag Chair from T-shirts here. And you can always renew the seat cover of a chair with T-shirt fabric following the tutorial here (stay tuned for an actual T-shirt one soon!). But in this T-shirt rescue,  I did a modern take on traditional chair caning (or, rather, weaving with a wicker-like material called “paper rush“). I was obviously inspired by the original pattern, but wanting to take it in a new direction!

(Photo by Peter Stanglmayr)

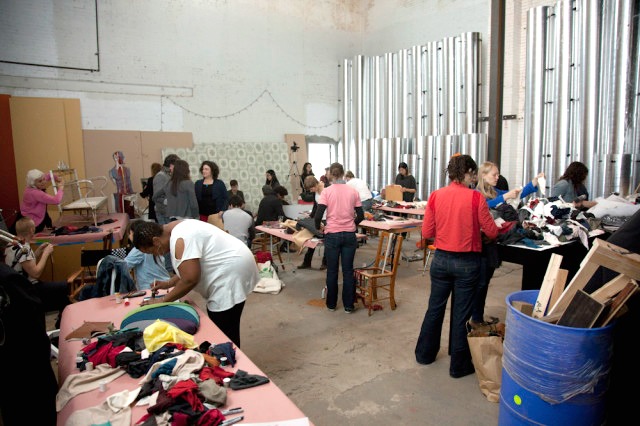
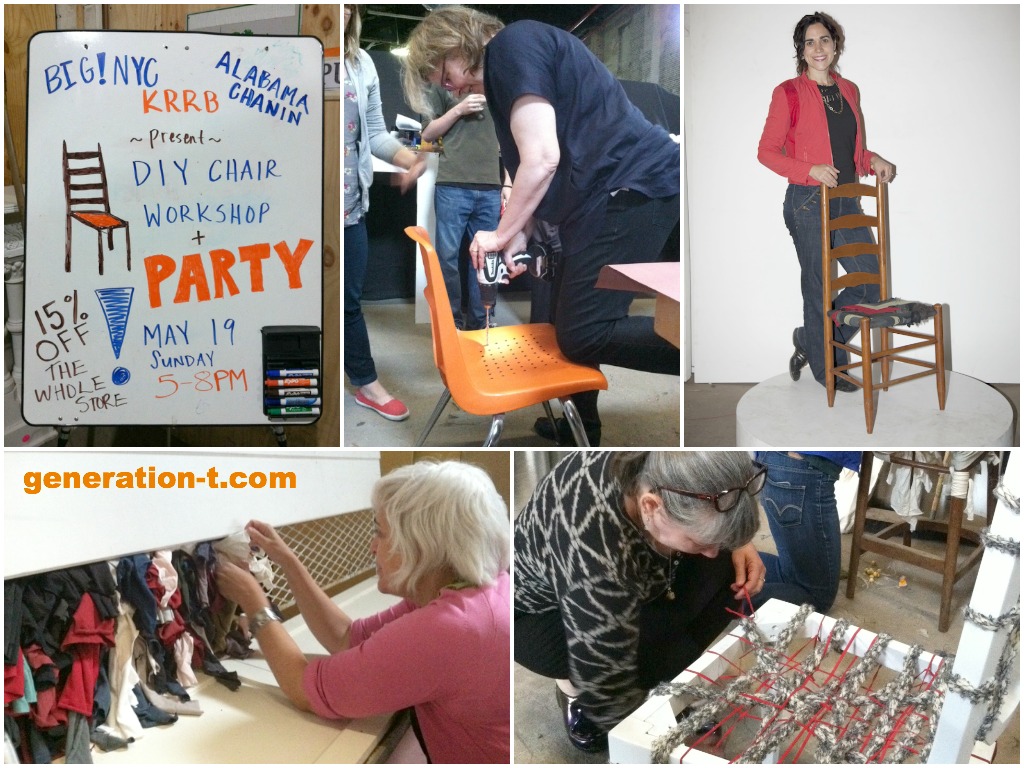
On a rainy Sunday in May, Build It Green! NYC (@bignyc) drew all sorts if creative types to Gowanus, Brooklyn for Krrb’s (@krrbsale) second annual DIY Chair Workshop. Sponsored by Alabama Chanin (the sustainable, slow fashion outfit in Alabama, @alabamachanin), as part of #makeshift2013, Build It Green gathered up its collection of discarded and beat-up chairs for us to renew.

(Photo by Peter Stanglmayr)

Materials:
-Structurally sound old wooden chair
-Lots of 3-4″-wide T-shirt fabric scraps (cut horizontally across the T-shirt for maximum stretch)
-Scissors
-Hammer

Make it:

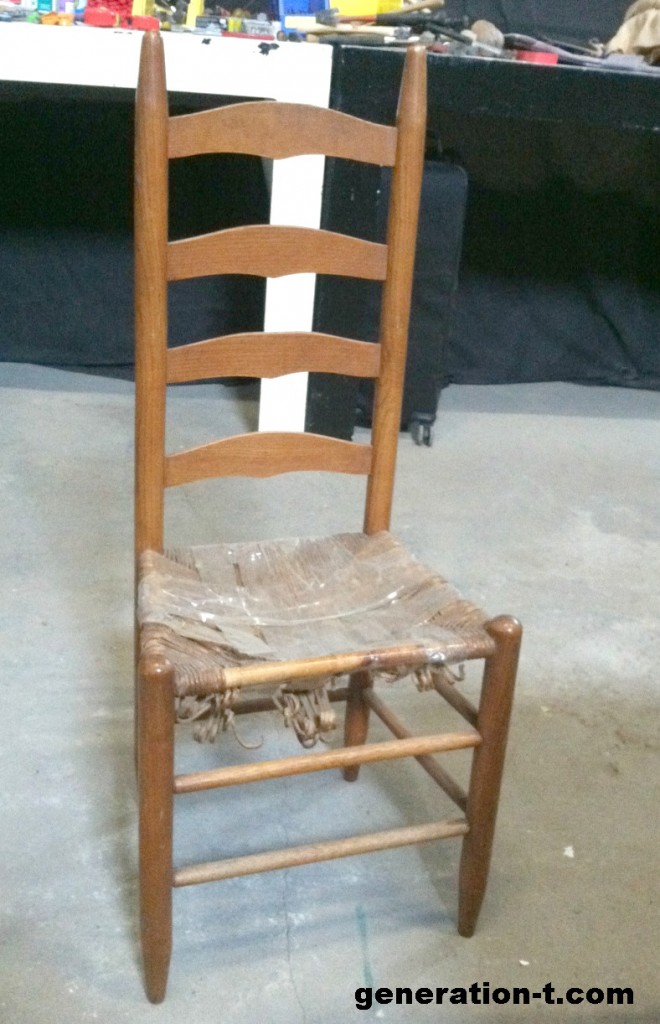
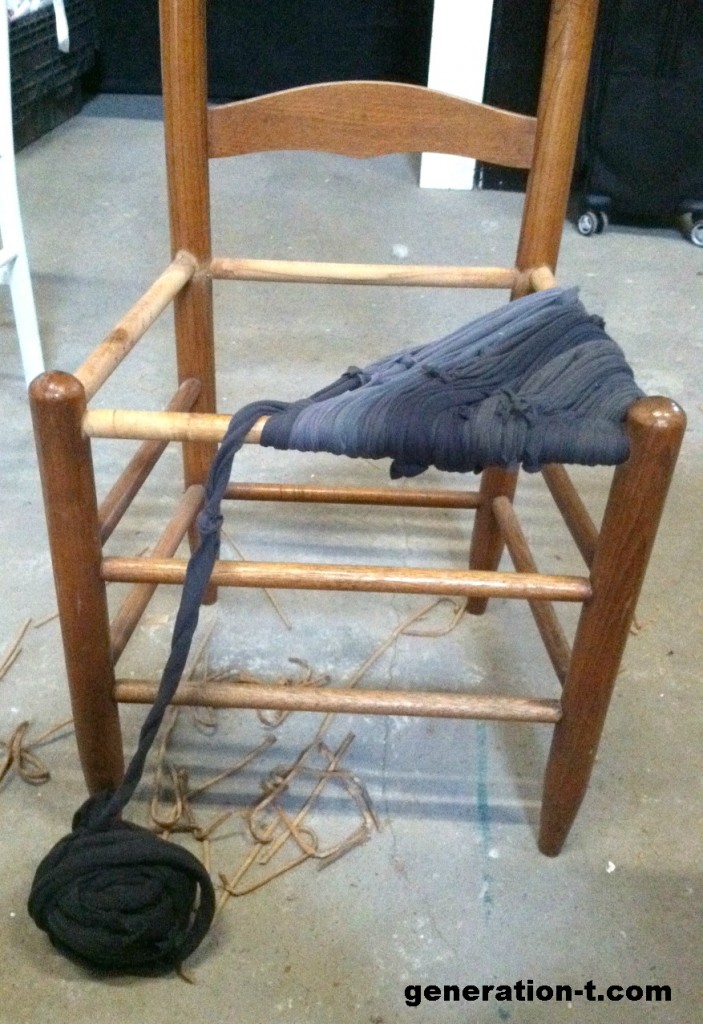
1. Find a chair whose seat is crumbling (note the packing tape holding it together!), but has framework that is still in good shape.

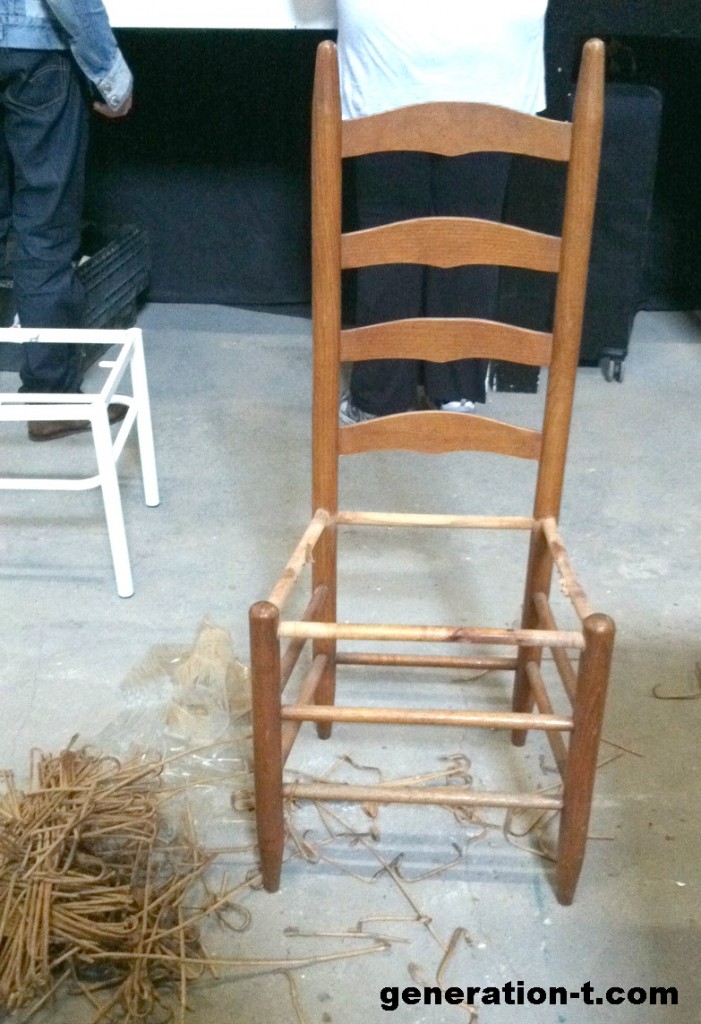
2. Clip off the seat (and peel away all the tape). Use the prongs of the hammer to pry out any nails left in the bars of the seat. Set them aside and note, as you deconstruct the seat, how they were used in the original construction.

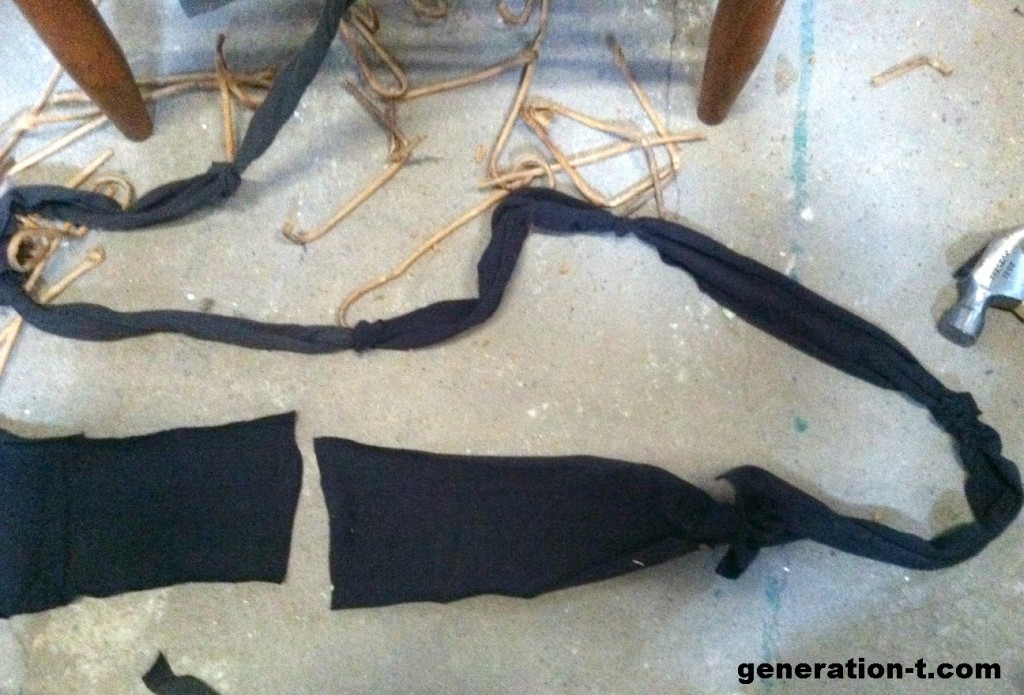
3. Cut the T-shirt scraps into 3″- to 4″-wide strips (as long as the scraps allow) and loop them together by cutting a small hole in each end and weaving one through the other (sort of like a cow hitch knot). Stretch the “yarn” out and wrap the end into a ball to make the weaving more manageable. (Though I found, to really make it workable, I wove a length, then added more, then wove, then added more — if the tail of yarn is too long, it does get cumbersome.)

4. Wrap one end of the yarn tightly around one of the bars of the chair seat. Use the nails you pulled out in step 2 (and the existing holes, if possible), and hammer them back in, securing the fabric in place. Starting in one corner, weave the yarn around two bars on a diagonal, crossing them in the middle in a sort of figure-eight. I went almost halfway across the seat, making sure to pull the yarn taut as I went, and then started a new length of T-shirt scrap yarn from the opposite corner.

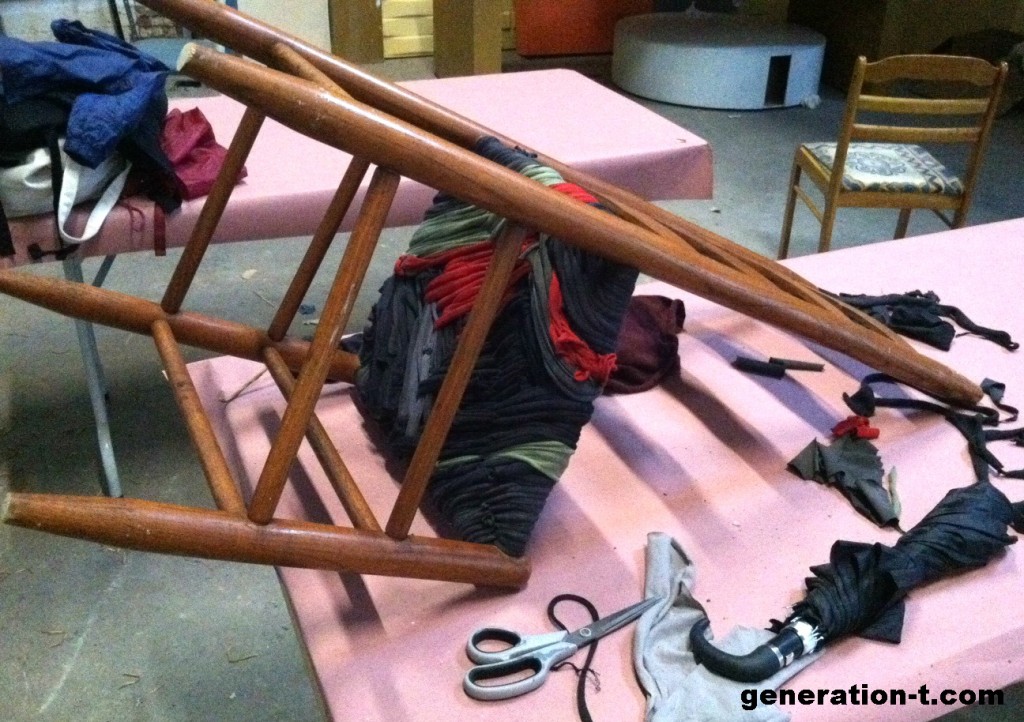
5. Once I had tightly woven the yarn from the two opposite sides (leaving a gap in the middle), I started again at one of the open corners and “stitched” up the gap separating the two sections by cross-weaving into the sections. (I also had the brilliant idea of moving my chair onto one of the work tables so I could stretch out my back a little!)

6. Tie and then thread the ends of the weaving into the inside of the chair seat. There will be some rough edges where the scraps were pieced together — embrace the texture of it!

The workshop was amazingly fun. Amy Devers of A&E’s “Fix This Yard” was on hand to help out — she and Natalie reworked a whole bench (see Natalie at work on it below). I met Kay Gardiner (you knitters might recognize her from her popular books), who learned how to wield a power drill (see her in action below, too!) to refashion her chair. I met Stacey of Patternix knit design studio — who kindly helped me finish my chair after her  woven knit creation was done. Many of the completed chairs are now available in an online silent auction on Krrb (we adopted mine!). So, go bid on your favorite! All proceeds support Build It Green NYC (New York City’s only non-profit retail outlet for salvaged and surplus building materials).

And at the very least, click through for more photos of the event and more refashioned chairs! One of the attendees wore a very cool refashioned T-shirt. Can you spot it in the gallery of photos?

All photos by Megan Nicolay unless otherwise noted.

UPDATE 6/18/13: There’s a video!

[ 1 Comment | Posted on June 10th, 2013 ]

iLoveToCreate: Happy Shiny Pixie Headband!

I attended a photo shoot recently and was inspired to make this headband after I saw a similar one in the stylist’s stash of goodies! While hers was glittery gold and mine is iridescent (I also doubt that hers was fashioned from an old T-shirt sleeve), it’s the Lady-liberty-inspired shape that’s so compelling.

I mean, it’s so bright and sunshine-filled (and a little prehistoric?), and I have to admit, though I was begging for cool temperatures back in the heat waves of July (and couldn’t be happier that nature has complied!), the shorter days are already threatening to change my mood. I’m already missing the sun! This happy, shiny, pixie headband brightens up the day wherever you are.

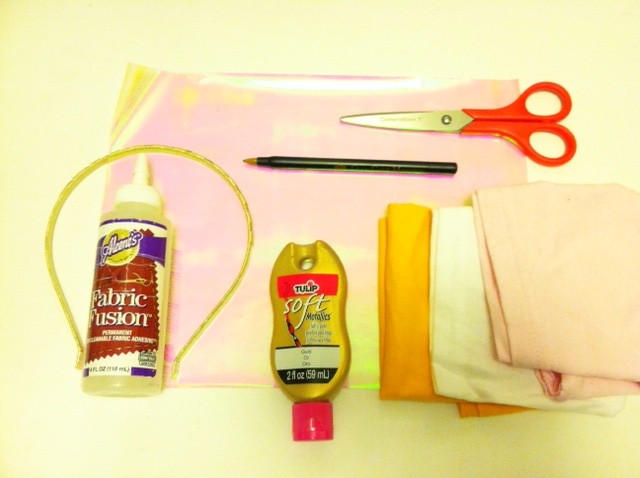
Materials:
-T-shirt sleeve (or T-shirt scrap of equivalent size)
-scissors
Tulip Fashion Glitter transfer sheets
-ballpoint pen
-ruler
Aleene’s Fabric Fusion
-warm iron and pressing cloth
Tulip Soft Fabric Paint in gold metallic (optional)
-toothpick (optional, to use as a paint applicator)

Make it:
1.
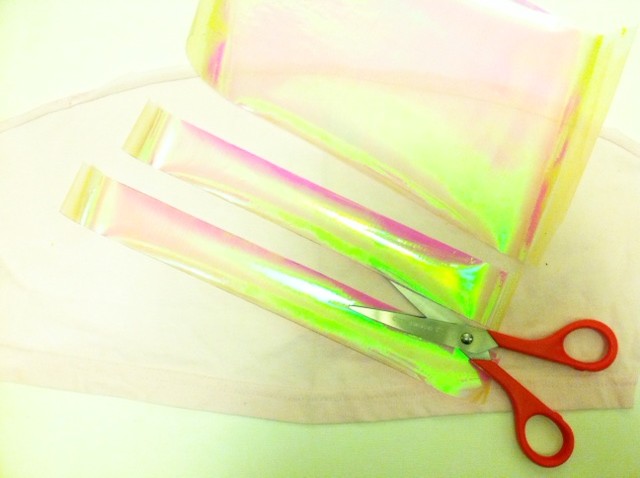
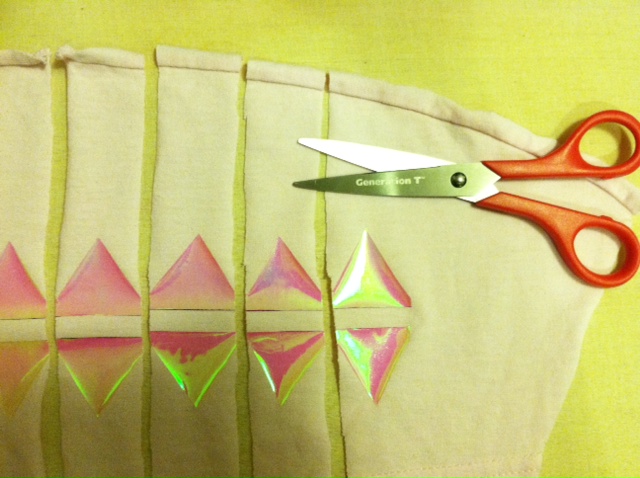
Cut out the underarm seam of the sleeve, and lay it flat, right side up. Measure, mark, and cut two 1 1/4″-wide to 1 1/2″-wide strips from the iron-on transfer sheets.

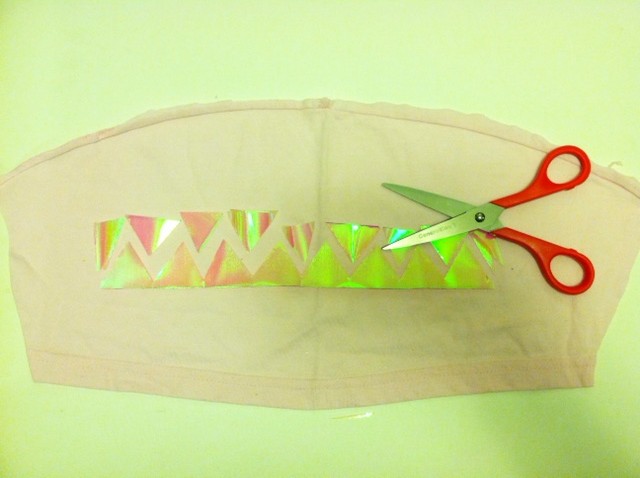
2. Sandwich the two strips together and cut out a series of triangles from one edge (through both layers), leaving a zigzag that runs the width of the strips.

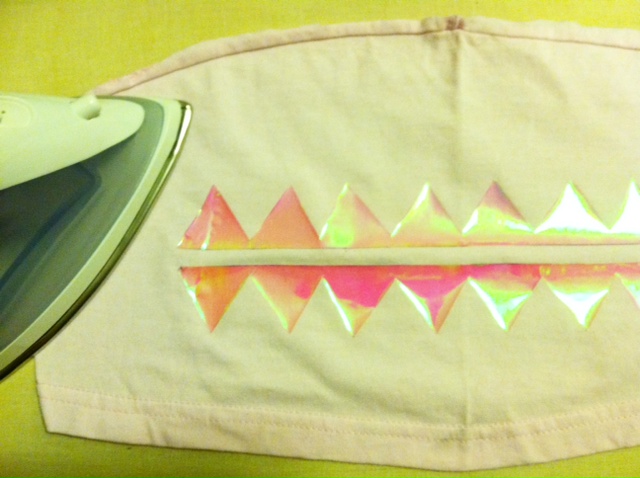
3. Separate the strips and align them along the straight edges, about 3/8″ apart. Use a pressing cloth and iron the strips onto the fabric.

4. Make parallel cuts through the fabric, separating each pair of triangles from the row of zigzags.

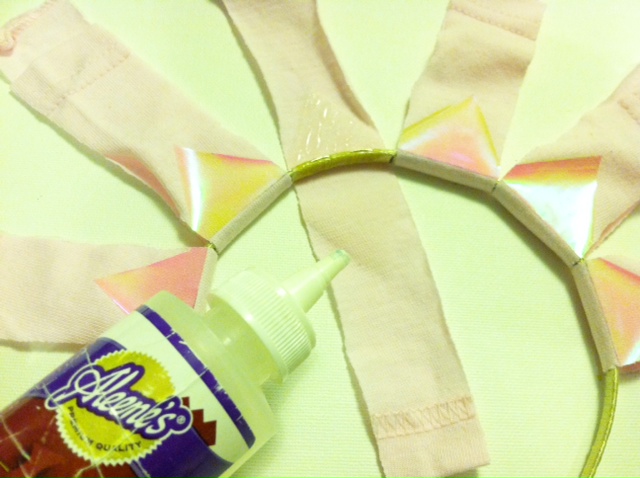
5. Determine how many rays of sunshine you’d like (I debated between 5 and 6, and ultimately went with 6), and arrange them evenly around the arc of the headband. Working one ray at a time, spread fabric glue evenly along the inside of the headband, and wrap the flexible fabric piece around the headband, lining up the triangles. Apply glue evenly to the inside of the strip of fabric and press the triangles together (the triangles should seal beyond their edges).

6. Finish gluing each ray, and let them dry flat. (Note: If the fabric is pulling apart, use a clothespin or paperclip to pinch it while it dries.)

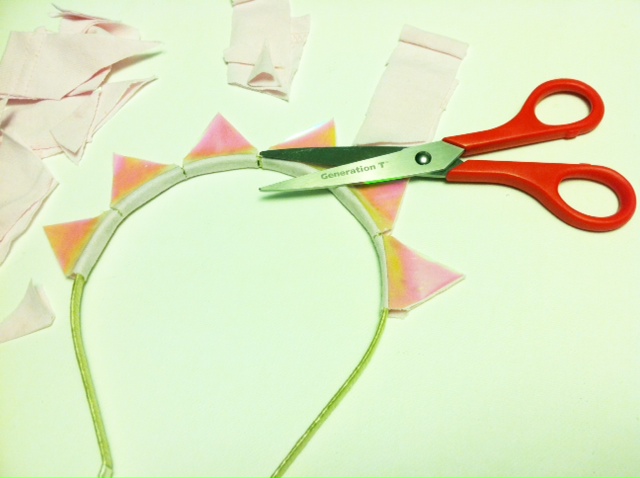
7. When the glue is completely dry, trim the fabric to the edges of the triangles.

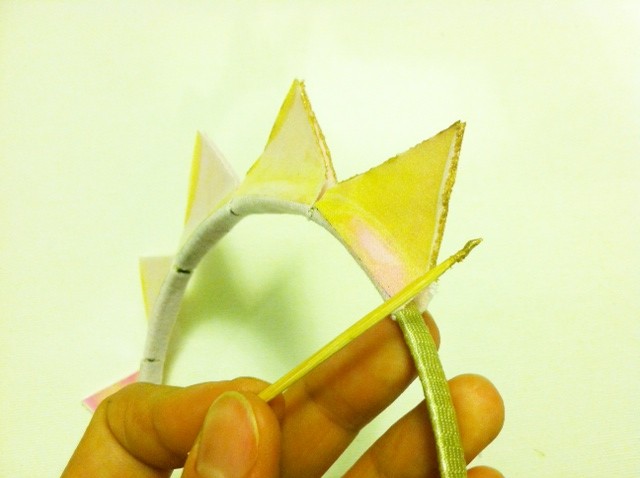
8. As an optional finishing touch, apply the metallic paint carefully with a toothpick along the fabric edges of the rays. Let it dry.

9. Try on the headband to spread a little sunshine both indoors and out!


[ 4 Comments | Posted on September 25th, 2012 ]

How to: T-shirt Scrunchie Necklace

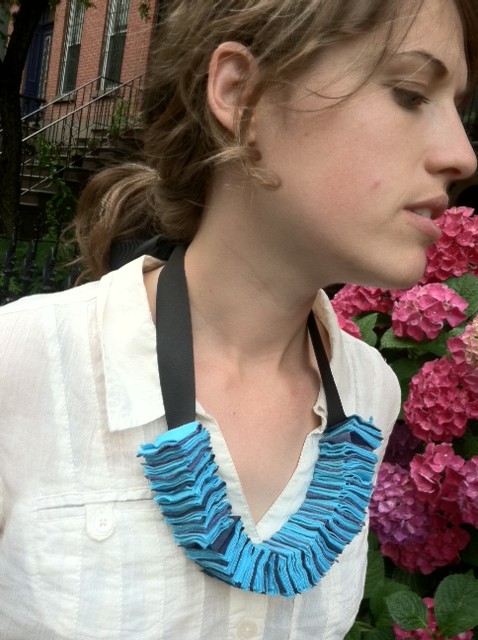
Last week, I posted a tutorial for making a statement necklace using T-shirt scraps. This week, we’re making a necklace using the scraps leftover from that necklace. It’s worth keeping in mind that you can construct and wear this necklace in about two minutes — seriously! Now that is a statement.

Materials:
-Scrap hems (or scrap sleeve seams) from 2-3 T-shirts
-Safety pin or paperclip
-Fabric scissors

Make it:
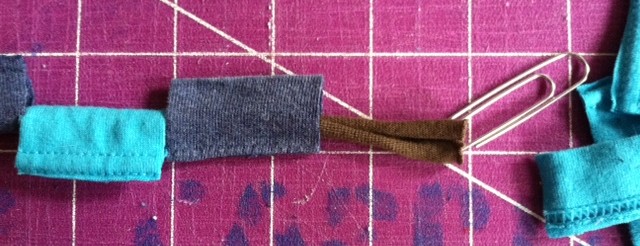
1. Trim the stitching off one of the T-shirt hems and stretch it out to create a long T-shirt cord. Attach a safety pin (all I had on hand was a paperclip, which worked fine!) to one end. Collect all the hem pieces left over from cutting the rectangles needed to make the T-shirt Confetti Necklace (a byproduct of step 1, the hem pieces should be about 1 1/2″ long, with the stitching still in place). There should be a hollow space through the center, making it, essentially, a soft bead.

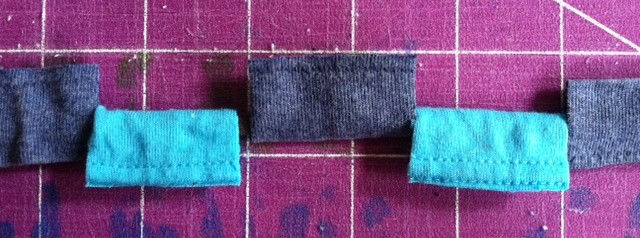
2. Thread the T-shirt cord through the T-shirt beads, arranging them in any desired pattern.

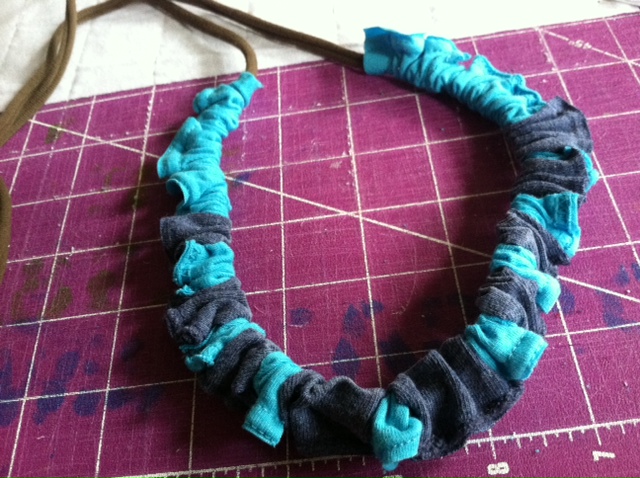
3. Rotate the beads so the stitching appears on the “outside” of the necklace and scrunch them together, creating a ruffled look. Then tie the two ends of the T-shirt cord in a bow at the desired length at the back of your neck.

Ta-da! Almost exciting as fireworks. Happy 4th, everybody!


[ 5 Comments | Posted on July 4th, 2012 ]

I Love To Create: T-shirt Confetti Necklace!

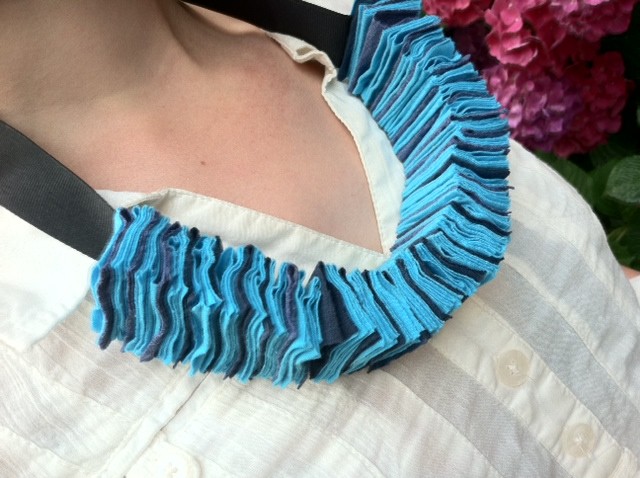
Interestingly, the inspiration for this festive, soft Fourth of July necklace came from south of the border — while I was on vacation in Oaxaca, Mexico, we happened upon a small gallery where I spotted an orange folded paper bracelet made by women in a local artist collective. The paper was so soft and fibrous, it reminded me of fabric. So when I set to re-imagining that bracelet stateside in my Generation T workshop (as a necklace of fabric and glue!), I was pleased that the results are even cozier — a wonderfully celebratory accessory fit for a summer barbecue! (I was intentionally playing it subtle with the shades-of-blue color palette, but a bold red, white, and blue color scheme would really pop.) And it’s comfy, too, when the sun goes down and it’s time to snuggle up and watch the fireworks.

Materials:
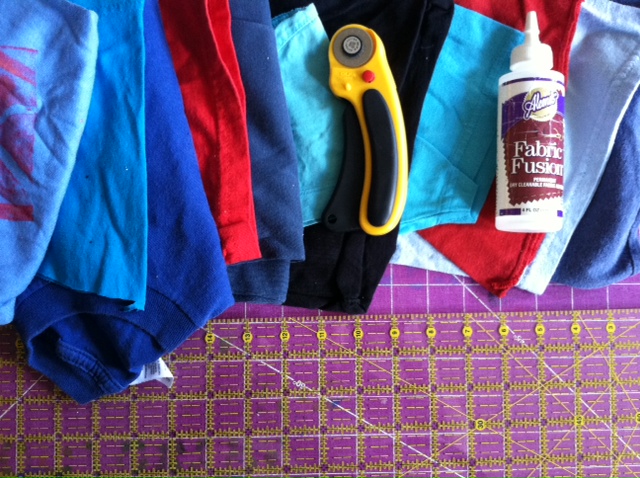
-T-shirt scraps (sleeves work well!), including one long one to use as the fastener
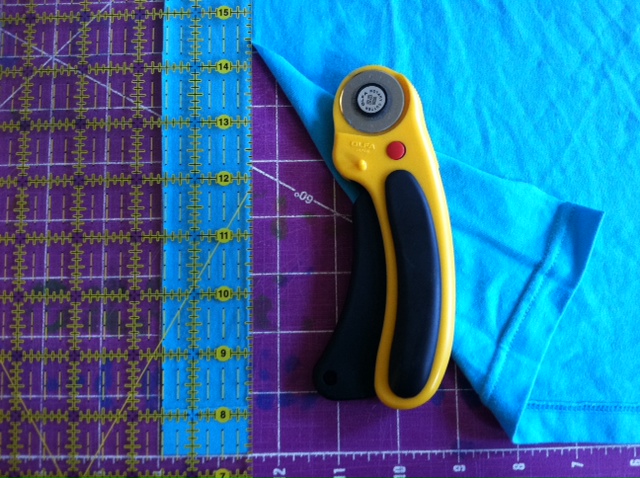
-Rotary cutter and cutting mat
-Quilting ruler
Aleene’s Fabric Fusion glue
-Ribbon (optional, in place of the long piece of T-shirt scrap to fasten the necklace)

Make it:
1.
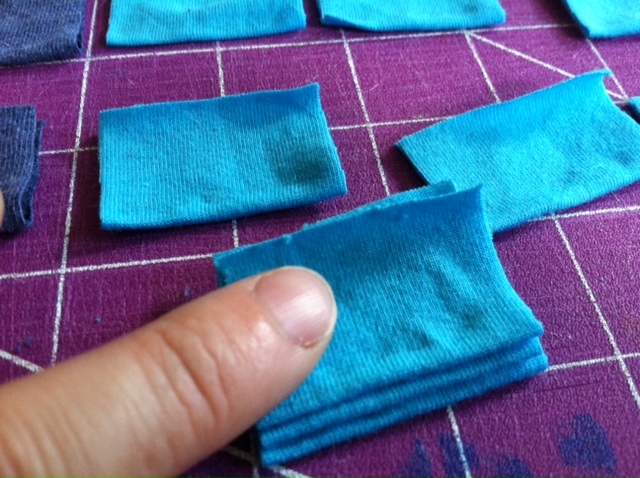
Cut 1 1/2″-wide strips from the T-shirt scraps.

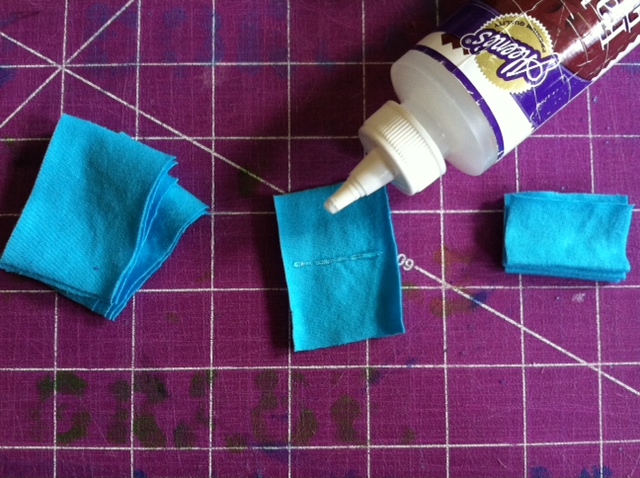
2. Cut the strips into 2″ pieces to make rectangles that are 1 1/2″ x 2″. (I cut about 124 rectangles in two different colors to make an approximately 9″-long necklace segment.)

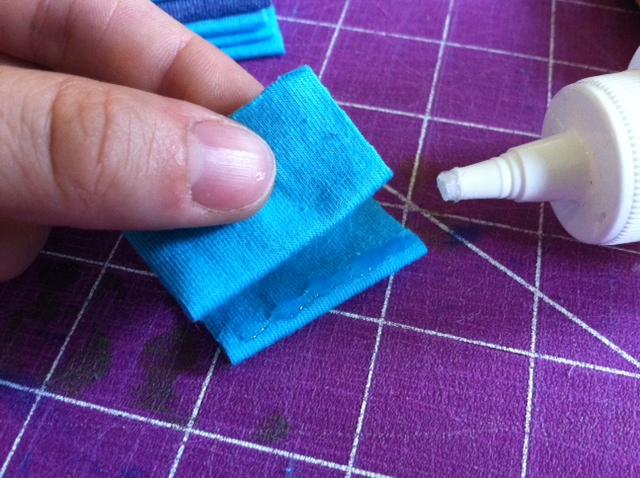
3. Lay one of the rectangles flat, wrong side up, and spread a thin line of glue slightly off-center and parallel to the short ends. Fold it in half so that the glue line retains the crease. Let the glue dry and repeat for the remaining rectangles.

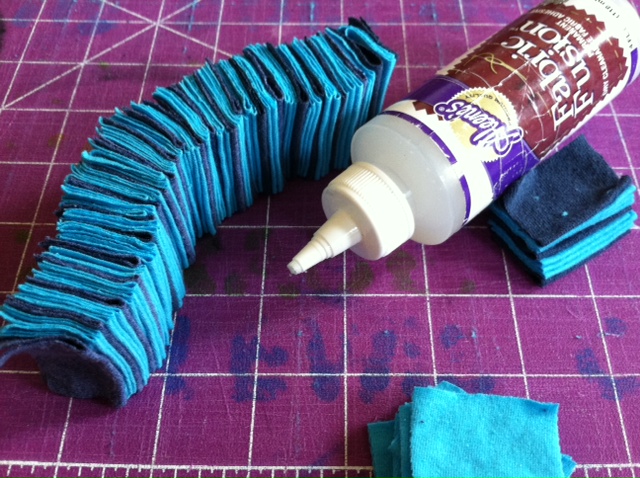
4. Squeeze a thin line of glue close to the folded edge of one of the rectangles and press another folded rectangle over it.

5. Repeat step 4 as many times as needed, to attach more rectangles together and create the necklace piece. (Arrange different colors to create a pattern!) Reserve two folded rectangles to use in step 7.

6. Let the necklace piece dry, then touch up any gaps as desired.

7. Spread glue along the end of a long T-shirt strip or ribbon (shown here), and center and press it along one of the spare rectangles from step 5.

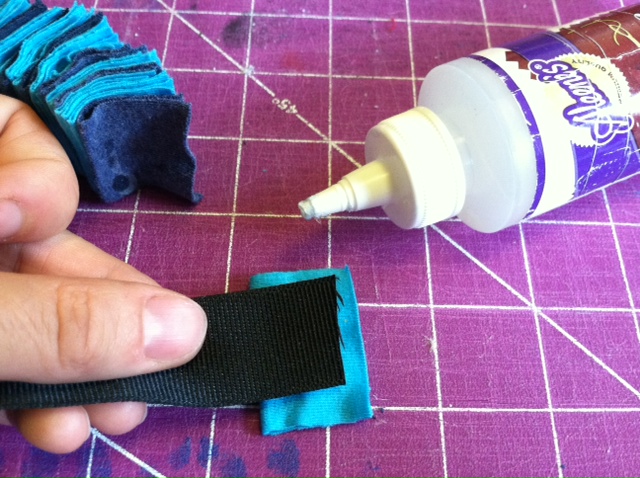
8. Then add more glue to the ribbon and press it against one end of the necklace piece, aligning the T-shirt rectangles (the ribbon end should be sandwiched in between T-shirt material). Repeat on the opposite end of the necklace piece. Let dry completely. Then snip the T-shirt strip or ribbon in the middle so you have two ends for tying.

9. Tie the ends in a bow at the back of your neck.

Variations:
Experiment by making smaller rectangles for a more delicate piece (you can make a necklace this way, or, I made an accompanying bracelet using 1″ x 1 1/2″ rectangles).
Use chain in place of the fabric fastener. (I like the idea of an all-white necklace piece with a gold tone chain.)
Try wearing it as a headpiece! (My sister’s boyfriend tied the necklace around his head
as a joke, bonnet-style, but with the right messy up-do, it could be quite the statement piece.)
Play with color: Make the red-white-blue version mentioned above, use the color scheme from your favorite sports team to wear to the next game, or craft a rainbow to brighten your day!

Tune in later this week to see the second necklace I made using the scraps left over from this one–super easy, super fast, and also no-sew (no-glue, even!).


[ 6 Comments | Posted on June 26th, 2012 ]

T-shirt Spiral Statement Earrings

Ages ago, I promised variations on my Softie Spiral Headband made from T-shirt coils. Well, at long last, here’s one take — a pair of colorful, bold, statement earrings. As a DIY project, they’re a nice alternative to the headband (if you’re too impatient or too short on time to make all the coils required for the bigger project!).

Materials:
-T-shirt scraps in different colors (T-shirt hems with the stitching cut off are perfect!)
-Fabric scissors
Aleene’s Fabric Fusion or similar fabric adhesive
-Ruler
-1 pair earring posts and backs
Aleene’s Jewel-It Embellishing Glue or similar jewelry adhesive

Make It:
Simply follow the instructions for making a T-shirt coil in the spiral headband tutorial. Make three pairs of same-sized and like-colored coils. (In this example, that means: two matching blue coils, two matching gold coils, and two matching pail yellow coils.)

To make sure that the two blue coils end up the same size, start by cutting the T-shirt strips to the same length. The top coil in the earring should be the smallest, with each coil getting gradually larger as you move down the length of the earring (the yellow one is about 1 3/8″ in diameter, the gold one is about 1 1/2″, and the blue one is about 1 3/4″).

Use the Fabric Fusion to glue the coils in a row, rotating the coils so that the ends of the T-shirt strips get “buried” in the seam. Then glue an earring post to each of the small coils (close to the edge, at the top of the earring, as shown) using the jewelry glue.

Allow the glue to set completely, then attach the earring backings, and you’re ready to wear or gift them!

Note: If these earrings are too big for your style (they do measure about 4.5″ long), you can make them smaller — just keep the same basic ratio between the sizes. Alternatively, you can make single coil earring studs for an even faster result!

[ 1 Comment | Posted on June 4th, 2012 ]

Crafting with the Next Generation

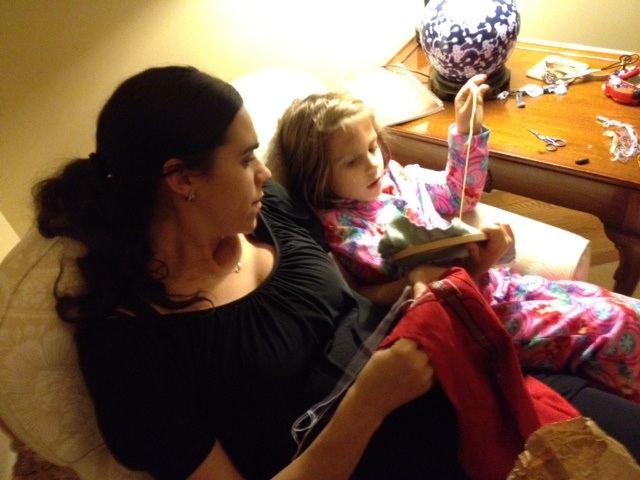
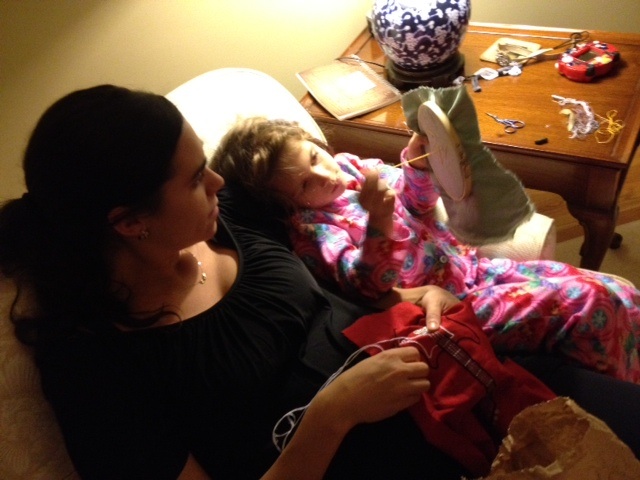
After Thanksgiving dinner with my in-laws, we all settled into the living room for some Wii karaoke and Wii dance party, and I, in my 8-months-pregnant state, settled into an armchair to work on an embroidery project I was trying to finish before the little guy arrived. It wasn’t long after I sat down that my young niece snuggled in next to me and asked, “Aunt Megan, can I do what you’re doing?” Though I wasn’t quite ready to pass my project into the hands of a 5-year-old, I did have a spare needle, plenty of floss, and was more than happy to share my hoop. (I was also rather giddy that she had taken such an interest in what I was doing!) I suggested that we ask her grandfather whether he had a fabric scrap she could work on (he used to work in the interior decorating business and always seemed to have plenty of spare yardage), and sure enough he came back from the garage having clipped a corner of textured, shiny, sea foam green upholstery fabric for her to work on.

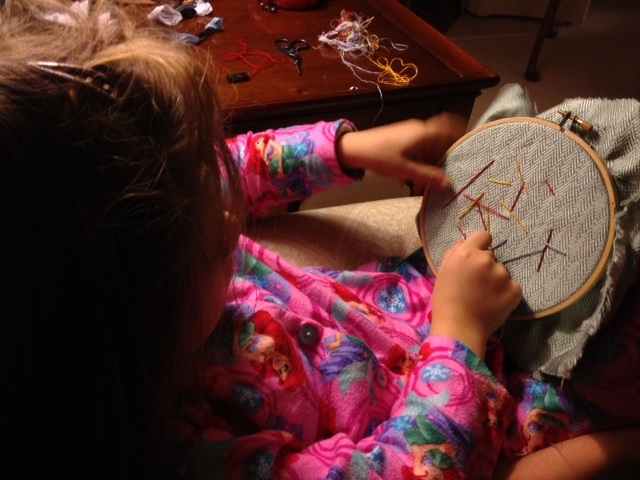
I helped her sandwich it in between the rings of the hoop, let her choose a color, and threaded the spare needle. And she started stitching…and stitching…and stitching! Long stitches and short stitches, cross stitches and straight stitches — only pausing for me to tie off an end and change the thread color under her creative direction. I asked her what she was making. “Oh! This is a mini-blanket for the baby. For him to snuggle with….” she replied. We talked about me helping her make a back to the mini-blanket and finishing the edges when she was ready.

Below, the young seamstress at work — she never once made the freshman mistake of stitching around the hoop, rather than just up and down through the fabric. (I was impressed. I don’t think I can say the same for my first embroidery experience!) The next morning, she declared herself finished with that piece of fabric, handed it off for me to take home to Brooklyn to finish, and started work on a black and white gingham pattern which allowed her to practice making short, even stitches by following the pattern on the fabric.

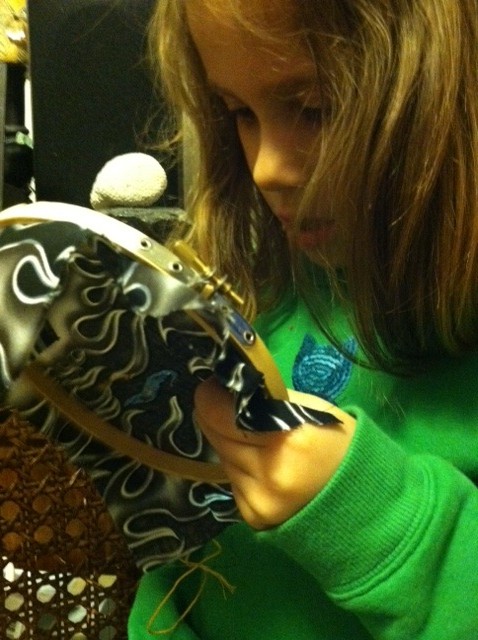
Fast forward to the day after Christmas — the little guy had arrived, and my niece was in New York to meet her new baby cousin. She asked if we could sew again. I reminded her that we needed to choose a back panel for the mini-blanket! So we sat down with my fabric stash in the Generation T workroom and flipped through scraps until she spotted the black and white flame fabric  — I had purchased it several years ago in Portland, Oregon (to make a quilted throw pillow for Mr. T — back before he was Mr. T) while I was on book tour for Generation T. I also used it as the backing fabric for the electric bass, so there’s definitely a theme! We cut a swatch, threaded a needle, and she began tracing the flames with embroidery floss.

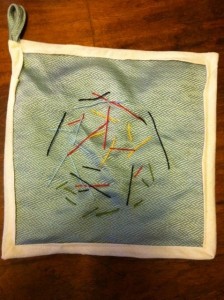
When she left, I embroidered her initials on her work, pinned the pieces together and used some scrap muslin to edge the mini-blanket. I also added the loop, which yes I recognize makes it look a little like a potholder, but also allows me to tether it to the stroller!

And no complaints from this little guy about his new handmade mini-blankie! He loves to snuggle with it and grip the edges tightly.

I can’t wait until the next project my niece and I make together! And here’s to the next generation of DIYers — I can’t wait till this little guy is gripping some scissors in his little hands, too!
[ 8 Comments | Posted on January 30th, 2012 ]

From Our Readers: Rachel!

Inspired by the Softie Spiral Headband project I posted in November, reader Rachel made these beautiful ornaments from coiled scrap strips of T-shirts.  A colorful Christmas tree and a candy cane to trim the tree or tie onto a gift! Rachel reports that they were super quick and easy to make and that she’s really loving her discovery of green crafting. We’re loving it, too!

Happy holidays — and don’t forget, you have until midnight tonight (EST) to enter the Generation T Holiday Giftaway!

[ Comments Off on From Our Readers: Rachel! | Posted on December 24th, 2010 ]

I Love to Create: Softie Spiral Headband

Yes, Thanksgiving is nearly upon us, but I’m already looking beyond the food coma to the holiday party scene! A little bit of proper party headgear puts me in the mood. You can make this headband in an afternoon and be party-ready by evening. Make one in bright tones, and you’ll be able to transcend the cold weather and be positively springlike!

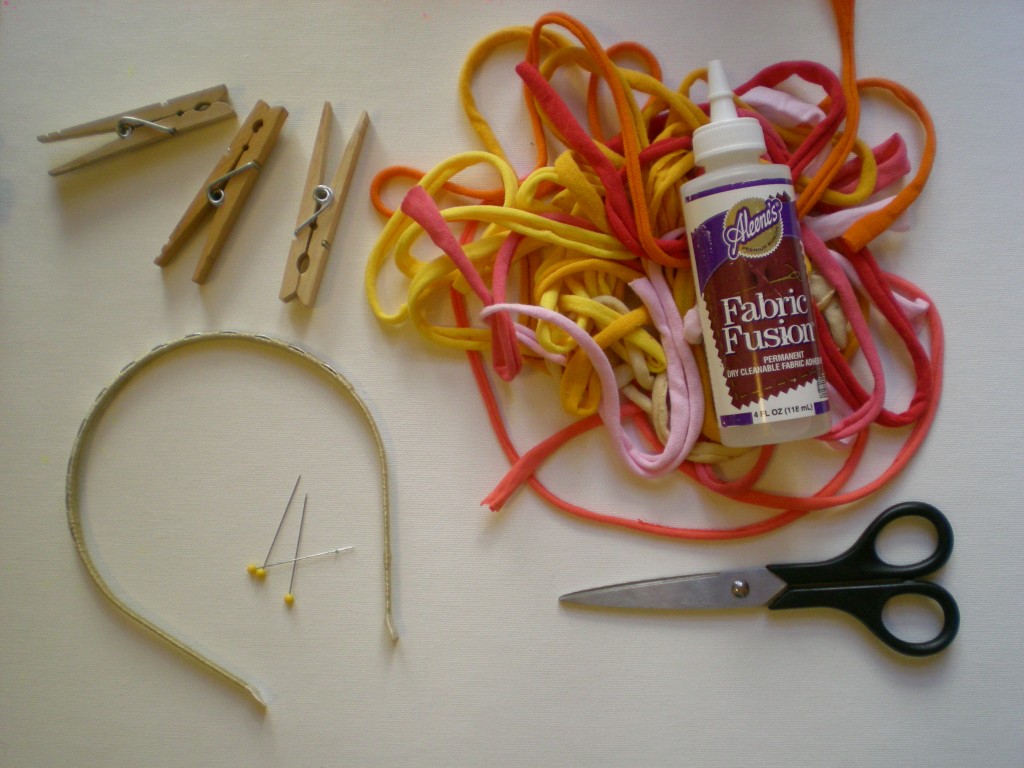
Materials:

-1″-wide T-shirt strips of varying lengths (in complementary shades)

-Aleene’s Fabric Fusion Permanent Dry Cleanable Fabric Adhesive

-fabric scissors

-1 fabric-coated plain headband (preferably with a metal base)

-clothespins

-straight pins (optional)

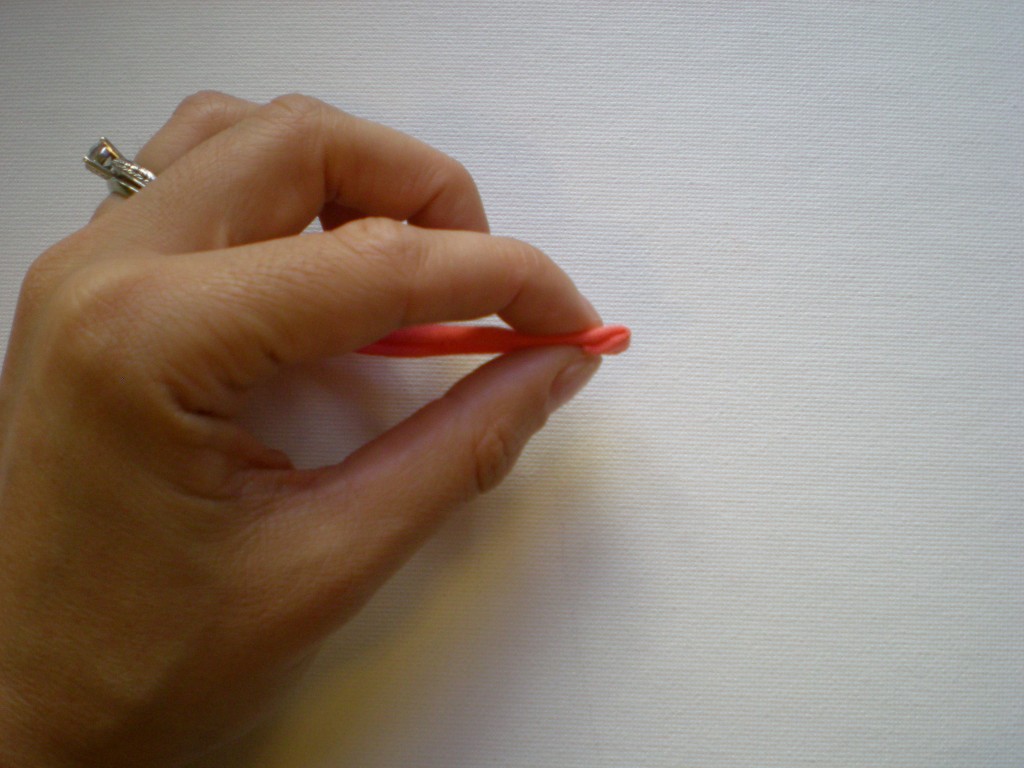
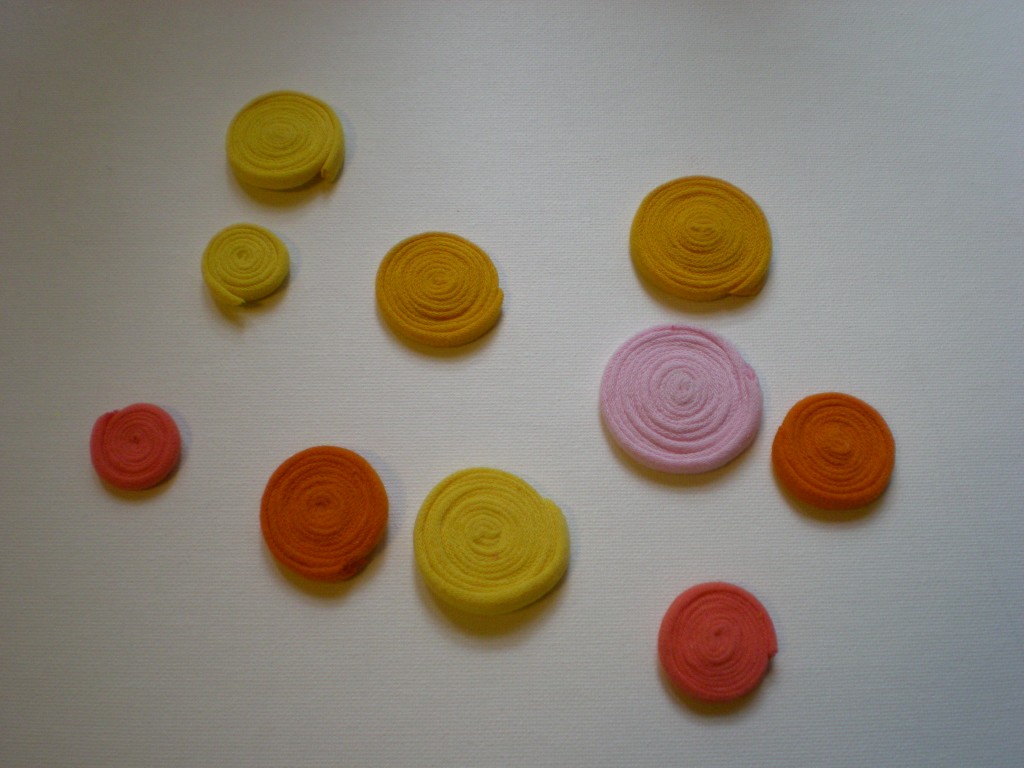
1. Gather the T-shirt strips. (A T-shirt hem works well — just cut off the stitching and stretch it out!) Select one strip, squeeze a dab of Fabric Fusion on the inside end and fold it over on itself.

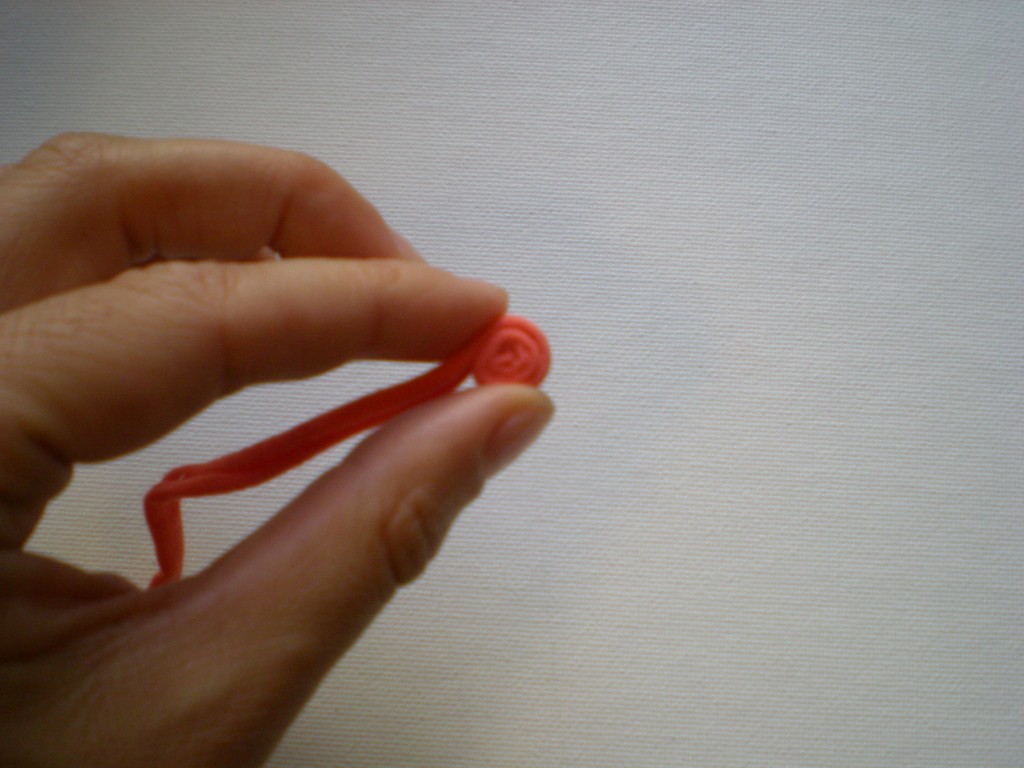
2. Gently squeeze more glue around the outside of the fold and coil more fabric into the glue.

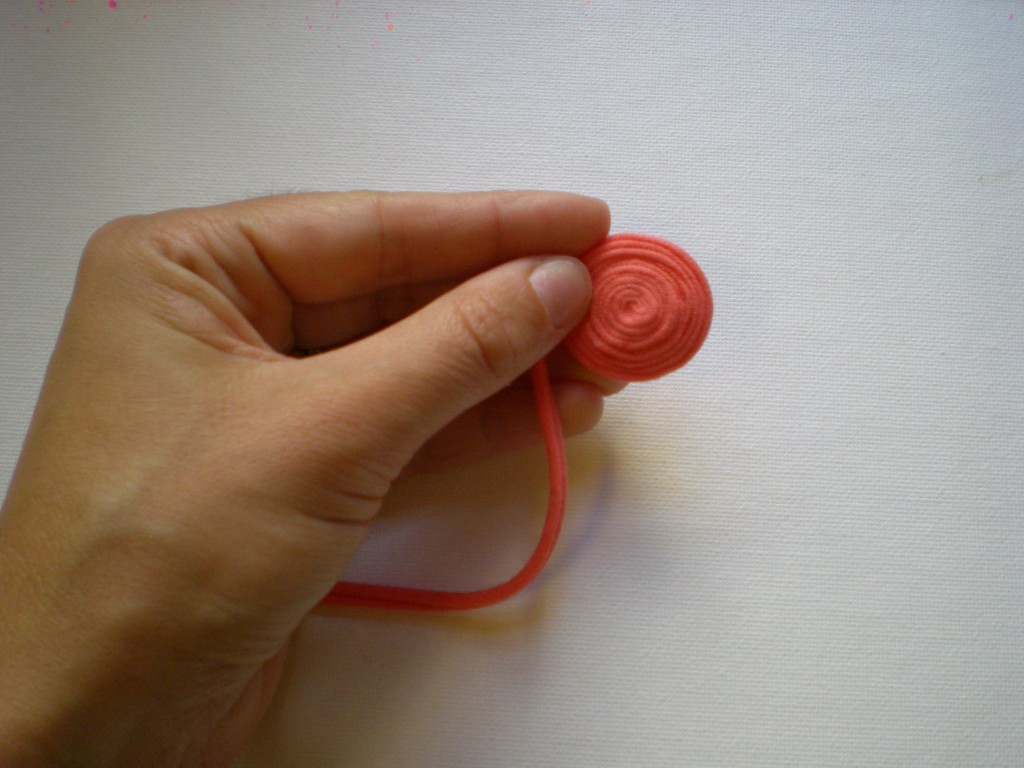
3. Continue gluing and coiling until you have a 1″ to 1.5″ fabric disc. Then snip the end at an angle and apply a bit of extra Fabric Fusion to make sure it flattens against the edge of the disc.

4. Repeat steps 1 through 3 to make seven to nine more discs! Optional: Use straight pins to keep the ends of the coils in place while they dry.

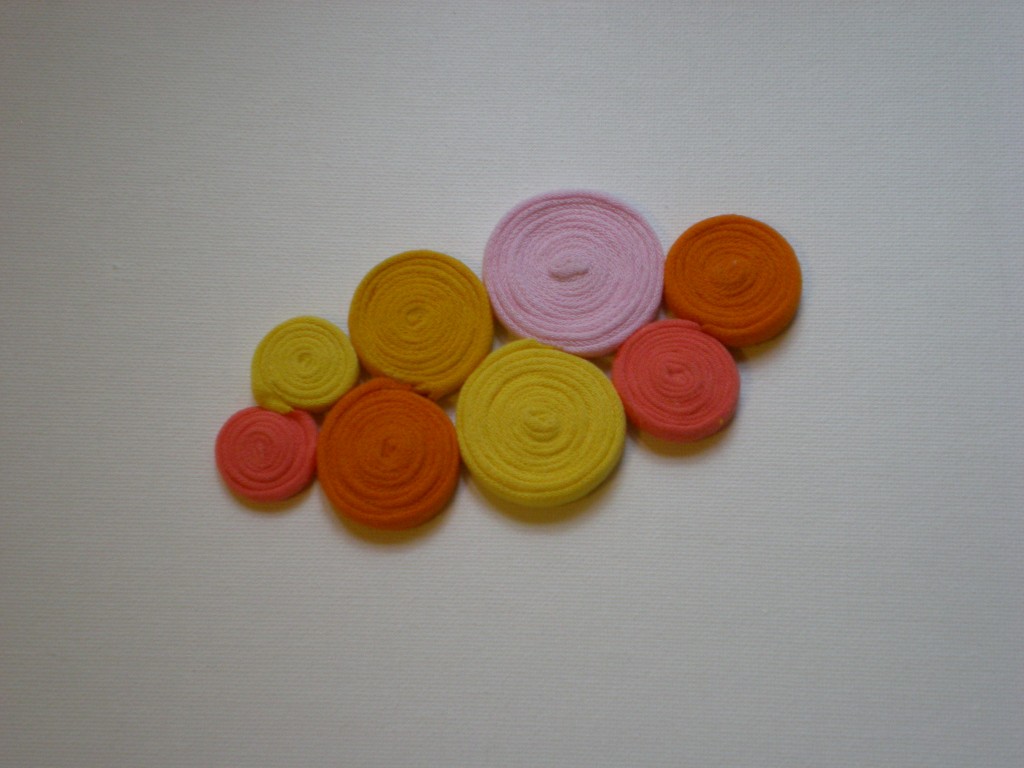
5. Arrange the discs in a pattern you like and glue them together at the intersections. Let the panel dry.

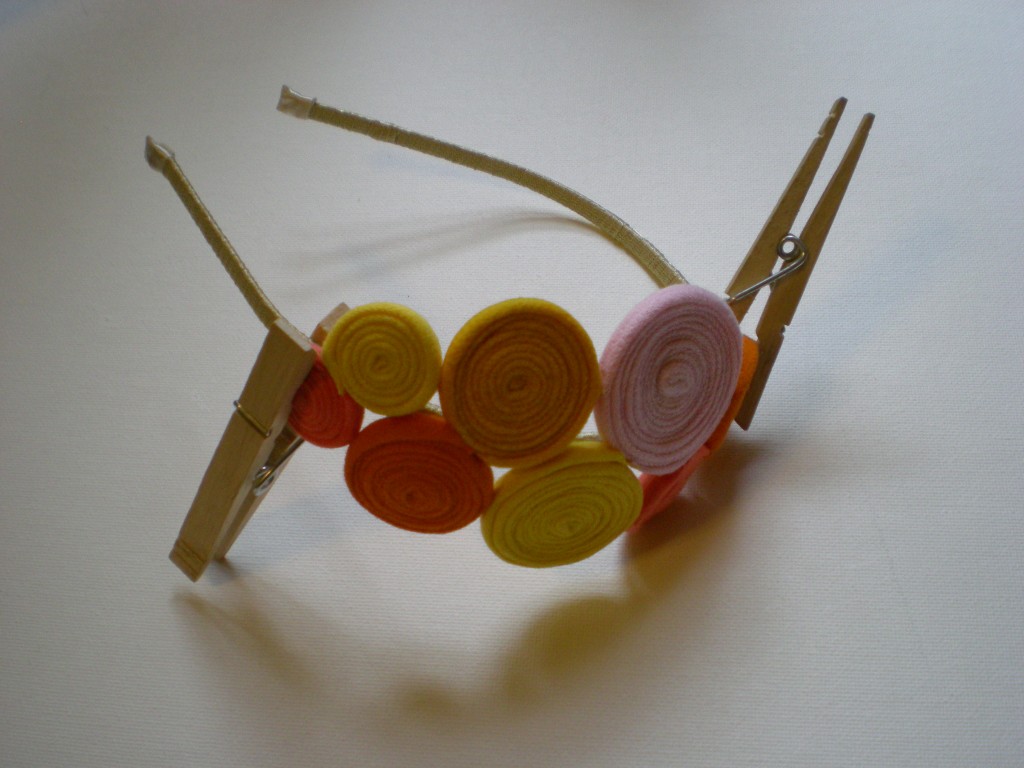
6. Apply glue along the top edge of the headband and gently press the panel against the headband.

7. Clip it in place with clothespins (so you don’t have to hold it in place). Let it dry.

8. Wear it hair up or down!

*Stay tuned for some crafty coil variations in the coming weeks!

[ 8 Comments | Posted on November 23rd, 2010 ]