T-shirt Projects

I Love to Create: Iron-on Sparkle Stencil T-shirts

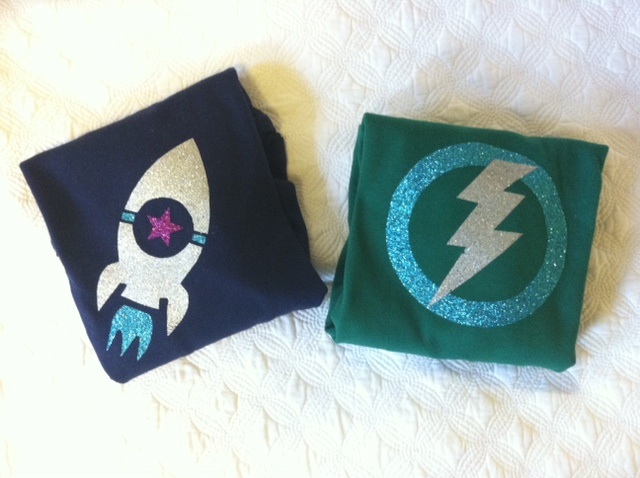
I missed posting an iLoveToCreate project last month because I got a little distracted by that rather big DIY project of my own (more projects relating to my newest muse in the coming months, but in the meantime…). I recently attended a little boy named Caleb’s 2nd birthday party and was inspired to make something — something superhero-inspired for a super little guy! And since I’m obsessed with these iron-on glitter sheets, how about some fun, sparkly T-shirts?

Oh, and also, if you happen to be attending the Craft and Hobby Association (CHA) winter conference this year, don’t forget to stop in at the iLoveToCreate Bloggers Lounge next weekend to say hello to some of your favorite craft bloggers.

In the meantime, feast your eyes on two-year-old Super Caleb!

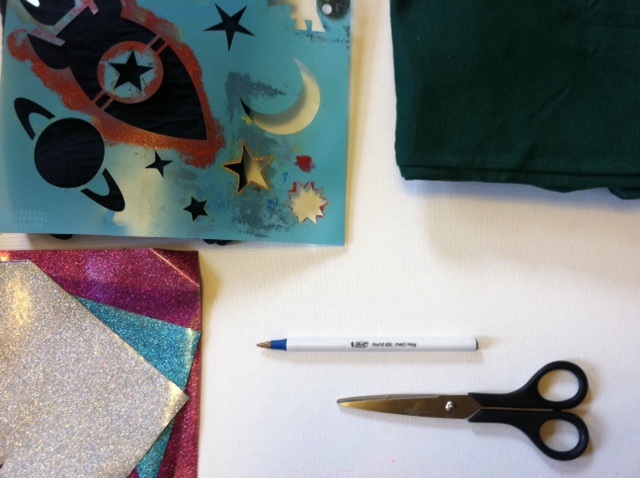
Materials:
-Stencils and other household objects to trace

-Ballpoint pen

Tulip Fashion Glitter Shimmer Transfer Sheets
-All-purpose scissors
-Toddler T-shirt(s)
-Pressing cloth
-Iron

Make it:

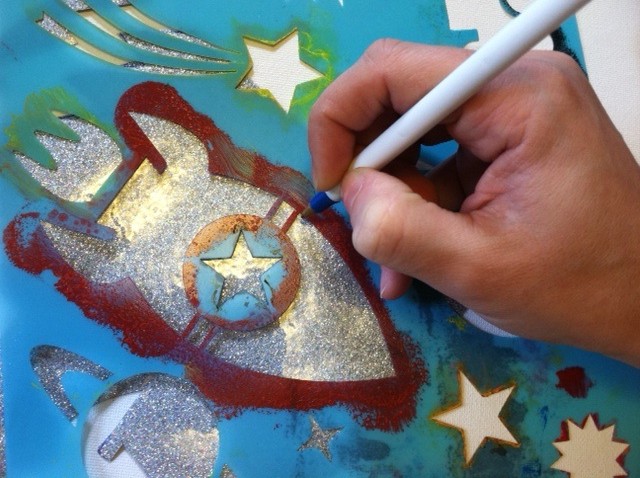
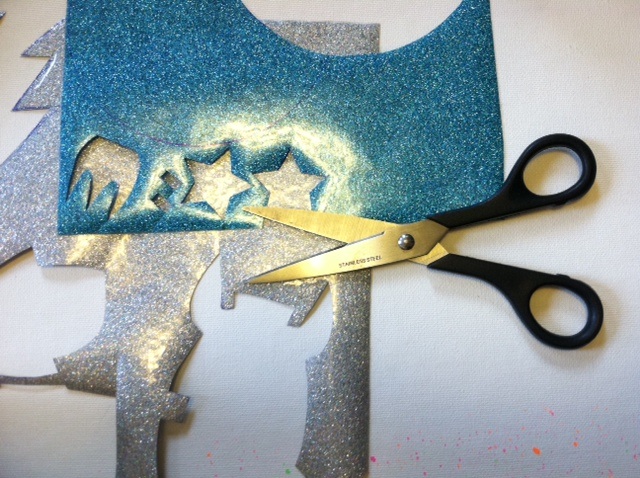
1. Select a stencil and trace the parts of it onto the desired color glitter transfer sheets. (Silver for the body of the rocket ship, purple for the star decal, blue for the stripe and the flame. Extra stars in blue!) Alternately, trace household items (like different size bowls, jars, tupperware lids, bottle caps, etc.) to create basic shapes like circles and rectangles.

2. Cut out all of the shapes and peel off the top layer of plastic before arranging the shapes on the front of the shirt.

3. Use the warm iron and pressing cloth to press on one piece of the design at a time (so that none of the pieces shift accidentally as you’re applying them). Iron on any sleeve decorations separately so you can lay that portion of the fabric flat when you’re working on it.

4. Then fold them, wrap them, and tie a ribbon in a bow…

5. …and gift them to a cute little toddler you know!

(Caleb’s mom reports that he loves wearing them, and points often to the sleeves, identifying the “stahs.”)


[ 3 Comments | Posted on January 24th, 2012 ]

Other Projects

How To: Embroidered Electric Bass Softie

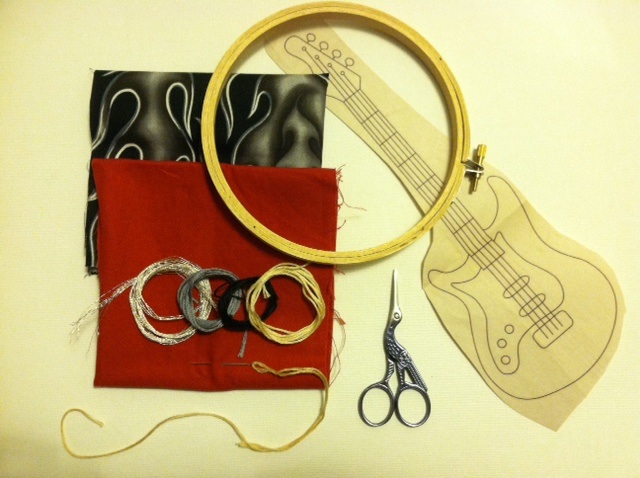
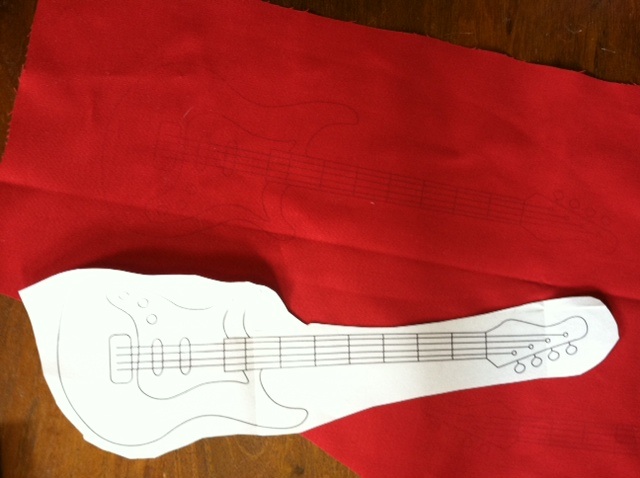
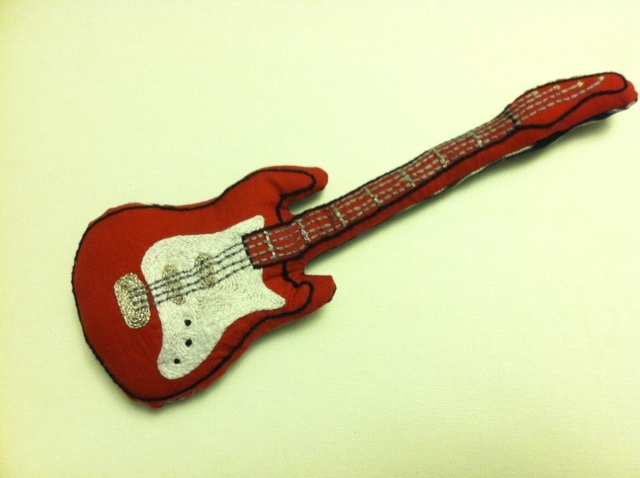
Happy New Year! With all the baby prep in the final months of 2011, I finished one craft project not-exactly-in-time-for-baby, but in time for Christmas. I began this embroidered bass guitar a couple of months ago, after finding the pattern in a local sewing shop. Though most of the designs in the envelope were intended (so suggested the text on the packaging) to be applied to tea towels or pot holders or grocery totes, I immediately envisioned this one as a softie toy for my soon-to-arrive little rock star. And, well, all I can say is that he seems to be taking to it quite naturally.

Materials:
-Solid color cotton quilting fabric to embroider
-Patterned cotton quilting fabric for backing
-Electric Bass Iron-on Pattern (in Colonial Patterns “SR4 Rock’n & Roll’n”)
-All-purpose scissors
-Iron and ironing board
-Wooden embroidery hoop
-Embroidery floss in white, black, silver, and slate blue
-Embroidery needle
-Embroidery scissors
-Straight pins
-Sewing machine and thread
-Fiberfill

Make it:

1. Cut out the iron-on pattern and place it face down on the plain fabric. Follow the instructions on the pattern packaging to press and transfer the image with a warm iron.

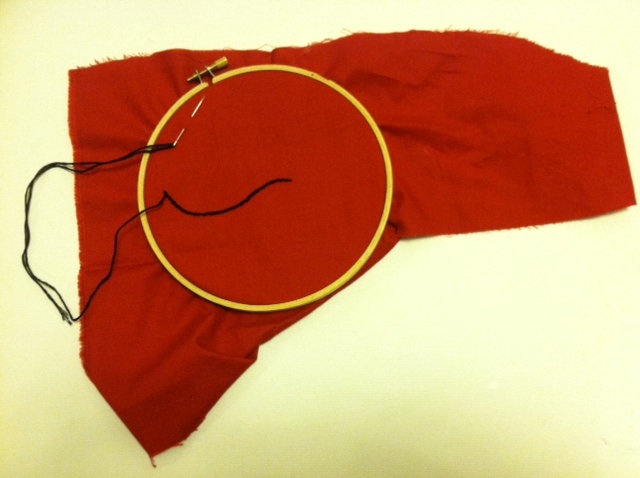
2. Thread the needle with an arm’s length of black embroidery floss. Use four strands for each stitched segment of the design. I outlined the bass in black with a split stitch, used split stitch fill in white for the pick guard, split stitch and split stitch fill in silver for the frets, pickups, bridge, and tuning keys, used backstitch in slate gray for the strings, and finished off the control knobs with French knots in black.

3. When the stitching is complete, carefully cut about 1/2″ around the black outline stitching. Place the embroidered piece against the backing fabric, right sides together, and cut around the shape to create a matching back piece. Pin the edges and, leaving a 1/4″ seam allowance, sew a running stitch around the pinned area. Leave a 2″ opening at one end. Remove the pins and turn the fabric right side out. Stuff with fiberfill, making sure all the “corners” get filled first, and hand stitch the opening closed.

4. Put it in the hands of an eager young musician.

[ 2 Comments | Posted on January 1st, 2012 ]

More Fun

From Our Readers: Willow!

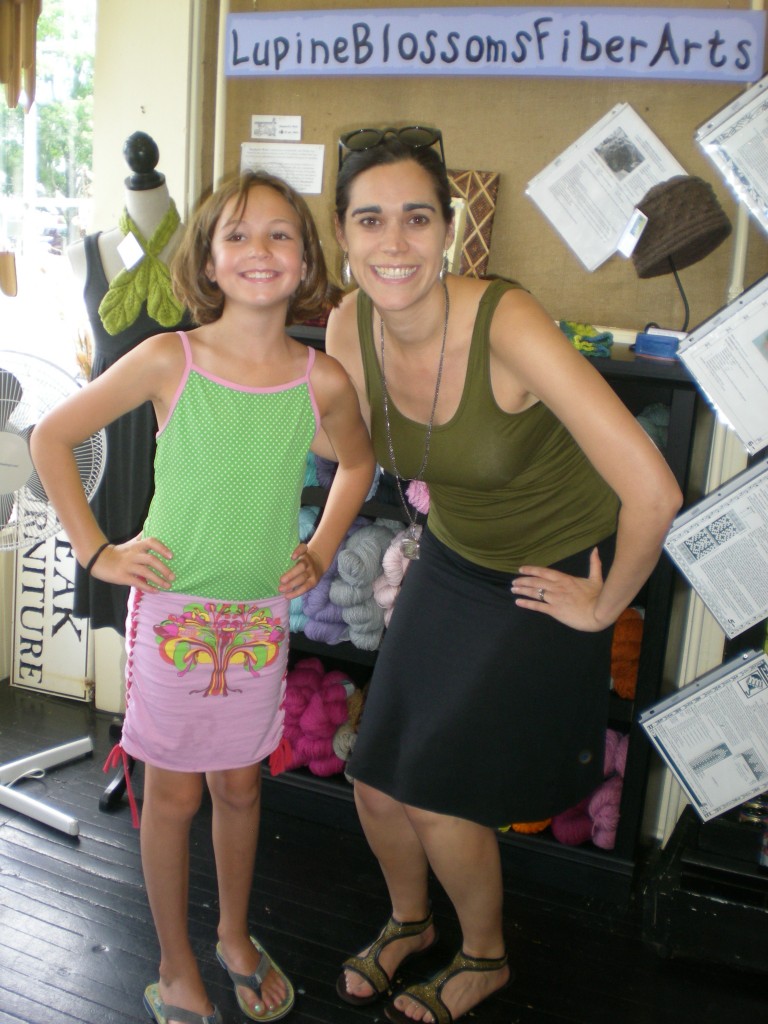
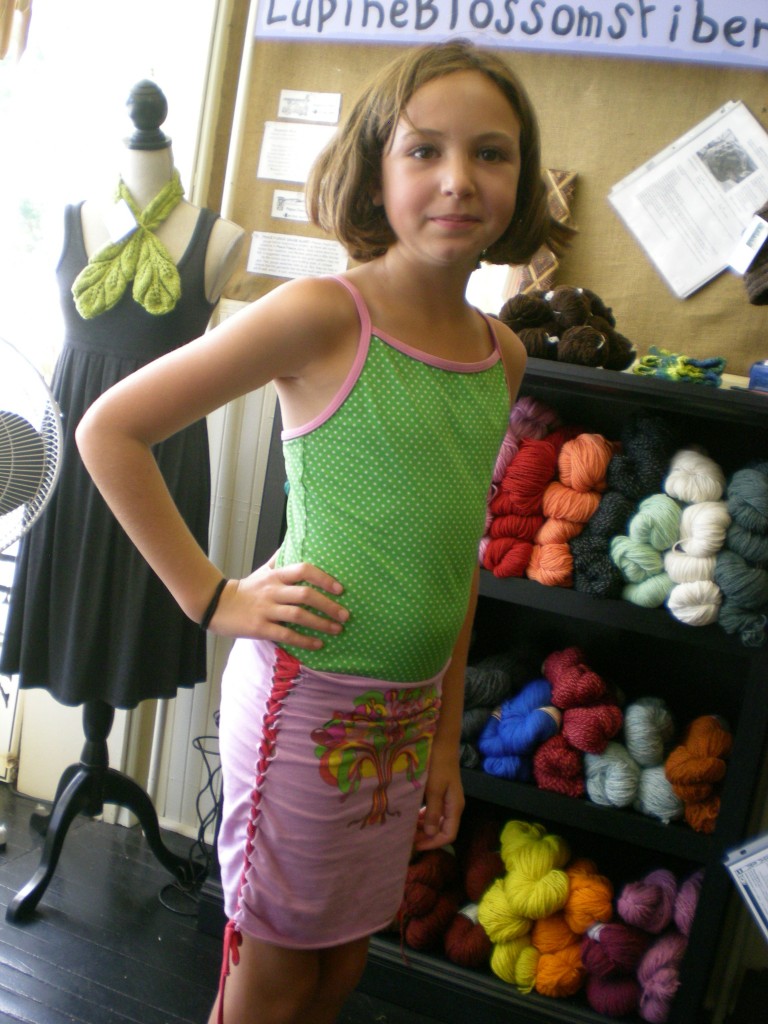
This past July, I visited a local coffee shop in my hometown in New Hampshire and bumped into a young fan named Willow, who was there with her mom, and who happened to be sporting a “Sidewinder” skirt that she made herself from Generation T: 108 Ways to Transform a T-shirt (project #52).

She did amazing work on that skirt, and she’s pretty darn cute, to  boot!

[ 1 Comment | Posted on December 29th, 2011 ]

Adventures

Hello to the Newest Member of Generation T!

With apologies for the sporadic posts over the holidays (and I still owe you all the winner of the BurdaStyle book giveaway), I’m happy to share my most rewarding DIY project to date! Our little “Baby T,” Nikolai Elliott Janka, arrived December 18, just in time for Christmas. Though he’s been thoroughly distracting (those fingers, those ears, that nose, those toes!), I have been doing a bit of crafting which I’ll share with you over the next few days.

In the meantime, bear with me while I navigate the timing of naps, food, diaper changes, and Generation T posts. Happy holidays and peace to you all in the New Year.

cheers,
Megan

[ 6 Comments | Posted on December 27th, 2011 ]

More Fun

From Our Readers: Lindsey

Last month, I was alerted to a DIYer named Lindsey over at Hello Hydrangea blog, who seeks out inspiration in books and across the web to make her own designs! Here, inspired by Generation T, she discovered a new T-shirt recon that she has dubbed “Dinosaur” because it reminds her of the spikes on a triceratops.

I love it because it reminds me of a dissection or x-ray vision, with a strong, colorful spine running down the back! Either way you slash it, it’s amazingly quick and easy to make — check out Lindsey’s tutorial on Hello Hydrangea here if you’d like to try your hand at it, too.

[ Comments Off on From Our Readers: Lindsey | Posted on December 19th, 2011 ]

More Fun

Tee Party at The Duplex NYC!

Here are some belated highlights from the Tee Party we hosted at The Duplex in NYC in October!  I thought it might be just the thing to inspire a last-minute craft night to finish up those DIY holiday gifts (and don’t forget to download the free Generation T gift tags in the right column of the website to attach to all of your fabulous reconstructed T-shirt projects).

We made stylish no-sew scarves (and for those cracking open your books, it’s the Mane-iac scarf, page 235 in Generation T: Beyond Fashion).

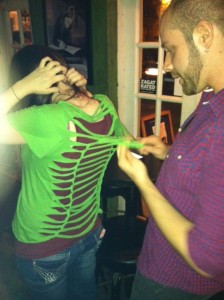
Sassy no-sew tops, too! This couple made the Back in Action tee (page 260 in Generation T: Beyond Fashion).

Then there was the Pinup Girl halter top, page 28 in Generation T: Beyond Fashion — and a mash-up of the Makes Me Wanna Collar and the Back in Action T-shirt (shown above), pages 38 and 260 in Generation T: Beyond Fashion.

A variation of the Outer Lace sleeveless top, page 56 in Generation T: 108 Ways to Transform a T-shirt (check out all the scraps re-purposed as bracelets, too). And, my good friend, host and bartender for the evening, Matthew!

So keep stockpiling your old T-shirts! Because you never know when the next Tee Party invite will arrive in your inbox…

[ Comments Off on Tee Party at The Duplex NYC! | Posted on December 16th, 2011 ]

Adventures

The BurdaStyle Sewing Handbook Giveaway!

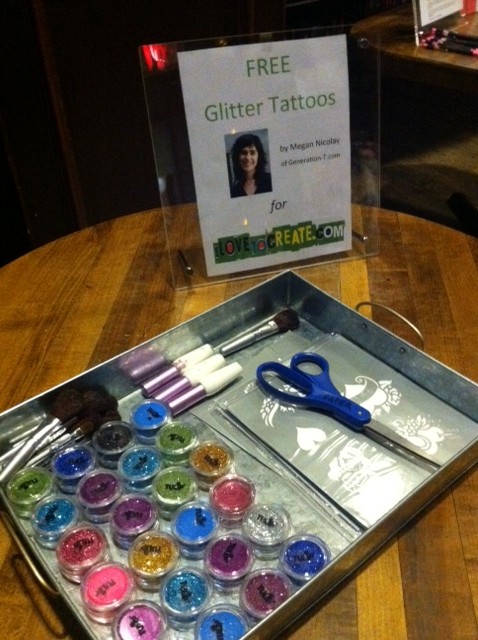
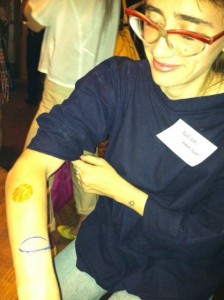
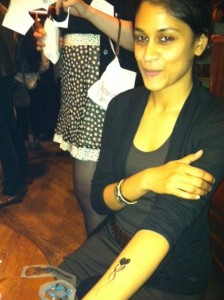
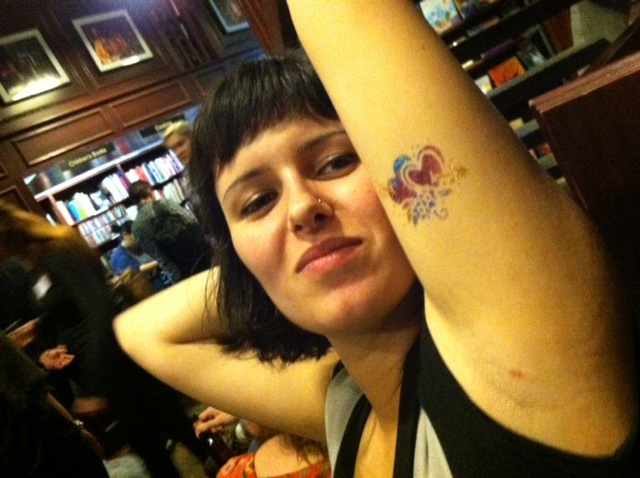
Thanks to everyone who came out to the BurdaStyle event in November. Book parties at Housing Works Bookstore are always a blast and, as is evident from the glittery highlights below, the celebration for the BurdaStyle Sewing Handbook was no exception. I was “inking” folks all night long — and applied a total of about 50 glitter tattoos (which were provided generously by iLoveToCreate.com)!

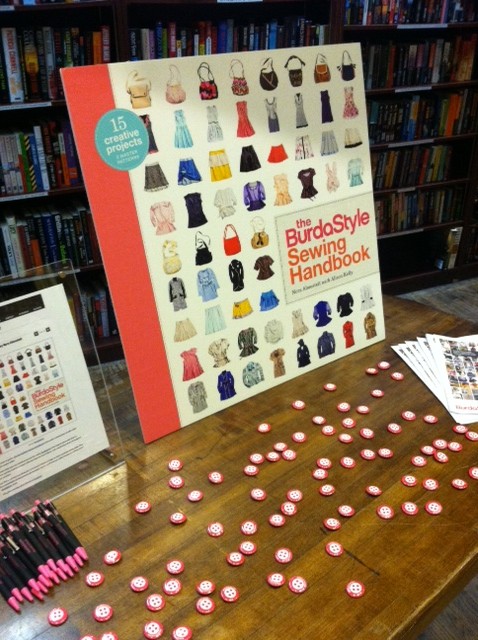
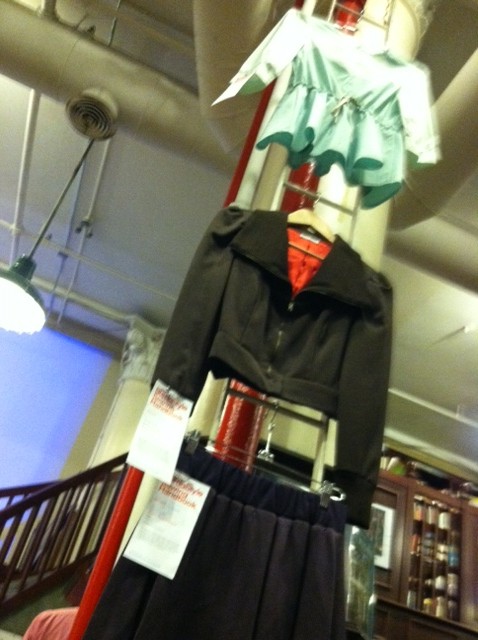
Giant cover displays peppered the tables, samples from the pages of the book were hung all through the rafters…

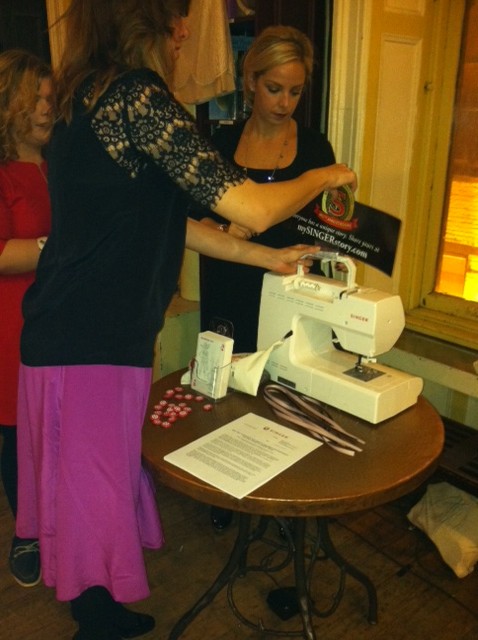
Event sponsor Singer had make-and-take tables set up for DIY drawstring bags using fabric from Spoonflower, and there was the iLoveToCreate glitter tattoo setup, with your glitter tattoo artiste, me! And I didn’t even catch a glimpse of the photo booth fun that was happening at the other end of the room.

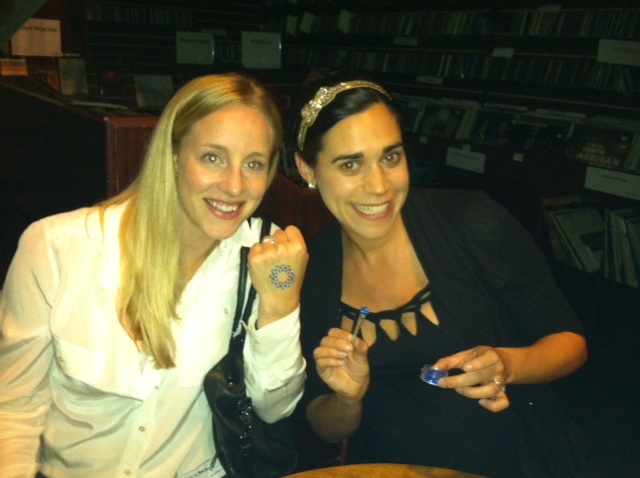
Here I am in action, glitter brush and dish poised and ready for the next willing victim! (As you can see, I wore my sparkle headband for the occasion.)
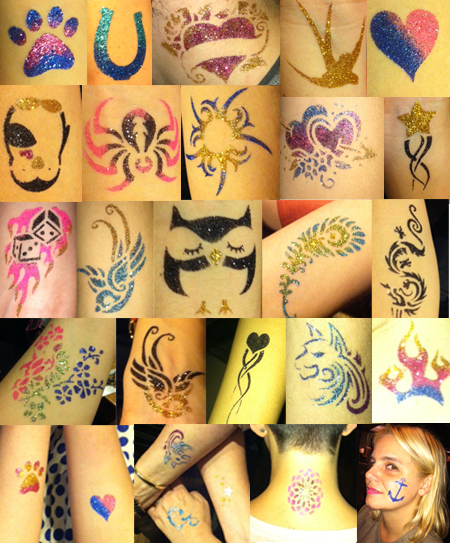
Pink anchors, basketballs swooshing through hoops…

A recycling heart and a classic sparrow.

Black hearts and flowers for the truly badass…

And while most opted for the wrist or inner forearm, there were a few face, neck, and even underarm tattoos administered!

Like I said, there were many, many glitter tattoos applied throughout the night, while folks frolicked and celebrated the release of the next new sewing book!

And since I know many of you wanted to be there in person, but couldn’t make it on such short notice, I’m extending the party online (okay, sorry, no glitter tattoos via html) by sending one of you lucky readers off with a copy of The BurdaStyle Sewing Handbook, courtesy of BurdaStyle! All you need to do to enter is leave a comment on this post or on the Generation T Facebook page sharing why you love to sew before noon on Wednesday December 14. One entry per person; to have a bonus entry count, send us a tweet sharing why you love to sew, tagging both @GenerationTee and @BurdaStyle.

I’ll select a winner randomly and make the announcement later this week via the Generation T blog, Facebook, and Twitter. Here’s to sewing up a storm this holiday season!

[ 12 Comments | Posted on December 13th, 2011 ]

Media

Jezebel.com’s Holiday Gift Guide!

Thank you to Jezebel.com where, under the heading “12 Days of Buying: Gifts for Crafty Types,” my second book Generation T: Beyond Fashion is one of the dozen featured ideas for folks who like making stuff! It’s described (accurately, I might add!) as including “new fashions, as well as baby clothes, home items (including a wine cozy!), apron, blankets, bags…the list goes on.”

All of the projects are pretty accessible, so it’s appropriate for novices as well as sewing gurus. And most of the projects can be done without a machine.”

So if you have a crafty one on your holiday shopping list this year, consider a giving copy of Generation T: Beyond Fashion: 120 New Ways to Transform a T-shirt or the original Generation T: 108 Ways to Transform a T-shirt. And, hey, I’ll even show you how to wrap it up!

Also featured in the Jezebel round-up: an adorable sheep-shaped knitting needle gauge for your favorite stitcher, custom-designed fabrics from Spoonflower, a doodle-n-wash tablecloth, classes at Make Workshop in NYC, and more.

[ Comments Off on Jezebel.com’s Holiday Gift Guide! | Posted on December 10th, 2011 ]

T-shirt Projects

How To: Advent Calendar T-shirt!

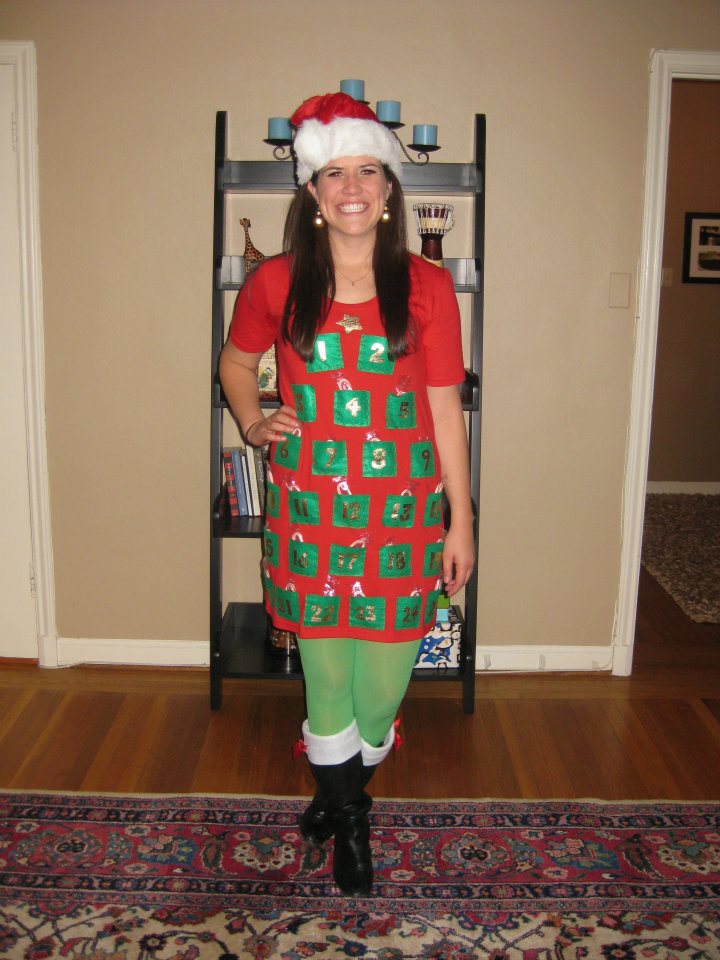
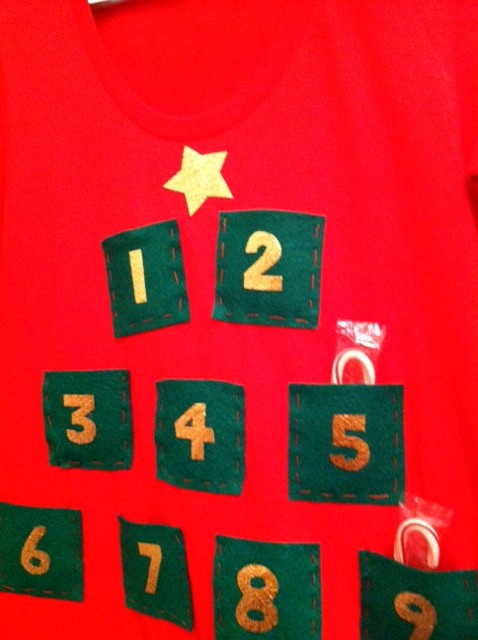
This project comes courtesy of my very talented and party-hopping younger sister, Ariana, who attended a very special holiday gathering this month in the Bay Area at which attendees don’t just wow with sparkly seasonal cocktail dresses — they costume it up. And not just sexy Santas and holiday carolers, but as, say, a dreidel, Nutcracker ballerinas, or the entire cast of Charlie Brown’s Christmas!

The event is called the Elf Party. It was originally started as a party among friends and has since grown into a huge fundraiser for children in need — not to mention a very popular event. Tickets sold out in just 30 minutes this year!

Needless to say, Ariana needed to dress to impress, and when we were having a crafty consult, I suggested that she be an advent calendar–a wearable variation on the “Final Countdown” pocketed calendar (project #35) from Generation T: Beyond Fashion — complete with pockets full of treats! And so she set to work…

Materials:

-Plain tunic dress or long T-shirt (in red or green for Christmas or blue or white for Hanukkah; sample is from American Apparel)
-2 to 3 sheets of craft felt (in red or dark green for Christmas or blue or white for Hanukkah)
-Fabric scissors
-Pen
Tulip Fashion Glitter Shimmer Transfer Sheets
-All-purpose scissors
-Pressing cloth
-Iron
-Straight pins
-Treats (individually wrapped mini candy canes and other hard candies work well–depending on how long you’ll be wearing the outfit, keep in mind that body heat can melt Hanukkah gelt or other chocolates!)

Make it:

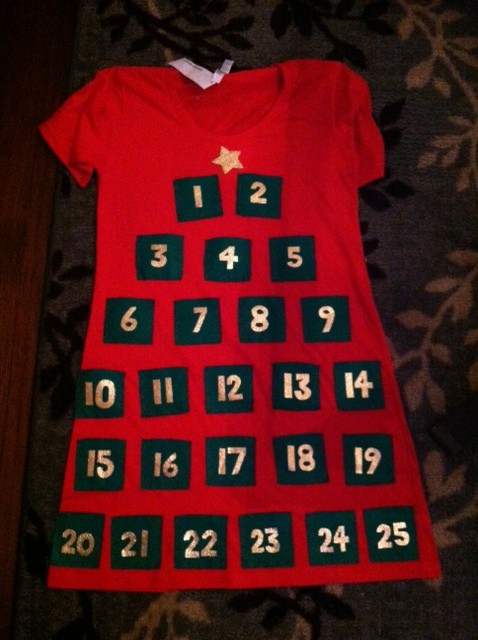
1. Measure and cut about twenty-five 3″ by 3″ squares of felt (depending on the number of pockets you’d like).

2. Trace or draw the numbers 1 through 24 (or 25), on the glitter transfer sheets. Note: Trace numbers 1 through 12 for the twelve days of Christmas, or 1 through 8 for the eight nights of Hanukkah, and so on. (Optional: If you’re going Christmas-themed, trace and cut a star to place at the top of the arrangement.)

3. Cut out the numbers and/or shapes.

4. Following the instructions on the packaging, peel the clear layer off the top of the glitter numbers and arrange them glitter side up on each felt square. Then press the numbers on the squares with a pressing cloth and a warm iron.

5. Lay the tunic flat and arrange and pin the squares onto the front. Thread the needle with contrasting or matching thread and use a running stitch or backstitch to sew around the two sides and the bottom of each square to complete each pocket.

6. Remove the pins, try on the tunic, and fill up those pockets with treats!

[ 1 Comment | Posted on December 6th, 2011 ]

More Fun

From Our Readers: Carol Schneider Designs!

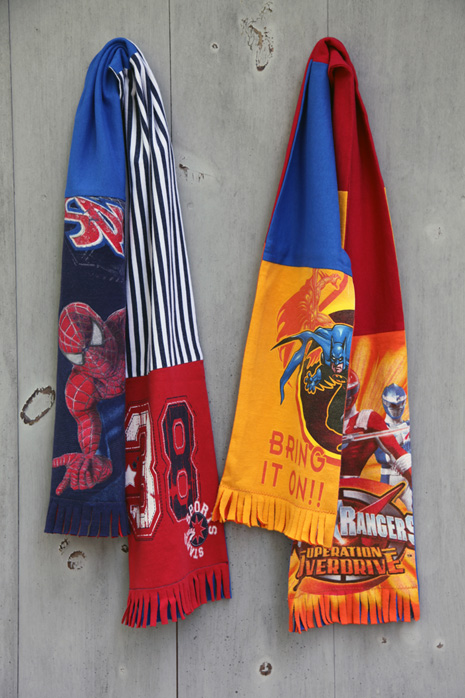
Recently, I had the opportunity to sit down with Carol Schneider, lecture series publicist by day and fashion designer by nights and weekends (y’all know how much I love a crafty superhero alter ego!). She started making scarves from vintage kimono fabrics, but eventually (as we all do, right?) found her way to discarded T-shirts. Here are some scrap-fabulous highlights from her website.

For those of you in the NYC area, I found out that Carol and some of her designer colleagues (Annie Walwyn-Jones, Teresa Montalvo, and Danielle Mailerare) are hosting an open house this Tuesday and Wednesday, December 6 and 7, 3:00 to 9:00 pm to share and sell their designs!

I got a preview of some of Carol’s more recent T-shirt scarves that will be on sale this holiday season for kids and adults, and gosh they’re pretty cute and clever. I love the New York-themed one (that Coney Island tee is a great thrifty find!) and there’s a pink one that incorporates a pocketed T-shirt into the quilted mix.

I just love all the colors she uses–isn’t it inspiring? (I’m always looking to keep the color quotient high when winter grays settle in!). If you’re feeling crafty, I encourage you to turn to project #77 “Scarf It Up” in Generation T: 108 Ways to Transform a T-shirt (page 194) to make your own scarves from your T-shirt stash. Or check out this video from the Generation T/Threadbanger archives for some more basic scarf designs.

And if you’d rather buy than DIY, support a small business and check out that open house I mentioned above (Tuesday and Wednesday, December 6 and 7, 2011, from 3:00 to 9:00 pm) at the home of Carol Schneider Designs in NYC!

27 East 22 Street, 7th floor, NYC
(between Broadway & Park)
212-505-6615


[ Comments Off on From Our Readers: Carol Schneider Designs! | Posted on December 3rd, 2011 ]