T-shirt Projects

Luke, I Am Your Father.

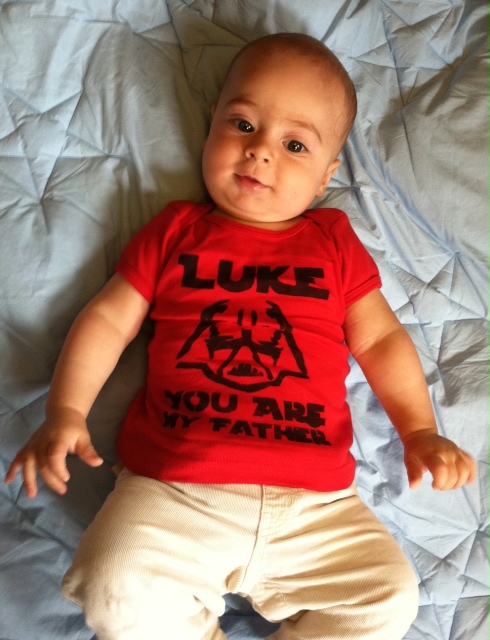
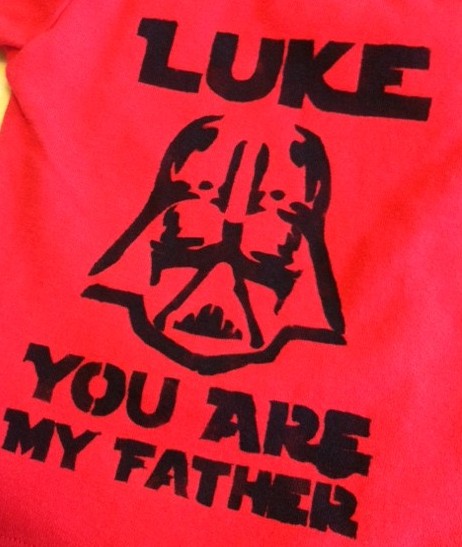
Oh, that iconic (though misquoted) line uttered by Darth Vader to Luke Skywalker. Any kid growing up in the 1980s with the name Luke was oft subjected to various illuminations of this kind along with other ubiquitous Jedi advice such as, “Use the Force” and “May the Force be with you.” Today, on Father’s Day, we decided to flip Darth’s utterance on its head to honor a very special Jedi Knight named Luke (aka Mr. T) over here in the Generation T galaxy.

Though it’s a project particularly suited for a father named Luke (I’m sure you know one or two!), you can easily substitute any other Star Wars-loving dad’s name to make a personalized message from his little Ewok.

Materials:
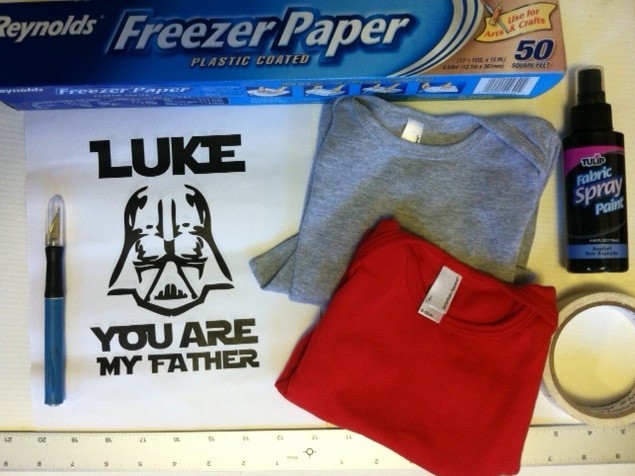
-T-shirt for the little one (at least one, but I made two in different sizes)
-design printout (high contrast is best, and adjust your letters, like A and O, to make sure you’re not missing any center cutouts)
-freezer paper
-craft knife
-cutting mat
-ruler
-masking tape
-iron
-fabric spray paint (and/or fabric paint and a foam brush — I used both)

Make it:

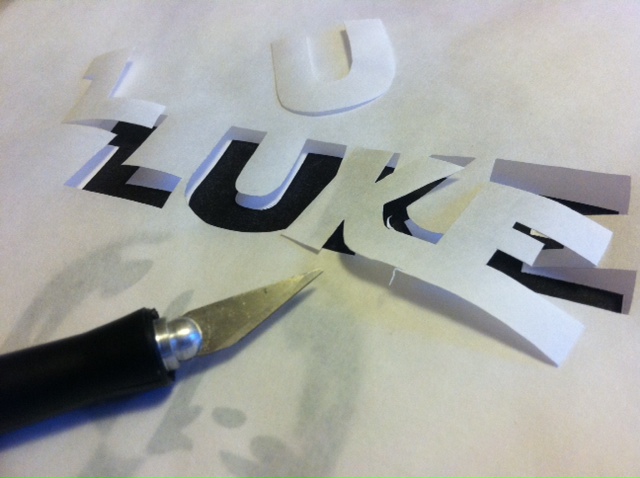
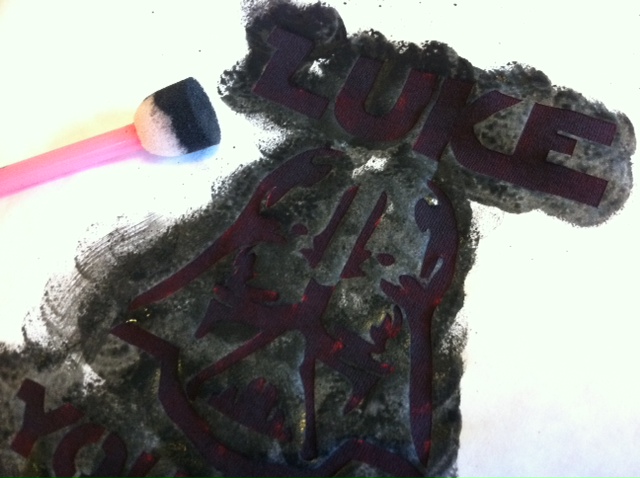
1. Lay your printout on the cutting mat and place a sheet of freezer paper, shiny side down, over it. Trace the darkened pieces with the craft knife to create the stencil. (Again, be sure to attach the center of any letters with holes to their outside framework to prevent parts of the letter from going missing — I used masking tape to fix a couple letters I botched!)

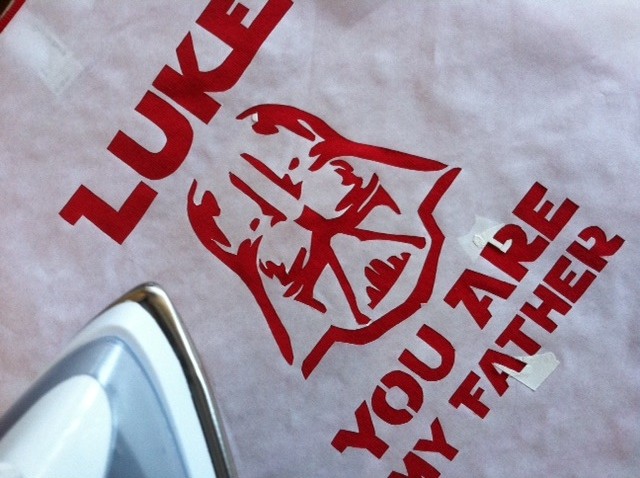
2. Lay the freezer paper stencil over the T-shirt, using the ruler to center it below the T-shirt neckline. Gently press it (oh-so-quickly!) with a warm the iron to temporarily secure it to the front of the T-shirt. Insert a scrap piece of paper between the front and back of the T-shirt to keep the paint from bleeding through.

3. Spray and/or sponge the paint over the stencil. Cover the entire stencil but be careful not to over-saturate the fabric with paint or it may bleed under the edges.

4. Let the paint dry and gently peel off the stencil. (And even with the best intentions, the paint may bleed a bit!)

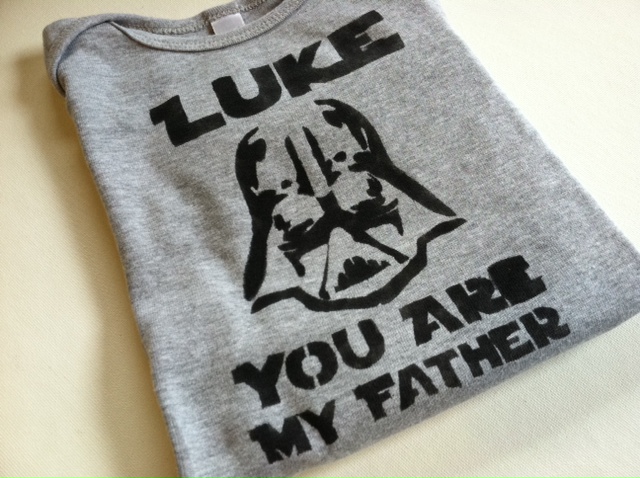
5. If the stencil is dry, reapply it to the next T-shirt and repeat! (We tried a version in gray, one size up, in long sleeves, for winter — because, hey, why not celebrate Father’s Day all year long?)

Happy Father’s Day from Generation T!

[ 2 Comments | Posted on June 17th, 2012 ]

More Fun

From Our Readers: Califia!

Califia, resident of California, blogger over at Spooning, and co-editor of the book Be Thrifty, reports that she has made three of the “Wild Thing” hooded blankets so far (#47 in Generation T: Beyond Fashion) — the most recent being gifted to her friend’s darling new baby, little Sabrina.

I think she looks mighty fierce in her pink and green ears, don’t you?

[ 2 Comments | Posted on June 13th, 2012 ]

Other Projects

How to: Make a Starter Embroidery Kit

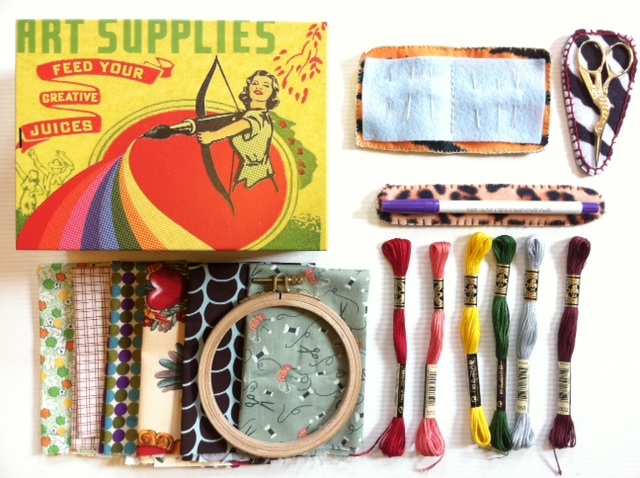
As you may know, my niece became very enthusiastic about embroidery over the holidays, and now that another very important holiday is upon us (her 6th birthday, of course!), I decided to put together a personalized “my first embroidery kit” for her. It has a combination of store-bought and handmade elements, so you can make your shopping and DIY lists accordingly.

Here’s what I included:
Tin box (or a basket, or a small tote bag)
-6 swatches of about 10″ by 10″ fabric (snipped from my own fabric stash — lots of geometric patterns for easy stitching)
-6 skeins of embroidery floss in different colors
-4″ wooden embroidery hoop
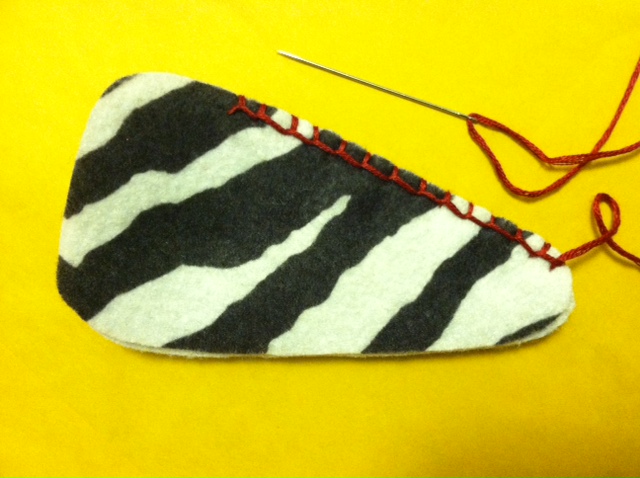
-Classic stork embroidery scissors and a felt sheath
-6 needles and a felt case
Disappearing ink pen and a felt sleeve

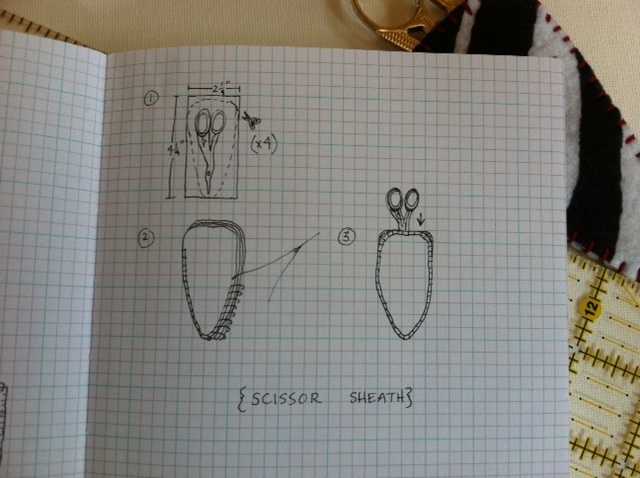
To make the scissor sheath, trace about 1/4″ to 1/2″ around the scissors on a piece of felt (tip: use the disappearing ink pen before packaging it up!). The shape should be approximately 4 1/4″ by 2 1/4 at its longest and widest.

Cut four matching pieces of felt using the tracing as your guide. If you’re using printed felt (with a right and a wrong side), pair off the four pieces, wrong sides together.

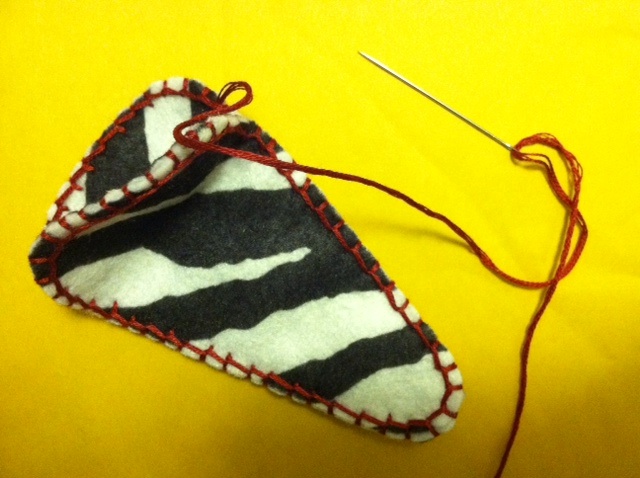
Then sandwich all four pieces together and blanket stitch along the edge with a contrasting color embroidery floss. Starting about 3/4″ from the top, stitch around the bottom of the sheath (where the point of the scissors will rest) through all four layers, then stop again on the other side, 3/4″ from the top.

Without tying off the thread, stitch through only two layers at a time to finish the edges at the top of the sheath (where the scissors will be inserted).

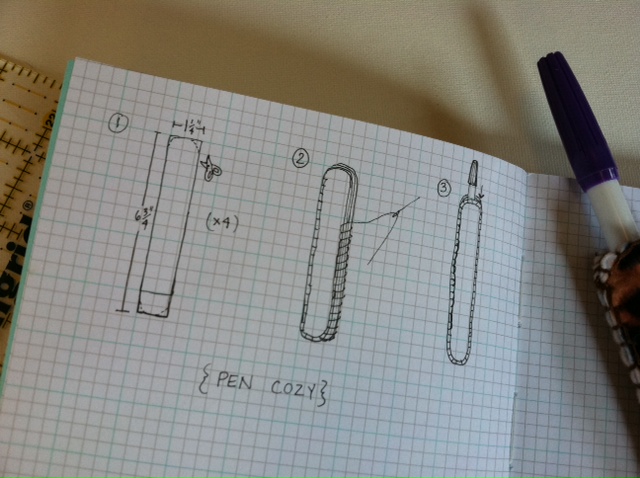
Tie off and snip the thread, and insert the scissors! Here’s a diagram from my sketchbook as a refresher:

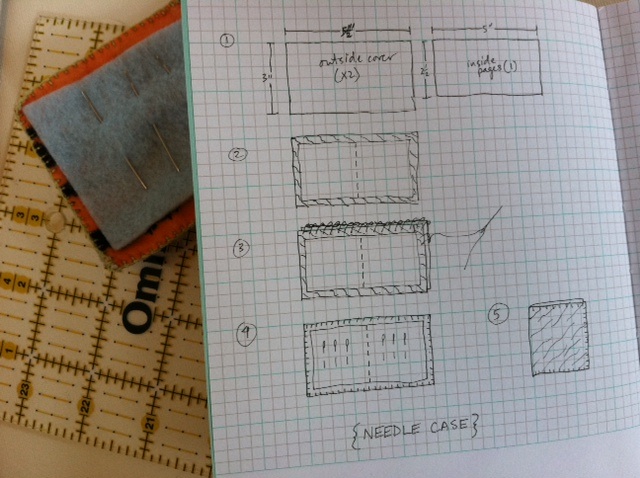
For the needle case, cut two 3″ by 5 1/2″ felt rectangles for the cover and one 2 1/2″ by 5″ rectangle for the inside page (1). Center the inside page on the right side of one of the larger rectangles and sew a straight running backstitch along the center to create the interior “spine” of the needle case (2). Then sandwich the second larger rectangle against the first, wrong sides together, and blanket stitch around the edges (3)! Arrange the needles onto the inside page (4), and fold the book closed (5).

For the disappearing ink pen sleeve/cozy, cut four pieces of 1 1/4″ by 6 3/4″ felt rectangles (1). Stack them together as you did the pieces of the scissor sheath and blanket stitch them the same way: through all four layers and then through just two layers at a time around the opening (2). Tie off the end, snip the thread, and insert the pen (3)!

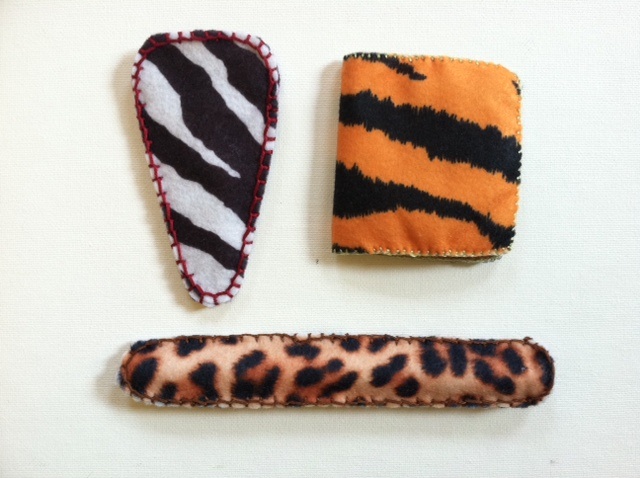
Here’s a look at the finished felt DIY components.

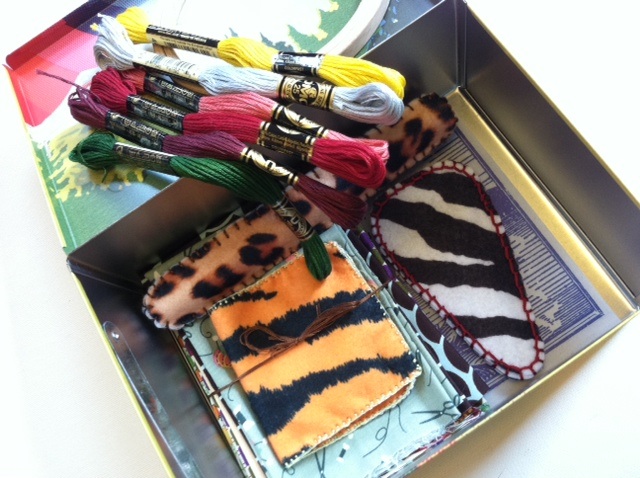
Then it’s time to assemble everything. Make sure it looks nice and neat — because it’s likely the last time it’ll look that way!

What would you put in a first embroidery kit? I thought about some iron-on patterns, but for now I think she’s at the stage where she’s experimenting and doing her own thing (but I’ve got my eye on this one for future gifting!). I also thought about including a stitch card (there’s a tear-out one from this book and I was tempted to include the one from my copy).

[ 4 Comments | Posted on June 7th, 2012 ]

T-shirt Projects

T-shirt Spiral Statement Earrings

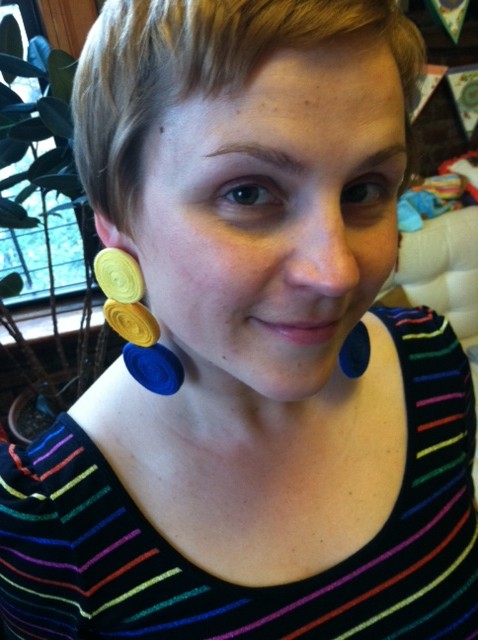
Ages ago, I promised variations on my Softie Spiral Headband made from T-shirt coils. Well, at long last, here’s one take — a pair of colorful, bold, statement earrings. As a DIY project, they’re a nice alternative to the headband (if you’re too impatient or too short on time to make all the coils required for the bigger project!).

Materials:
-T-shirt scraps in different colors (T-shirt hems with the stitching cut off are perfect!)
-Fabric scissors
Aleene’s Fabric Fusion or similar fabric adhesive
-Ruler
-1 pair earring posts and backs
Aleene’s Jewel-It Embellishing Glue or similar jewelry adhesive

Make It:
Simply follow the instructions for making a T-shirt coil in the spiral headband tutorial. Make three pairs of same-sized and like-colored coils. (In this example, that means: two matching blue coils, two matching gold coils, and two matching pail yellow coils.)

To make sure that the two blue coils end up the same size, start by cutting the T-shirt strips to the same length. The top coil in the earring should be the smallest, with each coil getting gradually larger as you move down the length of the earring (the yellow one is about 1 3/8″ in diameter, the gold one is about 1 1/2″, and the blue one is about 1 3/4″).

Use the Fabric Fusion to glue the coils in a row, rotating the coils so that the ends of the T-shirt strips get “buried” in the seam. Then glue an earring post to each of the small coils (close to the edge, at the top of the earring, as shown) using the jewelry glue.

Allow the glue to set completely, then attach the earring backings, and you’re ready to wear or gift them!

Note: If these earrings are too big for your style (they do measure about 4.5″ long), you can make them smaller — just keep the same basic ratio between the sizes. Alternatively, you can make single coil earring studs for an even faster result!

[ 1 Comment | Posted on June 4th, 2012 ]

T-shirt Projects

Rookie Turns a T-shirt into a Mod Dress!

How cute is this? Learn how to stitch up this black and white mod dress by Marlena Pope over at RookieMag! I love the styling, too — red-red lips really pop with the black and white geometry of it all.

I’m thinking color wheel opposites could be fun couplings instead of the black and white — orange and blue, maybe? or yellow and violet!

Photo via RookieMag.

[ 1 Comment | Posted on May 24th, 2012 ]

T-shirt Projects

I-Love-the-’80s Fringe Fabulous T-shirts

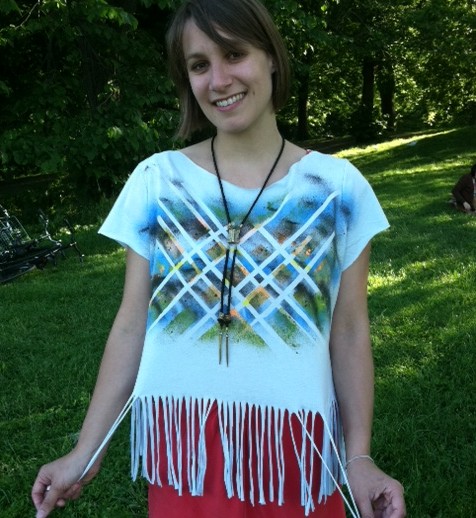
It’s springtime, which means one thing to me: T-shirt weather! It’s an exciting time here in the Land of Generation T, because as many of you know, it only gets better: After spring comes summer, which means we all get a little more scantily clad — T-shirts turn into tank tops and tube tops and ooh-la-la! So grab your scissors (to cut away some of that extra fabric, of course), crank up the color (bring on those fabric spray paints), and hop in your fabulous fashion time machine, because fringe is enjoying a bit of a renaissance this season. Last weekend, I dialed back the decades and dug into my craft stash to make some classic ’80s-inspired geometric tees.
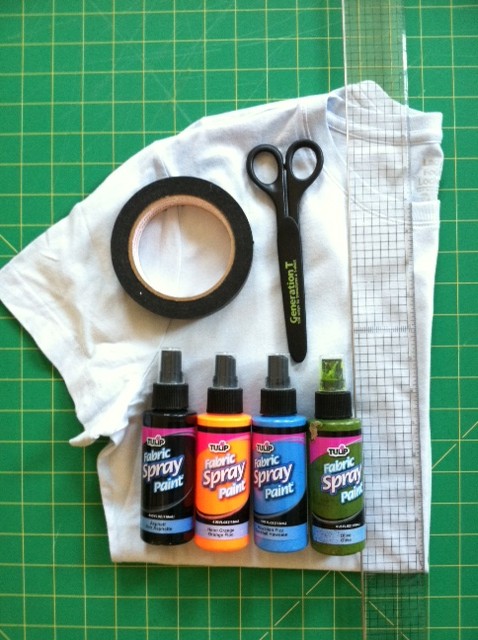
Materials:

-light-colored T-shirt (I used a light blue one)
-ruler

-masking tape
fabric scissors
fabric spray paint (variety of colors)
-scrap newsprint paper

Make it:

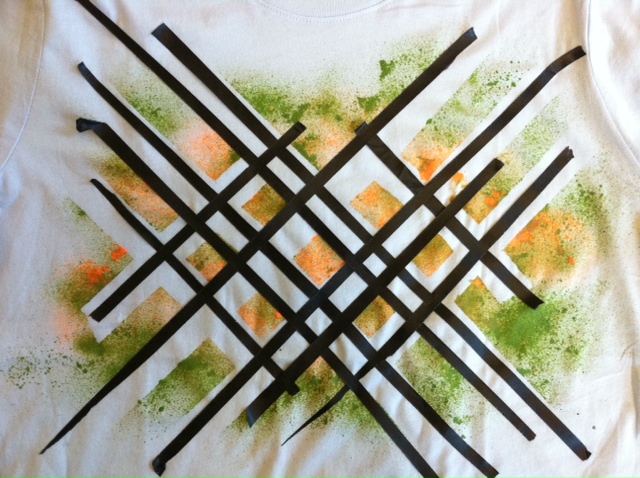
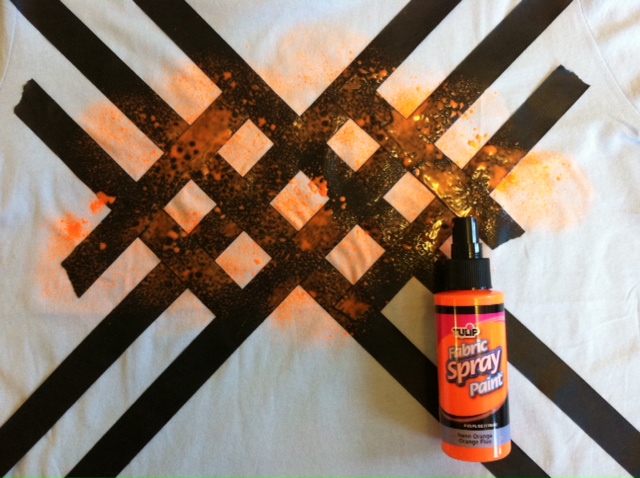
1. Lay the T-shirt flat. Use masking tape to mark a horizontal line about 8″ up from the bottom of the shirt. Find the vertical center of the shirt and apply tape to the chest-region of the T-shirt to create a crisscrossing geometric pattern.

2. Insert the newsprint paper between the layers of the T-shirt to prevent the paint from bleeding through. Then apply fabric spray paint over the taped area. Apply another color or two, then let dry.

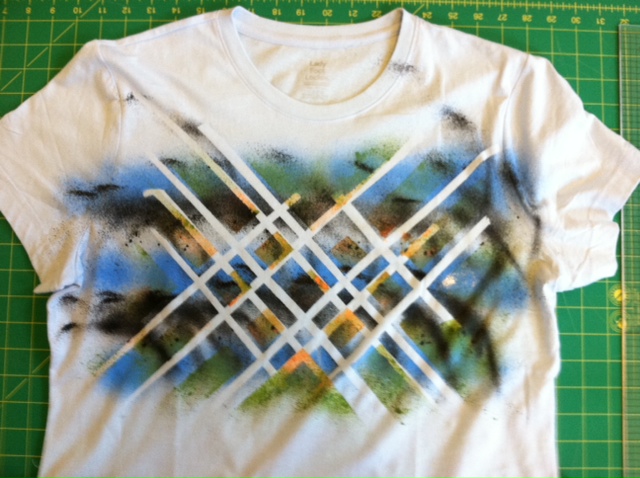
3. Peel back the tape, and then lay down more tape (I cut the tape strips in half, thirds, and quarters to make thinner lines) across your pattern to create a modified plaid pattern. Then spray paint more color!

4. Let dry completely before peeling off the tape to reveal your design.

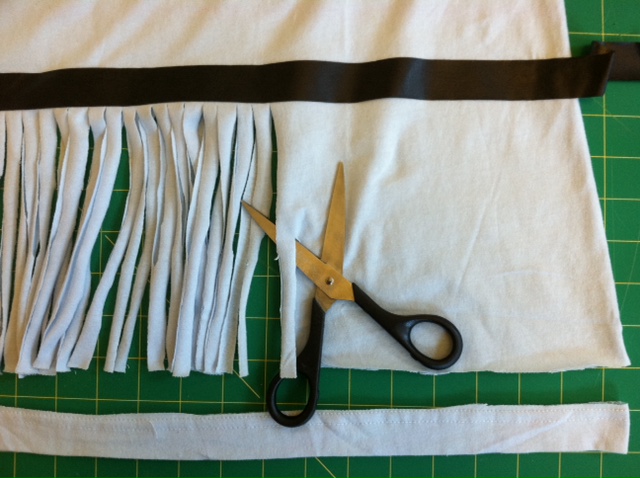
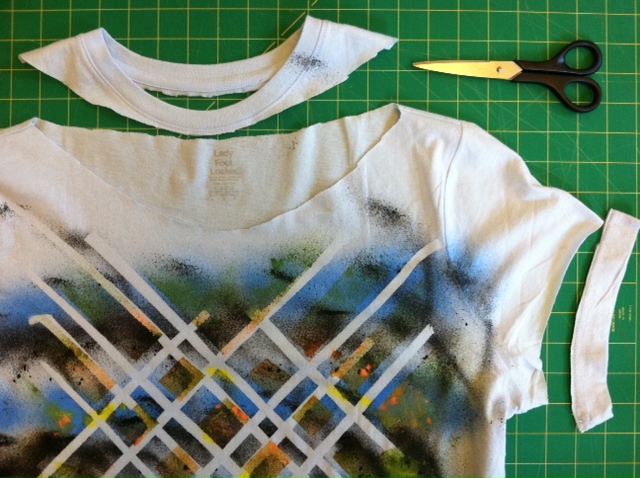
5. Cut off the bottom hem of the T-shirt, just above the stitching. Then, using the tape marker you pressed down in step 1 as your guide, cut 1/3″- to 1/2″-wide fringe from the bottom edge of the shirt.

6. Cut off the sleeve hems, just above the stitching, and cut out the neckband, just below the neckband edge in the front and the back, and about 2″ wider on the sides.

7. Gently tug on the fringe to stretch it out (the fabric edges will curl in). Try it on!

8. Grab up additional T-shirts and experiment with your paint patterns and fringe — cut it on a diagonal, in a chevron-inspired V-shape, make it long or short!

Then pack a picnic, sling your boombox over your shoulder, and turn up any of the decade’s Billboard hits!


[ 5 Comments | Posted on May 22nd, 2012 ]

More Fun

Building Gets a Fashion Makeover

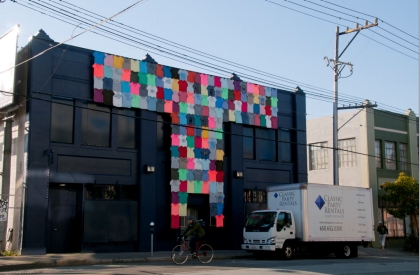
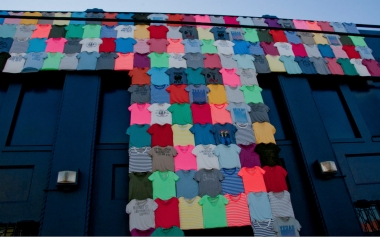
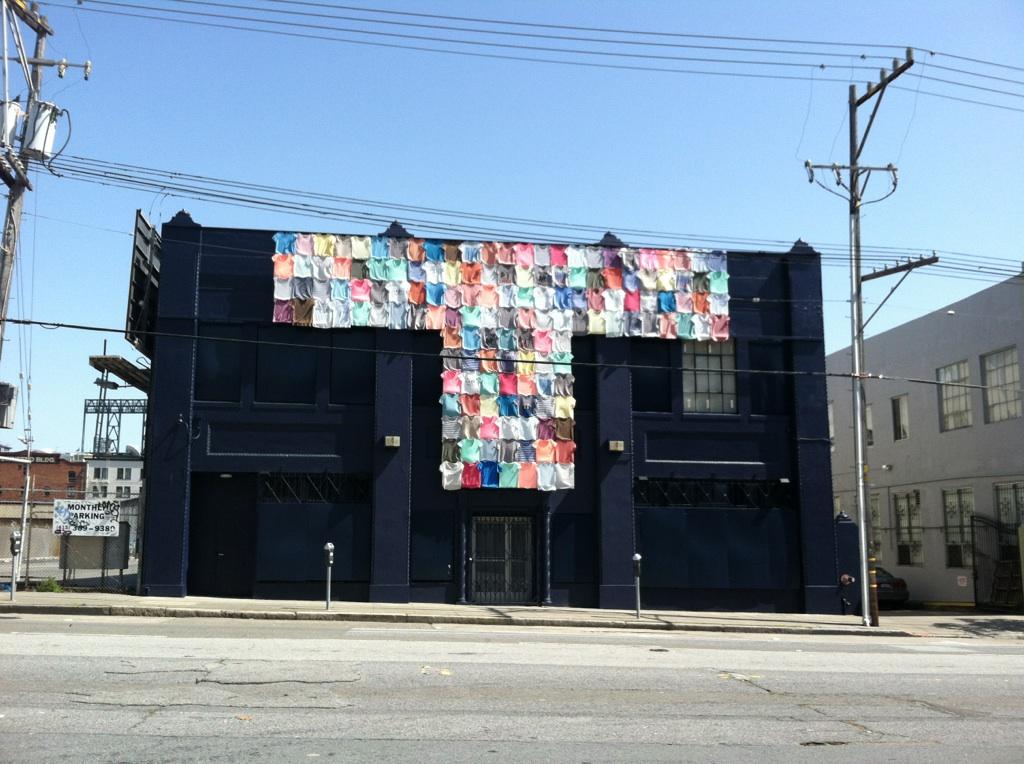
A Gap Inc. building in San Francisco, California got a fashion makeover recently —  all decked out in that super-soft staple we all love — T-shirts! It appears have been draped in 170 T-shirts, to be exact, making it casual Friday for the actual office itself!

What do you think of the season’s new colors and patterns? It looks like lots of neon, stripes, and jewel tones!

Photos via the Gap Inc. blog and my sister, Ariana (who happened to be driving by the other day — it looks like a few T-shirts have been snagged from the display since the original photos were taken) .

[ 2 Comments | Posted on May 4th, 2012 ]

Adventures

Tee Party at the American Folk Art Museum

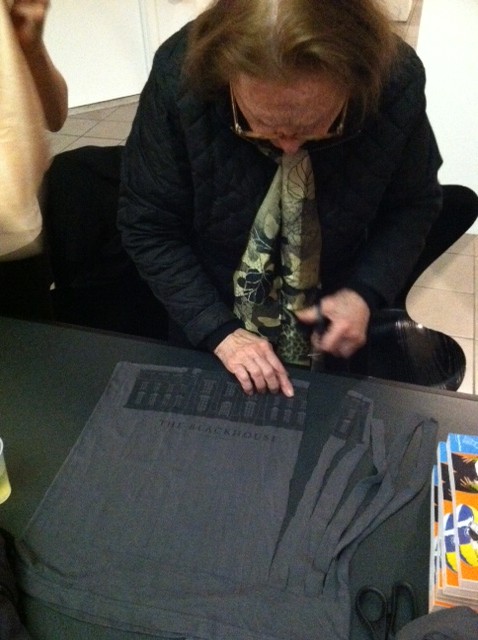
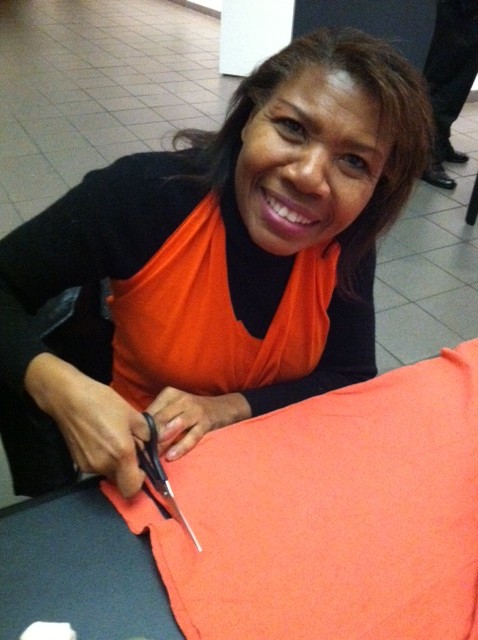
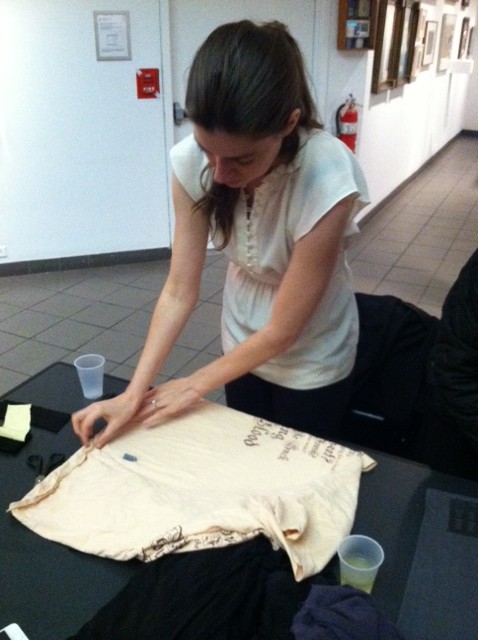
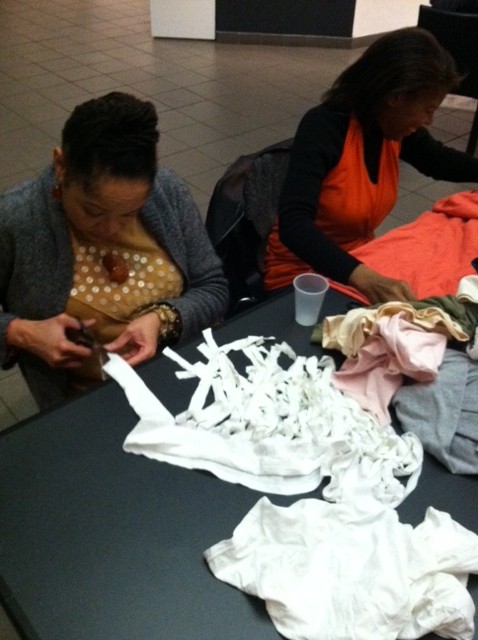
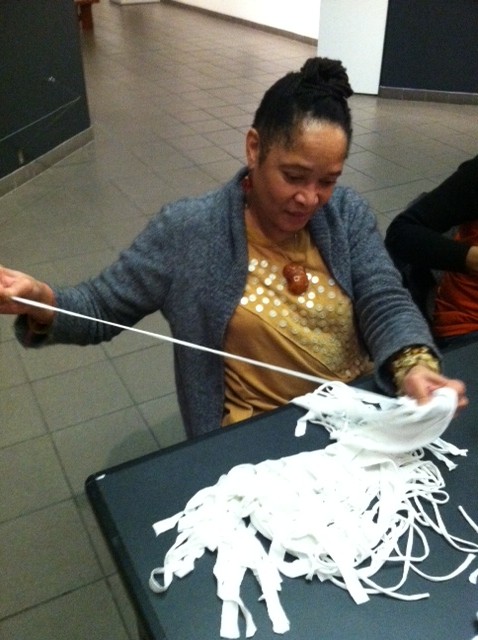
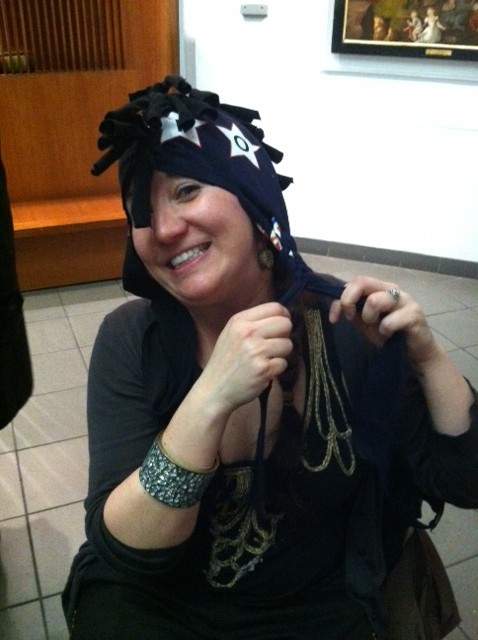
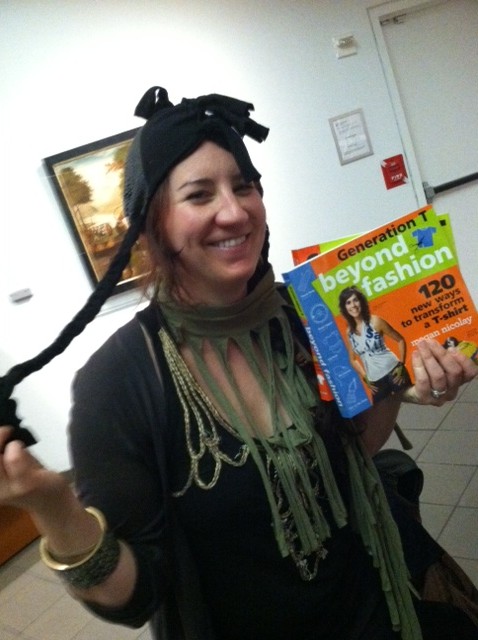
A very belated report on the Tee Party at the American Folk Museum in New York City a few weeks ago. Refashionistas of all ages came out for the festivities and FUN. But, really, any combination of T-shirts + scissors + good company + a bottle of wine is a golden equation for a cozy and creative evening! We made scarves, halter tops, tees, and hats. Just check out the scene below.
One lovely fashionista marked and cut fringe for a fabulous scarf. Cheryl, one of my models for the evening (note the fetching no-sew Pinup Girl halter top she’s wearing! — project #1 from Generation T: Beyond Fashion) started snipping up another colorful tee.

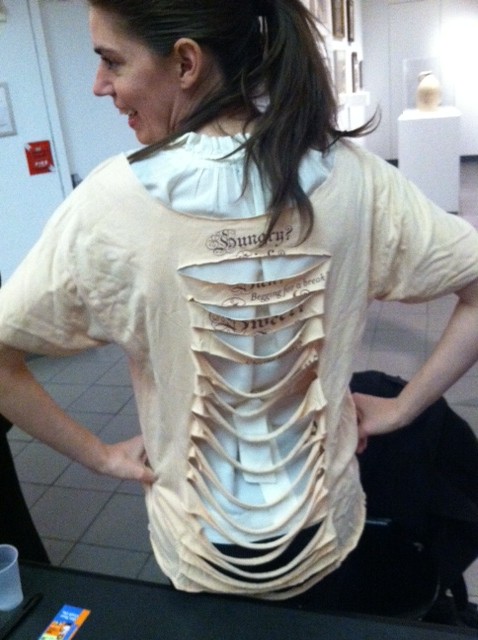
Here, another fab fashionista aligns her T-shirt before making the cuts… and ta-da! She opted to stop there on the Back In Action tee (#101 Generation T: Beyond Fashion).

Cheryl** (sitting next to Cheryl) cut, cut, cut her scarf (#88 “Mane-iac Scarf in Generation T: Beyond Fashion), and then stretchhhhed to complete the look.

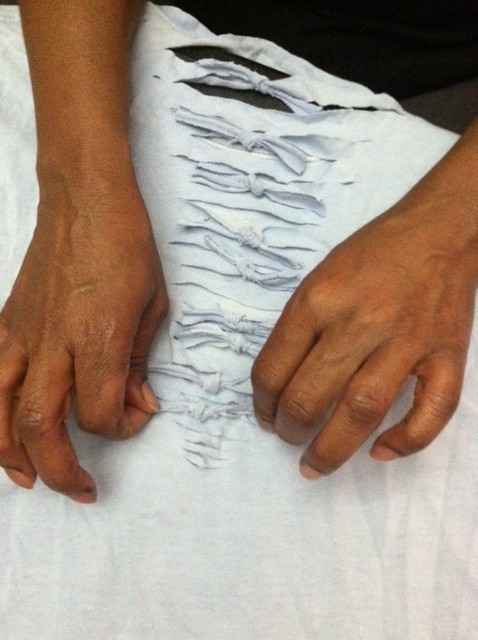
Crafty hands tied little knots… or made looped chains up the back of their tees.
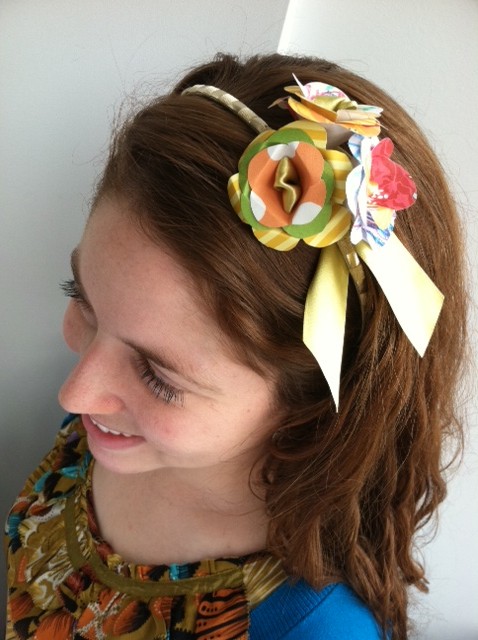
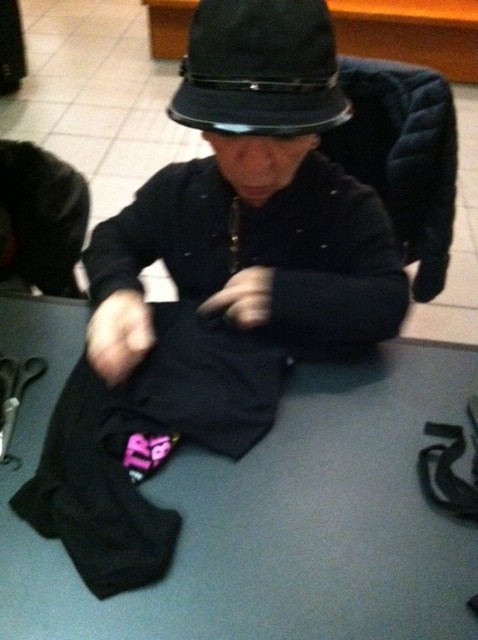
And thanks to our lovely host, Courtney, from the Folk Art Museum, for organizing the event. She’s such a multi-tasker that she actually braided her hat while she wore it! (Sometimes you just can’t wait until you’re finished before testing out a new DIY creation…)

**And, how cool is this: Cheryl (above, making the scarf) illustrated the instructions for my Generation T McCall’s pattern! Thank you, Cheryl, for your amazing work. I just love small town New York City! Stay tuned for the next Generation T Tee Party — you never know who will be there, but one thing is for sure: Summer is coming, which means warm weather and…T-SHIRTS!!!

[ Comments Off on Tee Party at the American Folk Art Museum | Posted on May 3rd, 2012 ]

Other Projects

I Love to Create: Paper Flowers 4 Ways!

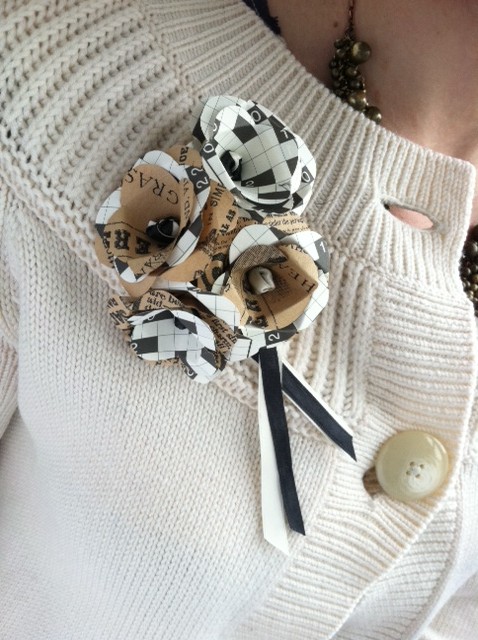
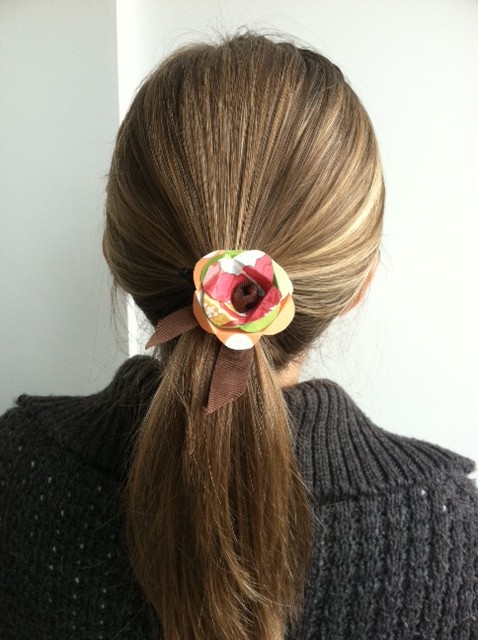
I’ve been playing with paper a lot lately over at my day job, so was inspired to dig into my own paper stash for this month’s iLoveToCreate project. With plenty of time until Mother’s Day, here’s a delicate flower that can be applied four different ways to create a non-wilting “bouquet” for her hand, her head, her hair, or her lapel.

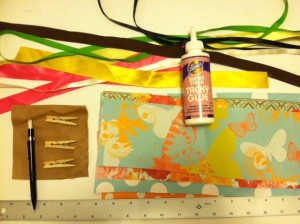
Materials:
-Paper scrap for template (brown paper bag or a sheet from the printer paper recycling) at least 3″ x 3″
-Decorative paper scraps (card stock, book pages, paper bags, thick wrapping paper, etc., in variety of colors)
-All-purpose scissors
Aleene’s Tacky Glue and clothespins OR Aleene’s Tacky Dot Rolls
-Pencil
-Ruler
-Ribbon of varying colors, widths, and lengths

Make It:
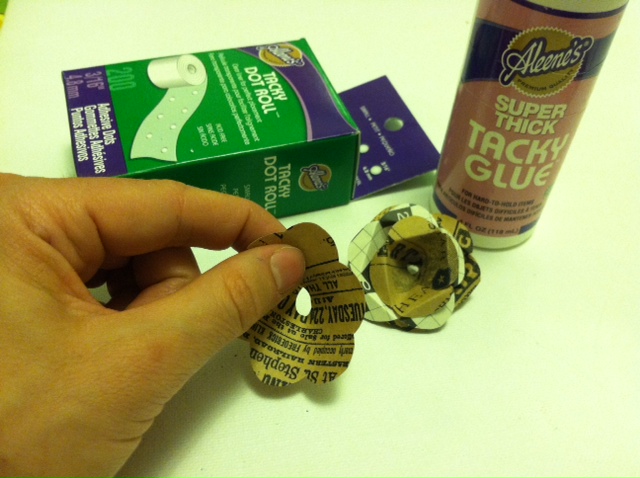
1. Fold the paper scrap in half three times to create a folded “wedge.” Cut a curved edge about 1 1/4″ from the point.

2. Unfold the template (it’ll look a little like a four-leaf clover), lay it flat and trace it three times on one or more of the decorative paper scraps. Three tracings makes one flower.

3. Cut around the tracings to make three identical blossoms. Snip two straight lines into the center of the first blossom, cutting out a wedge equal to two “petals.” Cut three petals from the second blossom, and four petals from the third blossom. Mark and then cut a 1/4″ semicircle from the center of each blossom, as shown.

4. Curve each of the blossoms to the cut edges overlap a bit. Adhere with glue or dots, let dry if necessary, then fold back the tips of the petals.

5. To make a flower ring, nest the blossoms inside one another. Select a piece of ribbon, wrap it around your finger, and knot the ends so the loop fits your finger. Gently thread the loop through the center of the flower, so the knot catches and rests in the center of the flower. Trim the ends of the ribbon as desired.

6. Slip the loop over your finger and the ring is complete!

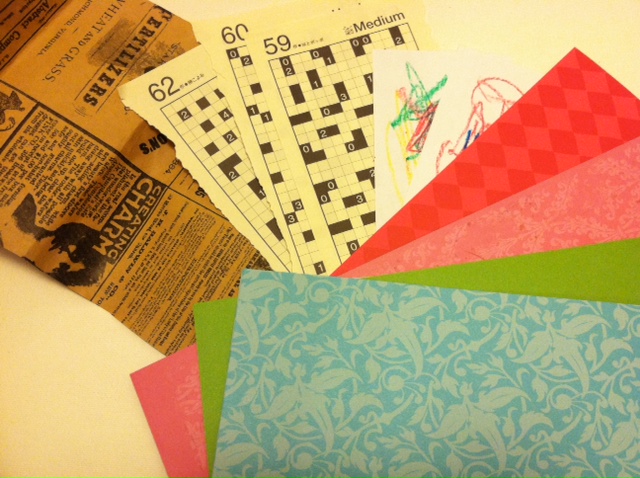
7. Return to your paper stash and repeat the process to make more! You can personalize your bloom using crayons and card stock (a sweet way for younger kids to get involved if it’s a Mother’s Day gift), go for a more muted geometric design using pages from an Japanese puzzle magazine, gather up some vintage appeal by cutting into that newspaper-printed paper gift bag, or simply dig into the scrapbooking scraps for some playful color.

8. Keep your flowers uniform and muted…

…or mix and match the colorful blossoms in a paper botany experiment!

9. To make the headband, brooch, or barrette, thread one end of the ribbon through the flower, back to front, knot it, and then thread the end back through the flower, front to back. Thread multiples together this way, too! Wrap the ends of the ribbon around the headband, brooch, or barrette base and glue or knot to secure it.

And now, the million-dollar question for the author of Generation T: Can you make these flowers with T-shirts? Absolutely! Substitute fabric glue for the adhesive, and trim the neckline of a shirt with these sweet little blooms.


[ Comments Off on I Love to Create: Paper Flowers 4 Ways! | Posted on April 24th, 2012 ]

Other Projects

iLoveToCreate: Upcycled Paperclip Necklace

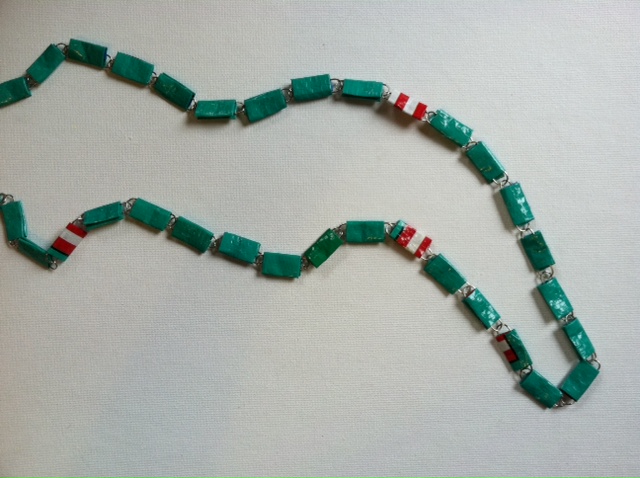
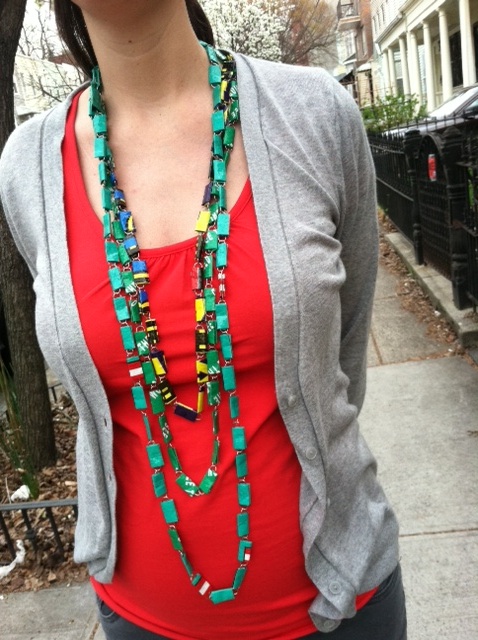
Here’s to a colorful and elegant twist on that old office cube classic: the paperclip chain. I was inspired to make it after spying a similar necklace that my friend Rebecca was wearing in the office a couple of weeks ago. When she told me that she scored the amazingly simple accessory while on vacation in Cambodia earlier this year, that’s when I experienced the creative flash of an I-could-so-make-that moment: Seeing as I won’t be able to afford travel to Cambodia anytime soon (I wish!), I decided to set out on a far more affordable trip…to the local 99-cent store.

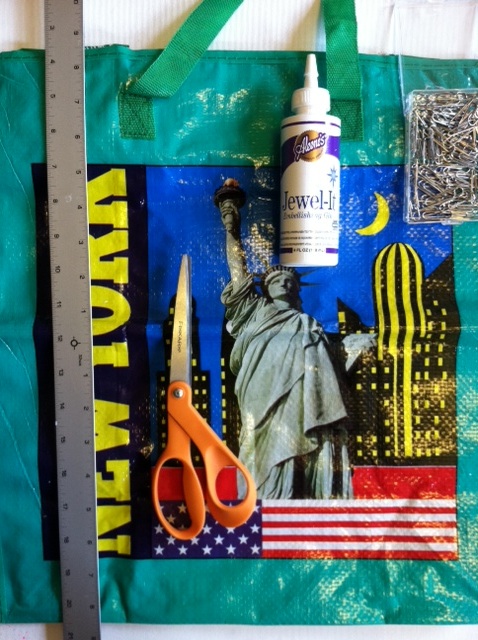
Materials:
-box of paperclips
-all-purpose scissors
-ruler
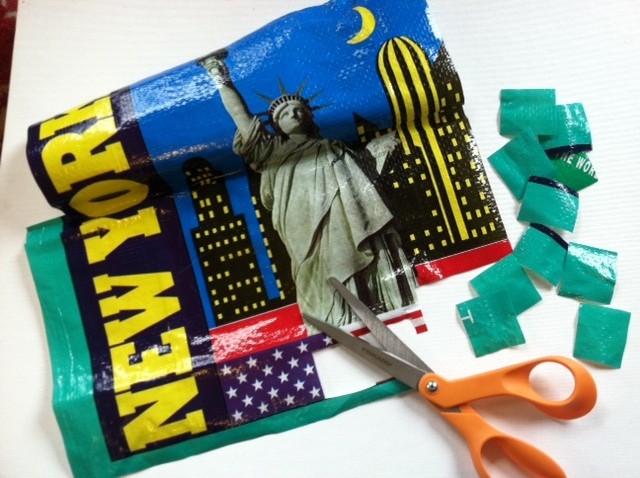
-woven plastic material (laundry bag from the dollar store, an Ikea shopping bag, all-purpose tarpaulin from the hardware store)*
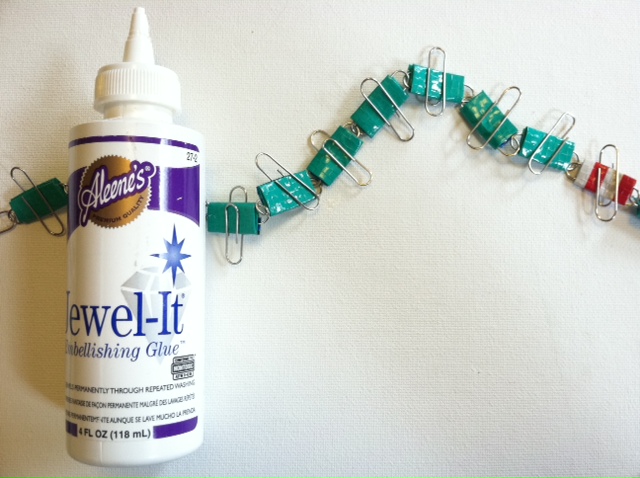
Aleene’s Jewel-It Embellishing Glue

Make it:
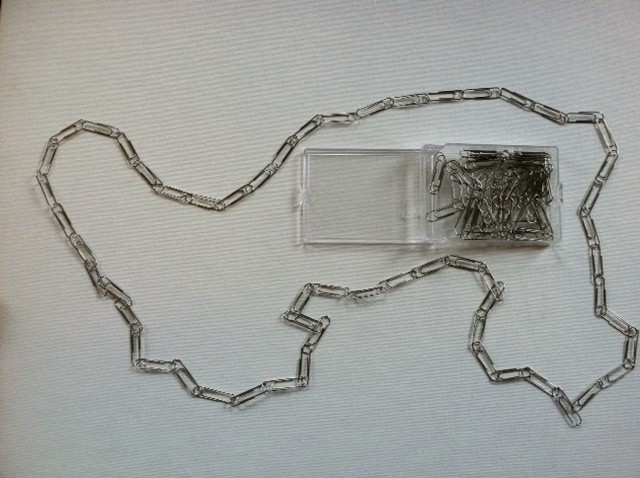
1. Link 38 to 48 paperclips in a chain. Hang the chain around your neck, see if you like the length, and add or subtract paperclips to your liking.

2. Measure and cut one 1 1/2″ by 1 1/4″ rectangle from the woven bag. Use that rectangle as a template to cut more rectangles. Cut as many rectangles as there are paperclips in your chain.

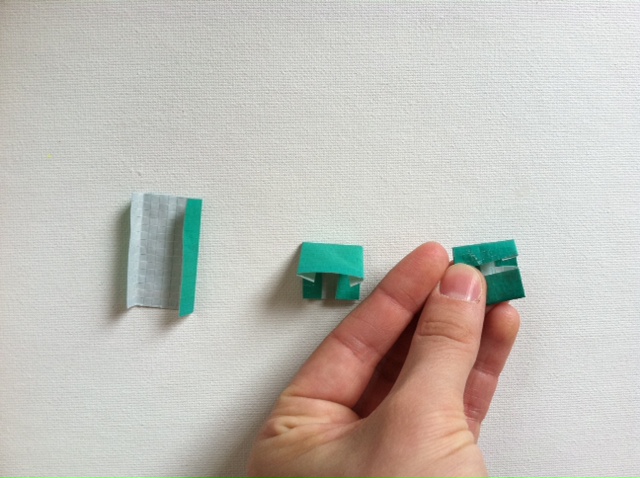
3. Select one rectangular piece. Fold the long sides in 1/4″ and crease. Then fold the piece in half lengthwise, crease it, and unfold. Fold the two short ends into the center line and crease again.

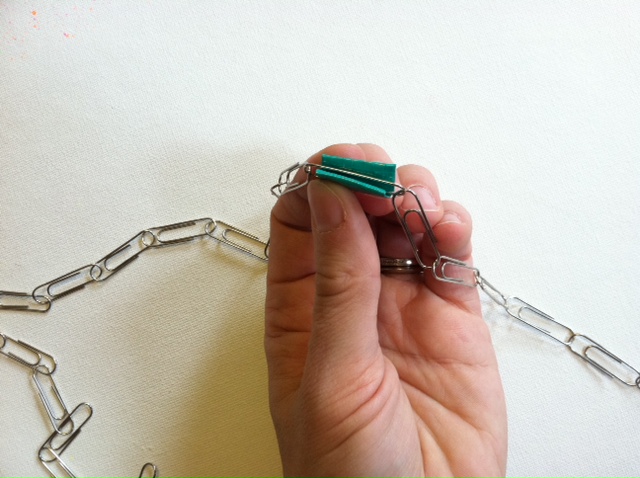
4. Refold the center crease, pinching the piece around the center of a paperclip in the chain to create a sort of “bead.”

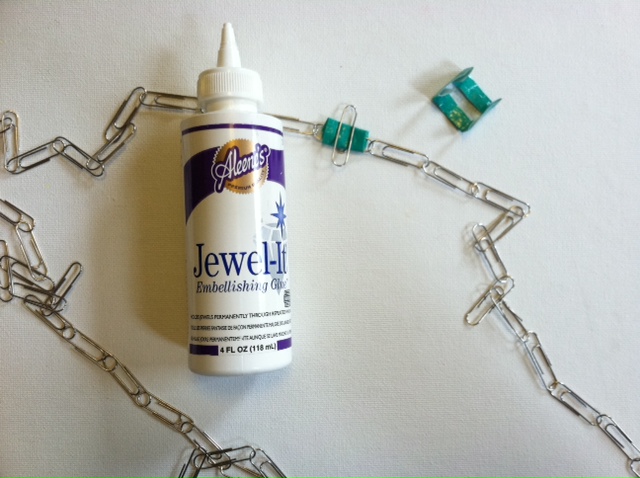
5. Squeeze the glue generously along the open edge (the motion is sort of like mustard on a hotdog). Pin it in place with a spare paperclip to dry.

6. Repeat with the remaining rectangular pieces until every link on the paper chain is covered by a bead. Let the beads dry completely before removing the spare paperclips.
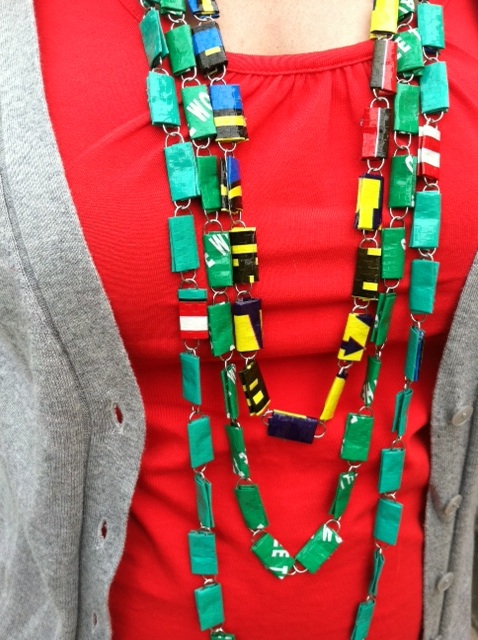
7. Remove the paperclips, touch up any finicky beads with an extra dab of glue, and repeat the entire process as many times as desired to create multiple colorful chains.
8. Drape them around your neck, and off you go.

Happy National Craft Month!

*Incidentally, these necklaces are made from the same sort of bags that Rami made his chic challenge-winning Project Runway All-Stars dollar store dress from, below! What a cool material to play with.

All photos by Megan Nicolay except for the Project Runway screenshot, via SheKnows.com.

[ 4 Comments | Posted on March 27th, 2012 ]