More Fun

From Our Readers: CC!

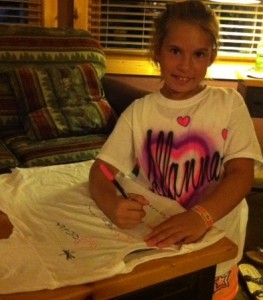
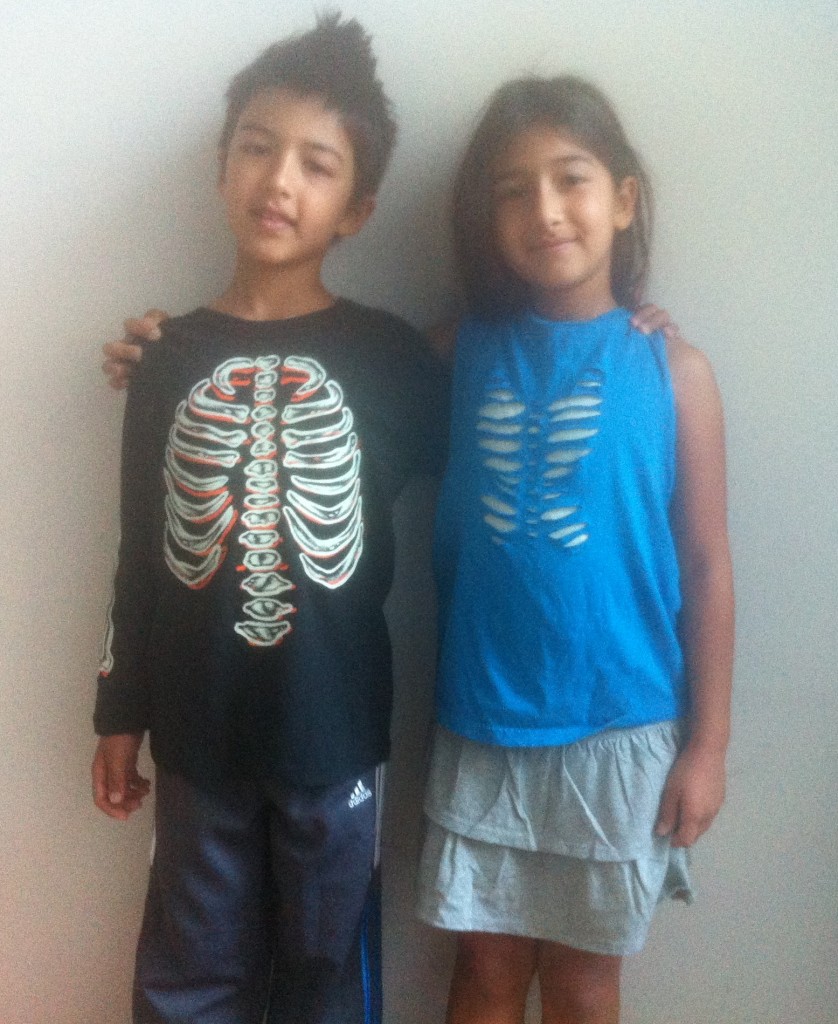
One of my favorite familial designations (big sister, mother, daughter, niece, cousin) is that of “Aunt.” So you can imagine my elation last week when I got an email from CC, another proud auntie who recently sent a copy of Generation T as part of a care package to her niece when an emergency appendectomy (!) threatened to derail the family vacation. Her niece (and nephew) were bummed about the change in course (who wants to go to the emergency room when you’re expecting a relaxing week on Cape Cod?) and Auntie CC had just the remedy. Needless to say, her gift was well-received: “I was on auntie cloud 9 when I got this photo. Thanks for making me look good!”

The young lady (standing here with her brother, who’s wearing a pretty cool T-shirt himself) was so proud of the butterfly slashed tee she made (variation on project #2 Brokenhearted in Generation T that we all hearted so much last month) that she selected it to wear on her first day of school. Now that, my friends, is quite the compliment!

She used the same technique as you would for the slashed heart, but simply used the outline of a butterfly as a guide instead. The great thing about this look is she can change the color of her tank top underneath and change the color of her butterfly — orange for a monarch or yellow for a tiger swallowtail.

Happy back-to-school!

[ Comments Off on From Our Readers: CC! | Posted on September 7th, 2012 ]

T-shirt Projects

iLoveToCreate: Back to (Pre)School Tees!

Whether your wee ones are heading back to daycare this fall or are college-bound (not so wee ones), it’s always a treat to have fresh togs to celebrate the occasion — learning! Yes! When I was brainstorming ideas for dressing my little one, I was inspired to try out my shiny new Tulip ScreenIt machine (unlike paper stencils that can wilt a bit after a few uses with soggy paint, you can print in bulk once you make a screen that you like! — I’m stashing that thought away for future birthday party favors…) For this one, I riffed on a little ditty I penned last year to the beat of the esteemed Sir Mix-A-Lot with a nod, of course, to the toddler set and their literary repertoire.
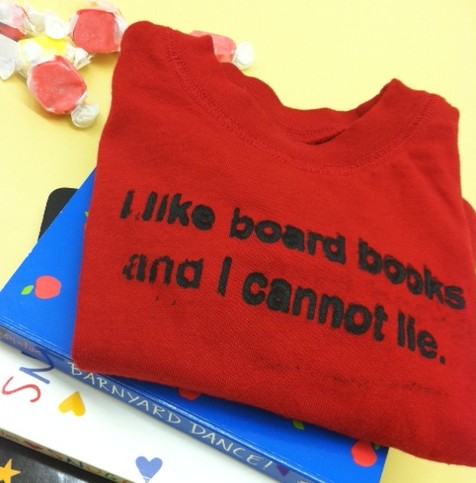
Materials:
Tulip ScreenIt kit (including fabric ink/paint, brayer, design screens, and a darkroom bulb to install in your workspace)
-8 1/2″ x 11″ sheet of printer paper with black design printed on it (“I like board books and I cannot lie.” in Arial font, size 54)
-tub of water large enough to accommodate the screen
-non-abrasive sponge
-plastic covering for your work surface
-blank T-shirts in the appropriate size
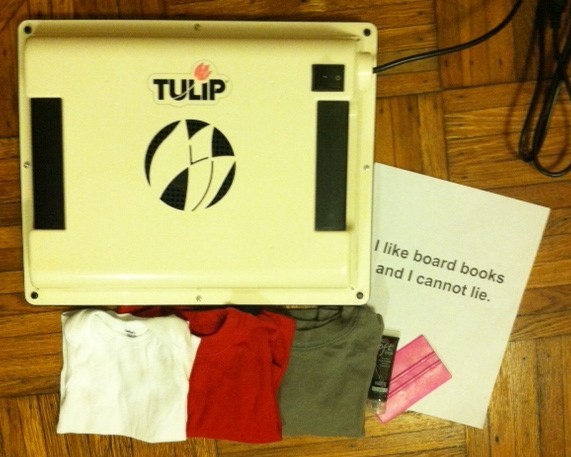
Make it:
1. In a totally light tight room (my bathroom is the only room in my apartment that qualifies, so welcome to my bathroom, dear readers!), place one of the blank screens onto the foam bed, then layer your design face down on top of it.  Close the ScreenIt system, sandwiching your design and the screen between the foam bed and the light lid. Then flip the switch on the system to expose the screen to your design. (I set my smart phone timer to 14 minutes.)
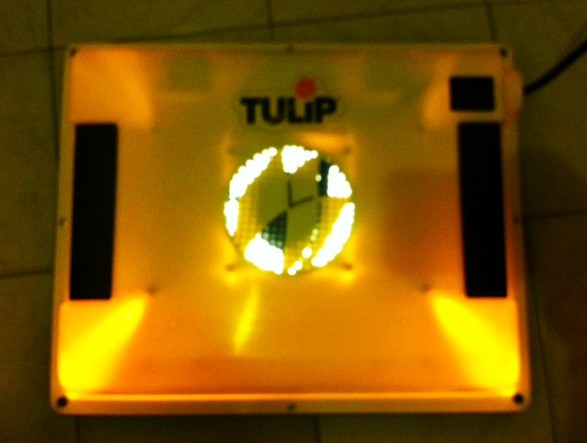
2. When the timer goes off, briefly submerge the film completely in water (since we’re getting so well acquainted, welcome to my bathtub!). I left the darkroom light on (that’s the yellow tinge you see), but it’s safe to turn on the regular overhead light at this stage.
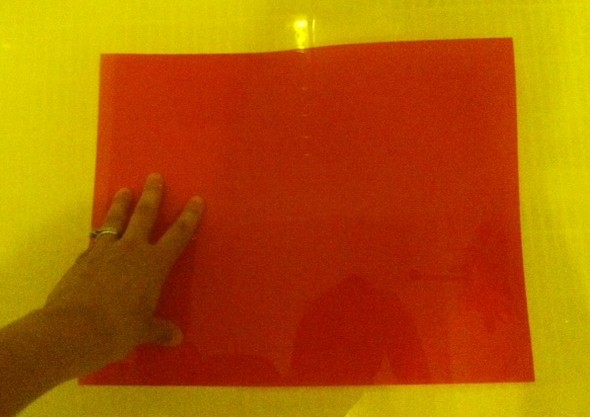
3. Place the screen on a flat, dry, plastic-covered surface for 30 seconds, then begin gently rubbing a wet sponge over the design to “bring out” the design and clarify it. (Note: I didn’t have a sponge, so I used a wadded up wet paper towel, which isn’t ideal, but can work in a pinch.) Let it dry completely (about 45 minutes to 1 hour).
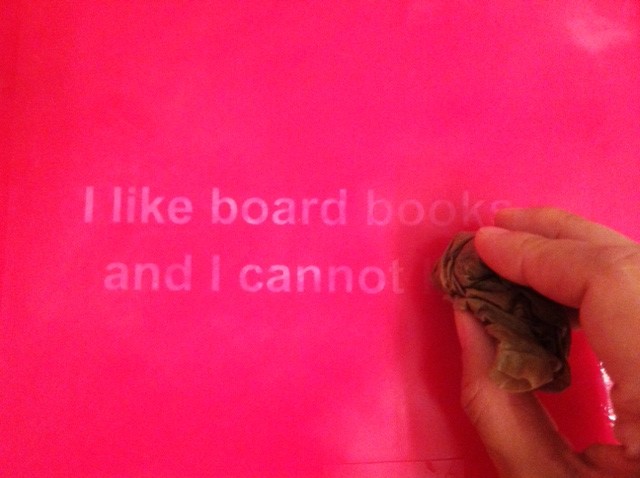
4. Slide the T-shirt over the foam bed of the machine, centering it as best you can.
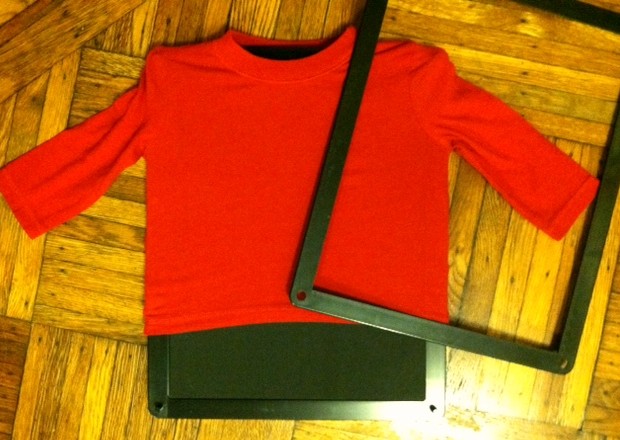
5. Place the design screen (right-reading, if you use text like I did) and then the black frame over the design, to keep the shirt and screen from shifting. (Note: Because of the size of the shirt I used — very tiny! — and the placement of the design on the screen, there was overlap, making the screen not entirely secure.)
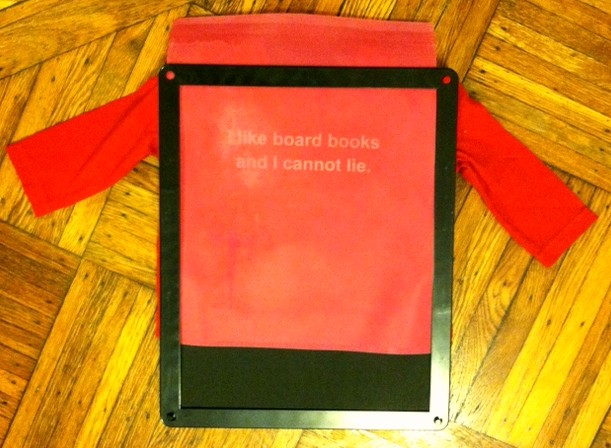
6. Apply a thin line of ink directly to the screen, along one side of the design.

7. Use the brayer to firmly spread the ink over the entire design, always swiping in the same direction.
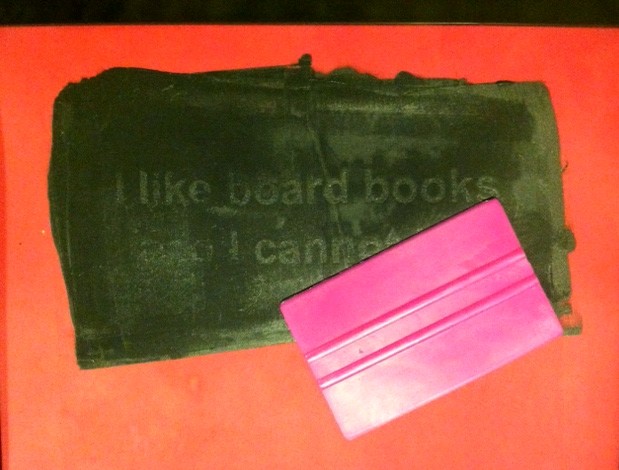
8. Remove the black frame and peel back the design screen. Rinse the screen immediately, without scrubbing it, so that you can let it dry and use it again. (As you can see, mine smudged a bit because the screen shifted slightly because of the small tee, but I think it just looks a little raw and edgier!)
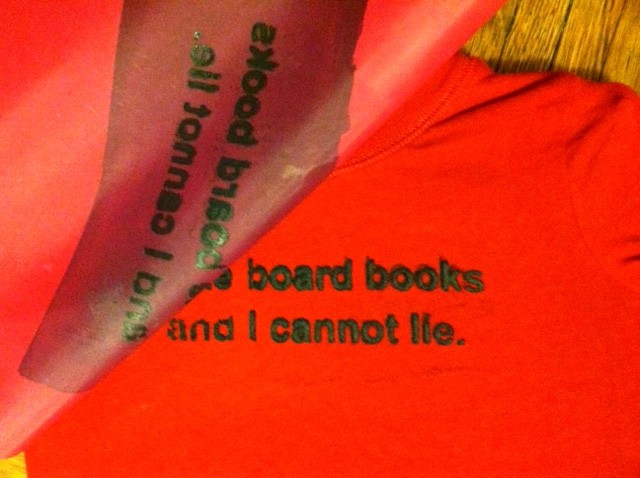
9. Let the shirt dry completely — about 4 hours (no heat-setting required) — and then dress your studious little guy or gal for success!
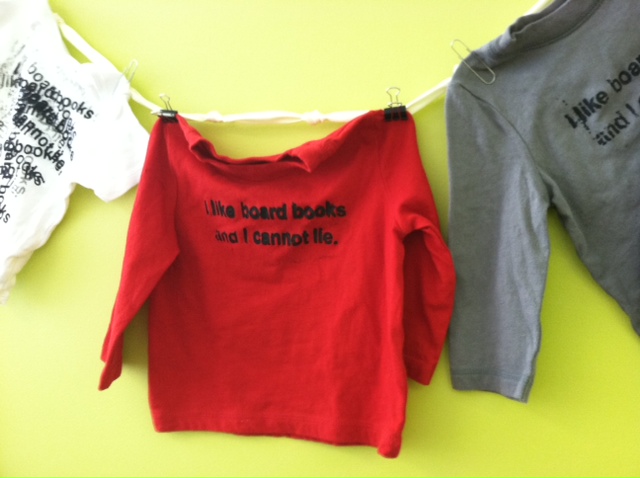
Variations:
-Since your screen can be used up to 75 times (I haven’t tested this!) if you rinse it immediately after using it (don’t scrub it!), try printing the same design on multiple different items. Print the design across the tush of a pair of pants for a crawler, or down the leg for a little one who’s walking. Print on bandanas, skirts, jackets, shoes and socks, even!
-Use your screen as a pattern that can be layered and repeated (see the white T-shirt in the photo above) — this is especially smart for when it smudges a little too much — just go with the mistake and turn it right around into something great!


[ 8 Comments | Posted on August 28th, 2012 ]

Adventures

A Spot of Tee: Skully T-shirt!
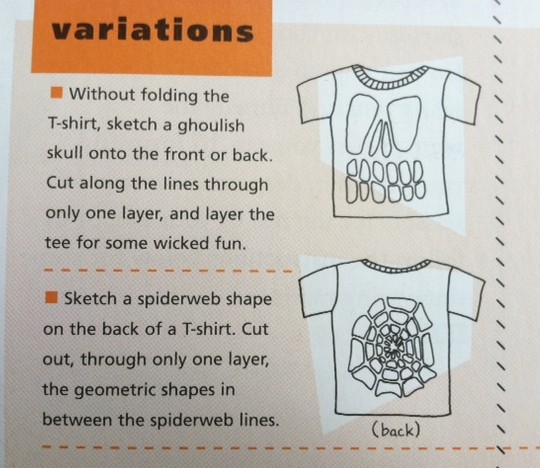
It’s Monday, and we’re back with our A Spot of Tee feature! Despite it having been June when I spotted this this skully tee (Halloween = 4 months away!), I actually spotted  it twice over a period of three days. Once in Prospect Park, Brooklyn at a BBQ (paired with some amazing platform sneakers — oh, how I wish I had the camera for those), and once here:
Where: F train Platform, West 4th Street Station, NYC
When:
June 2012
What:
Skully Tee
Key accessories: Denim shorts, fringed leather, (optional: platform sneaks!)
How do I get the look?: See the image below from page 35 in Generation T: Beyond Fashion (with a bonus spiderweb tee!), or click here for a tutorial via Hurley.

What, oh, what will we spot next…?

[ Comments Off on A Spot of Tee: Skully T-shirt! | Posted on August 13th, 2012 ]

T-shirt Projects

How-to: Olympic Gold Medal T-shirt

Team USA turned in some impressive performances yesterday (don’t worry, no spoilers on Friday’s events in case anyone’s got the DVR set), with a day-end NINE total medals including gold in women’s soccer (redemption!), women’s middleweight boxing (all hail Claressa Shields — what a story!), women’s water polo (Maggie Steffens, yes!), men’s triple jump (Christian Taylor), and men’s decathlon (Ashton Eaton and his teammate Trey Hardee for the 1-2!). With all that excitement, it’s hard not to get caught up in the Olympic fever. I know I am.

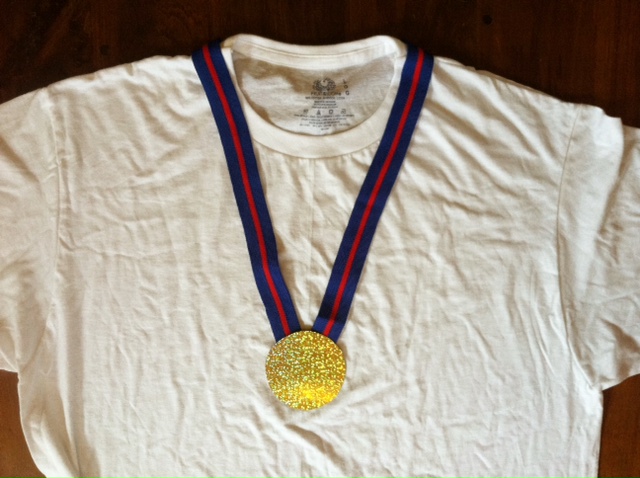
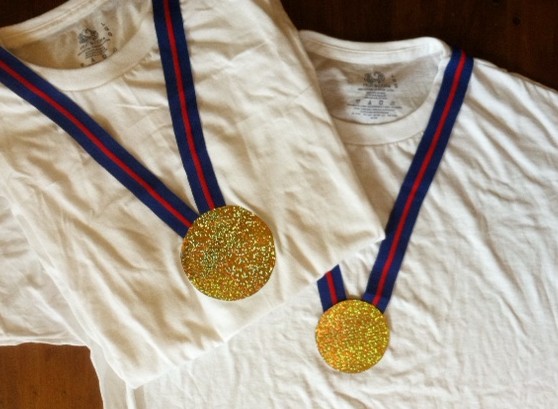
Here’s a quick-and-easy T-shirt project to get you on the medal podium–at least in spirit! (No grueling hours/days/years of training required.) Just in time for the closing ceremonies, here’s a trompe l’oeil gold medal to wear for the closing ceremony. (Note: Six-pack abs underneath the T-shirt not included.)

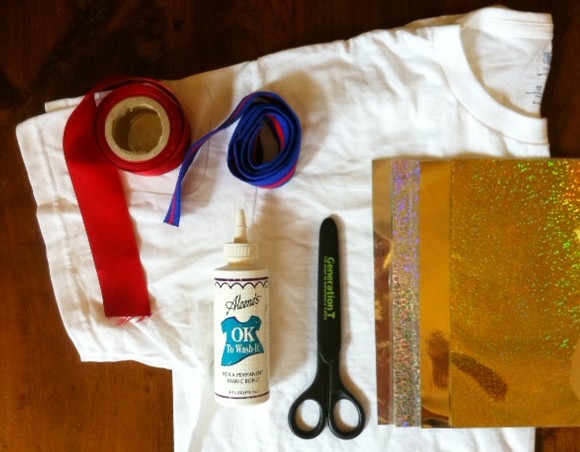
Materials:
-Plain T-shirt
-Ribbon or other colorful trim (at least 3/4″ wide)
Fabric Glue
Iron-on Metallic Glitter Sheets
-Iron
-Scissors

Make it:

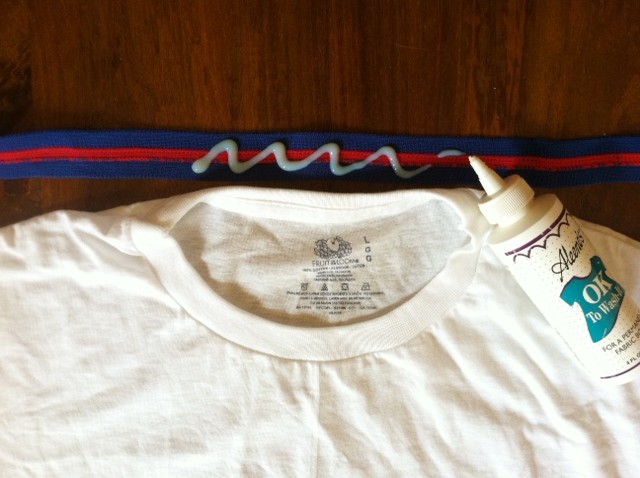
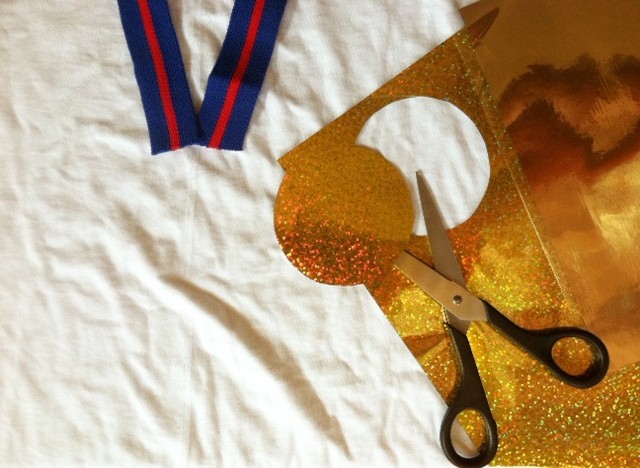
1. Squeeze a generous amount of fabric glue, centered, along the wrong side of the ribbon and press it against the back of the T-shirt neckband.

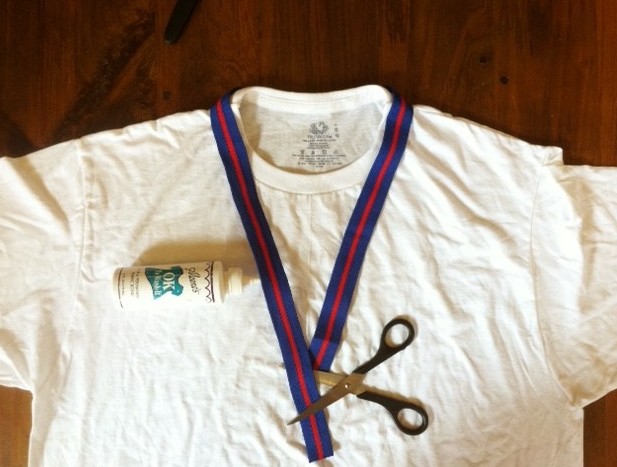
2. Wrap the ends of the ribbon around to the front of the shirt and glue them in place. Use fabric scissors to trim the ends of the ribbon so they’re even.

3. Trace and cut a 2″ to 3″ diameter circle from the gold iron-on sheet (I chose glitter gold over shimmer gold for the extra sparkle–and there’s silver in the pack, too, but why settle for silver, when you can go for the gold!).

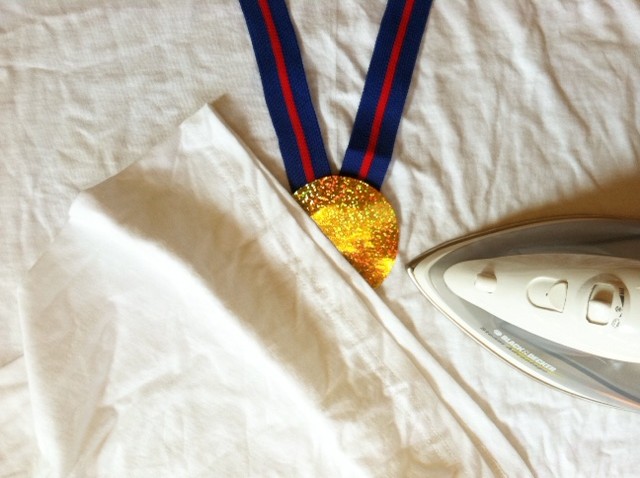
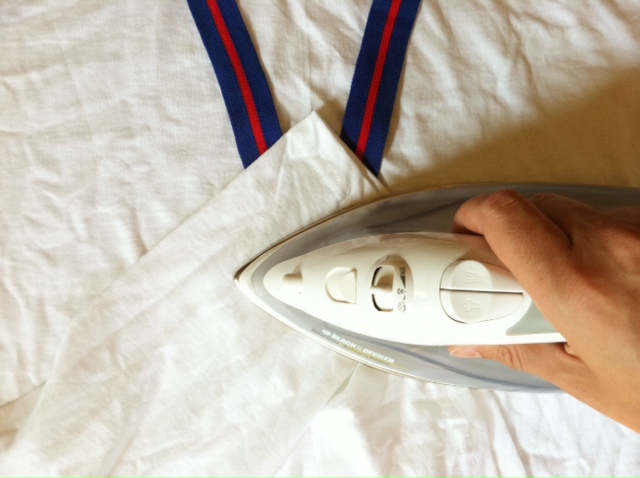
4. Place the gold circle on the T-shirt so it overlaps the ends of the ribbon. Being careful not to disturb the placement of the medallion, fold up the bottom of the T-shirt to use as a press cloth layer between the iron-on and the hot surface of the iron.

5. Press the circle in place with the iron, check that it’s secure, and press again if necessary.

6. Remove the iron (don’t forget to unplug it!), and try on your gold medal tee. Optional: Cut the sleeves of the shirt to your liking.

7. Repeat the process to make more T-shirts so all your friends and family who come over for the closing ceremony can parade around the living room!

Variation:
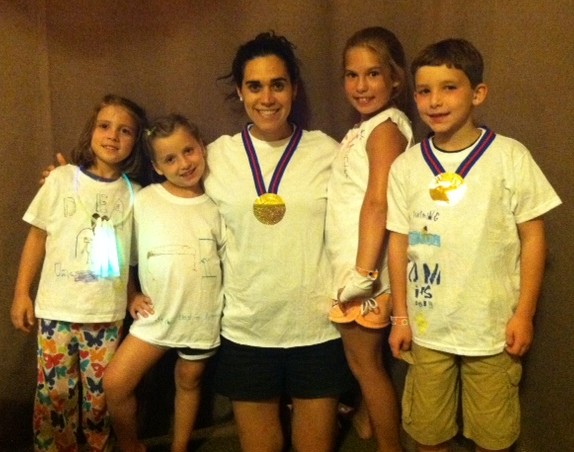
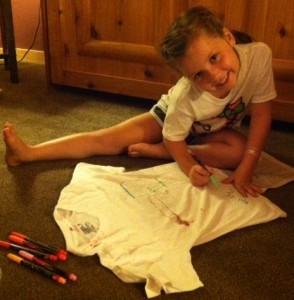
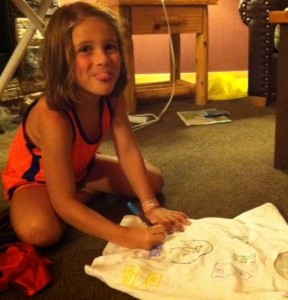
Decorate the T-shirts with fabric markers or slash them with scissors. I packed my markers on a recent trip to a family reunion so we could have an Olympic-themed T-shirt refashioning session with my young nieces/nephews/cousins. Dorothy opted for a glow-stick necklace in place of a gold medal, while Bri and Allanna were inspired by the US gymnasts who were competing via the TV screen while we crafted (go, Gabrielle Douglas!), and Tom is a big fan of the swimmers (he’ll have to make a few more of these tees to compete with Michael Phelps’ medal record!).

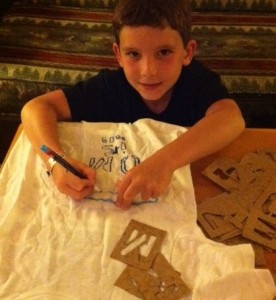
In addition to the fabric markers, we had letter stencils on hand to print out messages, and scissors on hand to modify and accessorize the tees. “Bri is the best at gymnastics” was lettered across Bri’s drawing of the balance beam and uneven bars. And “Swimming: TOM is good” accompanied Tom’s drawing of a freestyle swimmer (we also added iron-on lightning bolts to the sleeves!).

Allanna’s inspiring words were “#1 A True Gymnast Never Gives Up” and Dorothy’s initials personalized her T-shirt (plus an iron-on silver heart to inspire the champion within!).

Happy 2012 Olympics to all, and here’s to all the athletes who competed, whether they took home a medal or not. (We’re looking at you, Sarah Attar! — a true champion, if ever there was.)

And a nod to my sister, who made some gold medal tees first, and who hosted a totally awesome Olympic-themed birthday party during the opening ceremonies!

[ 3 Comments | Posted on August 10th, 2012 ]

Adventures

A Spot of Tee: Born in the USA

Welcome to the newest feature here on the Generation T blog, known hereafter as A Spot of Tee, where we hit the sidewalk (the layperson’s catwalk!) and engage in the spotting of T-shirt refashions (or DIY-inspired looks). I thought it apropos to start the A Spot of Tee series today for two reasons: 1. Much of the world is focused on London, England (2014 Summer Olympic Games) where a spot of tea tee is quite common. Second, our first tee was spotted on Independence Day weekend, which is enough to start us chanting, “U-S-A, U-S-A!” from the virtual stands of the Olympic pool, roadways, gymnasium, track, and field. Today’s tee is a fairly simple one, spotted on our way to a 4th of July barbecue!

Where: Underhill Avenue, Prospect Heights, Brooklyn
When:
July 2012
What:
A slashed, casual V-neck tee
Key accessories:
denim shorts, hamburger (not pictured)
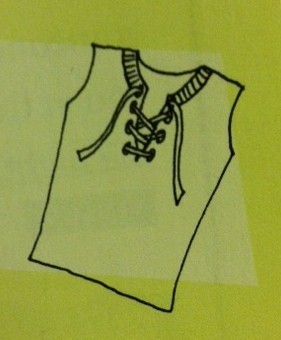
How do I get the look?: To keep the sleeves only temporarily cropped, this All-American gal simply rolled and tucked them. Without cutting the neckband completely off, she turned her crew neck into a V-neck, like this variation from Generation T: Beyond Fashion (step 3 from project 92, the “Fender Bender racerback tank top), cutting an additional 3″ to 4″ deeper than the neckband in the front and adding a slit down the center, to enhance the plunge another 3” or so (below left). Or, you could make a version of this with lacing — see variations for project #16 in Generation T (below, right):

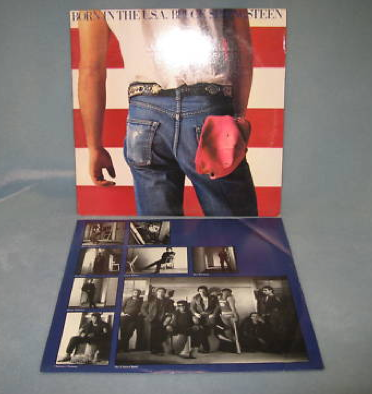
The denim plus American flag is so very Bruce Springsteen, don’t you think?

Though we often consume our “tee” over the weekend (Sunday afternoon would be rather proper, now wouldn’t it?), we’ll post on Mondays to give the week a nice jump start.  Here’s to celebrating our casual weekend wear!

[ 3 Comments | Posted on August 6th, 2012 ]

T-shirt Projects

I Love to Create: Easy Breezy Heat Wave Tee

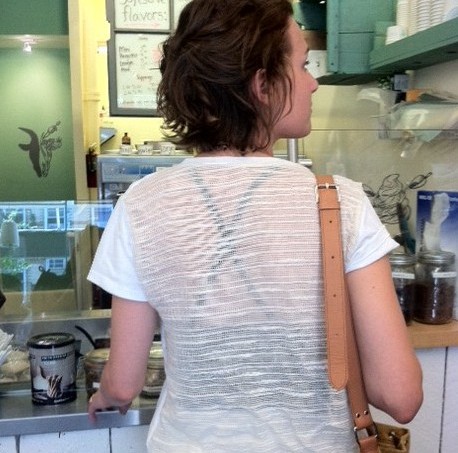
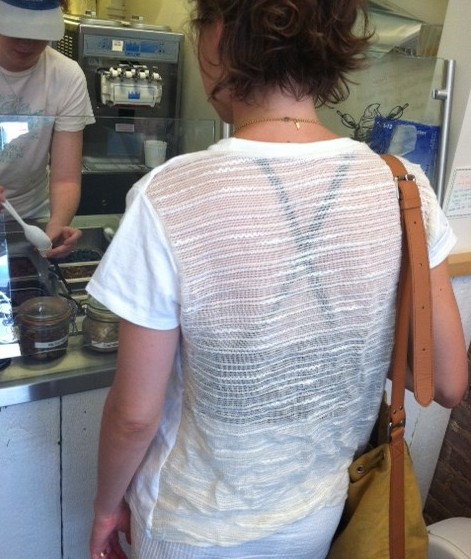
This design falls into the category of fashion as necessity: When temperatures push 90 and 100 degrees, there’s little else you want to wear besides a T-shirt. But even a tee can seem stifling when you add humidity to the mix. Here’s a T-shirt hack that’s meant to keep the air circulating–it features a cut-out back and a looser fit. (Of course, a trip to the local ice cream haunt doesn’t hurt the cooling plan either!)

I encourage you to dig into your fabric stash to find an unlikely contender for the fabric insert on this one. The fabric I used was originally purchased by my brother from a discount bin to use as a bed skirt. I inherited it when he moved, and my mom and I made curtains to filter the light in my apartment. Now the remnants have been reincarnated as part of this heat-beating T-shirt. What a life cycle! Tip: Check the give of your fabric–you shouldn’t have to worry too much about working on the bias (the diagonal of the fabric) since the rest of the T-shirt will have plenty of stretch, but consider your layout before you cut!

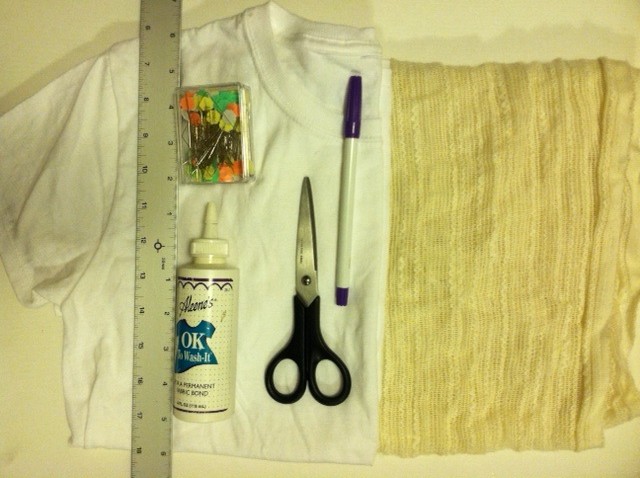
Materials:
-regular fit T-shirt
-fabric scissors
disappearing ink pen
-ruler
-straight pins (optional)
Aleene’s OK Wash-It fabric adhesive (or a sewing machine and thread to match your fabric)

Make it:

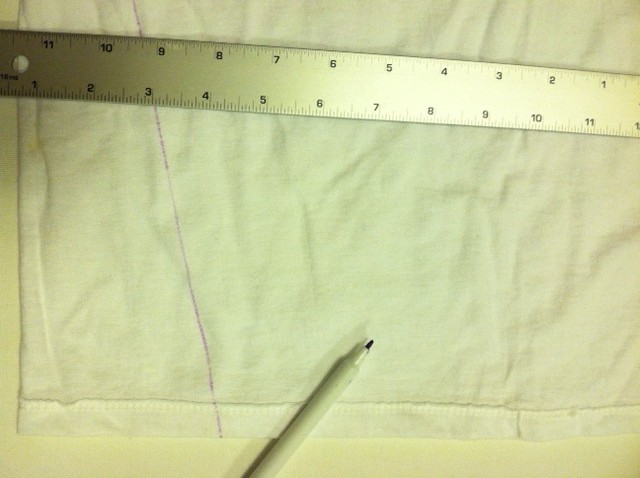
1. Turn the T-shirt inside out and lay it face down. Measure and mark about 3 1/2″ to 4″ in from either edge along the hem. Then draw a straight line from each mark to its adjacent sleeve (at the armpit).

2. Cut along that line through only the back layer. Continue cutting around the sleeve, just inside the seam (again, through only the back layer), along the top shoulder seam, and along the back of the neckband. Continue cutting until the back panel of the shirt can be removed. Set the front of the shirt aside momentarily.

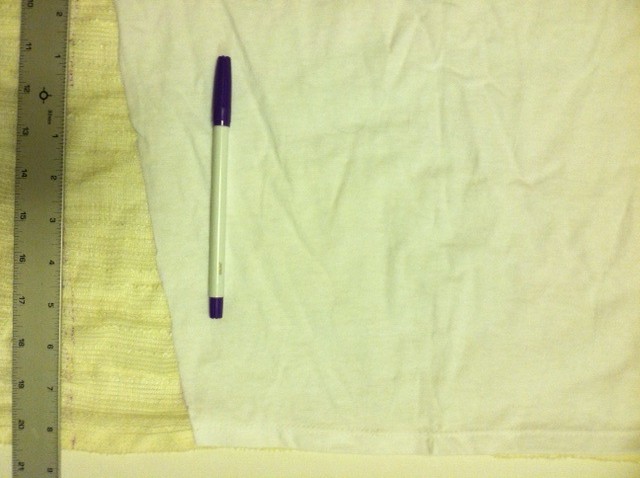
3. Lining up the bottom edges of the fabric pieces, lay the back panel of the T-shirt over the backing fabric and trace the panel, extending the shape on either side to accommodate for the 3 1/2″ to 4″ wedge that was cut away. (The extra fabric will help create the flare.) Cut out the shape from the backing fabric.

4. Lay the fabric against the front piece of the T-shirt so that the edges of the two pieces line up, right sides together. Use the permanent fabric adhesive to glue the inside edges together. Optional: Use straight pins to hold the fabric edges in place before you glue.)

5. Ease the edges together, pinching and pressing them in place. Then let dry completely.

6. Turn the tee right side out and touch up any gaps along the seams.

7. Layer the tee over a thin tank top if you’re feeling demure, or be bold by wearing a colorful, barely there undergarment (the point is to limit the layers of fabric on the skin after all!).

Variations:
-Replace a panel along the top of the sleeve as well.
-Replace a smaller panel in the back of the T-shirt with a cotton crocheted doily.
-Make the flare more exaggerated and fluttery.
-Experiment with different fabrics (silk scarf, old mesh sports jersey, a linen table cloth).

Next up? Though I quite like the subtle contrast in whites (the stark cream with the more ivory gauze), I’m going to experiment with dye the next time I make this design!


[ 4 Comments | Posted on July 24th, 2012 ]

More Fun

From Our Readers: A Crafty Vegan Librarian!

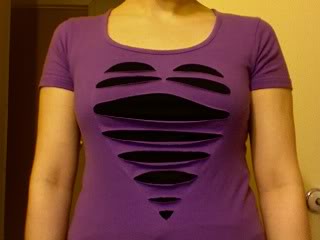
Back in April 2009, craftyveganlibrarian hosted a Tee Party for a magnificent seven DIY teens at the library where she works. The group used scissors and safety pins to customize their wardrobes using a handful of no-sew techniques. Below is the “Brokenhearted” tee design (project #3) by the crafty librarian herself, found on page 30 in Generation T.


[ 1 Comment | Posted on July 20th, 2012 ]

T-shirt Projects

How to: T-shirt Scrunchie Necklace

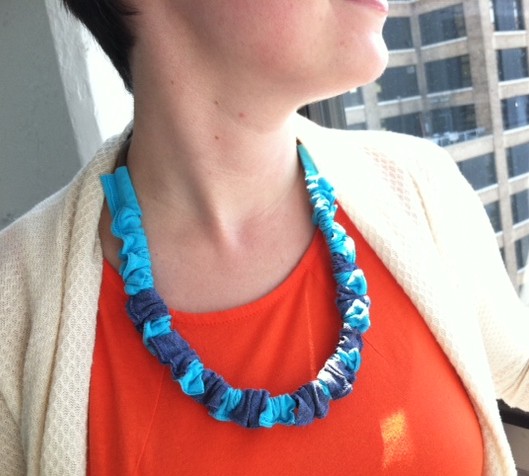
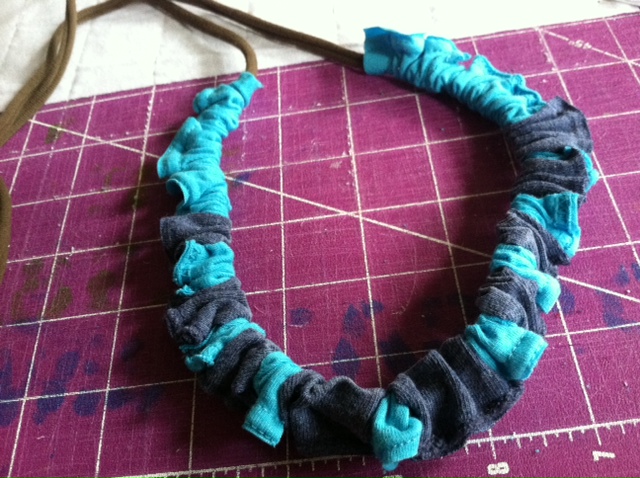
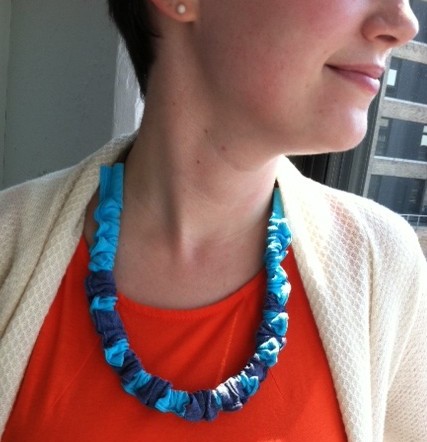
Last week, I posted a tutorial for making a statement necklace using T-shirt scraps. This week, we’re making a necklace using the scraps leftover from that necklace. It’s worth keeping in mind that you can construct and wear this necklace in about two minutes — seriously! Now that is a statement.

Materials:
-Scrap hems (or scrap sleeve seams) from 2-3 T-shirts
-Safety pin or paperclip
-Fabric scissors

Make it:
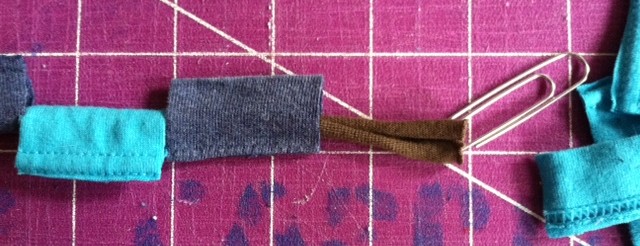
1. Trim the stitching off one of the T-shirt hems and stretch it out to create a long T-shirt cord. Attach a safety pin (all I had on hand was a paperclip, which worked fine!) to one end. Collect all the hem pieces left over from cutting the rectangles needed to make the T-shirt Confetti Necklace (a byproduct of step 1, the hem pieces should be about 1 1/2″ long, with the stitching still in place). There should be a hollow space through the center, making it, essentially, a soft bead.

2. Thread the T-shirt cord through the T-shirt beads, arranging them in any desired pattern.

3. Rotate the beads so the stitching appears on the “outside” of the necklace and scrunch them together, creating a ruffled look. Then tie the two ends of the T-shirt cord in a bow at the desired length at the back of your neck.

Ta-da! Almost exciting as fireworks. Happy 4th, everybody!


[ 5 Comments | Posted on July 4th, 2012 ]

T-shirt Projects

I Love To Create: T-shirt Confetti Necklace!

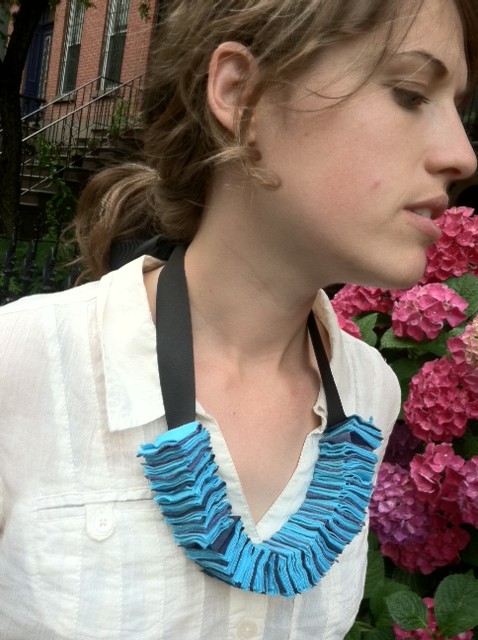
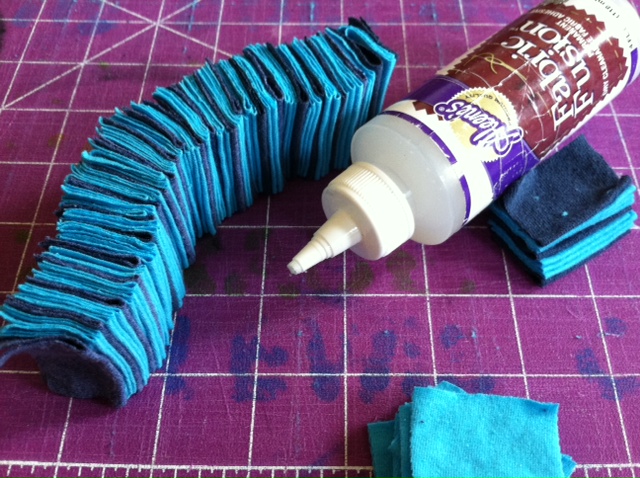
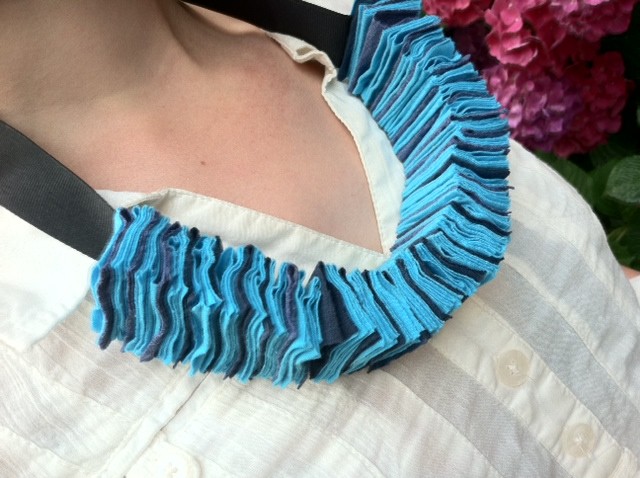
Interestingly, the inspiration for this festive, soft Fourth of July necklace came from south of the border — while I was on vacation in Oaxaca, Mexico, we happened upon a small gallery where I spotted an orange folded paper bracelet made by women in a local artist collective. The paper was so soft and fibrous, it reminded me of fabric. So when I set to re-imagining that bracelet stateside in my Generation T workshop (as a necklace of fabric and glue!), I was pleased that the results are even cozier — a wonderfully celebratory accessory fit for a summer barbecue! (I was intentionally playing it subtle with the shades-of-blue color palette, but a bold red, white, and blue color scheme would really pop.) And it’s comfy, too, when the sun goes down and it’s time to snuggle up and watch the fireworks.

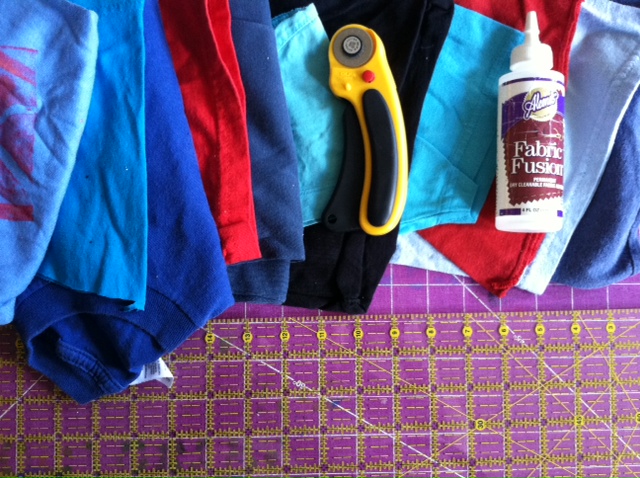
Materials:
-T-shirt scraps (sleeves work well!), including one long one to use as the fastener
-Rotary cutter and cutting mat
-Quilting ruler
Aleene’s Fabric Fusion glue
-Ribbon (optional, in place of the long piece of T-shirt scrap to fasten the necklace)

Make it:
1.
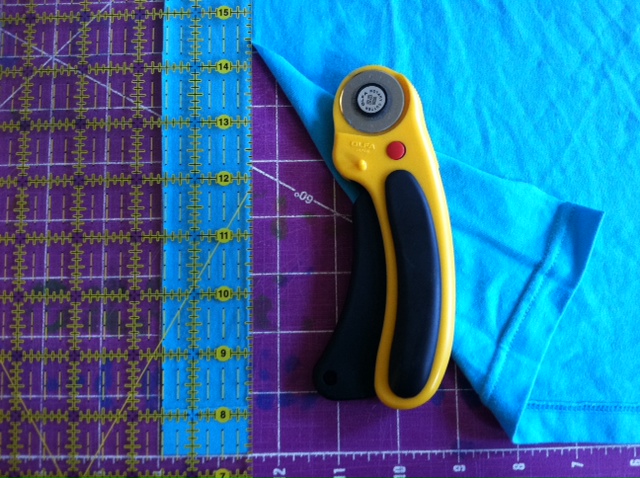
Cut 1 1/2″-wide strips from the T-shirt scraps.

2. Cut the strips into 2″ pieces to make rectangles that are 1 1/2″ x 2″. (I cut about 124 rectangles in two different colors to make an approximately 9″-long necklace segment.)

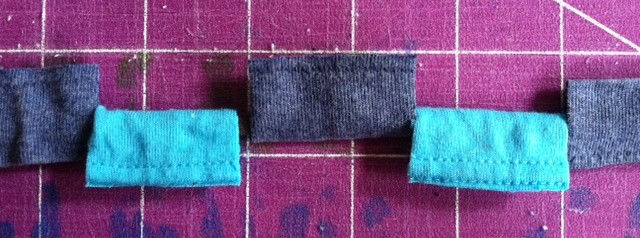
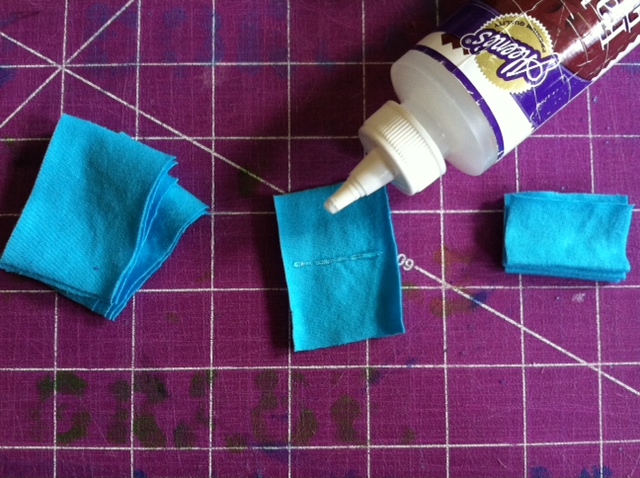
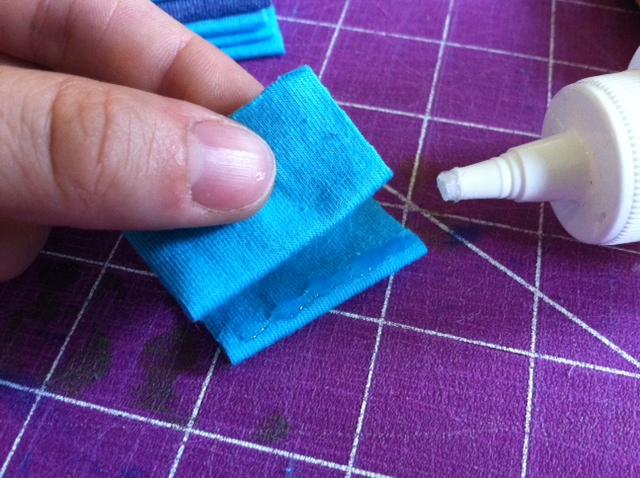
3. Lay one of the rectangles flat, wrong side up, and spread a thin line of glue slightly off-center and parallel to the short ends. Fold it in half so that the glue line retains the crease. Let the glue dry and repeat for the remaining rectangles.

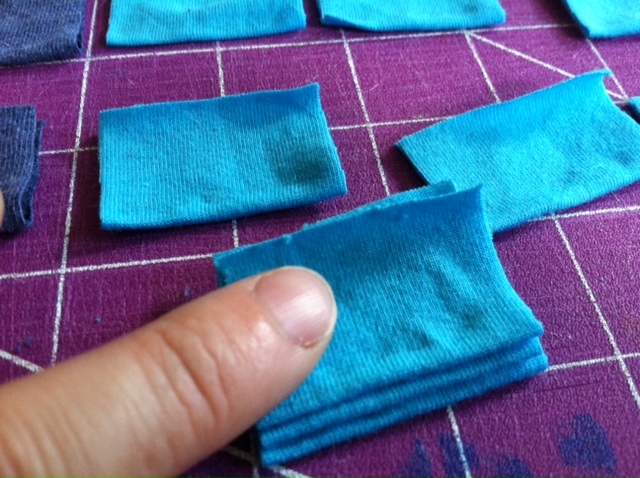
4. Squeeze a thin line of glue close to the folded edge of one of the rectangles and press another folded rectangle over it.

5. Repeat step 4 as many times as needed, to attach more rectangles together and create the necklace piece. (Arrange different colors to create a pattern!) Reserve two folded rectangles to use in step 7.

6. Let the necklace piece dry, then touch up any gaps as desired.

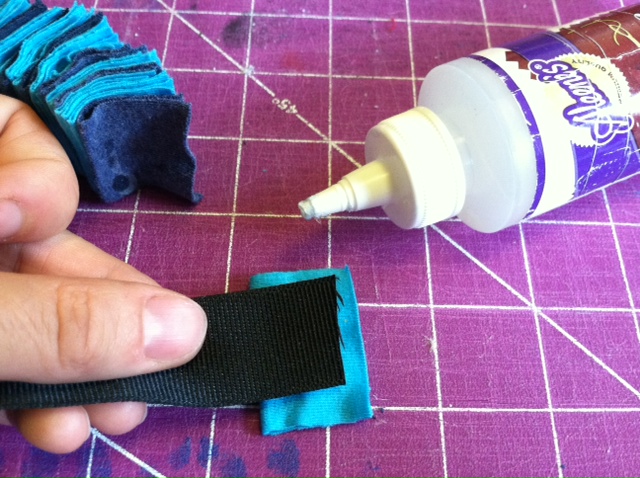
7. Spread glue along the end of a long T-shirt strip or ribbon (shown here), and center and press it along one of the spare rectangles from step 5.

8. Then add more glue to the ribbon and press it against one end of the necklace piece, aligning the T-shirt rectangles (the ribbon end should be sandwiched in between T-shirt material). Repeat on the opposite end of the necklace piece. Let dry completely. Then snip the T-shirt strip or ribbon in the middle so you have two ends for tying.

9. Tie the ends in a bow at the back of your neck.

Variations:
Experiment by making smaller rectangles for a more delicate piece (you can make a necklace this way, or, I made an accompanying bracelet using 1″ x 1 1/2″ rectangles).
Use chain in place of the fabric fastener. (I like the idea of an all-white necklace piece with a gold tone chain.)
Try wearing it as a headpiece! (My sister’s boyfriend tied the necklace around his head
as a joke, bonnet-style, but with the right messy up-do, it could be quite the statement piece.)
Play with color: Make the red-white-blue version mentioned above, use the color scheme from your favorite sports team to wear to the next game, or craft a rainbow to brighten your day!

Tune in later this week to see the second necklace I made using the scraps left over from this one–super easy, super fast, and also no-sew (no-glue, even!).


[ 6 Comments | Posted on June 26th, 2012 ]

Media

On this day in 2008…

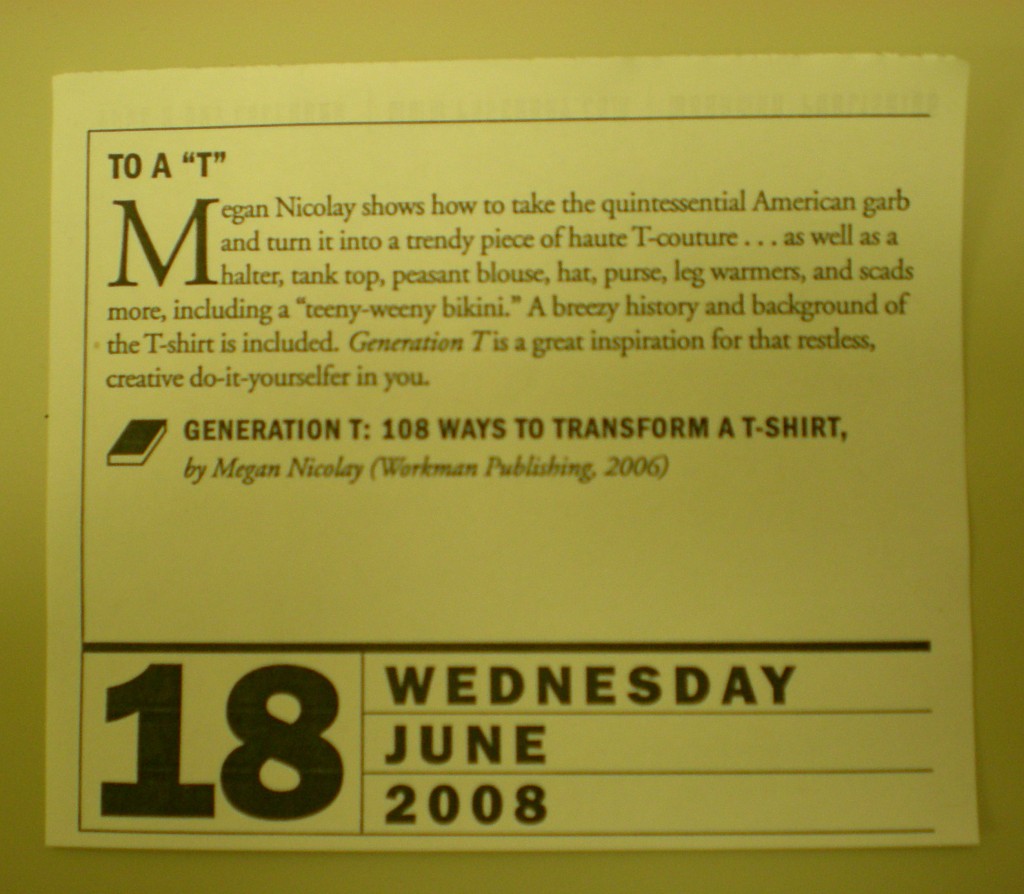
Well here’s a blast from the past: On this day in history (2008, to be precise), readers of the Book Lover’s Page-A-Day calendar flipped the page from June 17 to June 18 and were treated to a sweet little review of a (at the time) recently published tome on T-shirt refashioning!

My favorite line: Generation T is a great inspiration for that restless, creative do-it-yourselfer in you.” Tell me, what craft books in your library fit you restless creatives “to a T”?

[ Comments Off on On this day in 2008… | Posted on June 18th, 2012 ]