T-shirt Projects

Happy Halloween! T-shirt Pumpkins!

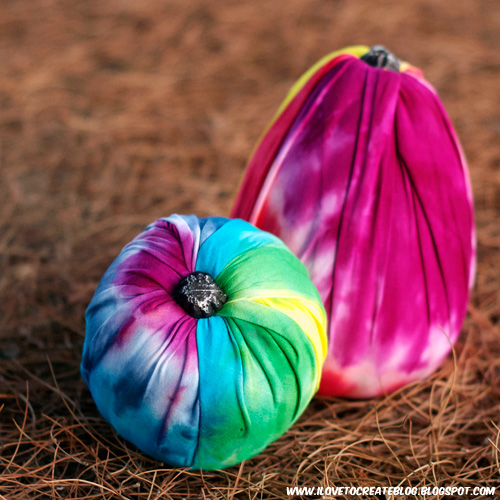
Wishing you all a happy Halloween with these colorful T-shirt pumpkins made by this oh-so-Swell Designer for iLoveToCreate.

Click here for the full T-shirt pumpkin tutorial, or follow along with this video from The Swell Life (and use your powers of imagination to substitute tie-dye T-shirt fabric for a red bandana!).

(PS: Alexa at The Swell Life has so many swell ideas for holiday decor — especially for Halloween — and we’re just plain tickled pink that she has one of our books on her shelf! Proof below.)

Pumpkin image via iLoveToCreate; video via The Swell Life

[ Comments Off on Happy Halloween! T-shirt Pumpkins! | Posted on October 31st, 2012 ]

More Fun

Let’s Play a T-shirt Game!

As some of us on the East Coast slowly emerge from the effects of the-decidedly-not-T-shirt-weather that recently blew through, here is, nonetheless, some T-shirt fun to help brighten the atmosphere. (And, I might add, a rather nice resource for some more last-minute T-shirt-based Halloween costumes!)

How many movie characters can you recognize by their T-shirt? — or rather, how many T-shirts can you recognize from their starring roles? (Because let’s face it, some of these T-shirts are so iconic, they deserve a line in the film credits!)

(Image via TheMarySue, from Fibers.com)

[ Comments Off on Let’s Play a T-shirt Game! | Posted on October 30th, 2012 ]

T-shirt Projects

10 Quick & Easy T-shirt Halloween Costumes II

Following up last year’s popular list of 10 Quick & Easy T-shirt Halloween Costumes, here is another collection of ten DIY costumes on the fly. From the cinematic to the everyday, from the historical to the commercial, from the sweet to the oh-so-punny (scroll down to #10)…. But let’s start with a classic.
JACK-O-LANTERN T-SHIRT COSTUME

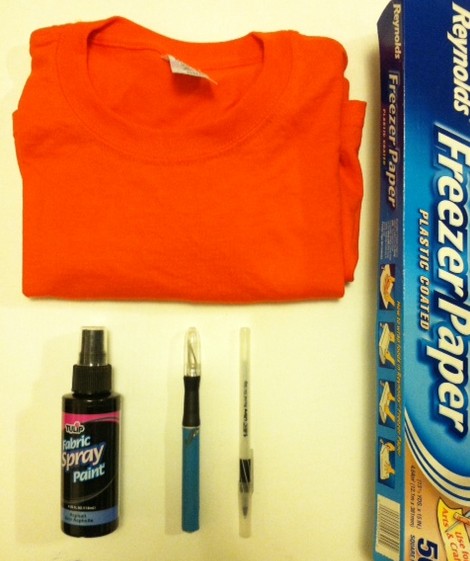
Materials:
-Orange T-shirt
Tulip Fabric Spray Paint (in black)
-Pen
-Freezer Paper
-Craft knife and cutting mat
-Warm iron
-Newsprint paper

Make it:
1.
Use the pen to sketch out jack-o-lantern features on a sheet of freezer paper.
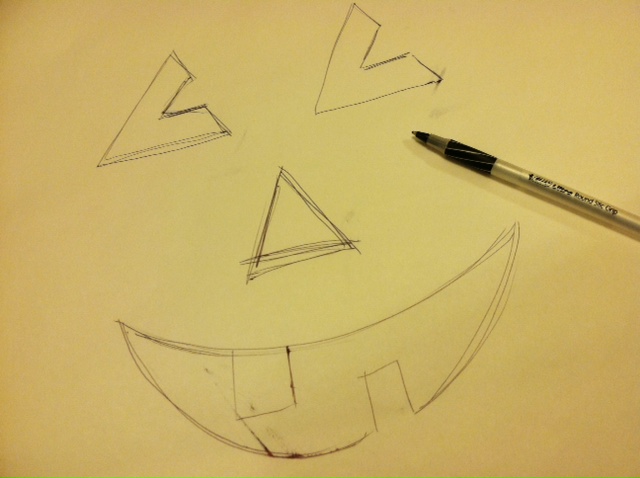
2. Use the craft knife and cutting mat to cut out the features.
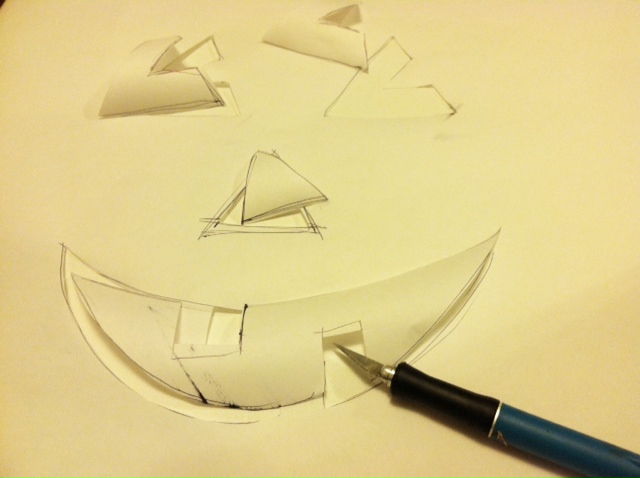
3. Iron the freezer paper stencil onto the front of the T-shirt. Insert a sheet of newsprint between the layers of the shirt to prevent the paint from bleeding through.
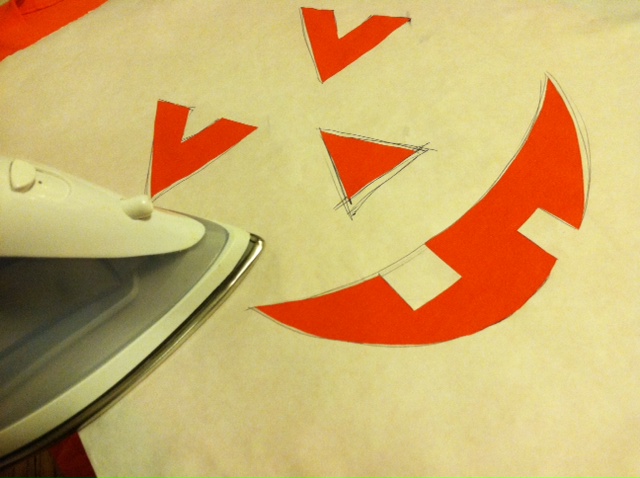
4. Mask the parts of the T-shirt that are still visible, and spray over the stencil with black paint.
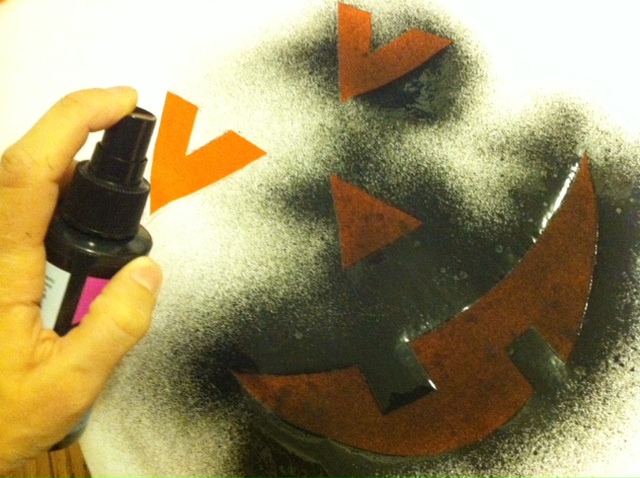
5. Let the paint dry briefly, then peel up the stencil.
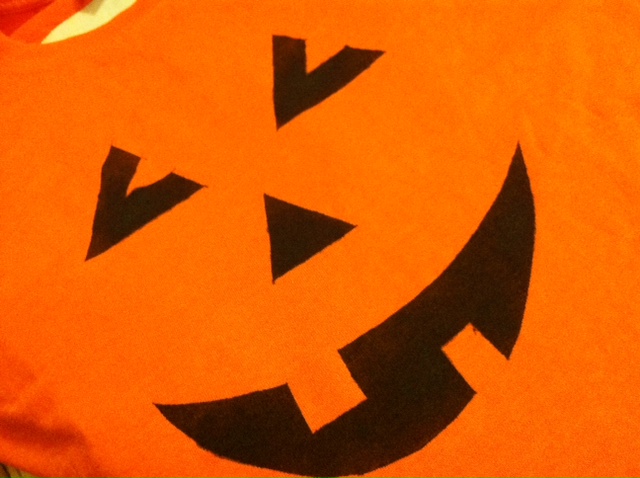
6. Let the paint dry completely, then try on the T-shirt and go find a pumpkin patch to haunt!
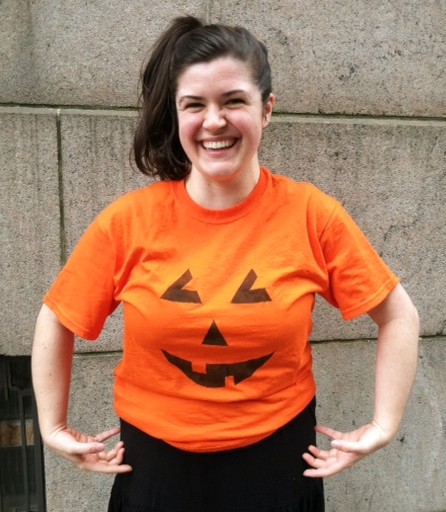
WITHOUT FURTHER ADO, HERE ARE 10 COSTUMES TO MAKE WITH T-SHIRTS (starting with the JACK-O-LANTERN)

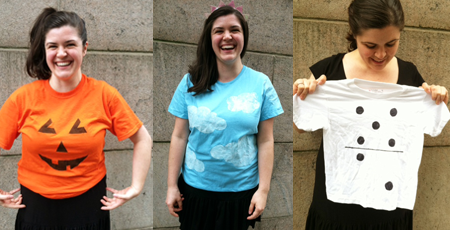
#1 Jack-o-lantern. As shown above, that pumpkin patch classic. Black paint on an orange T-shirt. Optional: Accessorize with a green vine and leaves headband.
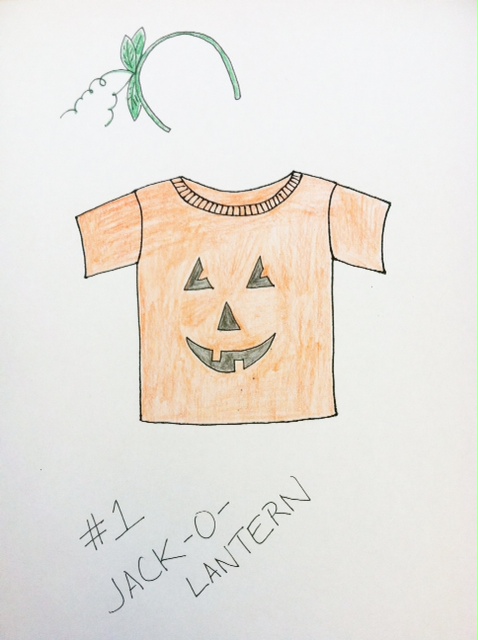
#2 Sunny day. Paint white clouds on a pastel blue T-shirt, or stick pillow stuffing on the T-shirt. Inspired by one of our readers, Emily A. (not to be confused with Emily P., our model for this post!), who used a variation of the Mohawk Mo’ Rock hat (from Generation T: Beyond Fashion) as the headpiece. We used this more recent accessory. And hey, you can always use the costume to moonlight in Ben & Jerry land.
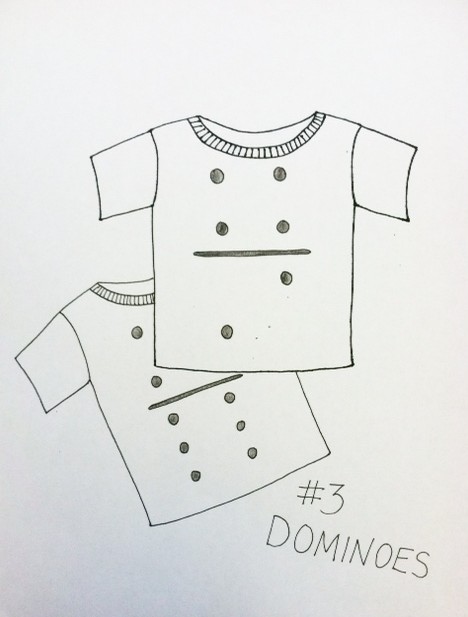
#3 Dominoes. A fun and very easy group costume (just leave the ears and tail at home so you don’t get mistaken for a dalmatian) — use black fabric paint or black permanent marker on a white T-shirt. And if you get tired at any point while wearing the costume, simply lie down adjacent or end-to-end with a matching number onĀ  a friend’s shirt!

#4 Strawberry. Paint yellow seeds on a red shirt, and use green T-shirt scraps to fashion a stem with leaves to sit a top your head. Go solo or meet up with friends to make blueberries, watermelon — a whole fruit salad!

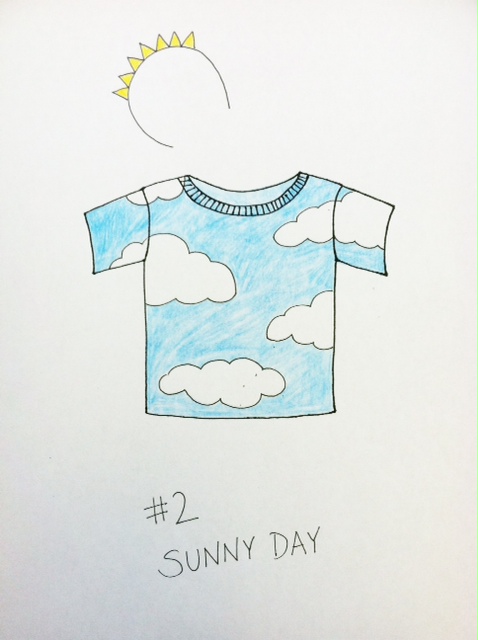
#5 Hippie. Tie-dye a T-shirt, then pair it with bell-bottom jeans, a headband, and any other . (Note: You have to schedule in additional drying time with this one.)
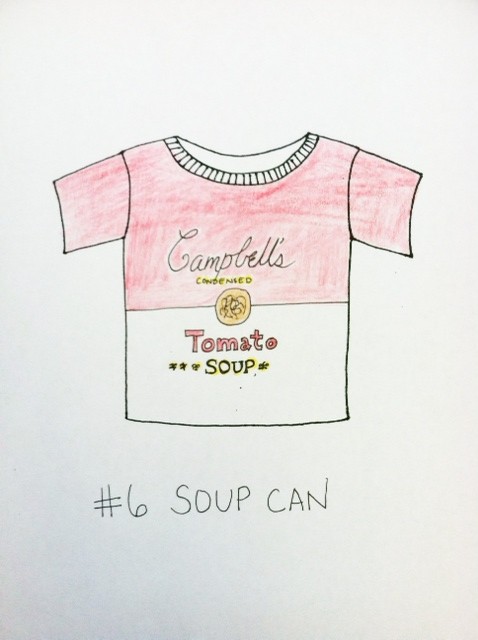
#6 Soup can. Start with a plain white T-shirt and use a black permanent marker, stencils, and red and yellow paint to embellish it. Then convince a pal to go as Andy Warhol!

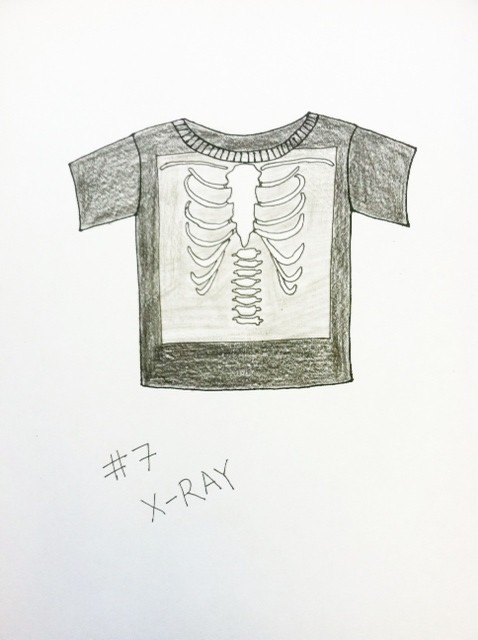
#7 X-ray. A great way to show some skeleton on Halloween, use white paint on a black T-shirt (and the painted parts will show up gray).

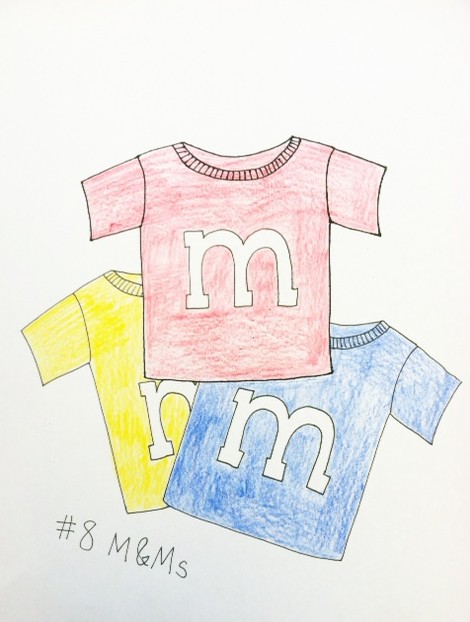
#8 M&M candies. Paint white lowercase ‘m’s onto red, yellow, blue, green, orange, and/or brown T-shirts. Then really go the extra mile and wear white gloves and white sneakers. Gather up a group of friends for a whole handful of candies. Note: This approach also works for Skittles!’

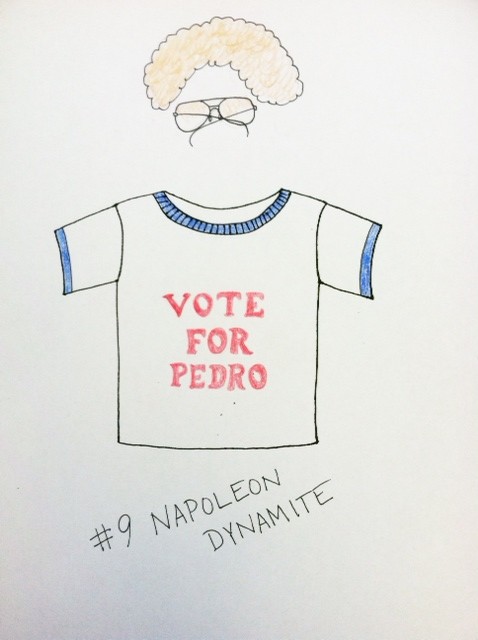
#9 Napoleon Dynamite. Based on the indie hit, paint blue edges on a white T-shirt to mimic a ringer tee; paint or iron on letters to spell “Vote for Pedro.” Top it off with some wiry glasses and a curly wig.
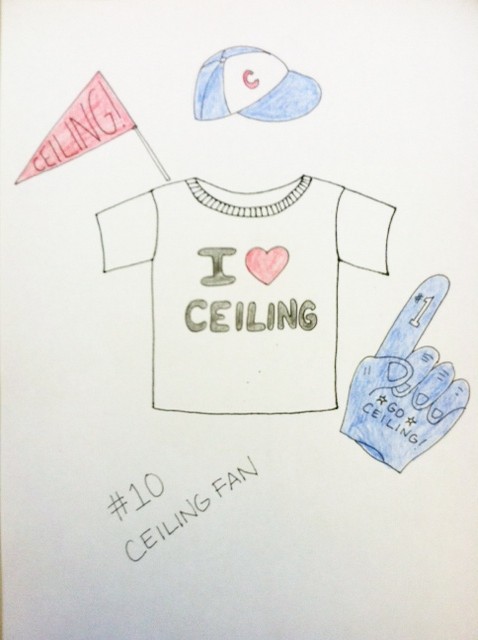
#10 Ceiling fan. Heh. Number 1 fan of the ceiling. Get it? Get it? Use fabric markers or paints on a white T-shirt — and plenty of cheerful props!
Happy trick-or-treating everyone! Here’s to last-minute costumes that are as easy as 1, 2, 3.

[ 3 Comments | Posted on October 23rd, 2012 ]

Adventures

T-shirt Jam Session with BoingBoing!

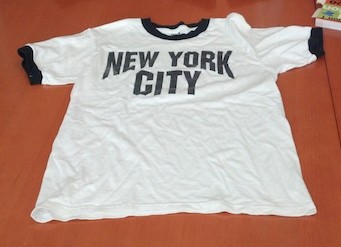
On a warmer day a few weeks ago, Jamie Frevele of BoingBoing and I sat down with my sewing machine, a couple pairs of sharp scissors, and Jamie’s stash of T-shirts (she has some amazingly iconic ones in there — Rosie the Riveter, Captain America, the New York City tee that John Lennon was famously photographed wearing — sleeves cut off — in New York in 1974 by Bob Gruen) to have a little Tee Party. And a party it was…

Without further ado, here’s how to cut the perfect neckline, and how to transform that old boxy tee into a fresh ‘n’ foxy tank top in T-minus 60 seconds (yes, we’re rife with T-shirt puns up in here). Here’s how it all went down, no-sew style:

For an additional tutorial (bonus!) on how to easily re-size a T-shirt with two easy seams — click through to see Jamie’s (@jamielikesthis) step-by-step photos of how we transformed her iconic New York City tee from this:

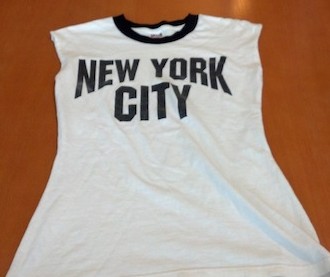
Into this:

The T-shirt (Ć  la John Lennon) is boxy no longer!

Happy new T-shirt to Jamie, happy birthday to John Lennon (today would have been number 72), and happy T-shirt refashioning to you all!

[ 2 Comments | Posted on October 9th, 2012 ]

Events

New York, NY @ Michaels Craft Store

UPDATE: THIS EVENT HAS BEEN POSTPONED. SORRY FOR THE INCONVENIENCE! (The store actually is out of stock of the screen printing kits, and they are reordering.) PLEASE CHECK BACK SOON FOR THE NEW DATE!

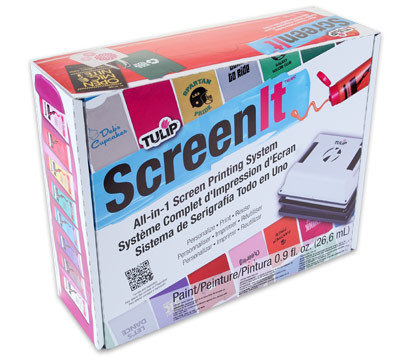
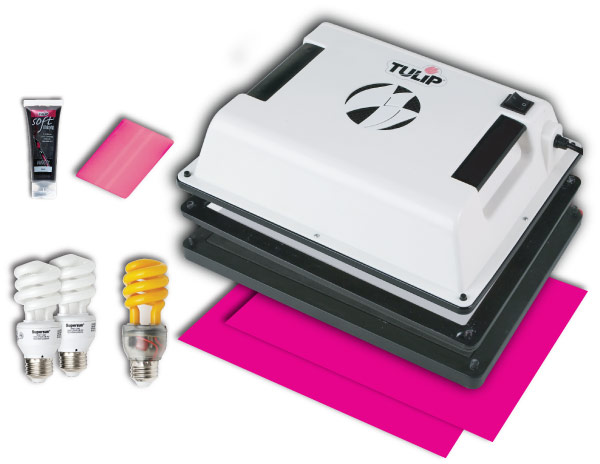
Come join me at the Manhattan location for Michaels Arts & Crafts store here in NYC! I’ll be demonstrating how to screen print at home with the Tulip Screen It system. It’s a pretty sweet kit (and super easy to use — just a couple of weeks ago, I transformed my bathroom into a darkroom by simply unscrewing the regular light bulb and replacing it with the yellow one you see below), and I’m looking forward to sharing with you how fun it is to use. You can print on T-shirts (think team or camp T-shirts, T-shirts for birthday gifts and favors), sweatshirts, tote bags, baby onesies, skirts, jeans — the list is endless…

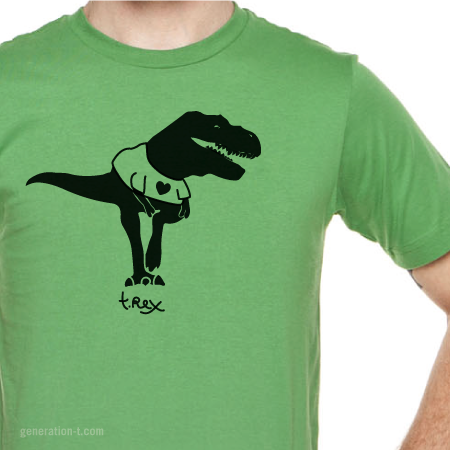
At Michaels, I’ll be screening on plain cotton woven fabric — a nice cloth napkin square that can be pinned on as a patch, stitched with some backing as a pillow, or used as a quilt square! My sister and I actually designed a brand new graphic specifically for this event, so come on out and you may walk away with a printed square with this friendly T. rex in a T-shirt to incorporate into your next craft project!

And who knows, maybe I’ll print a T-shirt or two in advance to giveaway…

Hope to see you there!

Michaels Arts & Crafts Store
808 Columbus Avenue (at 100th street)
New York, NY

PS: If you’re not in NYC, check the list here to see if there’s a demo happening at your local Michaels Craft Store! There’s a different design and different artist at each location.

[ 2 Comments ]

More Fun

In the Kitchen: Baby Teething Biscuits!

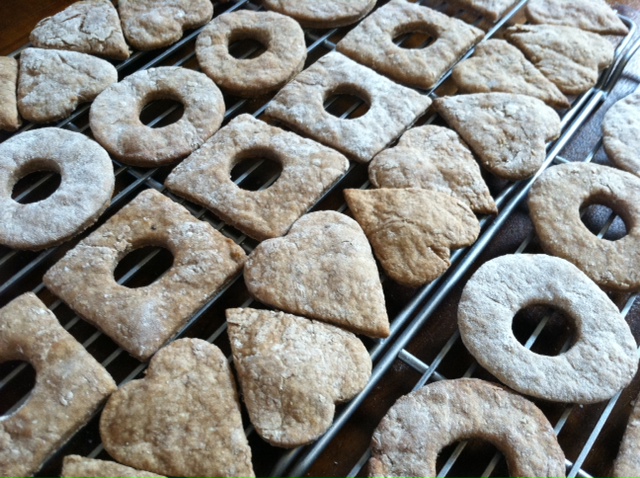
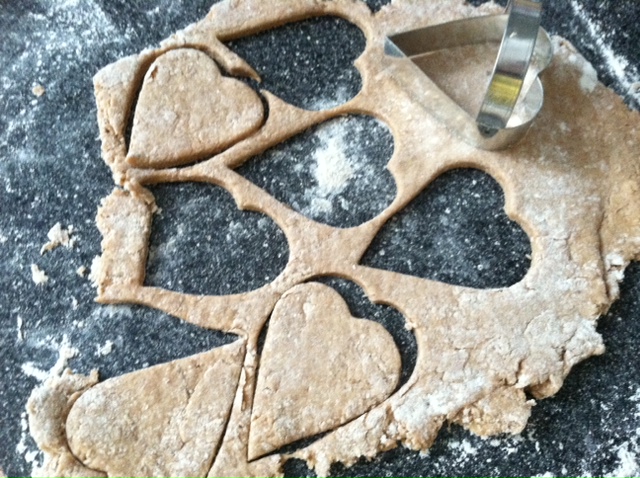
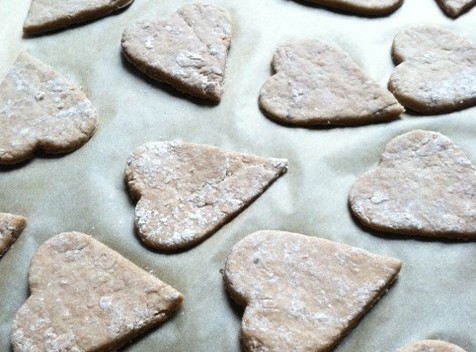
As you longtime readers know, sometimes I trade in my sewing room for some kitchen crafting. One recent weekend, I did just that, to make homemade teething biscuits for little Baby T (aka Niko). You heard me say teething, right? Hehehe. (Okay, I’ll use my T-shirt cookie cutter next time, for a better tie-in.) I very barely modified the recipe from Imprintalish (as you can see, I liked her idea of using a heart-shaped cookie cutter, and added some more geometric shapes to the mix!), then of course quadrupled the recipe to make enough for all of Niko’s pals.

Ingredients:
1 cup all-purpose flour
1 cup dry infant rice cereal
1 ripe medium mashed banana (1/3 cup)
2 tsp cinnamon
2 tablespoons vegetable oil
6 tablespoons water (or more, to form dough)

Yields about one dozen biscuits, depending on the size and shape cookie cutters you use.

Make it:
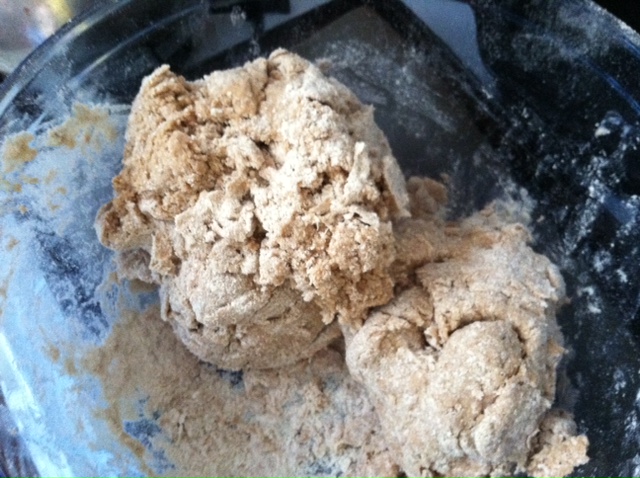
Preheat the oven to 425ĀŗF. In a large bowl, mix together the dry ingredients (flour, rice cereal, and cinnamon). Then add the wet ingredients (oil, banana, and water). Mix everything together until the dough forms a firm, non-sticky dough. (Lish, of Imprintalish, suggests adding water or flour, 1 tablespoon at a time, if necessary.)

On a clean, dry, flour-dusted surface, roll out the dough so that it is approximately 1/4″ thick. Use cookie cutters to cut out the shapes.

Bake it:
Line a baking sheet with parchment paper and arrange the shapes on the paper. Then bake for 10-12 minutes.

Remove the tray from the oven and use a spatula to transfer the biscuits to a cooling rack.

Taste it:
Test them out on a baby or two! Here are Niko and some of his friends gnawing on the heart- and doughnut-shaped biscuits. (The doughnut shapes seemed to be the most popular — since they’re easier to grip!)

Note: Teething biscuits should only be given to babies accustomed to chewing solid foods. Children should always be seated in an upright position and supervised while eating. To determine whether your child is ready for teething biscuits, he or she should be able to crawl on hands and knees, with tummy completely off the floor; use jaws to mash food with gums; eat thicker, lumpier foods with large pieces, and hold small foods in between forefinger and thumb.

[ 1 Comment | Posted on October 4th, 2012 ]

Adventures

A Spot of Tee: Maker Faire Edition

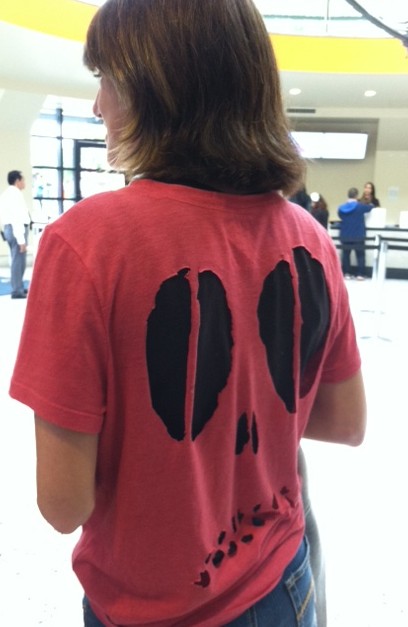
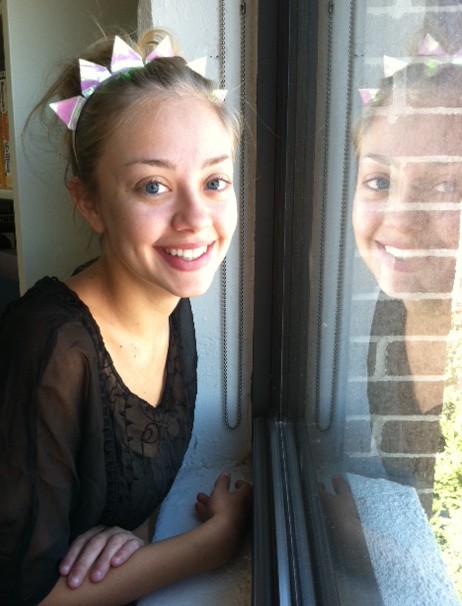
This past weekend we were at Maker Faire, a 2-day celebration of technology, engineering, sustainability, and DIY — and amidst the visual and aural feast of mechanics, explosions, and high-pitched frequencies, there were many a slashed T-shirt for me to spot! Starting with this one (to be fair, this young lady spotted me first — turns out, she’s a fan of Generation T, and recently hosted her own Tee Party at home!).

SPOTTED:

Where: New York Hall of Science, main entrance
When: September 2012
What:
Skully Tee
Key accessories: Black T-shirt and denim — and a Maker Faire day pass!
How do I get the look?: Melody used this entry on the Generation T blog to make her Skully Tee the very morning she was headed off to Maker Faire — it’s that quick and easy!

SPOTTED:

Where: New York Hall of Science, lower level, at the Tracimoc (that’s comic art, backwards) table
When: September 2012
What:
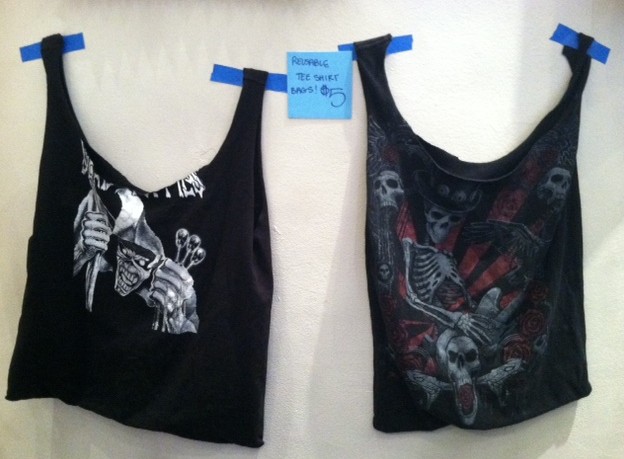
T-shirt totebags
Key accessories: Your arm, with this bag hanging off your elbow. (And some Maker Faire loot, perhaps?)
How do I get the look?: Try the grocery tote from Generation T: Beyond Fashion — perfect for toting books, groceries, or that Halloween haul.

SPOTTED:

Where: New York Hall of Science, near the Maker Faire food trucks (see, there are an actual feast to be devoured, too!)
When: September 2012
What:
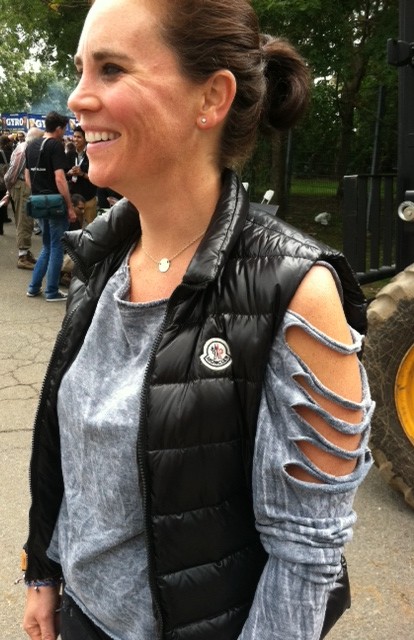
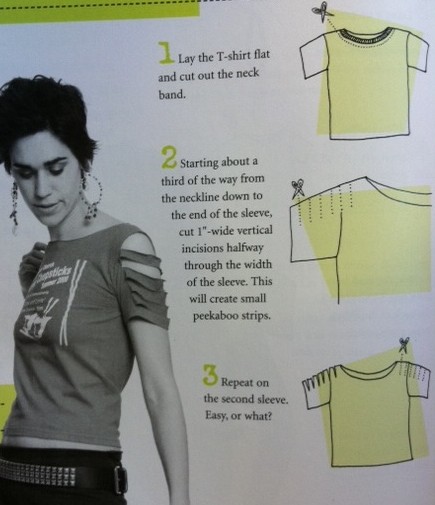
Slashed long-sleeved T-shirt
Key accessories: Puffy vest (you know, to make up for the body heat lost through those “shoulder vents”)
How do I get the look?: Follow the instructions below, from project #10, Shoulder Slash, in Generation T.

SPOTTED:

Where: New York Hall of Science, making the rounds
When: September 2012
What:
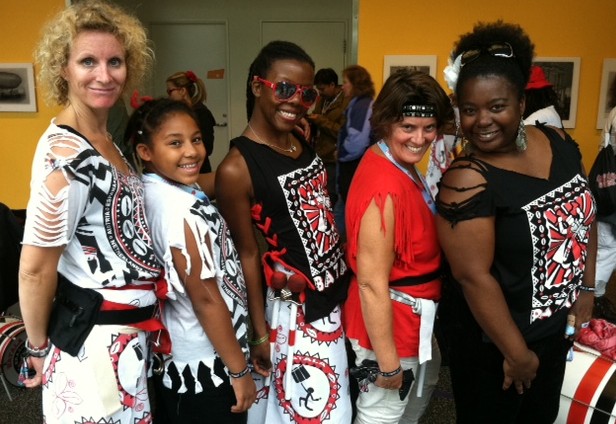
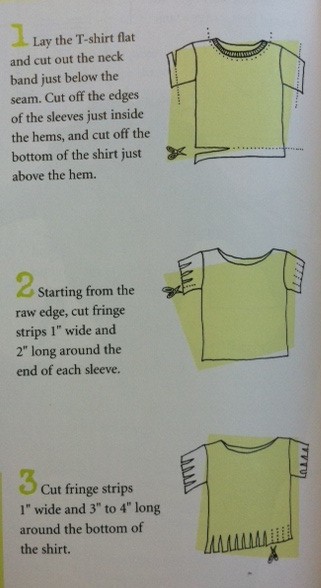
Fringed T-shirts, knotted T-shirts, laced T-shirts, slashed T-shirts on the members of Batala NYC, the all-female reggae percussion band!
Key accessories: Drum sticks.
How do I get the look?: For the fringe look, follow the instructions below for project #4, Fringe Benefits, from Generation T; for the slashed look, follow the instructions above. Add knots, beading, and lacing as desired.

SPOTTED:
Okay, it’s not technically a T-shirt, but these leggings just seemed so T-shirt-inspired…

Where: New York Hall of Science, outside the Maker Square tent
When: September 2012
What:
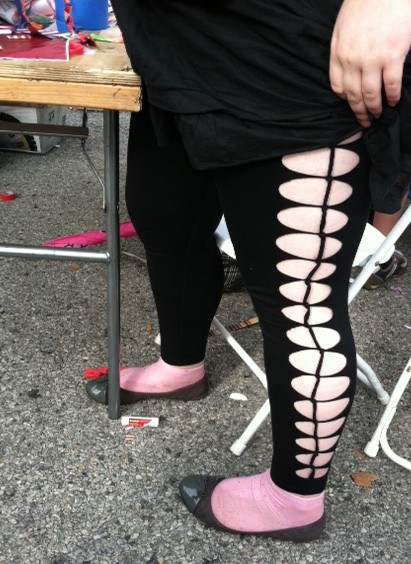
Slashed and woven leggings
Key accessories: Pink ankle socks
How do I get the look?: Snip parallel horizontal slits about 1″ apart along the outside fold of the leggings on each leg. Cut slits as high as you need to for your skirt or shorts to cover. Use a T-shirt cord (cut the stitching off a T-shirt hem, and strettccchhh it out) to weave through the slits, tying a knot at each link of fabric.


[ Comments Off on A Spot of Tee: Maker Faire Edition | Posted on October 2nd, 2012 ]

T-shirt Projects

iLoveToCreate: Happy Shiny Pixie Headband!

I attended a photo shoot recently and was inspired to make this headband after I saw a similar one in the stylist’s stash of goodies! While hers was glittery gold and mine is iridescent (I also doubt that hers was fashioned from an old T-shirt sleeve), it’s the Lady-liberty-inspired shape that’s so compelling.

I mean, it’s so bright and sunshine-filled (and a little prehistoric?), and I have to admit, though I was begging for cool temperatures back in the heat waves of July (and couldn’t be happier that nature has complied!), the shorter days are already threatening to change my mood. I’m already missing the sun! This happy, shiny, pixie headband brightens up the day wherever you are.

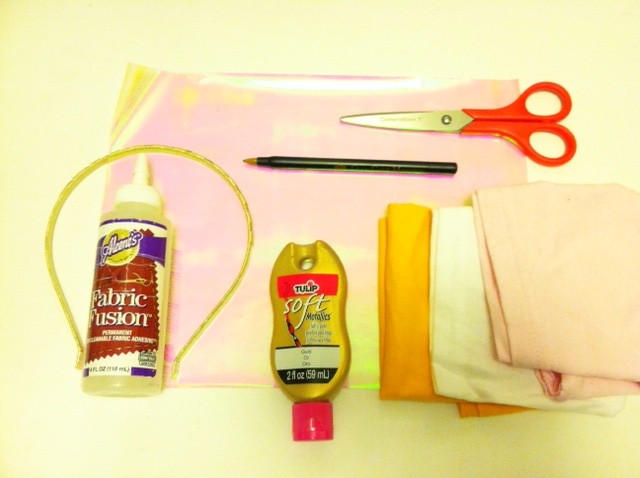
Materials:
-T-shirt sleeve (or T-shirt scrap of equivalent size)
-scissors
Tulip Fashion Glitter transfer sheets
-ballpoint pen
-ruler
Aleene’s Fabric Fusion
-warm iron and pressing cloth
Tulip Soft Fabric Paint in gold metallic (optional)
-toothpick (optional, to use as a paint applicator)

Make it:
1.
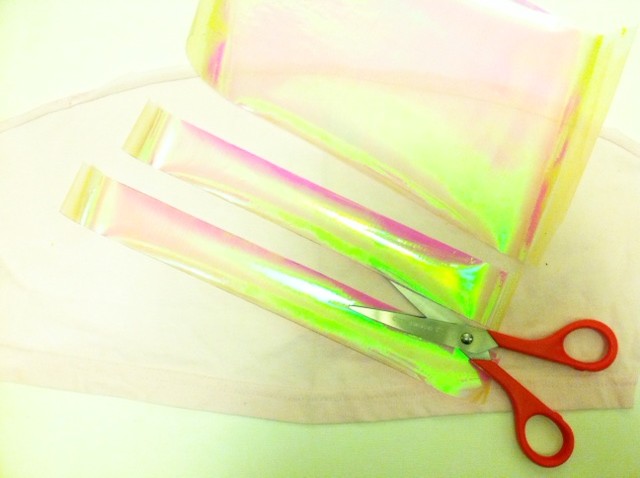
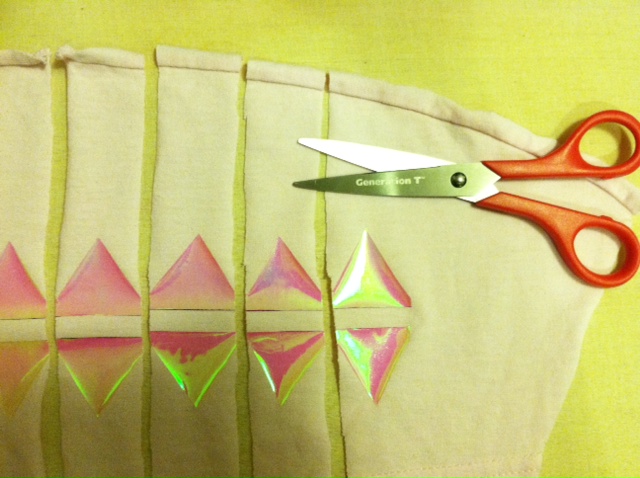
Cut out the underarm seam of the sleeve, and lay it flat, right side up. Measure, mark, and cut two 1 1/4″-wide to 1 1/2″-wide strips from the iron-on transfer sheets.

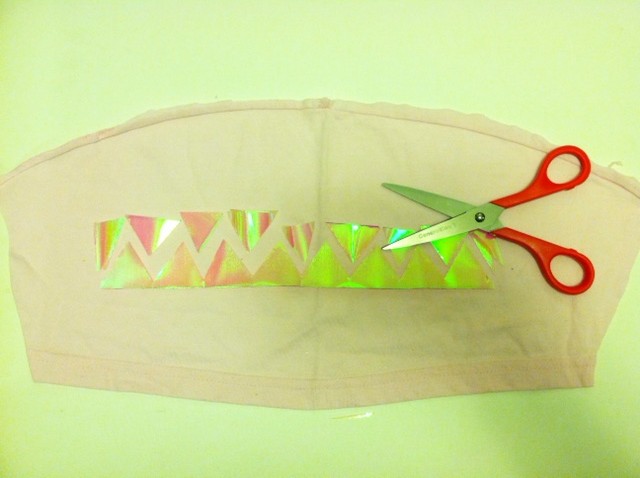
2. Sandwich the two strips together and cut out a series of triangles from one edge (through both layers), leaving a zigzag that runs the width of the strips.

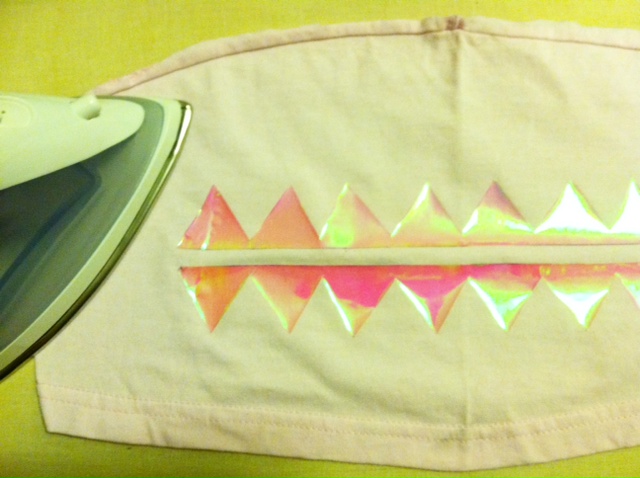
3. Separate the strips and align them along the straight edges, about 3/8″ apart. Use a pressing cloth and iron the strips onto the fabric.
4. Make parallel cuts through the fabric, separating each pair of triangles from the row of zigzags.

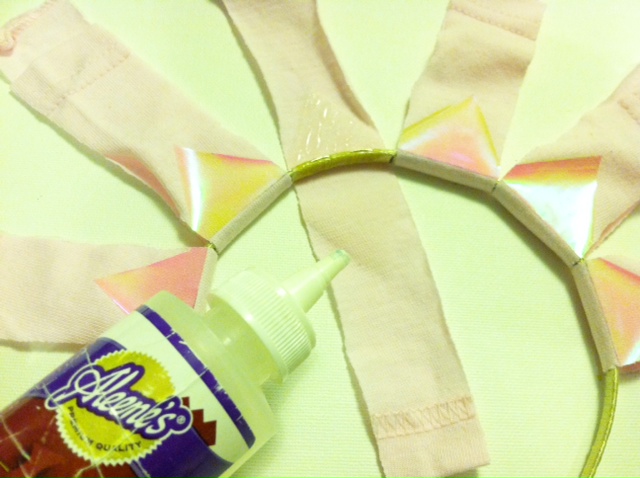
5. Determine how many rays of sunshine you’d like (I debated between 5 and 6, and ultimately went with 6), and arrange them evenly around the arc of the headband. Working one ray at a time, spread fabric glue evenly along the inside of the headband, and wrap the flexible fabric piece around the headband, lining up the triangles. Apply glue evenly to the inside of the strip of fabric and press the triangles together (the triangles should seal beyond their edges).

6. Finish gluing each ray, and let them dry flat. (Note: If the fabric is pulling apart, use a clothespin or paperclip to pinch it while it dries.)

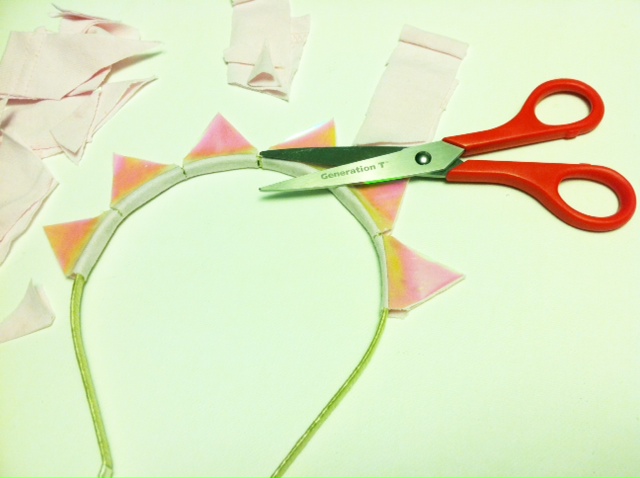
7. When the glue is completely dry, trim the fabric to the edges of the triangles.

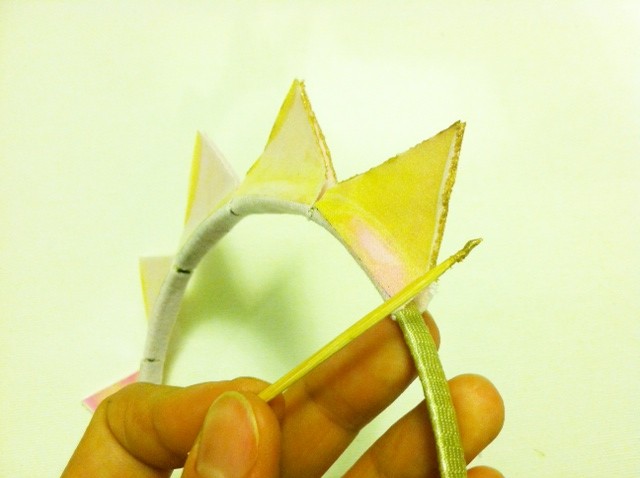
8. As an optional finishing touch, apply the metallic paint carefully with a toothpick along the fabric edges of the rays. Let it dry.

9. Try on the headband to spread a little sunshine both indoors and out!


[ 4 Comments | Posted on September 25th, 2012 ]

Events

Queens, NY @ Maker Faire/NY Hall of Science

See me at Maker Faire!Hey New York — this just in: Megan will be demonstrating some T-shirt transformation techniques at the Maker Square Stage at Maker Faire NYC in just one week!

Reduce, Reuse, ReFASHION! Learn 3 quick-fire, no-sew ways to transform that boring, boxy T-shirt that’s been languishing in the back of your closet into your next go-to style staple. Scissors will be provided, so bring a T-shirt and follow along!

Maker Faire takes place at the New York Hall of Science in Queens — details below.

Maker Faire NY 2012 (@makerfaire)
New York Hall of Science (@nysci)
47-01 111th Street
Queens, NY 11368

Click here for directions. Hope to see you there!

[ 1 Comment ]

More Fun, T-shirt Projects

From Our Readers: Maria & Franz!

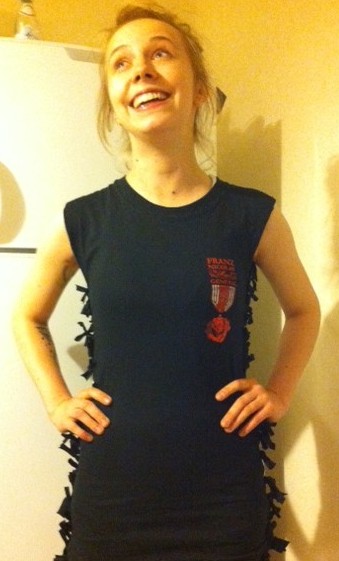
Earlier this summer, I got an email from my brother and sister-in-law with the subject line “T-shirt Guru, Help!” Maria and Franz are two musicians on an adventure along the Trans-Siberian Railway. Like any good musicians, they travel with merch, and like any good merch-peddlers, they run out of stuff fast. So they were down to two XXL T-shirts and quickly discovered that their fans were tending to come in smaller sizes. Maria writes…

“Franz and I have two XXL T-shirts left of one design and people much smaller than XXL keep expressing interest, but then balk at the size. We have a long train ride coming up, so I started thinking about trying to convert the shirts into cute, cut-up T-shirts. My sewing abilities and supplies are limited, but we’ve got decent scissors, safety pins, and a travel sewing kit. Can you recommend an easy-ish pattern that we could sell to a punky Russian girl?”

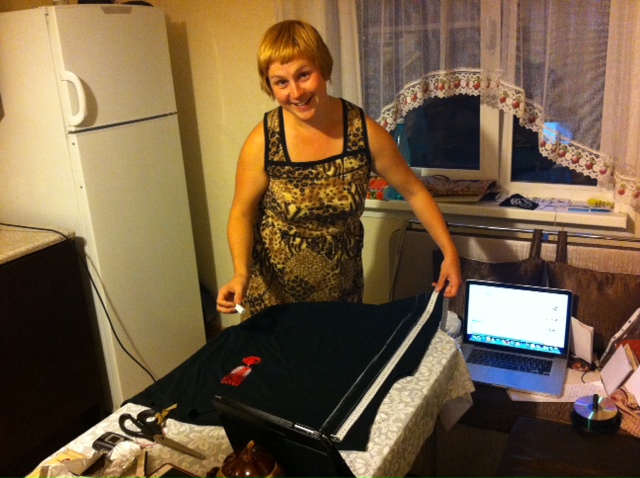
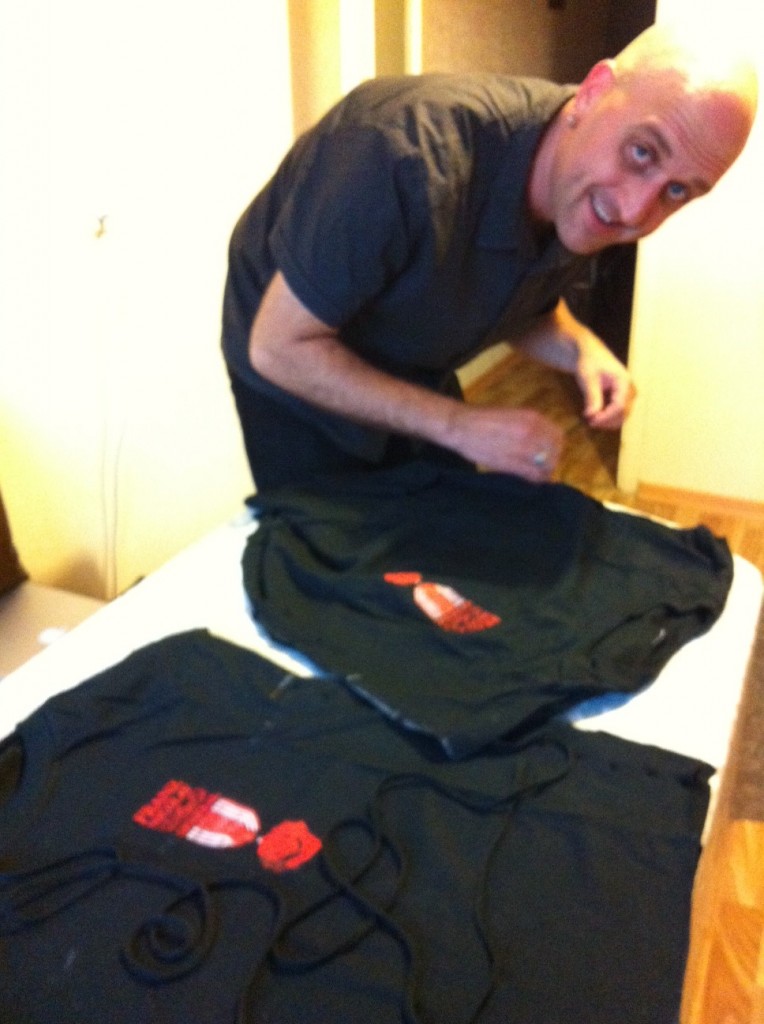
How could I ignore such a request? A few cross-continent consultation emails later, Maria and Franz had set up shop: They’d been crashing with some cute punk gals in the outer boroughs of St. Petersburg, and set up a workspace on their kitchen table. Armed with a pair of scissors, and that travel sewing kit, they set to work transforming their merch. Measuring and marking…

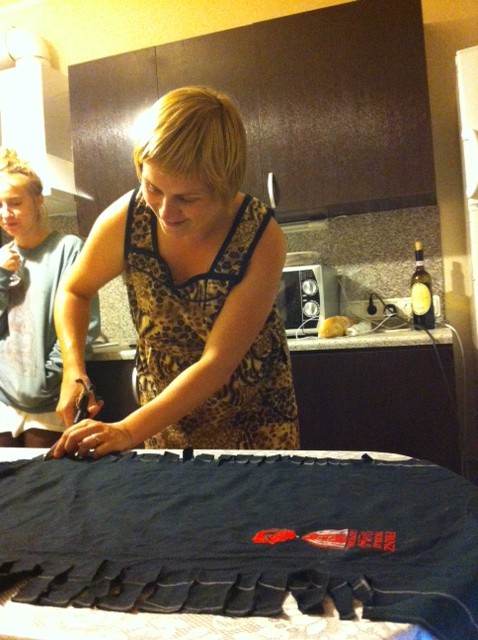
Cutting…

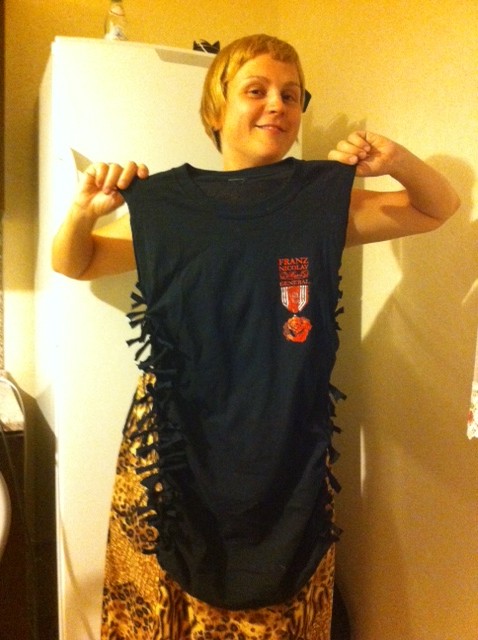
And knotting. Ta-da! It’s the “Knot So Fast” (project #104) tank top from Generation T: Beyond Fashion.

Sveta, one of the aforementioned cute punk girls who was looking on, was suspicious of all the scissor activity, but once she tried on the completed result, she asked if she could keep it, so, it seemed to be working. Nothing like converting a skeptic!

Then it was time to tackle “Outer Lace” (project #16) from Generation T.

And then they set off in search of one of the Russian editions of the two books, should any additional emerchencies arise.

UPDATE from the road: “We just sold the last of our Generation T-styled Franz Nicolay shirts to the fashionable women of Orenburg Russia. Thanks for the designs!”

[ Comments Off on From Our Readers: Maria & Franz! | Posted on September 14th, 2012 ]