Other Projects

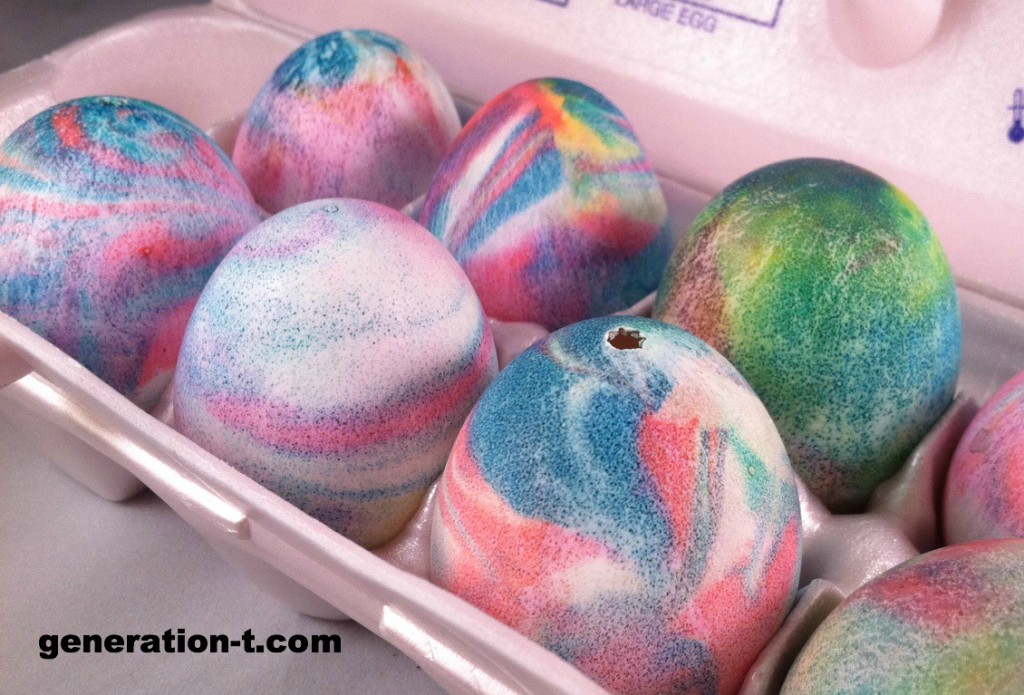
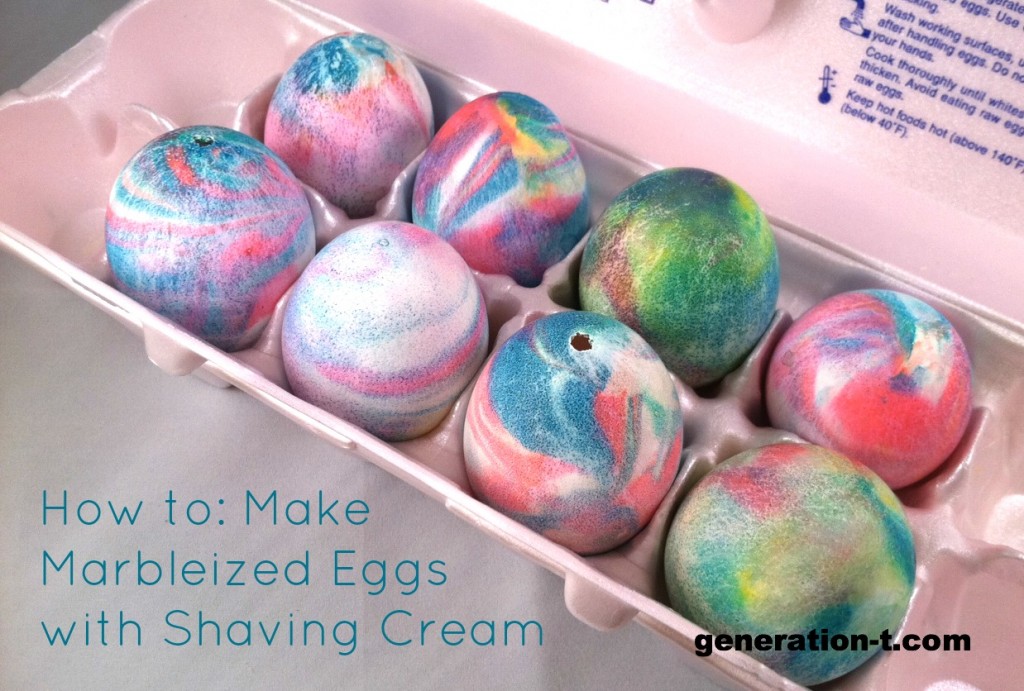
Dye Easter Eggs with Shaving Cream

Okay, we kicked off a week of non-T-shirt-related posts with the Glitter Dot Easter Eggs yesterday, because as teased last week, I taped a bunch of how-to videos for About.com and since so many of them are Easter-themed, that’s what’s comin’ atcha! I’m definitely not the first person to use shaving cream and food coloring to dye my Easter eggs, but the amazing marbleized effect on the surface of the egg is so irresistible…

Materials:
-eggs (blown or hard-boiled)
-food coloring
-foaming shaving cream
-plastic spoon or knife
-bamboo skewer
-drying rack
-paper towels
-a timer (4-5 minutes)

Make it:
-Click below to follow along with the video tutorial for Marbleized Eggs with Shaving Cream for About.com.

Update: I heard from a commenter that you can do this technique with Cool Whip, too! Have you tried it?


[ 1 Comment | Posted on March 27th, 2013 ]

Other Projects

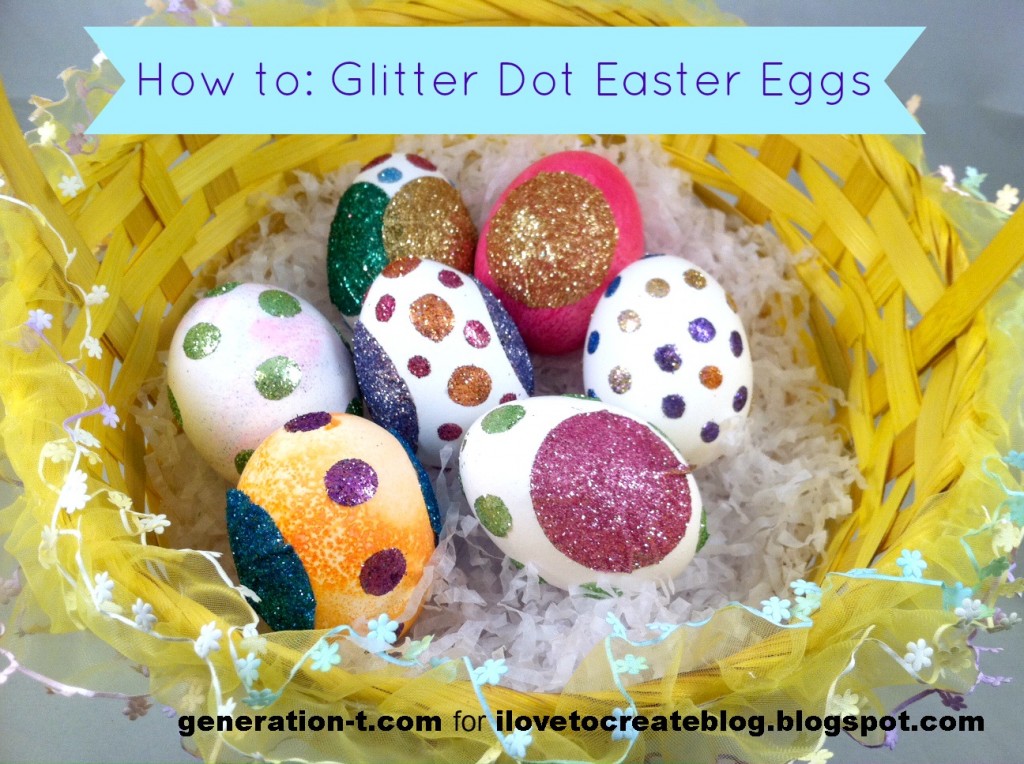
iLoveToCreate: Glitter Polka Dot Easter Eggs

I’m pretty traditional when it comes to decorating eggs at Easter time (dollar store egg dying kit, anyone?), but to be honest, it was getting kind of dull year after year. So this year, I dug through my craft stash to find a material that might have good crossover potential — one that was likely developed for one particular use (say, scrapbooking) that I could easily apply to something else (like Easter eggs). And voila!

Bring on the polka dots! Bring on the disco sparkle! The best part? No waiting around for dye to set or glue to dry. This is egg decorating with immediate (and rather shimmery) results.

For materials for the project and how to make these sparkle-riffic eggs, click below to watch the video tutorial I did for About.com and/or follow the step-by-step illustrated instructions (and a variation) at iLoveToCreate.com!


[ 2 Comments | Posted on March 26th, 2013 ]

Adventures

Weekend Craft Fun!

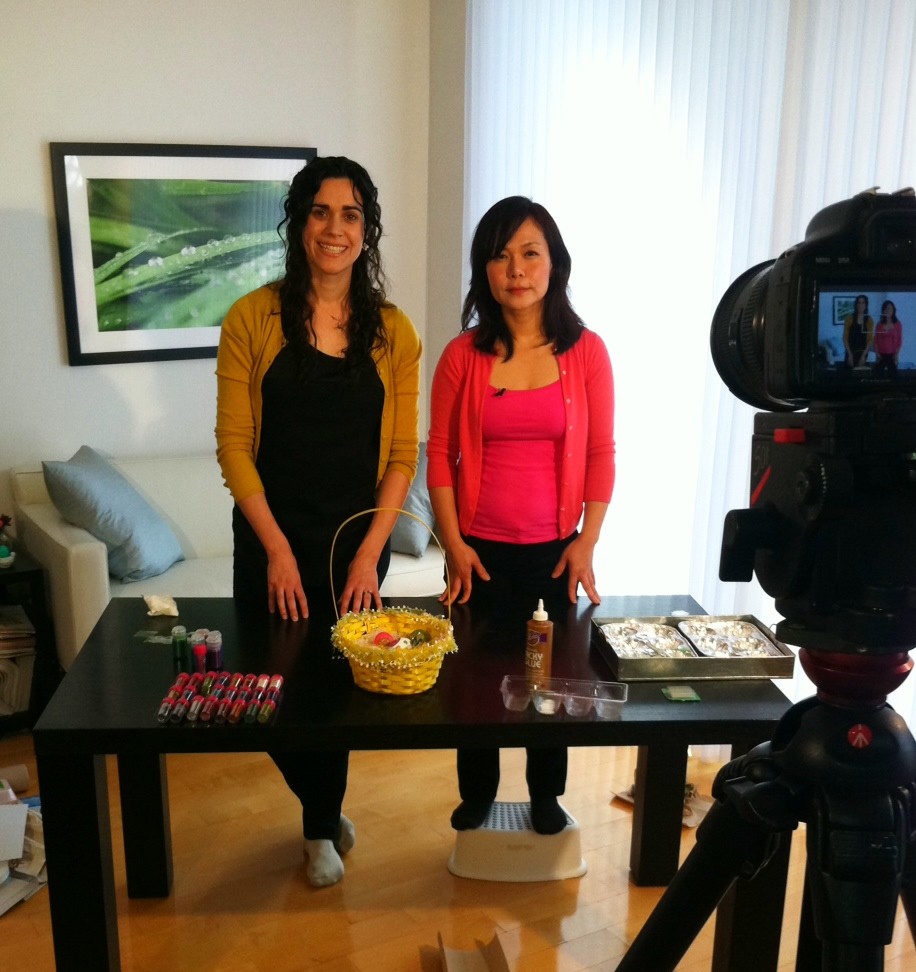
A busy weekend! On Friday I taped seven — seven! — craft tutorials for About.com. I’ll let you all know when the links are live so you can all get in on the craft action — we decorated eggs (three ways!) and umbrellas, and made some keepsake art pieces for the wall. Here’s a behind-the-scenes sneak peek (you can see what a giant I am!).

On Saturday I went away to camp — Brooklyn Craft Camp, that is. It was fun to be a craft camper — fun to have that time set aside to do nothing but make things and chat with my neighbors at each craft table. I practiced my embroidery under the expert eye of Jessica at Miniature Rhino, made cut paper cards with Julie of Your Secret Admiral, attempted crochet with Cal of Hodge Podge Farm, and made a painted bead necklace with Christina of MissBatch. Jay McCarroll was the keynote speaker — and there was a Pom-Pom Bar courtesy of PurlSoho! More photos to come later this week, once I get everything unpacked and uploaded. (I know, I know, it’s not like it was two weeks away at summer camp, but I came home with a lot of bags!)

Stay tuned!

[ Comments Off on Weekend Craft Fun! | Posted on March 18th, 2013 ]

More Fun

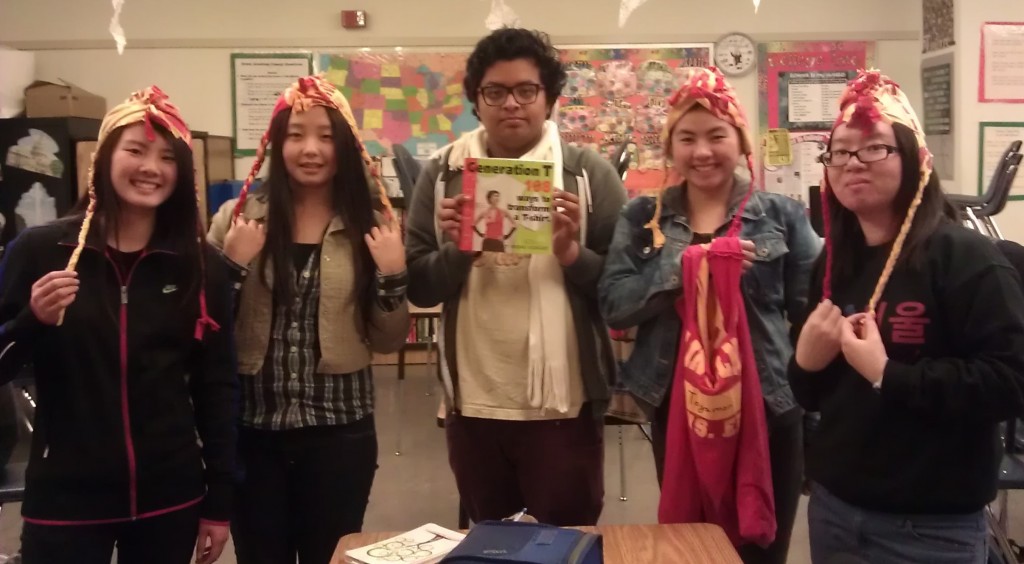
From Our Readers: Lincoln High School!

In December, I heard from a teacher at the Lincoln High School Green Academy, a 3 year program for kids interested in potential careers or majors in the green economy.  Her students took old PE uniforms (brilliant!) and made hats and bags (projects #72 Mohawk Mo’ Rock! and #42 Plastic Surgery from Generation T: Beyond Fashion) to give as gifts to the Principal, Assistant Principals, and other members of the school staff who helped them.

Be still my heart: Rescuing shirts that would otherwise have been trash-bound and upcycling them into giftable items!

[ Comments Off on From Our Readers: Lincoln High School! | Posted on March 1st, 2013 ]

T-shirt Projects

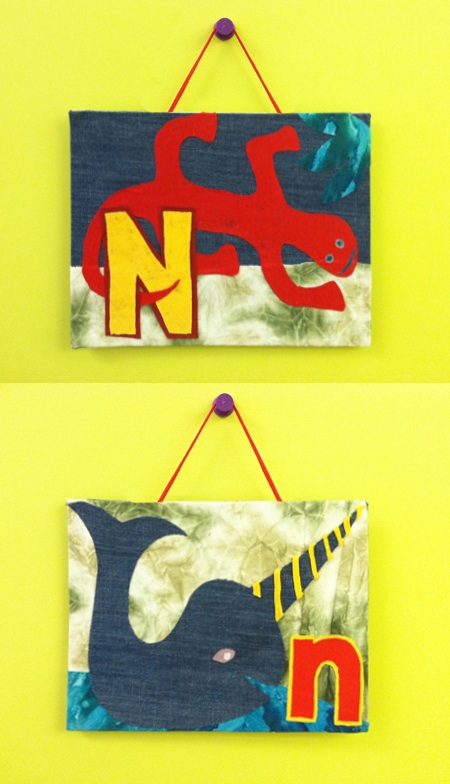
I Love to Create: A is for Animal Wall Decor

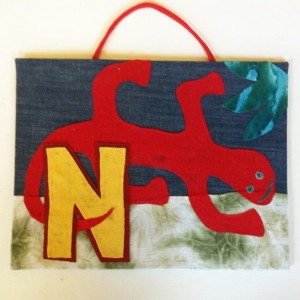
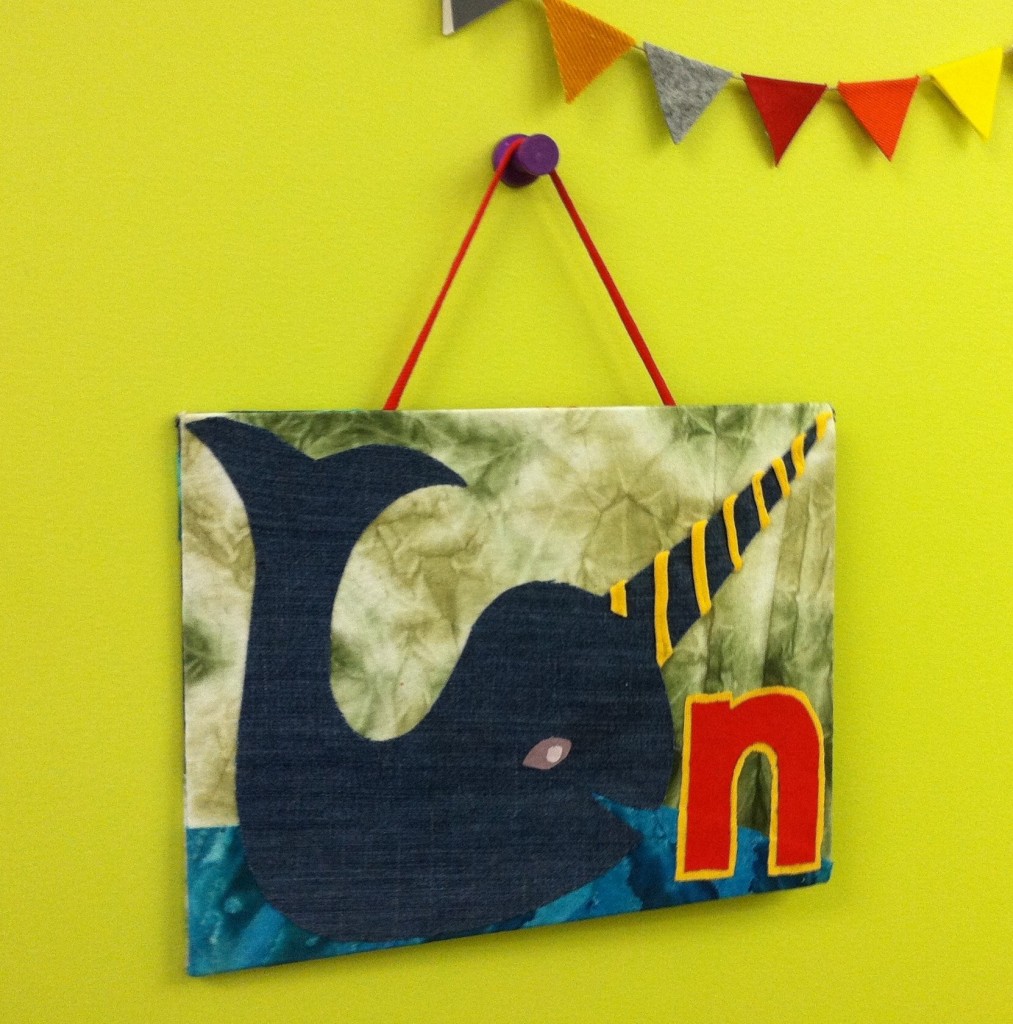
A is for Ant, B is for Beetle, C is for Cat…. Here’s an easy way to turn old clothing scraps (in this case, T-shirts and jeans) into personalized decoration for a young (or young at heart) friend’s bedroom wall or door. Whether you stick with the animal theme, or go with fruits and veggies (A is for Apple, B is for Broccoli, C is for Carrot), geography (A is for Australia, B is for Belgium, C is for China), or a more random selection of words (A is for Astronaut, B is for Bubbles, C is for Castle), part of the fun is brainstorming the image that will represent the recipient’s initial. For my son, N is for Narwhal was a shoo-in. N is for Newt came second. What animal would you choose?

Materials:
-Paper
-Pen
or pencil
-Scissors
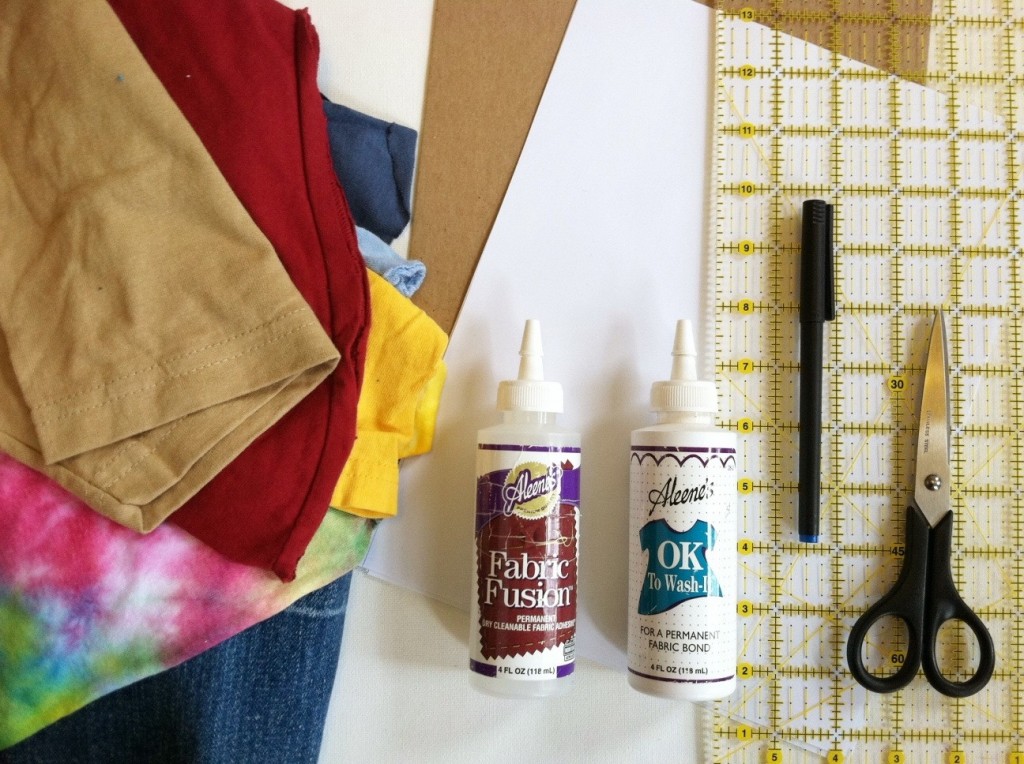
-Fabric scraps (old T-shirts and denim pieces)
-2 sheets 8 1/2″ x 11″ medium-weight cardboard (often used as stiffener in a flat parcel)
Aleene’s OK to Wash It
or Aleene’s Fabric Fusion permanent fabric adhesive
-Ruler
Fabric paints (optional, for additional embellishment)

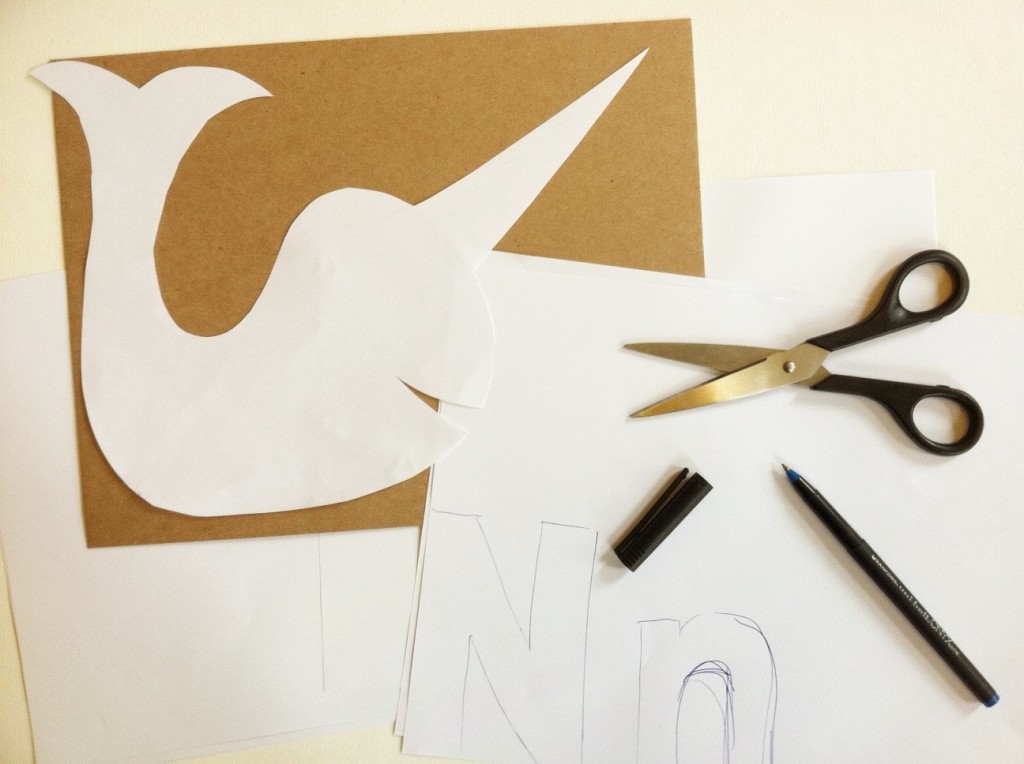
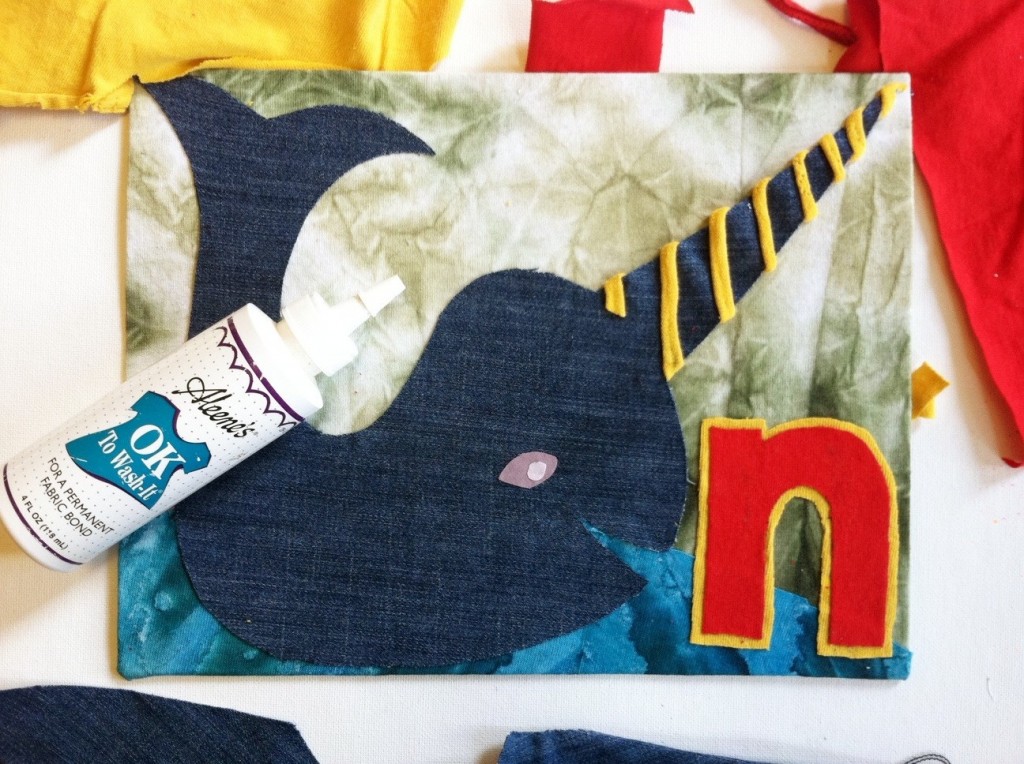
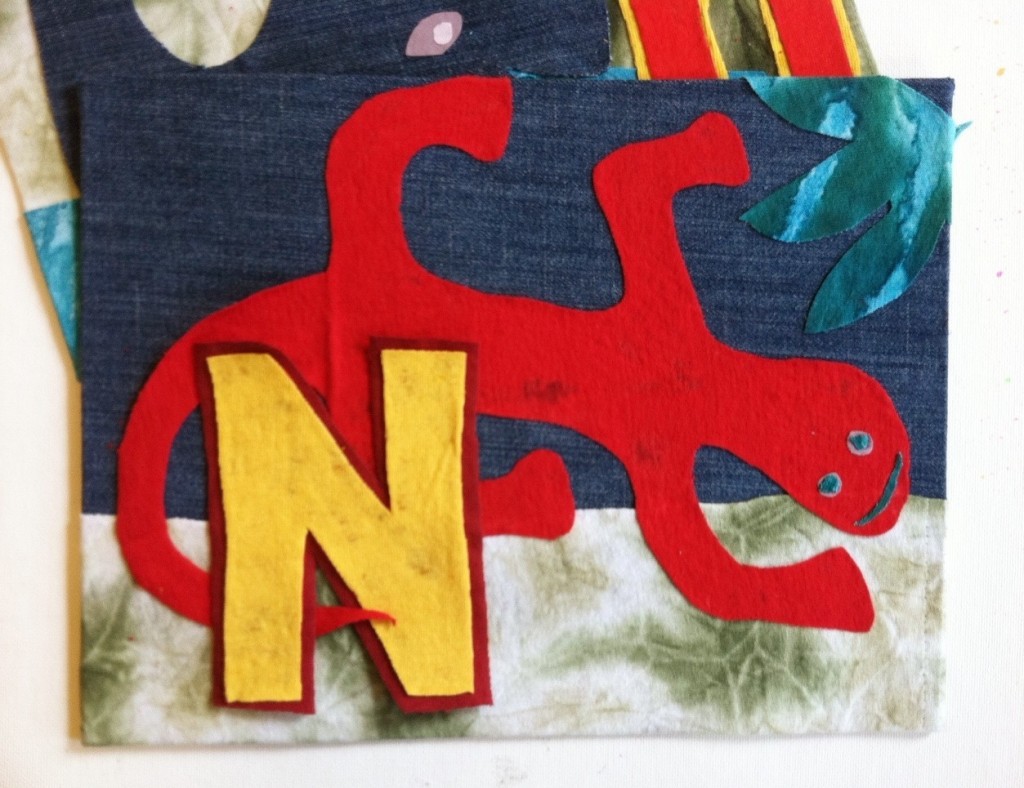
1. Select a friend’s or child’s first initial and then choose an animal (or two) with a name that also begins with the letter: I chose to start with N for Narwhal (that fabulous sea mammal that looks like it was crossed with a unicorn) and N for Newt (an orange salamander. Draw an outline of each animal and the capital and lowercase letter. Cut them out and arrange them on the cardboard to make sure they’ll fit. Set them aside.

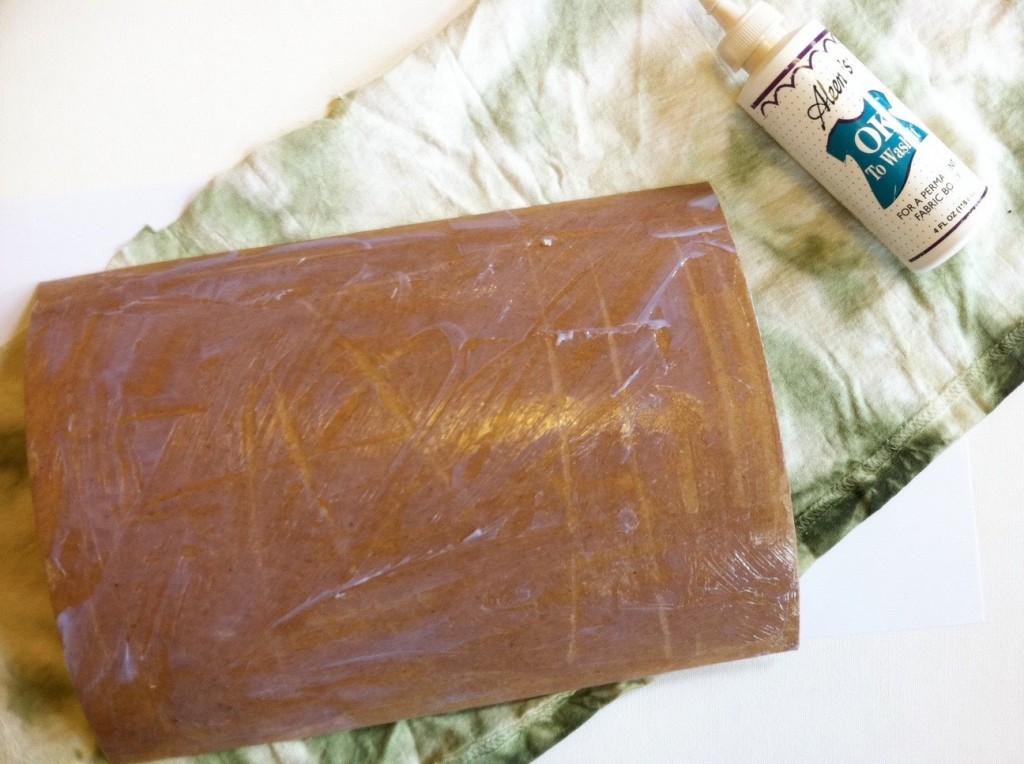
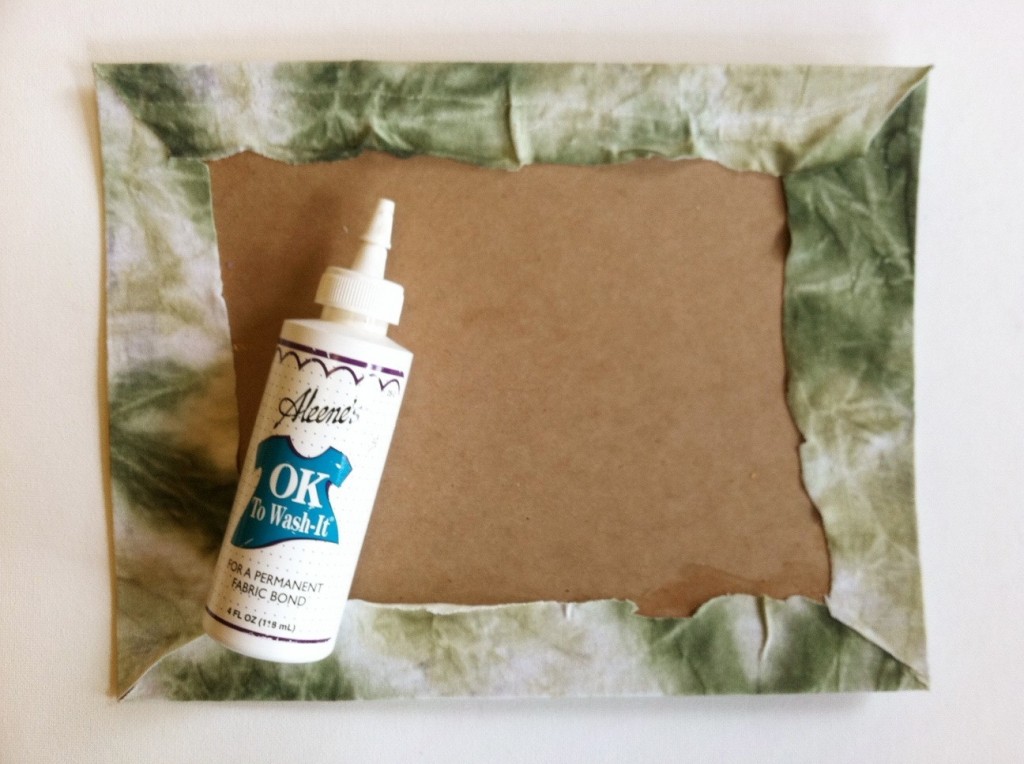
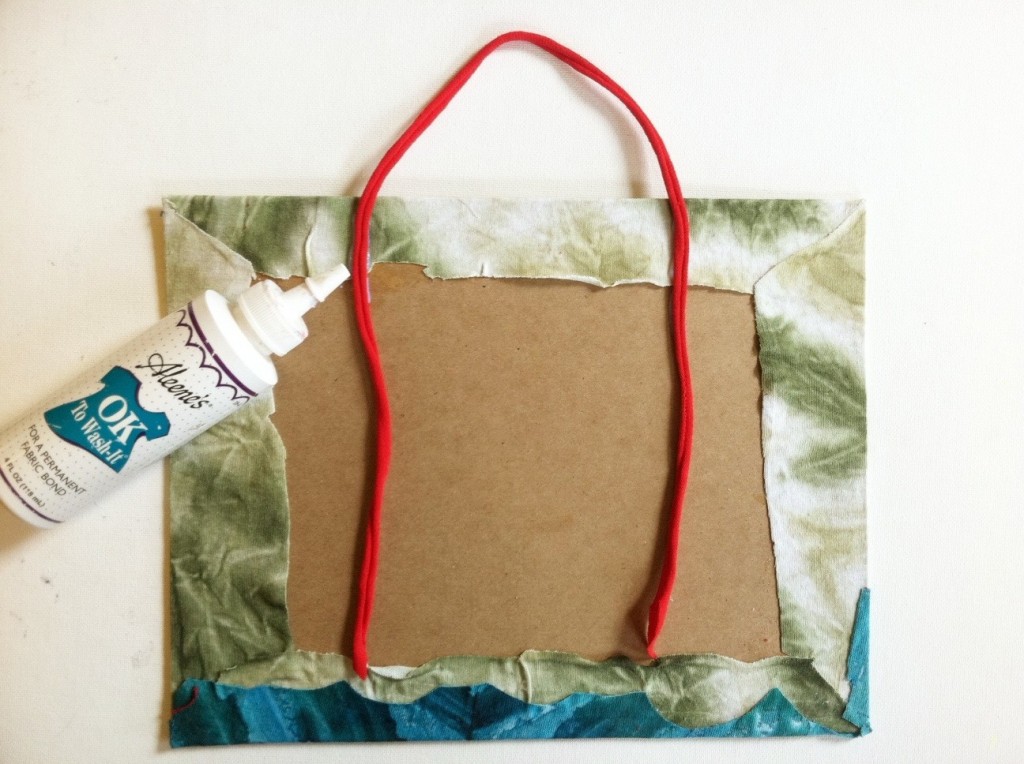
2. Spread fabric glue evenly over one side of one of the sheets of cardboard and press it onto fabric.

3. Fold and glue the edges to the back of the cardboard. (It’s okay if the edges are messy — they’ll be covered up.)

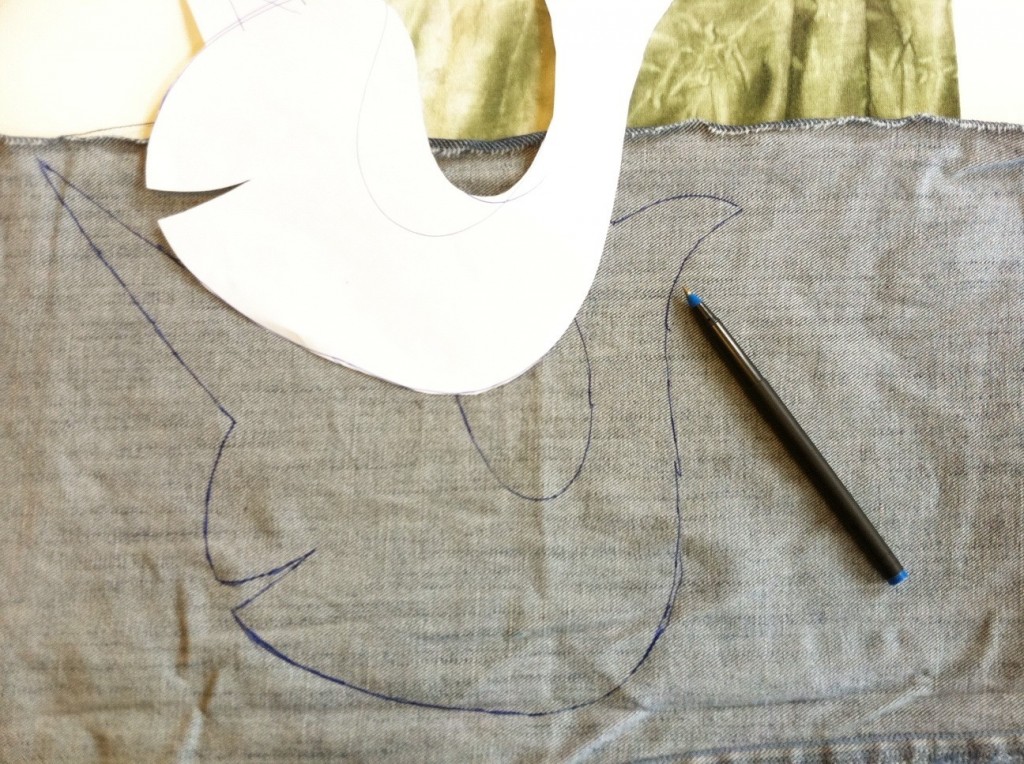
4. Trace one of the paper animal templates (in reverse) onto the wrong side of one of the fabric scraps. Repeat with different scraps with the letters and second animal.

5. Arrange and glue each of the elements onto the fabric-covered cardboard. Add background (like water!) and details (spiral on the horn, eyes!), making sure to layer the pieces appropriately. Let it dry and proceed to decorate the second piece of cardboard!

6. Cover the second piece of cardboard by following steps 1 and 2. Arrange and glue on the embellishments by following steps 4 and 5.

7. Flip one of the panels backside up and measure about 3″ in from each side. Mark each point.

8. Squeeze fabric glue at each mark, and press the length of a T-shirt cord into each line of glue.

9. Then spread glue across the entire backside of one of the panels and press it firmly to the back of the other, sandwiching the hanging strap ends between them. (This tidily covers any messy work and makes the sign reversible, whether you prefer caps or lowercase — or narwhals or newts.) Let it dry.

10. A, B, C, D, E, F, G…H, I, J, K, L, M, N is for Newt and Narwhal!

After it’s completely dry, choose a side to display and hang it up!

Variations:
-If you’re feeling ambitious, make multiple signs to spell out a person’s name. Arrange them in a row, a column, or rectangle.
-If you’re feeling really ambitious, make the whole alphabet, and line the edges of the room with A through Z animals!


[ 6 Comments | Posted on February 26th, 2013 ]

T-shirt Projects

I Love to Create: “You Complete Me” T-shirts!

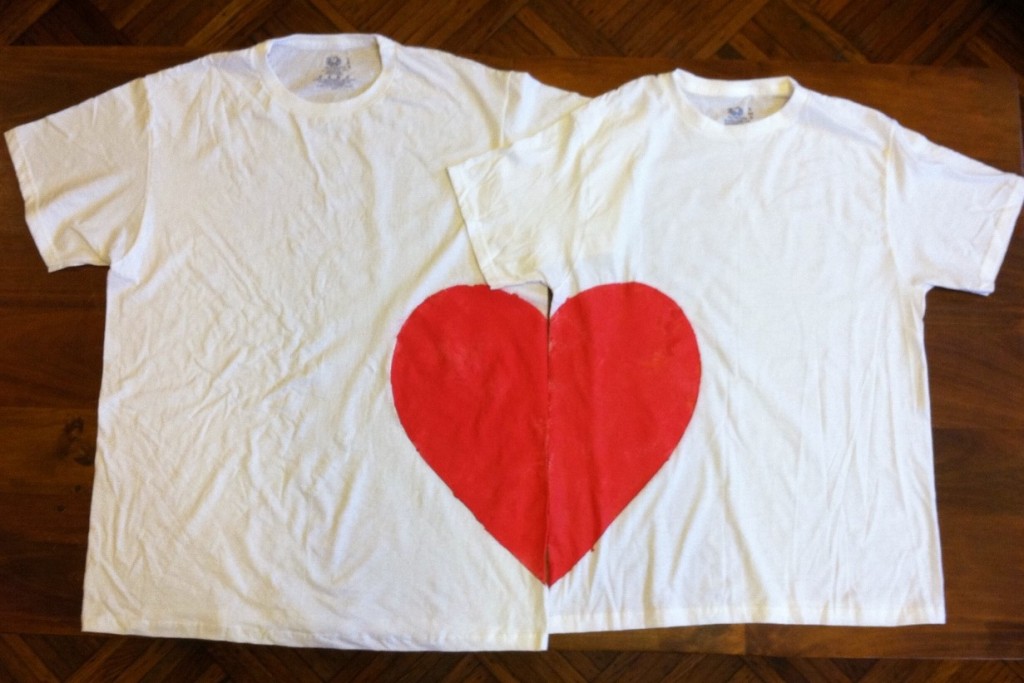
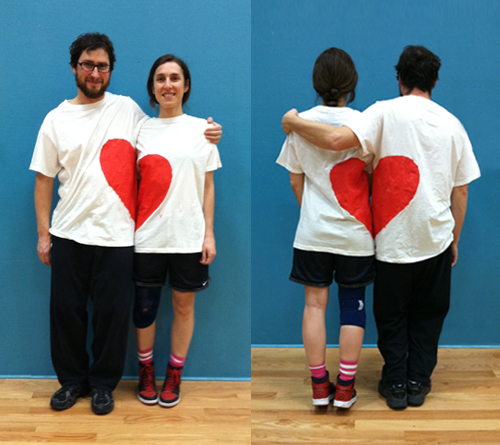
The sweetest thing to make for your best pal on Valentine’s day? The sweetest thing for your sweetie? I call it the “You Complete Me” Tee. Part friendship charm necklace, part Pinterest inspiration (these gloves!), each T-shirt in this pair appears, at first look, to be decorated with an abstract design when it’s without its match. When the two shirts are reunited, however, they form a heart. Awww…

Materials:
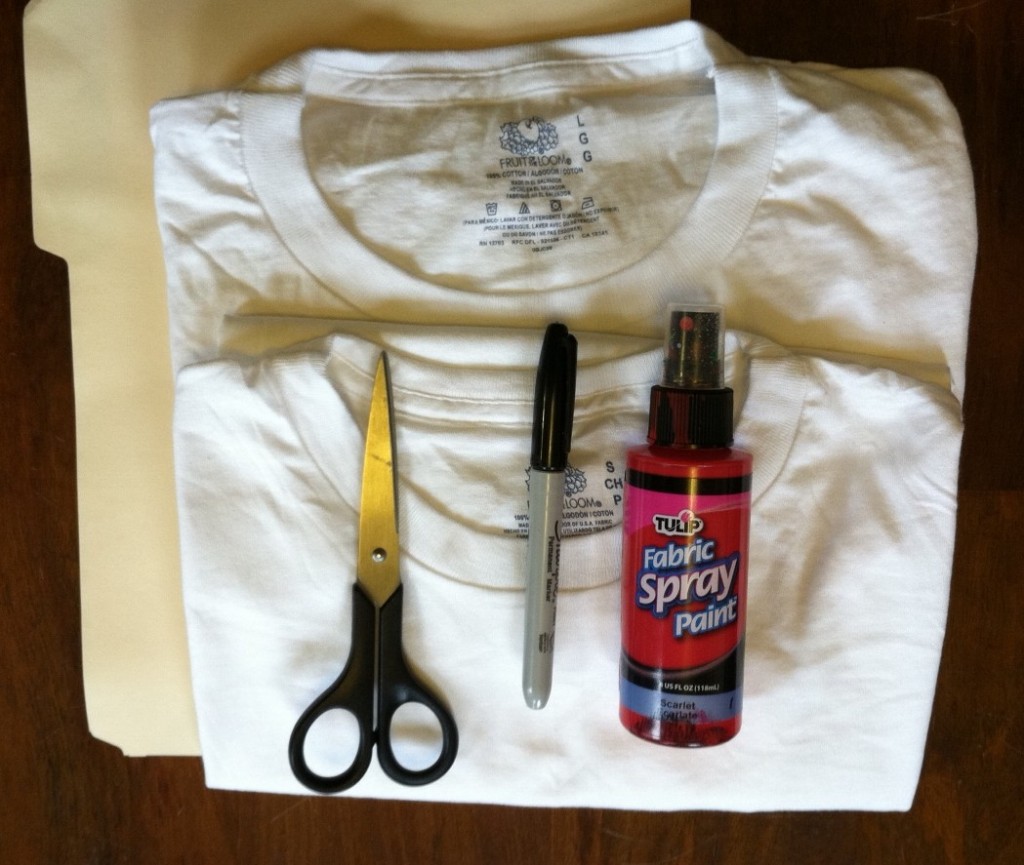
-2 plain T-shirts (preferably light in color)
-scissors
-empty file folder (or other large piece of card stock)
-marker
Tulip Fabric Spray Paint (in red!)
-plenty of newsprint to protect your work surface

Make It:

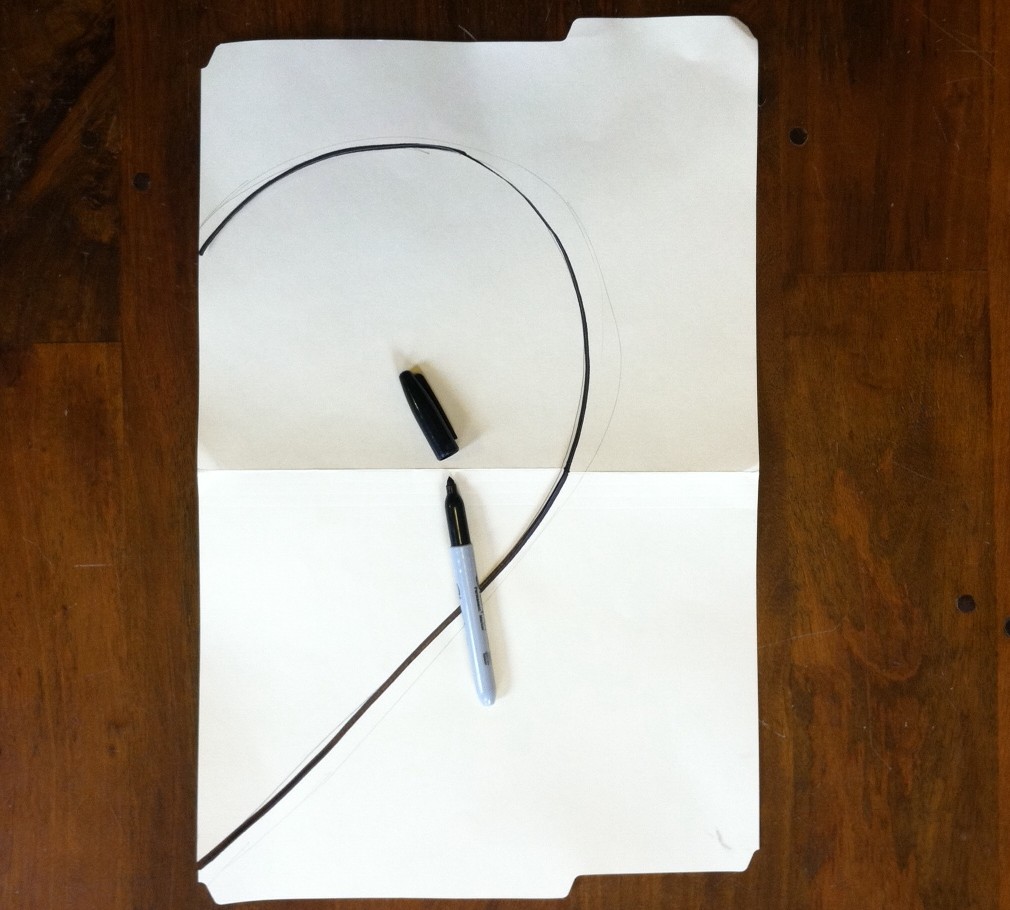
1. Lay the folder flat and use the marker to draw half of a heart along one of the long edges. (Note: I had to make an adjustment later on to accomodate the dimensionality of the human body–so don’t be afraid to make a particularly bulbous heart in order for it to “read” when the shirts are side by side.)

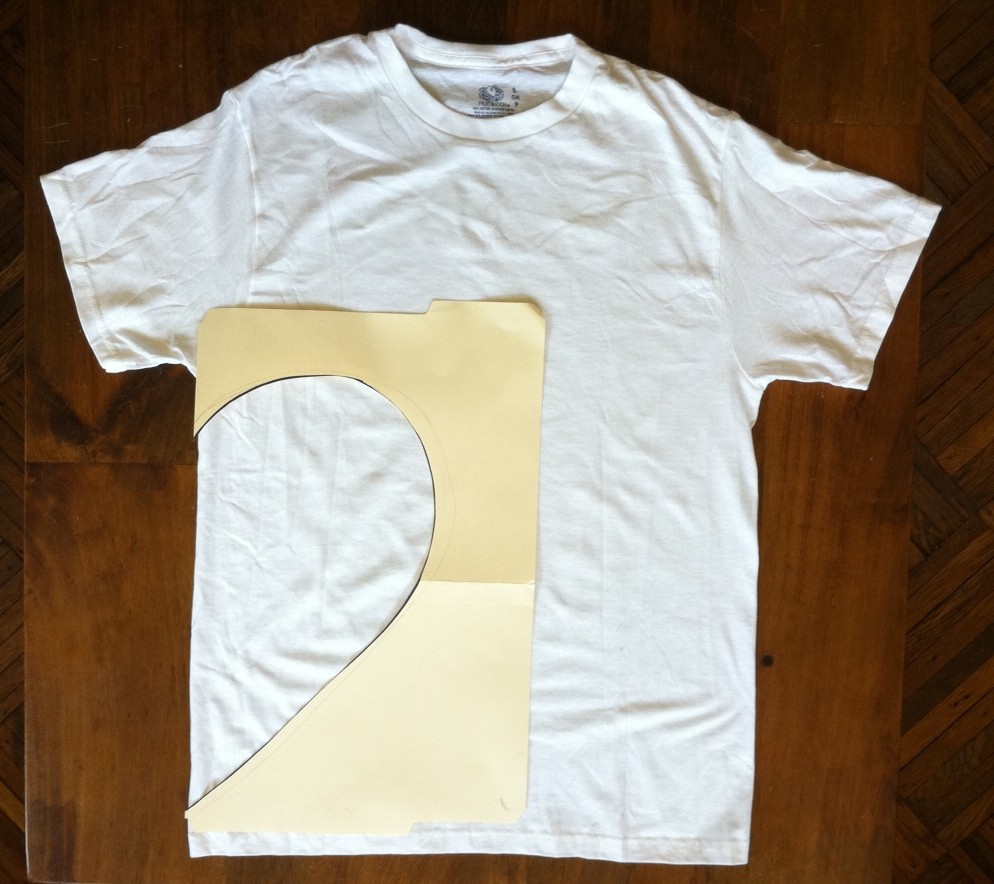
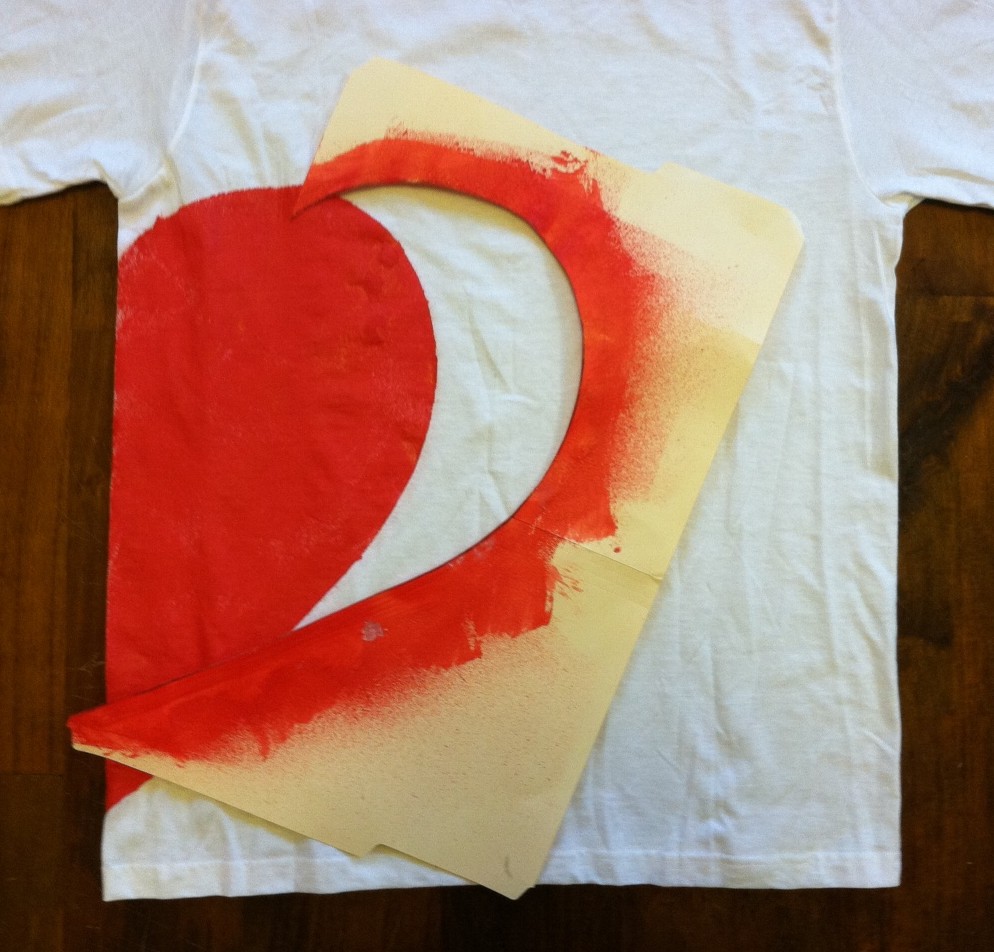
2. Cut out the half-heart template and line it up along the side of the torso of one of the shirts (under the sleeve). Mask the rest of the T-shirt (and use newsprint to protect your work surface), and spray paint the half-heart.

3. Carefully remove the stencil from the T-shirt, let it dry, and then flip the template to paint the other side of the heart on the other T-shirt. Then, when both the T-shirts and the stencil have dried, repeat the process to complete each heart on the back of the shirt. (And don’t worry if the paint seeps under the stencil a bit — like relationships, it might get a bit messy at times!)

4. Let it dry completely, wear it, and go find your best bud. (And don’t forget to make sure you stand on the correct side–and bend your knees or stand on your tiptoes, if necessary!)

Thanks to my friends Michael and Helen (who thematically appropriately identify as members of Camp Friendship Basketball League!) for modeling.


[ 2 Comments | Posted on January 22nd, 2013 ]

Adventures

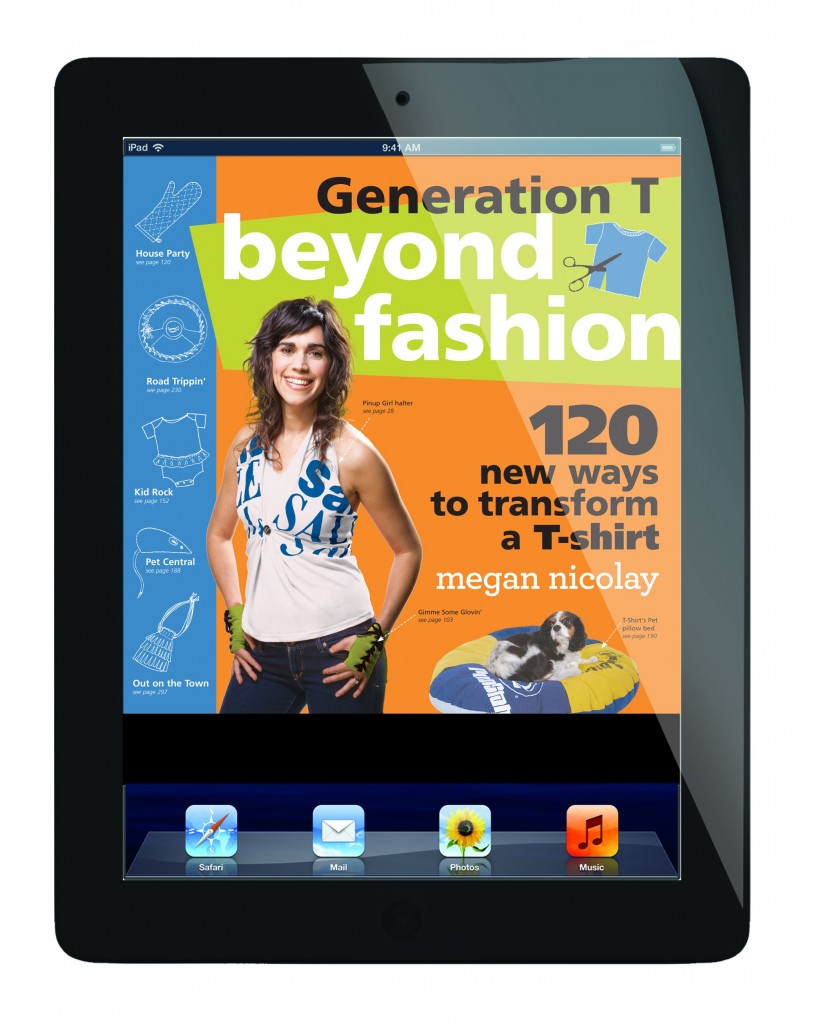
Generation T: Beyond Fashion, eBook Edition!

I’m so happy to announce, 3 years after its initial print publication, that Generation T: Beyond Fashion is now an eBook! As such, it is now conveniently available for perusal via your tablet e-reader — Nook, Kindle, iPad or iPhone, Sony e-Reader, Kobo, and so on — the works!

Naturally, I think this would be the perfect advance-download for that lucky someone on your list who’s receiving a Kindle or iPad for the holidays…hint, hint!

And, since many of you have asked, yes, the first book, Generation T: 108 Ways to Transform a T-shirt, will be available soon.

[ 1 Comment | Posted on December 6th, 2012 ]

More Fun

An iLoveToCreate iPad Holiday Giveaway!

They’re sure doing more than hanging mistletoe around iLoveToCreate studios. The company I blog for once a month (check out my recent holiday T-shirt project) is celebrating the season with a pretty sweet giveaway!  You can enter to win an Apple iPad — you know, one of those well-designed electronic tablets on which to read all your favorite inspiration sites and blogs all year long — you know, like (ahem) ilovetocreate.com or generation-t.com. Details below…


1 Lucky Winner will win:

Apple iPad Wi-Fi 16 GB – 3rd generation

Pick up the iPad and suddenly, it’s clear. You’re actually touching
your photos, reading a book, playing the piano. Nothing comes between
you and what you love. To make that hands-on experience even better,
they made the fundamental elements of iPad better – the display, the
camera, the wireless connection. All of which makes the third-generation
iPad capable of so much more than you ever imagined. Everything you do
with iPad, you do through its large, beautiful display. And when the
display is better, the entire iPad experience is better. The Retina
display on the iPad features a 2048-by-1536 resolution, 44-percent
greater color saturation, and an astounding 3.1-million pixels – in the
same 9.7-inch space. That’s four times the number of pixels in iPad and a
million more than an HDTV. Those pixels are so close together, your
eyes can’t discern individual ones at a normal viewing distance. When
you can’t see the pixels, you see the whole picture. Or article. Or
game. In ways you never could before.

Product Features

  • 9.7 Retina Display; 2048 x 1536 Resolution
  • Apple iOS 5; Dual-Core A5X Chip with Quad-Core Graphics
  • 5 Megapixel iSight Camera; 1080p Video Recording
  • Wi-Fi (802.11a/b/g/n); 16 GB Capacity: 1 x Headphones – Mini-phone
    stereo 3.5 mm, 1 x Docking / port replicator – 30-pin dock connector
  • Up to 10 Hours of Battery Life; 1.44 lbs

Giveaway ends December 31st at 11:59pm, open to US residents only, ages 18+. See Rafflecopter’s Terms and Conditions to enter please use the Rafflecopter form below. Good luck!

a Rafflecopter giveaway

[ 4 Comments | Posted on December 5th, 2012 ]

T-shirt Projects

I Love to Create: Snowflake Stencil T-shirts!

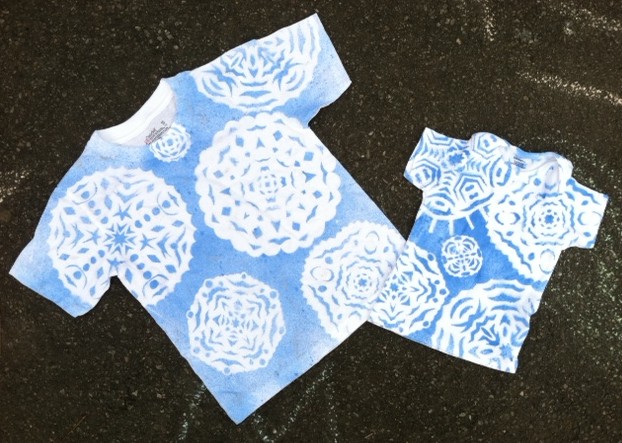
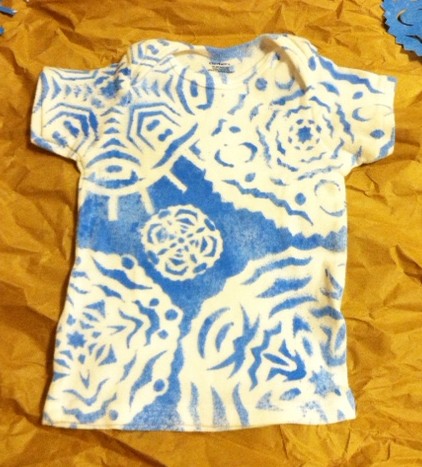
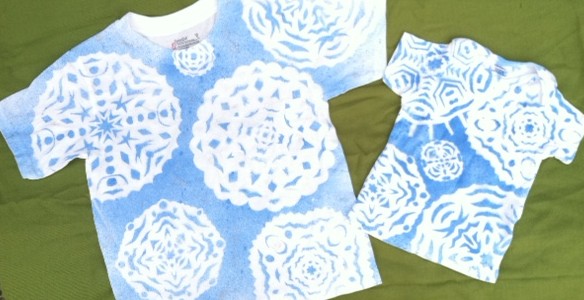
We had a wicked nor’easter blow through the East Coast last week, and though the snow pile-up lasted less than twenty-four hours, it sure put me in the mood for winter. So with a family gathering around the corner, I decided to make some wintery-themed T-shirts for the two young cousins in attendance–a little something to wear inside when it’s too cold outside! And a nice alternative to the ubiquitous holiday sweater, don’t you think?

Materials:
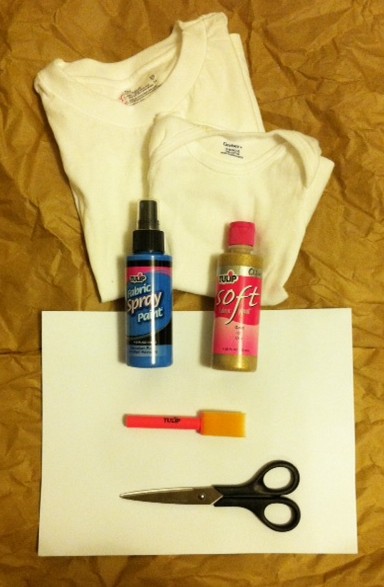
-white T-shirt(s) in appropriate size(s)
Tulip fabric spray paint (light blue)
-white printer paper
-paper scissors
-iron and press cloth
Tulip Soft Fabric Paint (Gold Glitter, optional)
Tulip Sponge Brush (optional)

Make it:
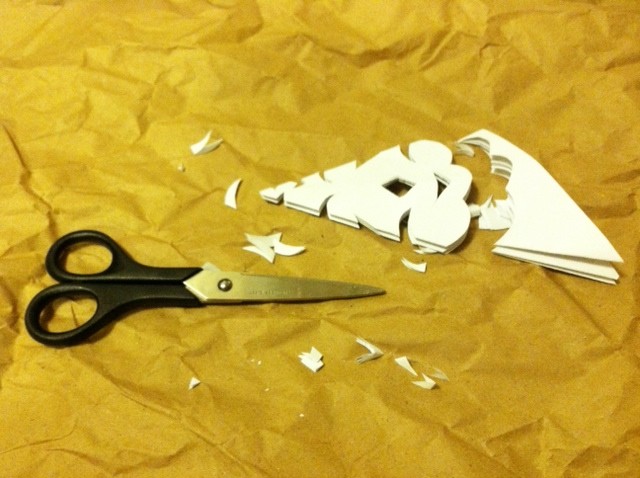
1. Fold one of the sheets of paper on a diagonal to “square” it. Use scissors to cut off the excess strip of paper.

2. Bring the lower left corner up to fold the triangle in half again.

3. And again!

4. Use your scissors to start cutting notches along the folded edges: zigzags, circles, crescents, curls, diamonds, and so on! Don’t forget to cut the open edges in an arc, so that the snowflake will be somewhat round in appearance when you unfold.

5. Unfold!

6. Repeat to make many snowflakes (no two will be alike)!

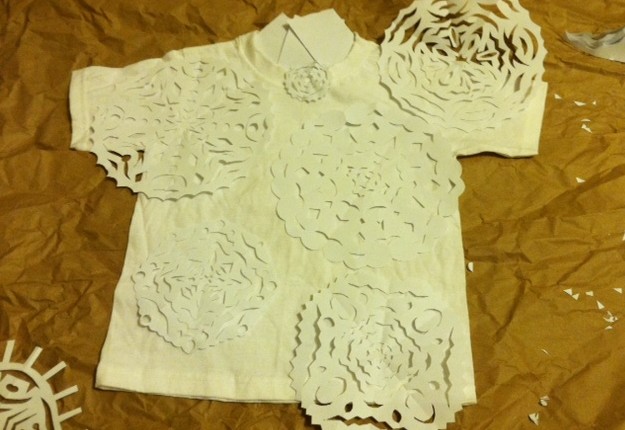
7. Lay the T-shirt flat on your work surface. Arrange the snowflakes onto the front, and press them with a warm iron to keep them relatively flat. (Note: The weight of the spray paint will actually help them stay flat, too.)

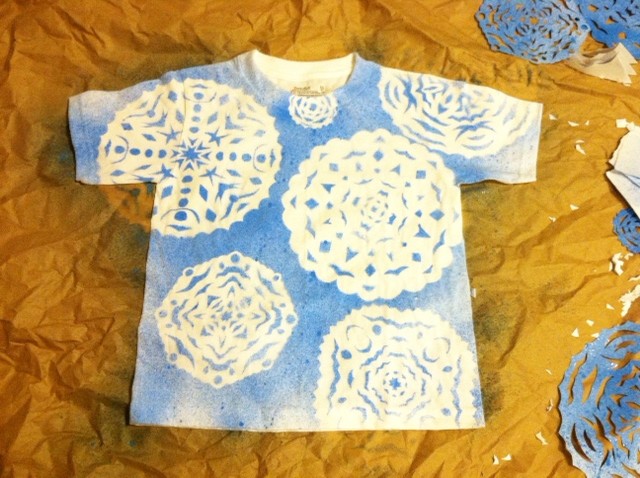
8. Lightly spray blue paint over the entire T-shirt (I masked the inside back neckband with paper scraps).

9. Carefully peel off the snowflakes and set them aside. Let the T-shirt dry.

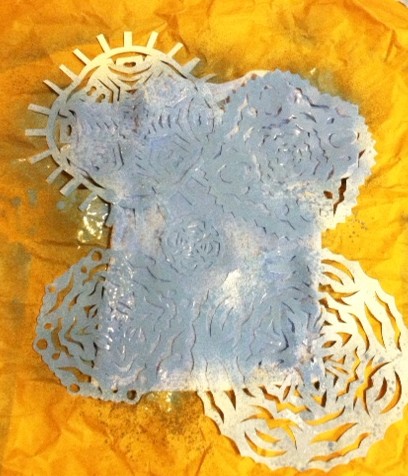
10. Reuse the snowflakes to make T-shirt number two!

Optional: Use the foam brush and glitter paint to add sparkly highlights to the snowflakes.

Let dry, then try on the shirt (or gift it to its recipient!), and curl up by the fire, knowing your snowflakes will never melt.


[ 2 Comments | Posted on November 20th, 2012 ]

T-shirt Projects

Harold and the Purple Crayon Halloween!

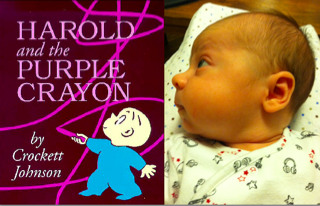
Baby’s first Halloween is a tough one — there’s a lot of pressure to make it memorable (even though he won’t remember it at all) and it’s also probably the only time that he won’t have an opinion about the costume. About two months in, Mr. T and I discovered our baby had not one, but two literary doppelgangers, and I promised that if he was still anywhere near as bald as he was at the time, we would honor one of his likenesses for his first Halloween. So between Crockett Johnson’s timeless “Harold” and the holiday-appropriate Alfred Hitchcock, Harold and his violet-hued crayon won out. Let’s start with the inspiration (above, at two months old). Wrinkled brow, giant cheeks, turned up nose. Pretty uncanny, right?
And please forgive the inconsistency in the photos…I made the costume over several late nights!

Materials:
-purple T-shirt (to use for parts)
-long-sleeved off-white T-shirt (or more, depending on how many “drawings” Harold will make)
-blue sleeper (this was worn as the top layer over 2 other sleepers, for warmth!)
-fabric scissors
-ballpoint pen
-ruler
-craft knife and cutting mat
gold fabric spray paint
freezer paper
-warm iron

-copy of Harold and the Purple Crayon by Crockett Johnson (for reference! and for reading!)
disappearing ink fabric marking pen
-sewing machine with matching thread
-needle and thread (for hand sewing)
-fiber fill
craft jingle bells (optional, to make the crayon rattle a bit)

Make it (Harold’s Purple Crayon):
1.
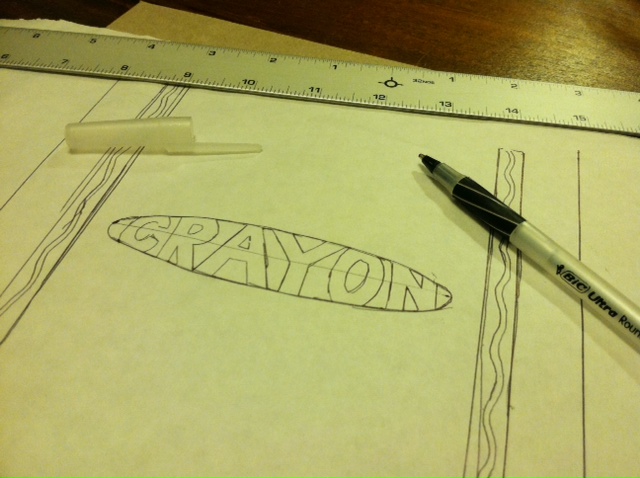
Use the ruler and ballpoint pen to mark out a stencil for the stuffed crayon.
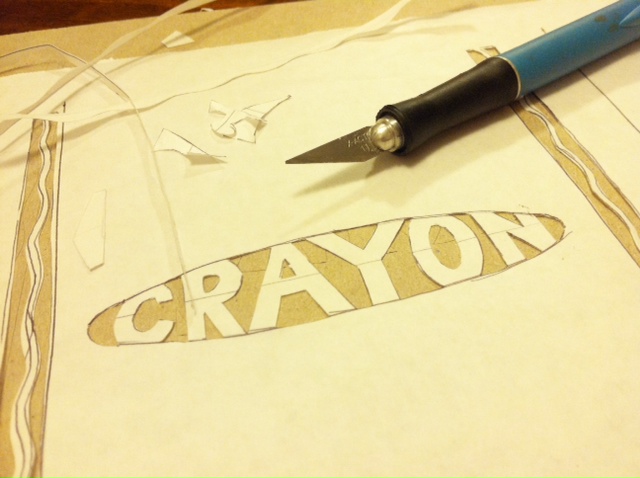
2. Use the craft knife and cutting mat to cut out the stencil.
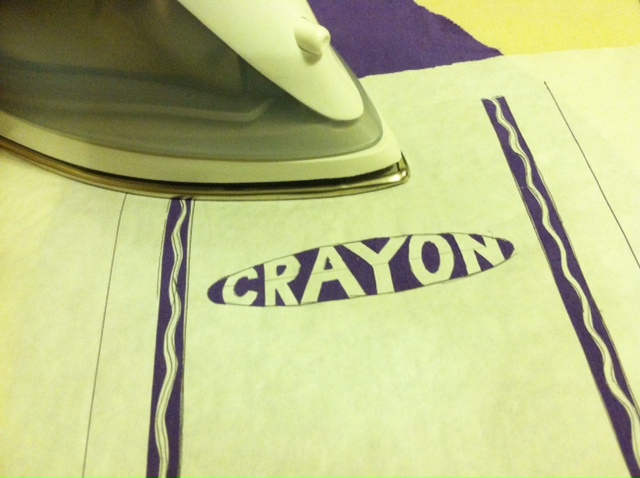
3. Iron the stencil onto a scrap from the purple T-shirt (I used a flattened out sleeve).
4. Use the fabric paint to spray over the stencil, making sure to mask the areas you don’t want painted. (I originally was going to use black paint for authenticity, but saw this Gold Glimmer in my paint stash, and thought the high contrast would make it show up better!)
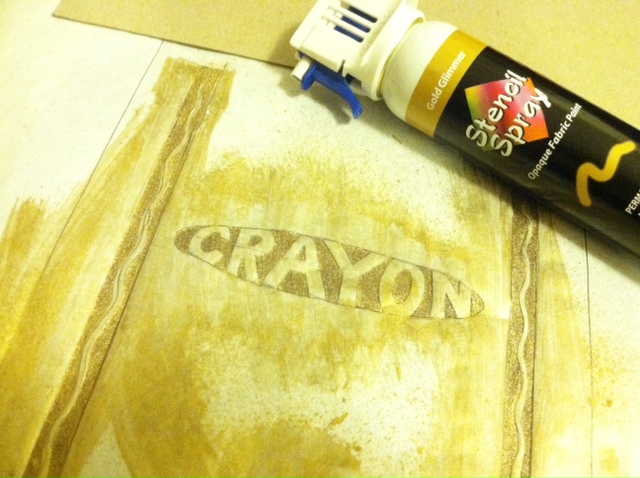
5. Let the paint dry for a minute, then peel off the stencil before letting it dry entirely. (I let the stencil sit too long on the one below, and as you can see the paint bled a bit  — so I made another one!)

6. Cut 4 to 5 additional rectangles of purple fabric to layer beneath the painted piece (to thicken the crayon wall and add structure). Cut a circle (also several layers) for the bottom of the crayon.
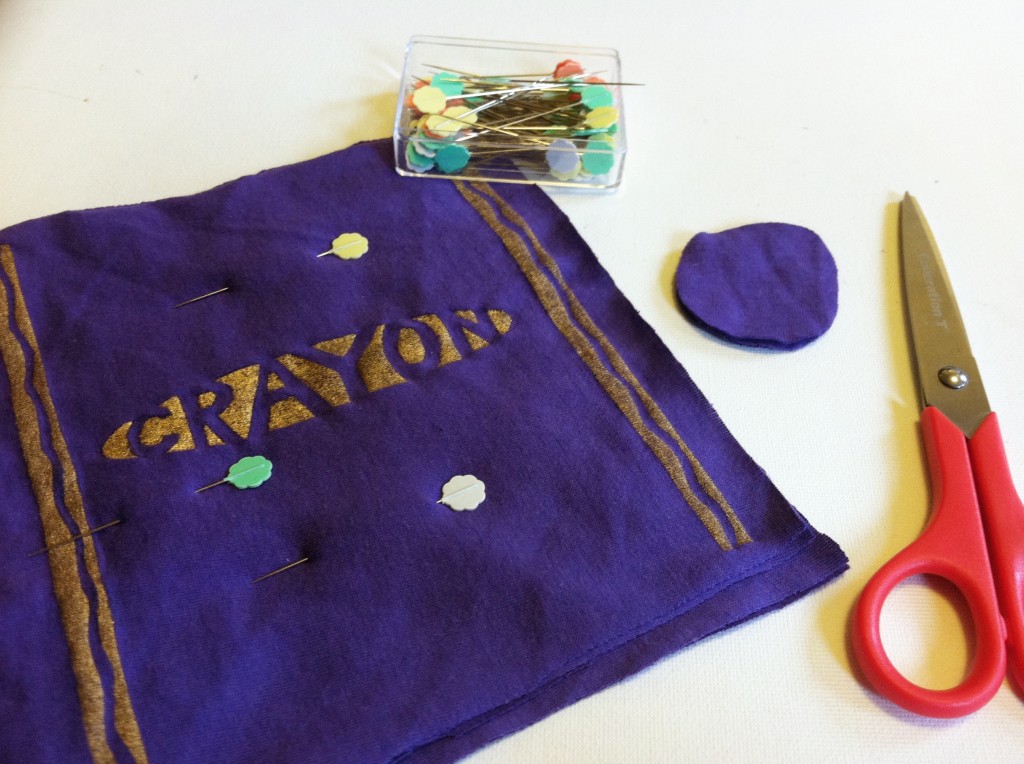
7. Fold the rectangle (all layers), right side in, and line up the paint lines. Then pin and use the sewing machine to stitch a straight line to create a tube. Make two angled cuts to help shape the point of the crayon.
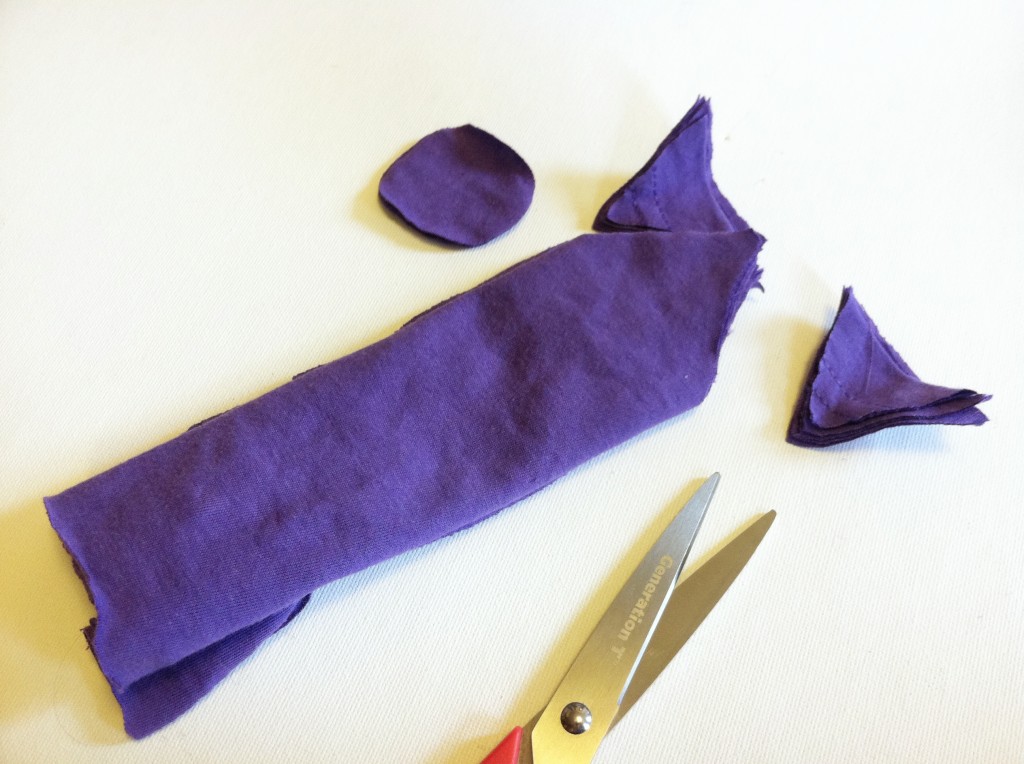
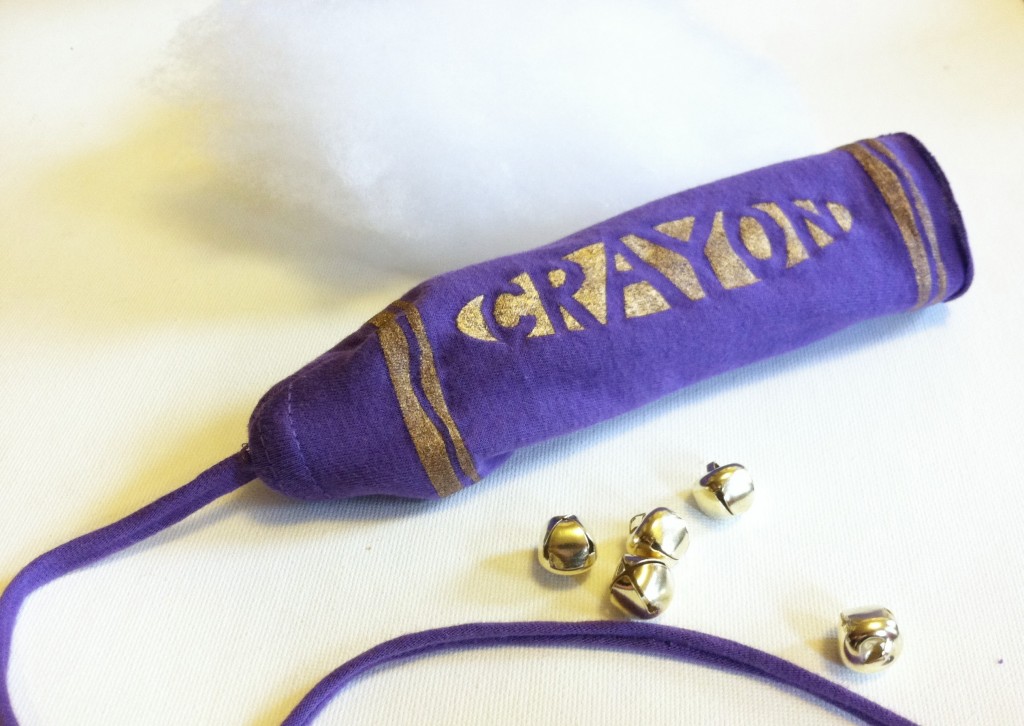
8. Cut a length of T-shirt cord and thread it inside the crayon tube, pinning it between the layers at the tip of the crayon. Stitch along the open edges at the tip (catching the end of the T-shirt cord) and turn it right side out. (The cord should appear to be a “drawing line,” extending from the tip of the crayon, as shown. Use fiber fill to stuff the crayon, and add a few bells in the center, if desired, to add a little jingle (it helped create more interest for my little guy, so he would play with it longer!).
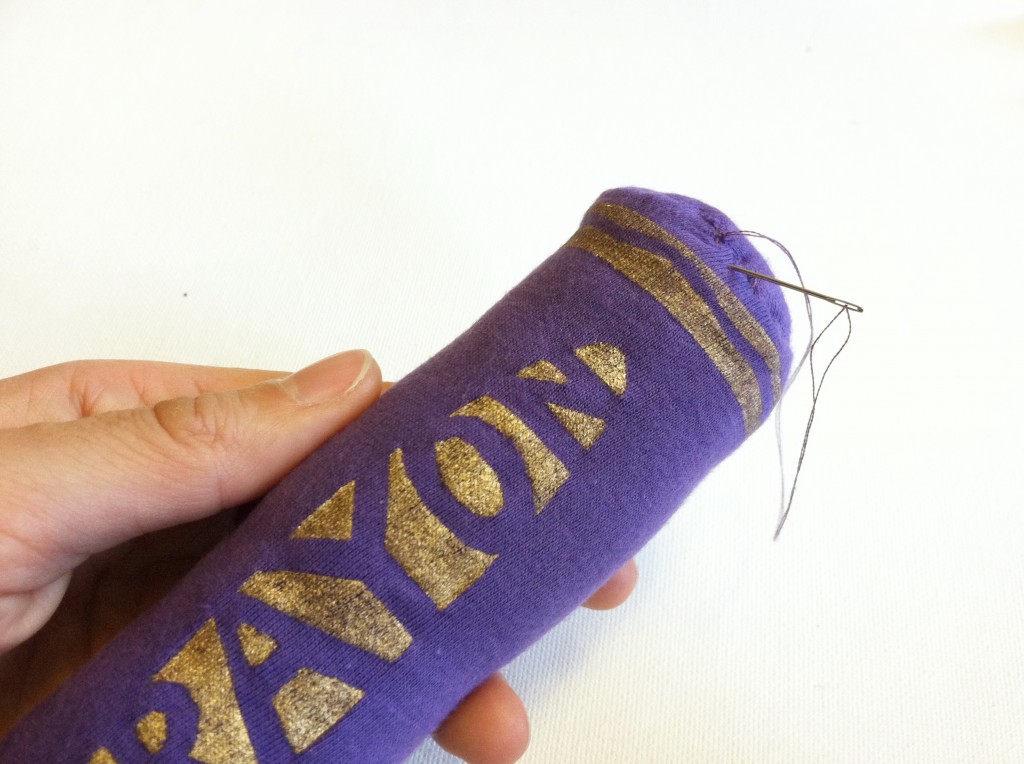
9. Tuck in the edges of the layered circle pieces, and hand-sew the end of the crayon in place.
10. Trim the T-shirt cord (drawing line) as necessary.
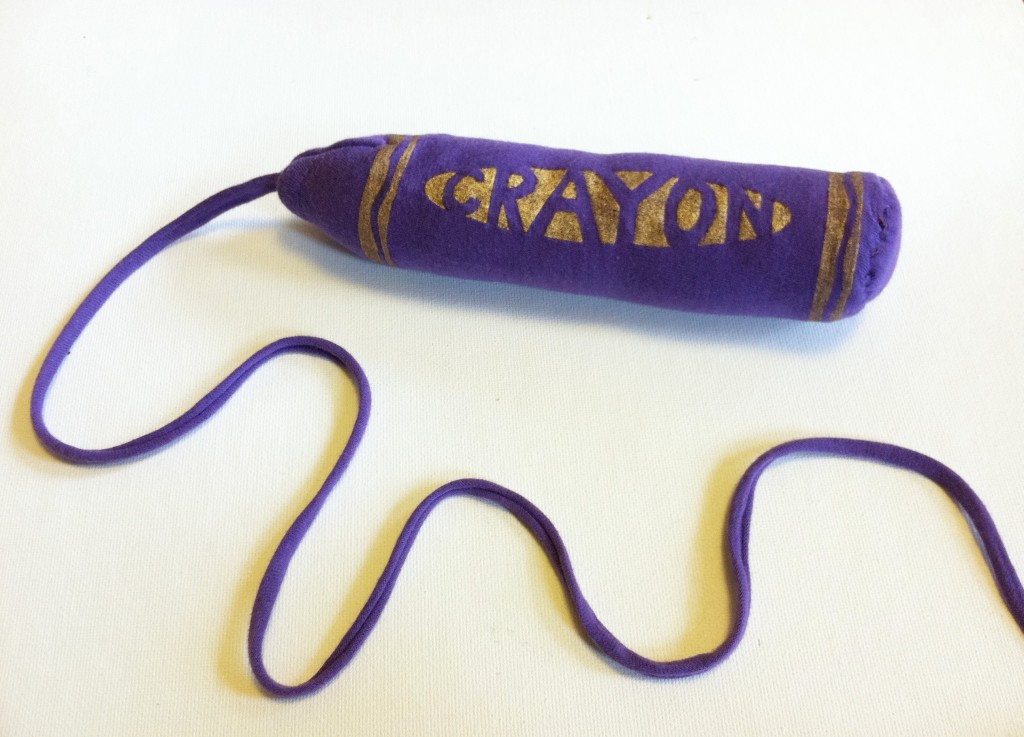
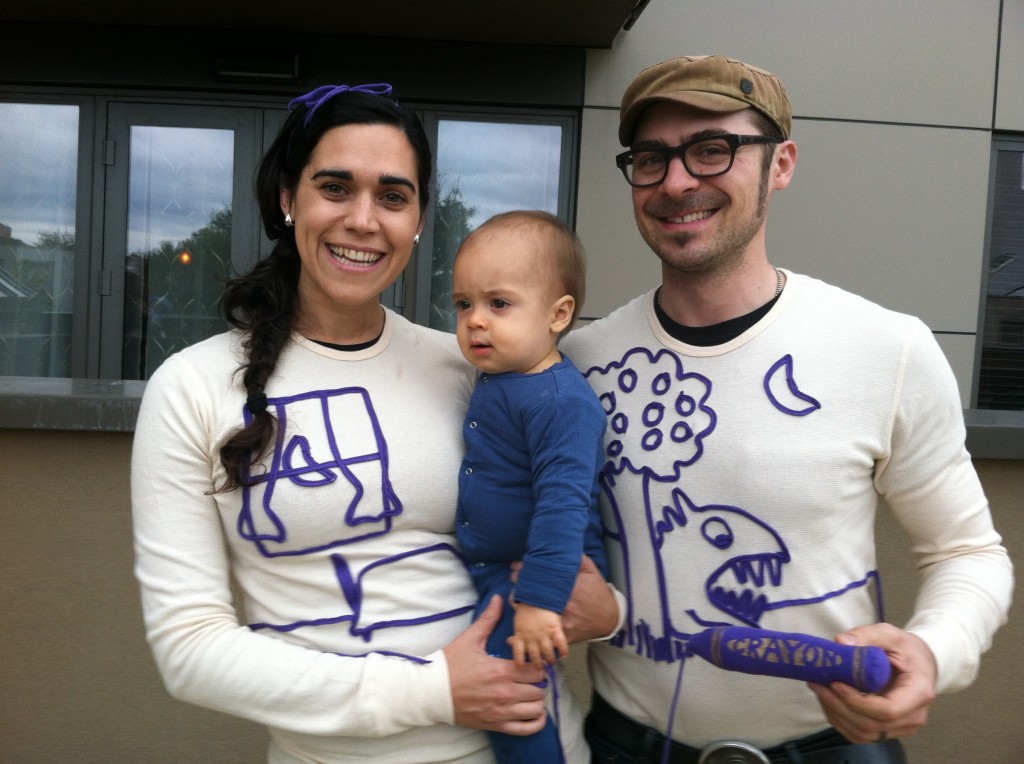
11. Harold’s costume is finished! But his drawings (aka his parents’ costumes) aren’t…
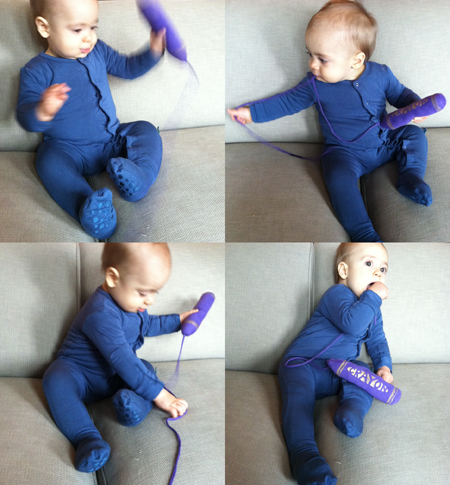
Make it (Harold’s Drawings):
1. Select a drawing from the book, and use the disappearing ink pen to sketch it onto shirt number 1. (It’s just a coincidence that the ink from the pen shows up purple before it fades!)
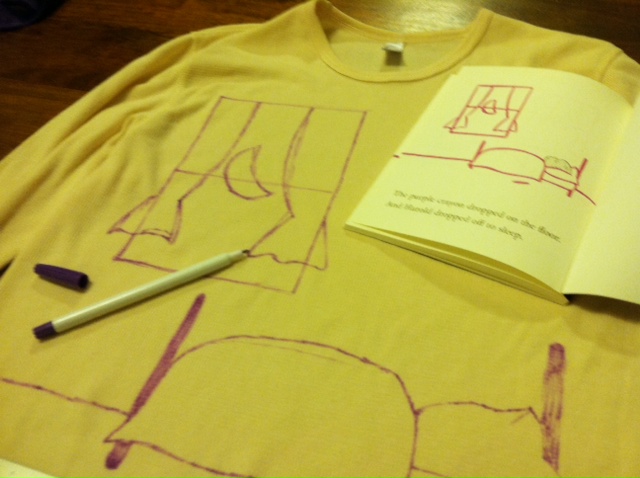
Optional: Select and sketch an image onto shirt number 2.
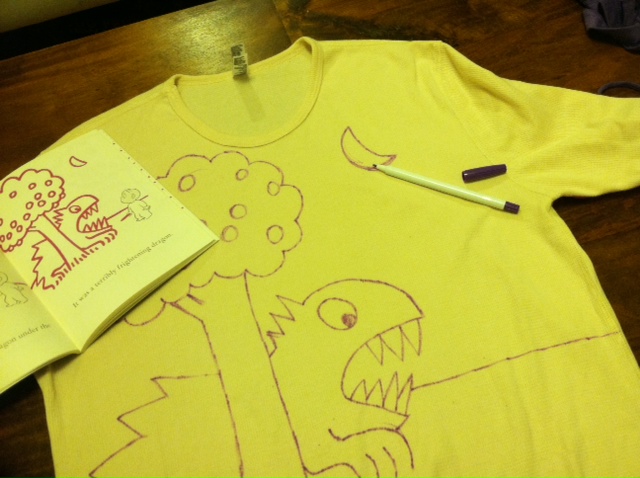
Perhaps, given the weather, I should have gone with one of these pages:
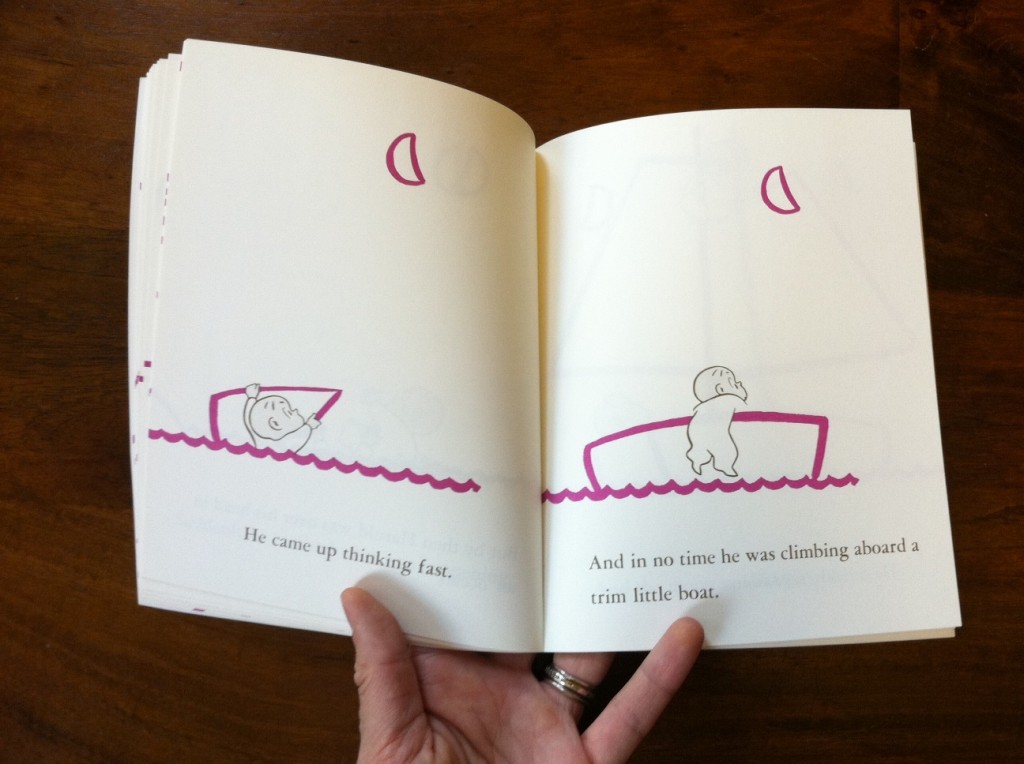
2. Begin to outline the drawings with more T-shirt cord.
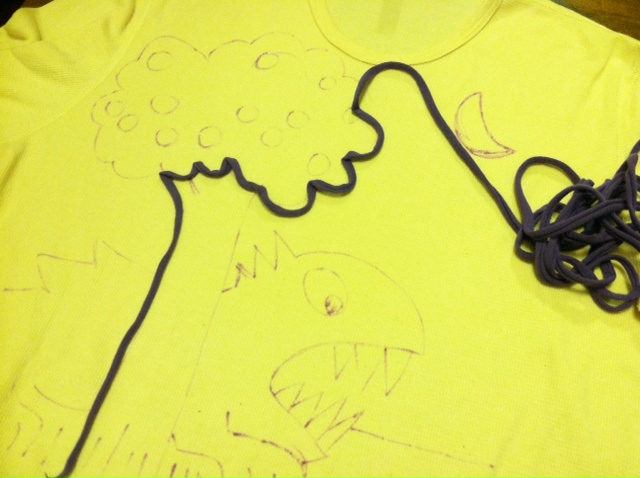
3. Use the sewing machine to carefully stitch the T-shirt cord over the sketches, piece by piece.

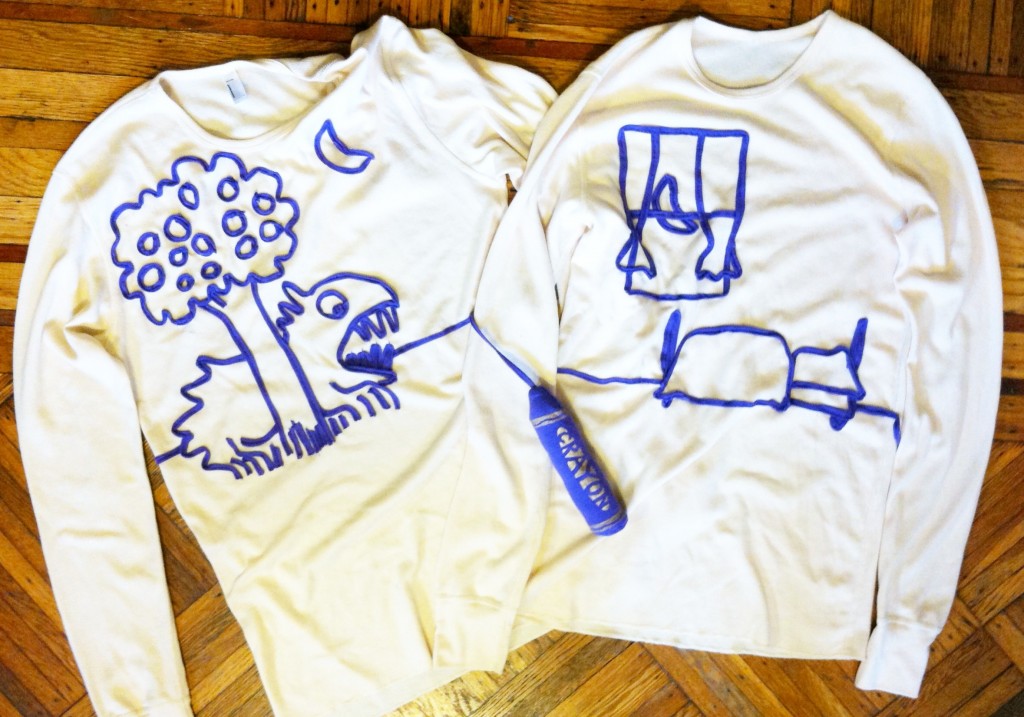
4. Done!
And what happens… When Grandma is unexpectedly in town for Halloween festivities? A quick online trip to Out of Print Clothing, of course, and we were able to round out the “story,” with Grandma as the cover of the book!
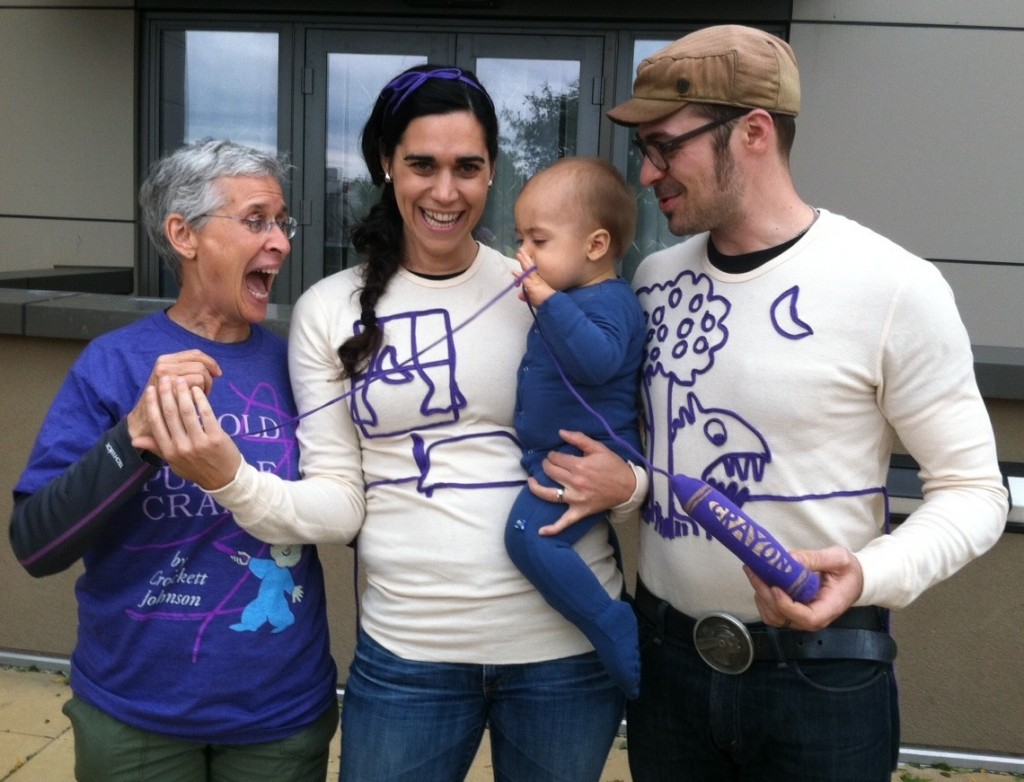
The best news? Less than 364 days until next Halloween. Start planning! What literary character would you dress as?

[ 14 Comments | Posted on November 2nd, 2012 ]