T-shirt Projects

His and Hers Heart (T-shirt) Surgery!

A little last-minute, I know, but here’s wishing you a very Happy Valentine’s Day from Generation T! Here are two lovely T-shirt tutorials excerpted from Generation T and Generation T: Beyond Fashion–they’re designs that can be made all year, really, anytime you want to share the love. With a few simple snips and stitches, you can wear your heart on your sleeve, or right across your chest. (And, because I love you all so much, the second one is even no-sew!) Enjoy!

#77 “Heart on Your Sleeve”

(excerpted from Generation T: Beyond Fashion: 120 New Ways to Transform a T-shirt)

#2 “Brokenhearted”

(excerpted from Generation T: 108 Ways to Transform a T-shirt)

[ 6 Comments | Posted on February 14th, 2010 ]

Making Scarves with Threadbanger

Happy New Year! I happily spent the end of the decade and the beginning of the next in a delightfully tropical locale where a T-shirt is commonly worn as just that: a T-shirt. But the cold winds blowing back in Brooklyn demand another use for that spare jersey fabric: the scarf. So, as promised, here are just a few of the ways to transform a T-shirt into a scarf, in cooperation with our dear friends at Threadbanger! (And come to think of it, because they’re so lightweight, and can be layered, these scarves actually could be worn in any climate…warm or cold.)


[ 8 Comments | Posted on January 3rd, 2010 ]

The Stockings…

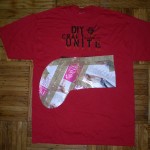
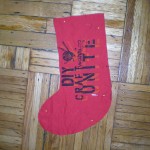
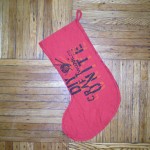
…were made from a T-shirt with care, with hopes that old tee could get some more wear. It’s not exactly how the traditional poem goes, and I realize I’m a little late with the tutorial should you have wanted to take a stab at it yourself, but stow this one away for next season! Here’s a holiday stocking variation on the Stocked Up wine cozy (project #32 in Generation T: Beyond Fashion):

Ingredients:
1 L or XL T-shirt
scissors
paper
pen or pencil
straight pins
chalk marker
needle
thread

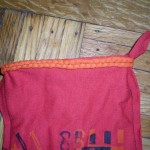
1. Make a pattern by sketching or tracing the outline of the stocking on a sheet of scrap paper. Cut it out, make any adjustments, and pin it to the front of a large T-shirt. Trace the outline on the tee using a chalk marker.

DSCN5515

2. Flip the pattern and trace to make a double-sided, double-thick stocking.

DSCN5516

3. Pin and sew a running stitch around the curved edges.

DSCN5519

4. Snip a scrap piece 3″ by 1″, fold it in half to make a loop.

DSCN5523

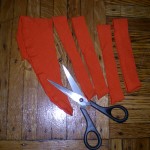
5. Cut three strips from a sleeve, and stretch them to make cords. Braid them together to make trim.

DSCN5528

6. Pin and sew the trim in place around the top edge with a running stitch. Secure the hanging loop as you go.

DSCN5529

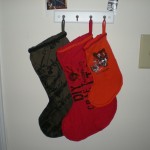
7. Remove the pins. Now it’s time to make them in multiples (and in varying sizes–the one on the right, made from a Tiger Cubs uniform, is for the four-legged meowing member of the household, naturally!), and hang them by the chimney…or the key hooks with care.

DSCN5533

8. Then fill ’em up with goodies!

DSCN5547

[ 4 Comments | Posted on December 25th, 2009 ]

From Our Readers: Rebecca!

From the mailbag: Rebecca from Wyoming writes that she made the Pin-up Girl halter top for her…dogs! She wanted to make them bright-colored vests so they wouldn’t be mistaken for wild animals when she took them hiking during hunting season. Rebecca used the Generation T halter top pattern as described in project #1 in the book (minus the pin), then cut an approximately 4″ slit from the center of the bottom front edge.  Her dogs, Mbera and Yaz, wear the halter backwards. Rebecca tied the corners created by the slit at the dogs’ backs to make the vest more fitted.

Here they are, the pinup pooches, outfitted and ready for an outdoor outing!

huntindogs2

Rebecca reports that Mbera and Yaz find their vests very comfortable–and the bright oranges sure make them stand out!

huntindogs1

Don’t forget to check out Chapter 5: Pet Central in Generation T: Beyond Fashion for more ideas and inspiration.

[ 1 Comment | Posted on December 12th, 2009 ]

DIY Pocket Calendar Full of Gifts for YOU!

We’re comfortably into December now and many of the holiday countdowns are upon us. Between these great roundups at WhipUp and Threadbanger, the advent airwaves are crowded…but let’s not forget our fair T-shirt. (Never!)

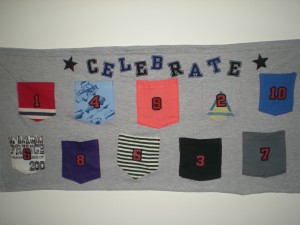
I made the Final Countdown pocket calendar (project #35 in Generation T: Beyond Fashion) using 1 large T-shirt as the base (cut off the bottom of the T-shirt just below the sleeves, then up the side to make a large rectangle), several T-shirt pockets (or you can cut and stitch on your own from sleeves and other scraps), and iron-on letters to personalize it. I ran a drawstring through the hem (now oriented at the top) to tie it at each end–or you can simply use tacks to pin it to the wall.

Despite its name, this DIY project can be used again and again and again–and again!
DSCN5379

In fact, this one can be used for every event around the year. Celebrate the eight nights of Hanukkah, the twelve days of Christmas, or the countdown to your VIP’s next birthday, an anniversary, or your own graduation. Fill it with candy, cookies, gift cards, handmade coupons, knick knacks, paper fortunes, or other party favors.

But to kick off some serious fun, we’re giving away Generation T surprises in celebration of the “Ten Days of Solstice.” There happen to be 10 pockets in this countdown calendar, so this season Generation T is excited to count down to the day of the maximum tilt of the Earth’s equator! Exciting.

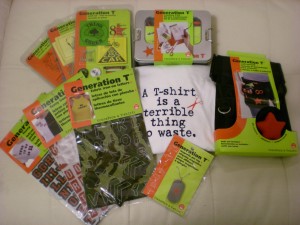
Starting today, you can enter to win one of the ten Generation T items shown here. The first winner will be announced tomorrow, December 12, and new surprise will be given away each day until Monday, December 21.
DSCN5391

Each pocket on the Final Countdown calendar represents a surprise gift that I’m raffling off daily. (Mr. T mixed them all up, so even I don’t know “what’s behind door number 1.”)

Here’s what happens:

1. To enter to win the prize in pocket #10, email me (megan @ generation-t.com) during the day today (December 11) until midnight (Eastern Standard Time), with the subject line “My DIY High” and one sentence about what gives you the DIY high. Don’t forget to include your mailing address so I can send you the prize if you win!

2. Your email qualifies you for the daily raffle to win what’s in pocket #10.

3. When the clock strikes midnight (EST), entries are closed for that day. I will  select a winner at random and announce that winner the following morning. I will also announce the new prompt (subject line/email) needed to enter to win the next daily prize (again, entries will be accepted until midnight, EST).

YOU CAN ENTER EVERY DAY! Any questions, leave them in the comments…

[ 3 Comments | Posted on December 11th, 2009 ]

Shake It Up, Baby!

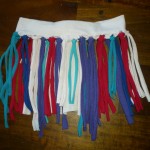
Besides all the cooking and baking and cheese-plate making that happened over Thanksgiving (playing host to 14 adults, 1 preschooler, and 1 newly adopted kitten), there was also the task of entertaining the little one (our adorable niece) as she scrambled around underfoot. So Mr. T and I put together a big pink bag-o-fun tote that she could dig into whenever she got bored. Of course Generation T made it into the bag: the Shake It Up Baby skirt (no-sew project #59 in book 2), made from a bunch of sleeves and other scraps in my workshop. I’m glad a took a picture of it before our niece tried it on, because as you can see, she didn’t stop moving once she had it on (between dancing to the music we had on and charging at me from down the hallway–that’s a lot of blur to try to catch on camera!).

DSCN5277 DSCN5319

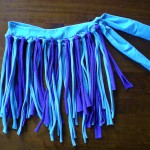
And because I was on a roll,  I went ahead and made a skirt for another young friend of mine and mailed it out in a care package I had been sitting on for months. The skirt was lightly longer (she’s a little older), and with purple and blue color strips this time! This is such a great project because it a) gives a use for all those scraps b) is no-sew c) is super easy–seriously, it will only take you about 15 to 20 minutes d) is ridiculous fun for the wearer!

DSCN5275

And, as a variation, if your tiny dancer likes bling, you can always glue on some “gems,” buttons, felt shapes, or feathers at the bottom of each fringe strip.

Let’s not forget our four-legged guest–the kitten was also in need of entertainment, once she got over the massive crowd invading her space. We tied extra T-shirt strips to the arms of a wooden chair and let them dangle there with a knot at the end so she’d have something to grab hold of. Whenever she was feeling playful, she wandered by and attacked! The T-shirt strips are perfect because they’re springy; when she releases them from her grip, they snap back and bounce around like they have a mind of their own. I’ve now added a Mouse Padded (stuffed cat toy, project #67) to my “to make” list…

[ 6 Comments | Posted on November 30th, 2009 ]

iSew!

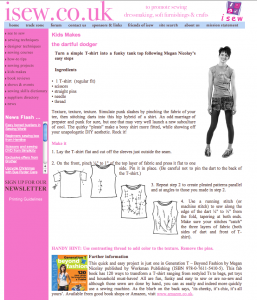
Screen shot 2009-11-12 at 10.39.18 AMCourtesy of our friends across the pond at iSew (in support of sewing of a creative hobby–hey, I can get behind that!) as well as all your friends right here at Generation T, here’s a tutorial for “The Dartful Dodger” tank top, project #14 from Generation T: Beyond Fashion). Bonus: T-shirts aren’t just for summer–you can layer this over a long-sleeved shirt in the colder months, too!

[ Comments Off on iSew! | Posted on November 12th, 2009 ]

Happy Halloween!

DSCN5033DSCN5095Happy halloween! For all my REALLY last-minute peeps, here’s a quick hint on how to use the technique from the Back in Action T-shirt design (project #101 from Generation T: Beyond Fashion) to make the spider web design I wore to the Michaels craft store grand opening.

Some hints: 1) Cut slits (about 1/2″ to 1″ apart) resembling the pattern shown below in the diagram. 2) Note the shorter slits for the outermost cuts to prevent big gaps on the outside of your spider web. 3) Loop from the outer slits in to the center. 4) Stitch or safety pin loops at the center (stitches are better in this version because there’s less bulk).

Picture 1

[ 8 Comments | Posted on October 31st, 2009 ]

Halloween Costumes and a Trick-or-Treat Tote!

Need last-minute costume ideas? Beyond sticking a load of Peeps all over a black T-shirt (you’re a “chick magnet,” get it?), or drawing a zigzag  black line across a yellow T-shirt (Charlie Brown!), or grabbing a buddy with a red T-shirt to be a Dr. Suess-ian “Thing 1” and “Thing 2,” there bagare so many other costumes and accessories to make from your stash of old T-shirts using just a pair of scissors (and maybe a needle and thread).

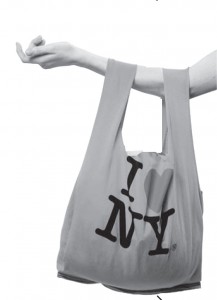
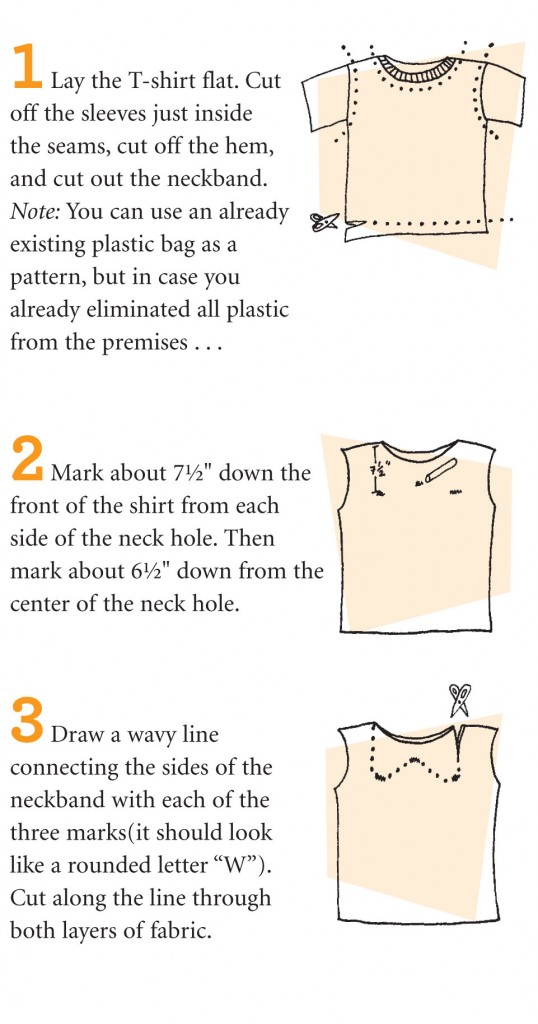
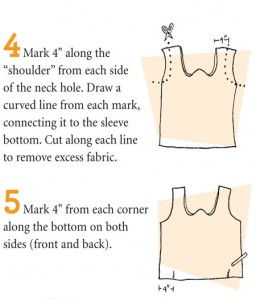
For all you procrastinators, click through for two no-sew tutorials for a superhero cape (or a Dracula cape or a royal cape!) and a hula skirt (luau!) from Generation T: Beyond Fashion in an entry I wrote for the Workman blog…PLUS…ditch that plastic bag by learning to make your very own T-shirt trick-or-treat bag right here!!

Happy Haunting…

#42 Plastic Surgery

(tote for treats–or for groceries, the other 364 days a year)

Ingredients:
1 T-shirt (M, L, or XL)
chalk marker
scissors
needle
thread

1-3

4-52

6-910

[ 13 Comments | Posted on October 26th, 2009 ]

Coast to coasters!

Three T-shirts. Twenty coasters. Three thousand eight hundred fifty-seven miles. I made these coasters (project #33 from Generation T: Beyond Fashion) for the Workman international sales department to take to a publisher’s dinner in Germany during the 2009 Frankfurt Book Fair. I love this project because the coasters are cute, super-absorbent, and on the occasion that you do suffer a spill, you can just toss them in with the laundry for a quick reset. (Plus, if you’re making a full set from one T-shirt, you can make the pieces come together in a mini-puzzle of sorts–it’s fun for the whole family!)

DSCN4765

Make a set of six as a gift for the hostess with the mostest, for a housewarming party, or for your run-of-the-mill coffee or tea sipping at a late night cram session in the ole dorm room. Don’t forget to post pics of your own projects over at the Generation T fan Facebook page… we love to see what you’re up to!

DSCN4786

[ 3 Comments | Posted on October 18th, 2009 ]