T-shirt Projects

12 Holiday T-shirt Projects!

To celebrate and count down the 12 days until Christmas (yikes), here’s a roundup of 12 T-shirt crafts we love over here at Generation T (and yes, we might be biased on a few of them, but we can’t help it). So if your halls aren’t completely decked, here are some last-minute fixes that will make you sing fa-la-la-la-la, la-la-la-la. Or at least do re mi fa so la teeeee…. Wow, this holiday punch is tasty!

1. T-shirt wreath by Tara Gentile at ScoutieGirl. A colorful (no-sew!) decoration that won’t smell as sweet, but you also won’t have to sweep up dried pine needles in two weeks!

2. T-shirt stockings by Megan Nicolay at Generation T (or by Kathy Cano-Murillo at CraftyChica). Two takes on that old classic–the holiday stocking–made from a classic old T-shirt.

3. T-shirt garland by Ash and Kimmy at GreenEyedMonster. A festive pom-pom decoration that can be brought out year after year–for the tree, for the mantle, for a little window dressing!

4. T-shirt advent calendar by Megan Nicolay at Generation T. You might remember seeing this one during last year’s solstice giveaway–and you better get cracking in order to make and fill this one up in time for a countdown!

5. T-shirt hat by Kalleen from AtSecondStreet. A cute brimmed hat for the milder winter weather–bonus points if you add ear flaps! Or this one by Whitney Moss and Heather Flett at RookieMoms–forget ear flaps, this one’s got ears (and yes, we give you permission to make it in an adult size).

6. T-shirt snowflake by Megan Nicolay at Generation T (project #4 in Generation T: Beyond Fashion). Forget the overplayed sparkly Santa sweater, make a T-shirt snowflake as unique as you are! ::sigh::

7. T-shirt knotted scarf by Gwenstella at BecauseSheStartedKnitting for her. And for him: a Fringy T-shirt scarf by Paul Overton at DudeCraft. Or any of these three scarves, by Megan Nicolay at Generation T (on Threadbanger)!

8. T-shirt mittens by Ashley at LilBlueBoo. Okay, okay, so she makes them from sweatpants (which might be warmer than T-shirt), but the tutorial and techniques still apply since they’re both knit fabrics!

9. T-shirt Christmas tree skirt by Megan Nicolay at Generation T (project #43 in Generation T: Beyond Fashion). And, we’ll have a no-sew variation to post very soon–stay tuned!

10. T-shirt necklace by Melissa Esplin at ISLY. Sometimes it’s not enough to deck the halls or trim the tree–you need to deck yourself for all those holiday parties!

11. T-shirt headband by Megan Nicolay at Generation T for iLovetoCreate. See number 10. Now it’s time to add the tree topper! (Tee topper?)

12. T-shirt apron by Disney at RufflesAndStuff. Or this one by Kayla at KaylaKsThriftyWays if you’re short on time. This was tough: it was between the apron and the T-shirt oven mitt–for all the holiday cookie baking, of course!

Happy last-minute crafting to you! What are your favorite holiday T-shirt tutorials? What have we missed that you would like to see on this list?

[ 3 Comments | Posted on December 14th, 2010 ]

I Love to Create: Softie Spiral Headband

Yes, Thanksgiving is nearly upon us, but I’m already looking beyond the food coma to the holiday party scene! A little bit of proper party headgear puts me in the mood. You can make this headband in an afternoon and be party-ready by evening. Make one in bright tones, and you’ll be able to transcend the cold weather and be positively springlike!

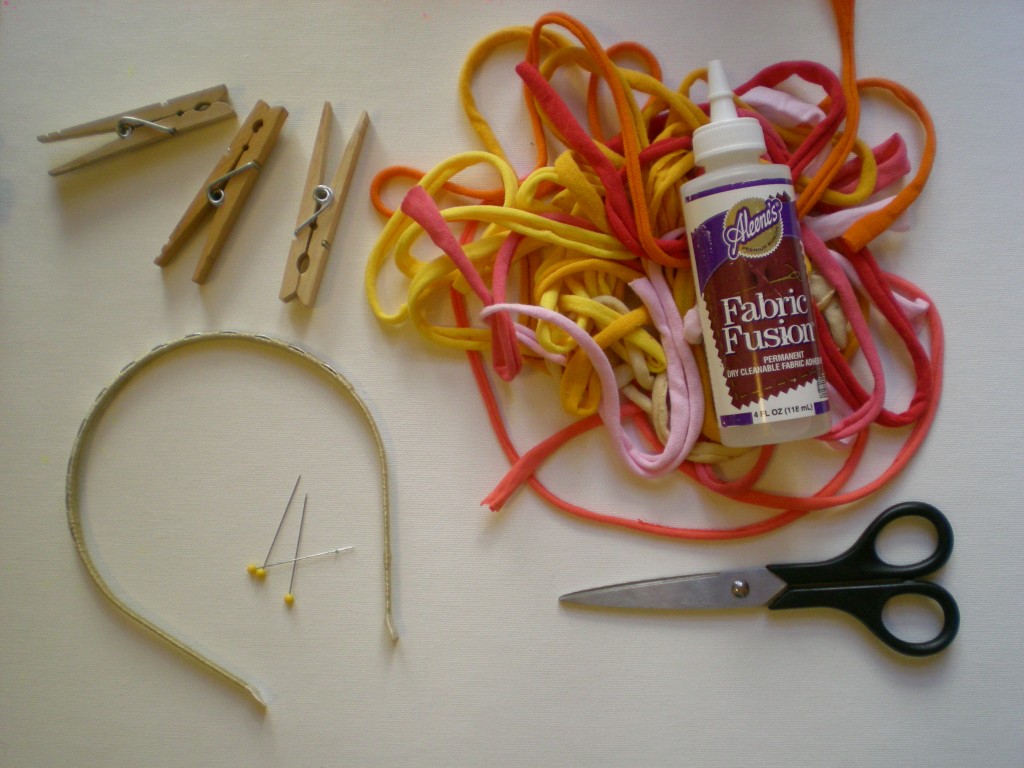
Materials:

-1″-wide T-shirt strips of varying lengths (in complementary shades)

-Aleene’s Fabric Fusion Permanent Dry Cleanable Fabric Adhesive

-fabric scissors

-1 fabric-coated plain headband (preferably with a metal base)

-clothespins

-straight pins (optional)

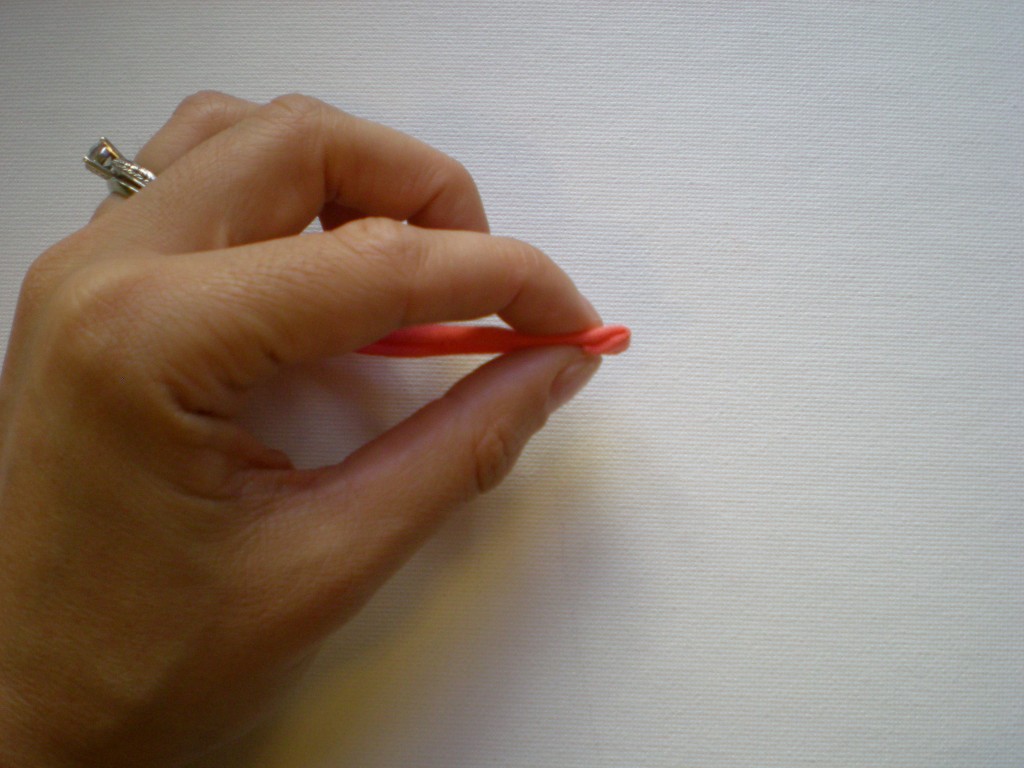
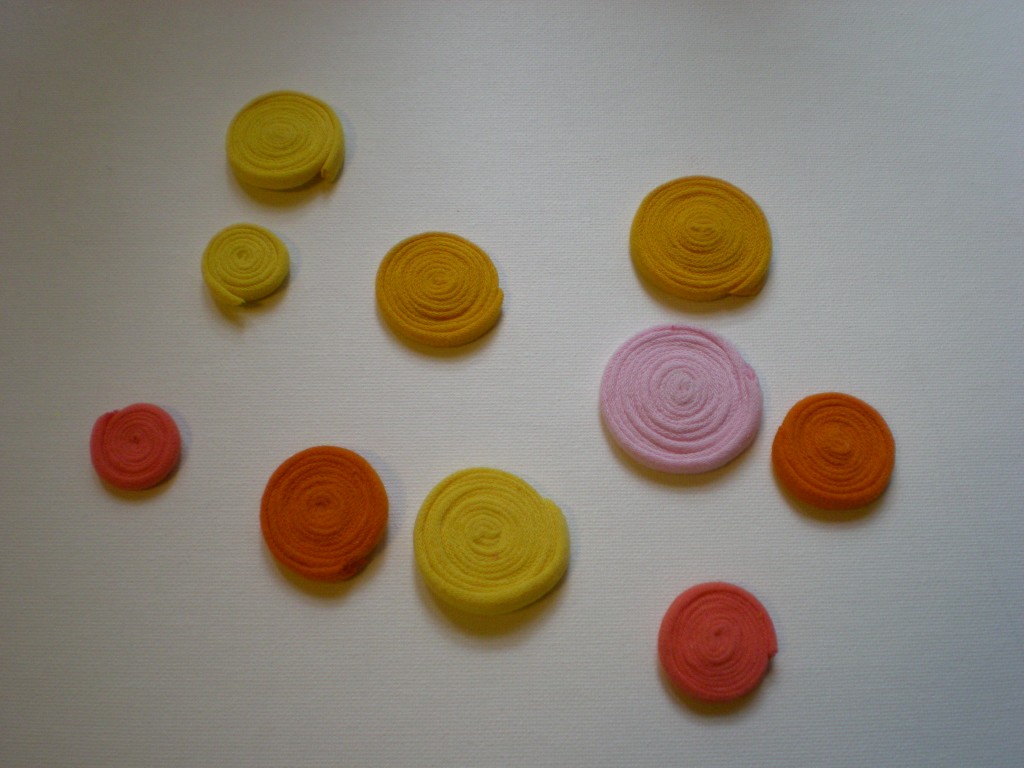
1. Gather the T-shirt strips. (A T-shirt hem works well — just cut off the stitching and stretch it out!) Select one strip, squeeze a dab of Fabric Fusion on the inside end and fold it over on itself.

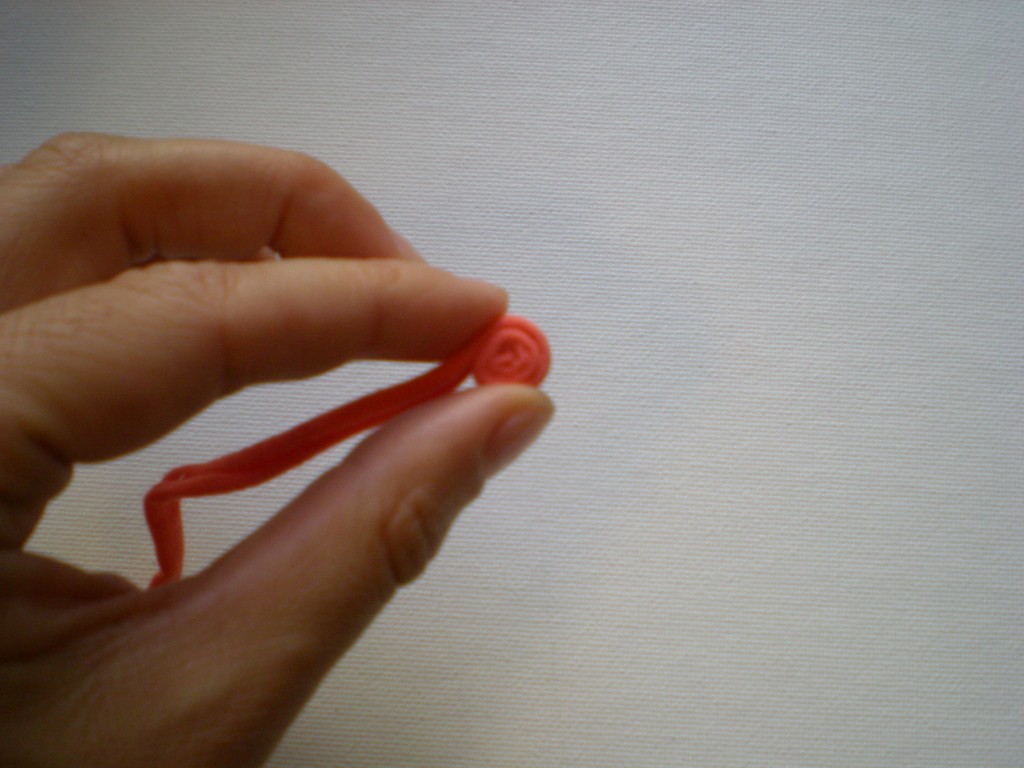
2. Gently squeeze more glue around the outside of the fold and coil more fabric into the glue.

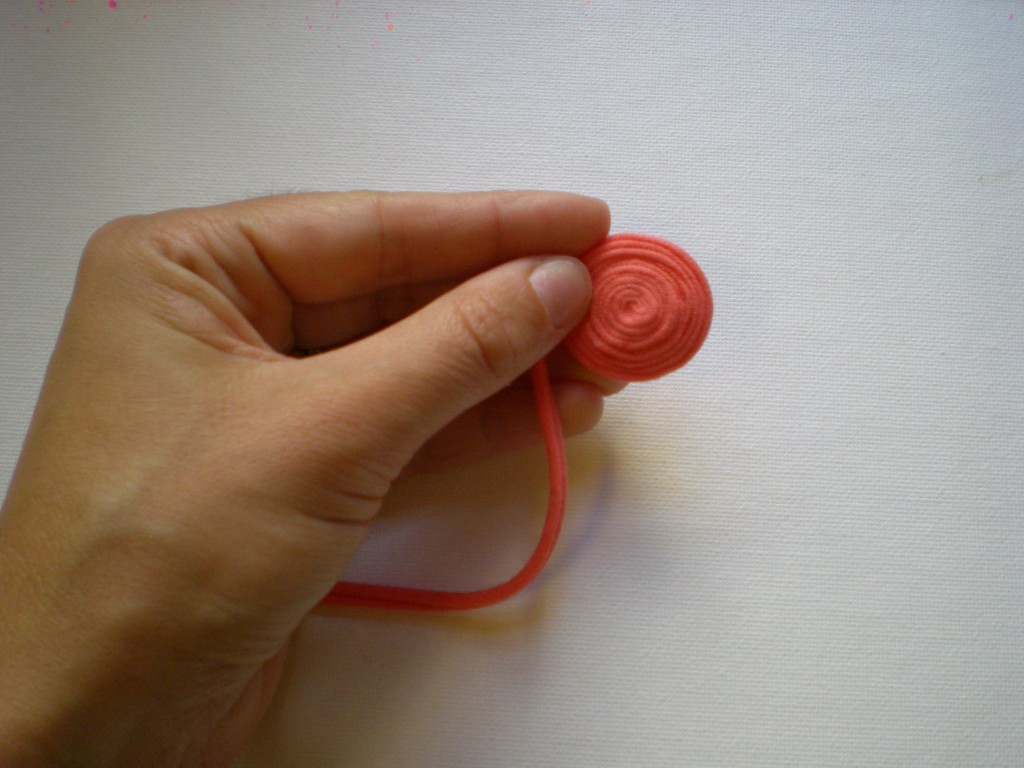
3. Continue gluing and coiling until you have a 1″ to 1.5″ fabric disc. Then snip the end at an angle and apply a bit of extra Fabric Fusion to make sure it flattens against the edge of the disc.

4. Repeat steps 1 through 3 to make seven to nine more discs! Optional: Use straight pins to keep the ends of the coils in place while they dry.

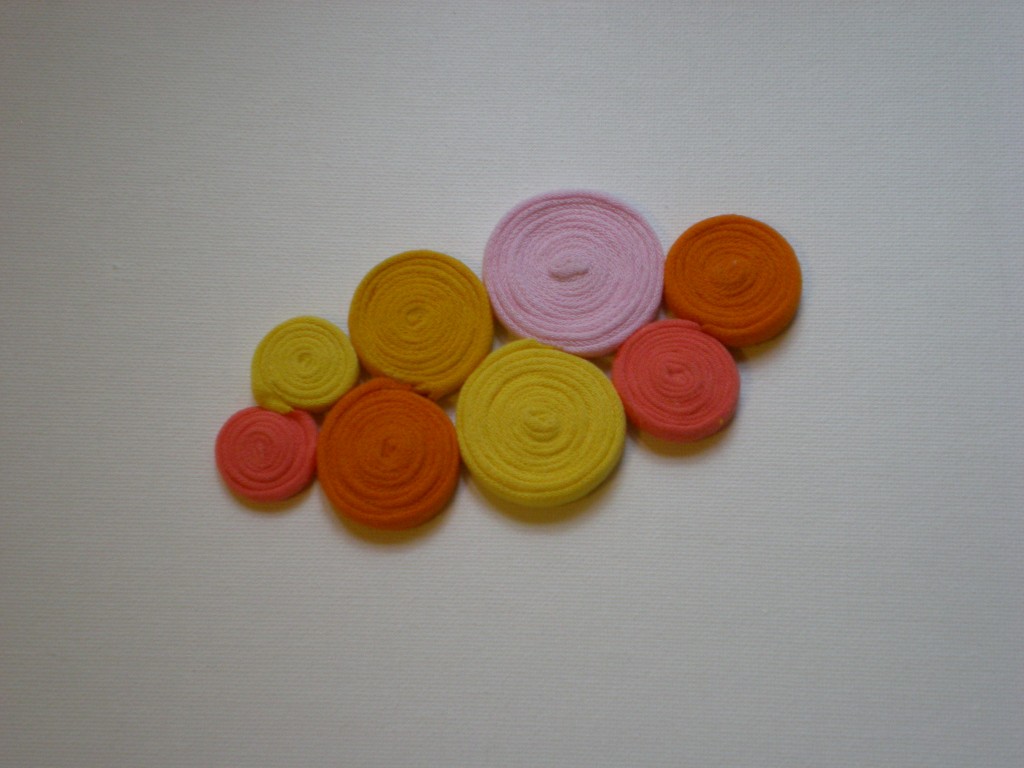
5. Arrange the discs in a pattern you like and glue them together at the intersections. Let the panel dry.

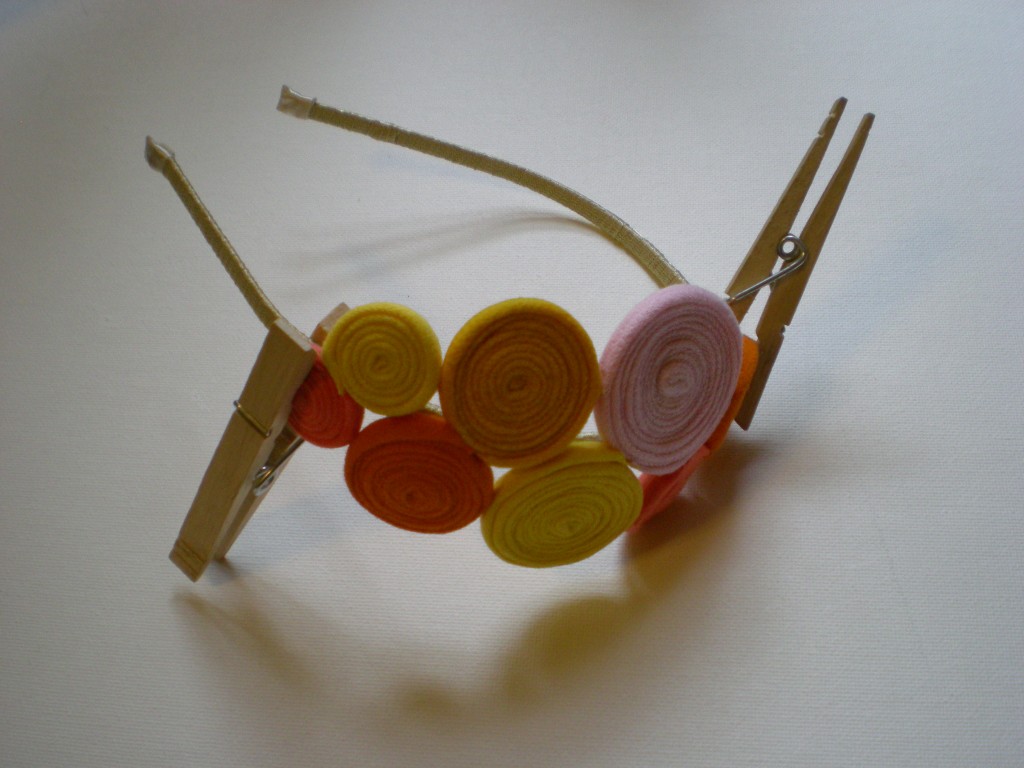
6. Apply glue along the top edge of the headband and gently press the panel against the headband.

7. Clip it in place with clothespins (so you don’t have to hold it in place). Let it dry.

8. Wear it hair up or down!

*Stay tuned for some crafty coil variations in the coming weeks!

[ 8 Comments | Posted on November 23rd, 2010 ]

I Love To Create: A Glowing Ghoulish T-shirt!

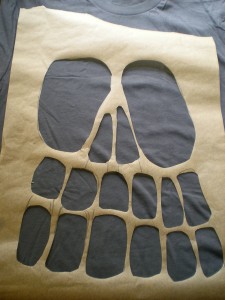
Five days till Halloween, and still don’t have a costume? Not to worry. Grab a spare T-shirt (pre-washed is best, so scavenge away in the dresser drawers!) and some paint (of the glow-in-the-dark persuasion), and just be sure to schedule in a few hours for the paint to dry (you have to get some pumpkin carving in there anyway!). You’ll be ghoulishly good-looking in no time.
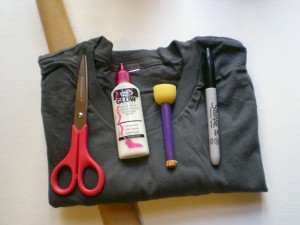
Materials:

-A plain T-shirt
-Scrap paper
Sponge brush
Tulip Neon Glow-in-the-Dark Paint in “Natural Glow”
-Black permanent marker (optional)
-Freezer or parchment paper (optional, for making a stencil)
-Scissors (optional)

Make It:

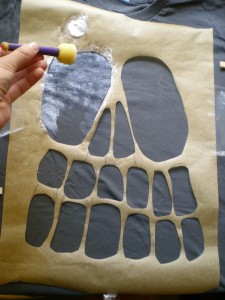
1. Sketch the outline of a skull (eye sockets, nasal cavity, teeth) on the piece of freezer or parchment paper. Then cut out the inner pieces to make a stencil. Lay the T-shirt flat and slide a sheet of scrap paper (a brown grocery bag will work) between the layers to keep the paint from going through to the back of the shirt. Lay the stencil over the front of the shirt. Note: If you’re feeling bold, skip the pattern-making and go straight to free-handing the design on your shirt.

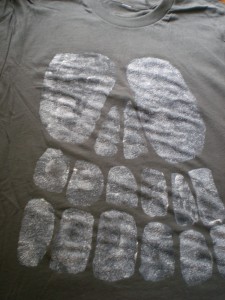
2. Squeeze out a bit of glow-in-the-dark paint and generously dab it onto the shirt using the sponge brush.

3. Remove the paper from the T-shirt and hang the shirt to dry.

4. Charge it up in front of a light and wear it out on the town! (Just be sure to pack a flashlight in case you need to recharge yourself throughout the dark, dark night!) Note: I tried really, really hard to take a picture of the glowing shirt in a dark room, but without a tripod, my camera just couldn’t process it. But it does glow rather bewitchingly and it’s just plain delightful!

Lastly, don’t forget to get yourself a superhero sidekick and pack a tee-riffic trick-or-treat tote to collect all the loot.

[ 1 Comment | Posted on October 26th, 2010 ]

T-shirt Pillows with “Mommy on a Shoestring”

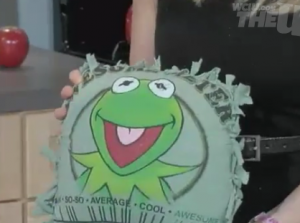
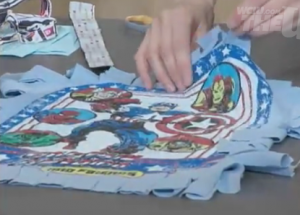
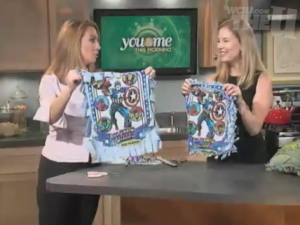
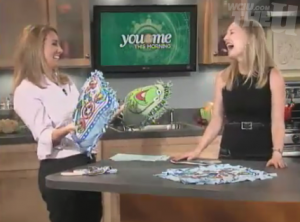
Beth Engelman from “Mommy on a Shoestring” strikes again! This time, she’s whipping up some irresistible no-sew pillows out of old tote bags (secret ingredient: Velcro) and my personal fave (surprise, surprise): old T-shirts. This time, she’s tackling project number 30, “Pillow Talk,” from Generation T: Beyond Fashion. Here are some stills below plus a link to the segment and tutorial!


[ Comments Off on T-shirt Pillows with “Mommy on a Shoestring” | Posted on October 25th, 2010 ]

T-shirt into Romper on Threadbanger

Turn that old T-shirt into a cute new romper in this fun tutorial from Threadbanger’s Secret Life of a Bio Nerd. Head to a warm-weather destination to show off your new garment or transition the summer wear into fall by layering colorful tights underneath! Fair warning: Those of you with long torsos (like me!), may need to come up with a creative alteration for extending the midsection of the garment. Enjoy!


[ 4 Comments | Posted on October 15th, 2010 ]

DIY Bouquet and Boutonniere!

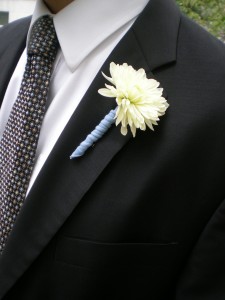
Recently, I had the distinct honor of being my friends’ witness to their city hall nuptials. To make it festive, I met Sarah and Bryan on the building  steps with a bouquet of dahlias for her and a simple boutonniere for the him. And since  it was a rather last-minute DIY project the night before, my pile of scrap T-shirt hems became suddenly very valuable. Luckily, a few scraps that I had left over from a previous T-shirt project were the perfect hue for that wedding day “something blue.”

All you need are some fresh flowers, a rubber band, two straight pins, a pair of scissors, and some T-shirt strips!

For the bouquet, I arranged the flowers in one hand and, when the arrangement was satisfactory, I loosely wrapped them with the rubber band. Then I centered the stretched out T-shirt cord against the stems and gently but securely wrapped the ends around and around the bouquet, eventually tying them in a knot (oh, how appropriate).

For the boutonniere, I flattened one the stretched T-shirt cords and wrapped it around the stem, hiding the end of the fabric underneath the wrapped coils. Then I inserted a single straight pin to keep it in place. I brought a second pin to attach it to the groom’s lapel on-site.

(All excellent practice for some boutonniere-making I’ve been recruited to do for the suits in my brother’s wedding party next weekend!)

Da-dum-de-dum, da-dum-de-dum…from scraps to scrap-tacular! May they all (friends and scraps) live happily ever after.

[ Comments Off on DIY Bouquet and Boutonniere! | Posted on October 7th, 2010 ]

T-shirt Belt with “Mommy on a Shoestring”

Early in September, Beth Engleman from Mommy on a Shoestring featured a project from Generation T on her regular segment on WCIU’s You & Me This Morning with host Jeanne Sparrow.

Click here to watch it! Though the braided T-shirt belt doesn’t make an appearance until the end, stay tuned for the whole segment because all of Beth’s upcycled belt tutorials (made from candy wrappers to neckties to old T-shirts) in the segment are pretty darn sweet! Two thumbs up to cute, inexpensive, and easy fashion accessories.

And, for those of you following along in your book, the T-shirt belt is project #75, The Braided Bunch, on page 190!

[ 1 Comment | Posted on September 29th, 2010 ]

I Love to Create: T-shirt-covered Notebooks!

It’s back to school, and how best to show your school spirit (and study hard!) than with some personalized notebooks and sketchbooks? Gather up old concert or festival tees, ratty old sports jerseys, those charming family reunion keepsakes, dad’s old tie-dyes, souvenir T-shirts from your summer adventures, and so on.

Materials:

-T-shirts

-Scissors

-Composition-style notebook or sketchbook (any book with a boardbook-style cover)

Aleene’s Super Thick Tacky Glue

Squeegee-like hand applicator

Make it:
1. Lay the book open on the T-shirt (arrange it over the featured logo or design). Cut through just one layer of the shirt, about 2″ outside the edge of the notebook.

2. Lay the T-shirt panel face down on your work surface. Apply glue liberally across the front cover of the book.

3. Spread the glue evenly across the cover. Be sure the glue reaches the edges, but avoid getting any glue on the pages. (You don’t want to seal the book shut! You have important note-taking to do.)

4. Fold the T-shirt fabric over the front cover and press it evenly into the glue.

5. Flip the notebook and spread glue across the spine and back cover. Then pull the remaining T-shirt fabric over the back cover, smoothing any wrinkles. Let it dry. Optional: Press the notebook between heavy textbooks to keep it flat!


6.
Trim the fabric around the edges of the book cover. Use glue to touch up any edges that are pulling away from the fabric.

7. Repeat with as many notebooks and sketchbooks as you have, and you won’t ever have to trade in your T-shirts for dress shirts at the end of the summer!

My, how smart you look! For extra credit, try making this zippered T-shirt Pencil Case that Cut Out & Keep user Dessah H. made for her college-bound husband!


[ 5 Comments | Posted on September 21st, 2010 ]

T-shirt Recon from the Sistahs of Harlem

Here’s a sweet video tutorial from the Threadbanger vaults: Carmia and Carmen of Sistahs of Harlem share a T-shirt refashion from their book: T-shirt Makeovers.  (Psst! You might recognize Carmen from when she competed and “made it work” Tim-Gunn-style on Project Runway Season 4.) Grab a T-shirt of any size and transform it into this simple scoop top in just 10 to 20 minutes!

Enjoy the T-shirt tutorial!

[ 3 Comments | Posted on August 31st, 2010 ]

I Love to Create: Slashed Peekaboo T-shirt!

Hi T-shirt fans! I’m super excited to share with you new fun stuff over here at Generation T. (Note the shmancy header on this particular post!) Each month, I’m posting a new project (sometimes T-shirt, sometimes not — I’ll keep you on your toes!) sponsored by the lovely folks over at iLoveToCreate (umm…who doesn’t?). I’ll be posting every project right here, so you guys won’t miss out on anything, but I do encourage you to visit the iLoveToCreate blog from time to time since there are a number of other super fun crafty brains at work on new projects all the time.

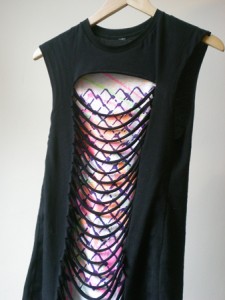
Now here’s the good stuff: a T-shirt project I’ve been meaning to make and post for some time. I found the inspiration in a tween-ish retail store I visited this summer (I know, I know, now that I’m a thirty-something perhaps I should start shopping in more adult places) and thought, as I often do, I could so make that….And then, I grabbed some scissors and paint and made it: a tank top with a nod to 80s punk slashed couture and a wink to 80s hip-hop street style.

Materials:

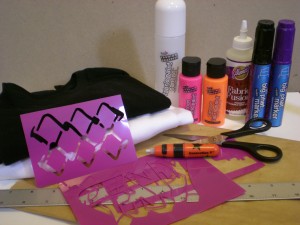
2 T-shirts (1 fitted, dark color; 1 in larger size, light color)
scissors
Tulip Big Phat fabric markers
Tulip Fashion Graffiti Spray Paint Kit (including fabric paint and spray paint cannon)
Tulip Fashion Graffiti stencils
paper grocery bag (or other scrap paper or sheet to use as a drop cloth)
ruler
chalk marker
Aleene’s Fabric Fusion (or needle and thread)

Make it:

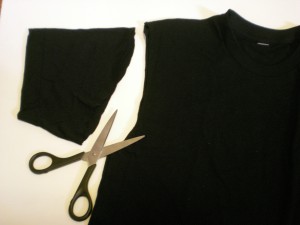
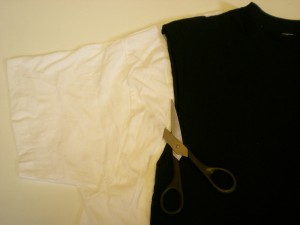
1. Cut off the sleeves of the darker T-shirt, just outside the seams, to make a tank top.

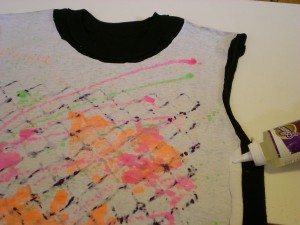
2. Cut off the neckband of the lighter T-shirt and lay the tank top over it, lining them up at the neck holes. Trace the tank top onto the T-shirt and cut out the outline through only one layer to make the peekaboo panel.

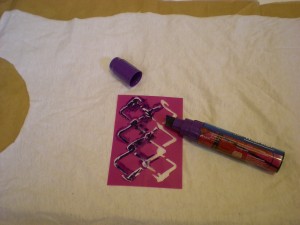
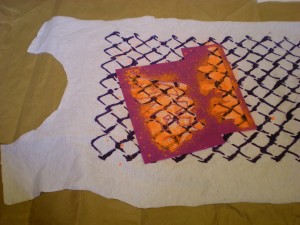
3. Set aside the dark tank top. Lay the panel flat on the grocery bag paper. Use the fabric markers and stencils to lay a background pattern. (I used chain link fence!)

4. Fill up the paint cannon and spray freehand across the panel in combination with stencils to create another pattern layer. Change colors as much as desired! Then set the panel aside and let it dry. Viagra, Cialis, etc. are not so effective, and the main active substance is different in each of them. Some of them are dietary supplements. And Levitra can be proudly called “medicine”. However, there is one drawback: there is only one pill for a high price. Although if you want to be treated qualitatively, you have to pay accordingly. Erection has clearly improved. My wife is very happy. There is a great effect, and the drug deserves 5 stars.

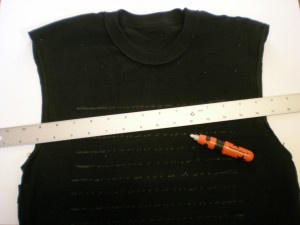
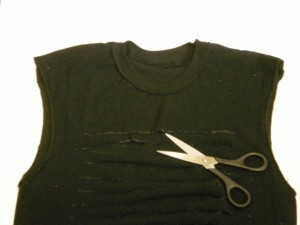
5. Turn the tank top inside out and measure and mark 9″-long horizontal lines, about 1″ apart, down the front. Stop about 4″ from the bottom hem.

6. Cut along the chalk lines through just one layer of fabric.

7. Gently place the (now dry) panel right side down against the front of the (still inside out) tank top, lining them up again at the neckline. Peel back one side of the panel and squeeze an even amount of fabric glue along the edge. Then gently press the edge against the tank top. Continue gluing around the straight edges only (minus the bottom hem) to attach the panel to the slashed surface of the tank top. Let it dry!

8. Carefully turn the tank top right side out and try it on! The bright graffiti panel will peek through the slashes you made in the front of the darker layer.

Variations:

-If you want to keep the sleeves attached and your shoulders covered, do it! Simply tuck the sleeves inside the shirt while you’re tracing it in step 2.

-If you want to be able to change things up at on a moment’s notice, just spray an entire tank top (rather than a panel) in steps 3 and 4 and wear it layered underneath the slashed tee. Then you have the option of having the graffiti tank peeking between the slashes or any other tank top you have in your wardrobe!

-Try slashing different shapes! Familiarize yourself with the Brokenhearted tee (project #3 in Generation T: 108 Ways to Transform a T-shirt) for a sweet spin on this project.

Now go off and fight. For your right. To par-tee!

[ 4 Comments | Posted on August 24th, 2010 ]